Removal:
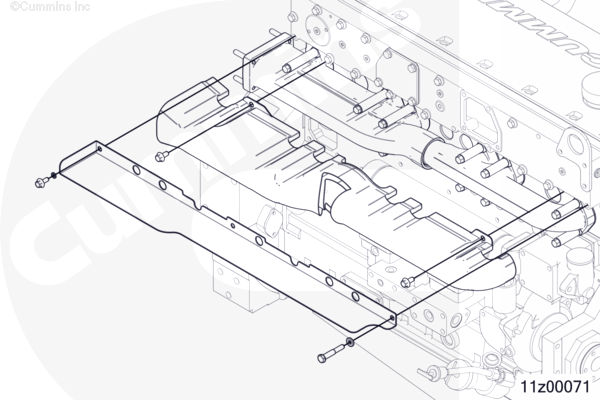
Remove the heat shield mounting capscrews.
Remove the heat shield.
Remove the insulation blanket mounting capscrews.
Remove the insulation blanket.
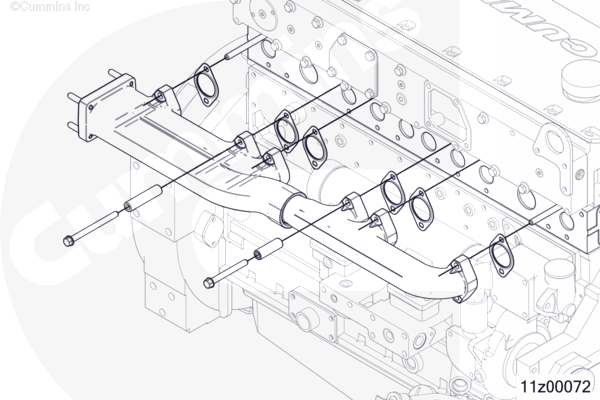
Remove an upper capscrew and spacer from each end of the exhaust manifold and install guide studs, Part Number 3376488.
Remove the remaining capscrews, spacers, exhaust manifold , and gaskets.
Discard the gaskets.
Installation:
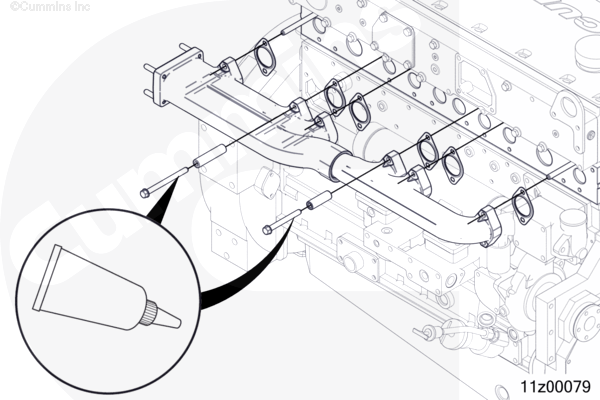
Apply a film of high temperature anti-seize compound to new exhaust manifold capscrews.
Align the manifold and gaskets using guide studs.
Install spacers and new capscrews hand tight.
Remove guide studs and install remaining spacers and capscrews hand tight.
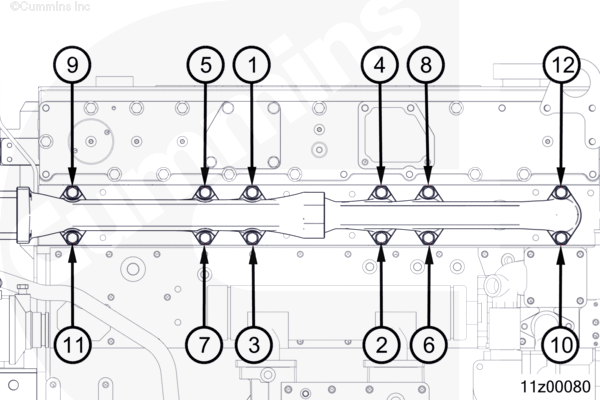
Tighten the capscrews in the sequence shown.
Torque Value:
- 27 n•m [ 239 in-lb ]
- 47 Nm 35 ft-lb
- Loosen all capscrews.
Tighten the capscrews in the sequence shown.
Torque Value:
- 27 n•m [ 239 in-lb ]
- 47 N•m 35 ft-lb
- Loosen all capscrews
- 27 n•m [ 239 in-lb ]
- 47 N•m 35 ft-lb.
Install the exhaust manifold insulation blanket.
Install the exhaust manifold heat shield.
Tighten the capscrews.
Torque Value: 47 n•m [ 35 ft-lb ]
