Home»Repowers»Sunstar Restoration Project – The Rebirth of a Star
Sunstar Restoration Project – The Rebirth of a Star
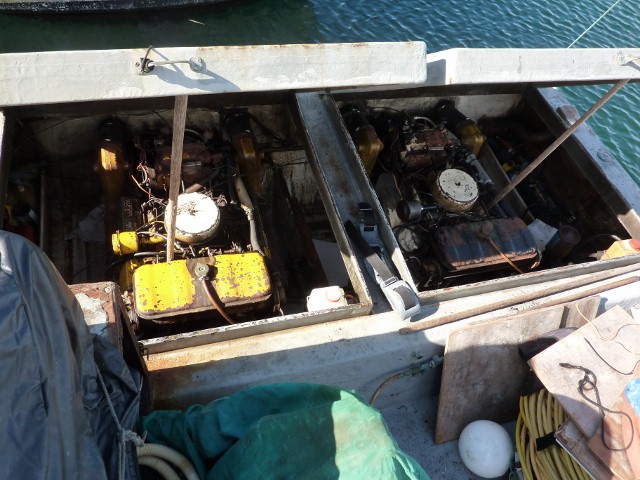
“What we started with” & some very old pre-3208 “Twin Cats”
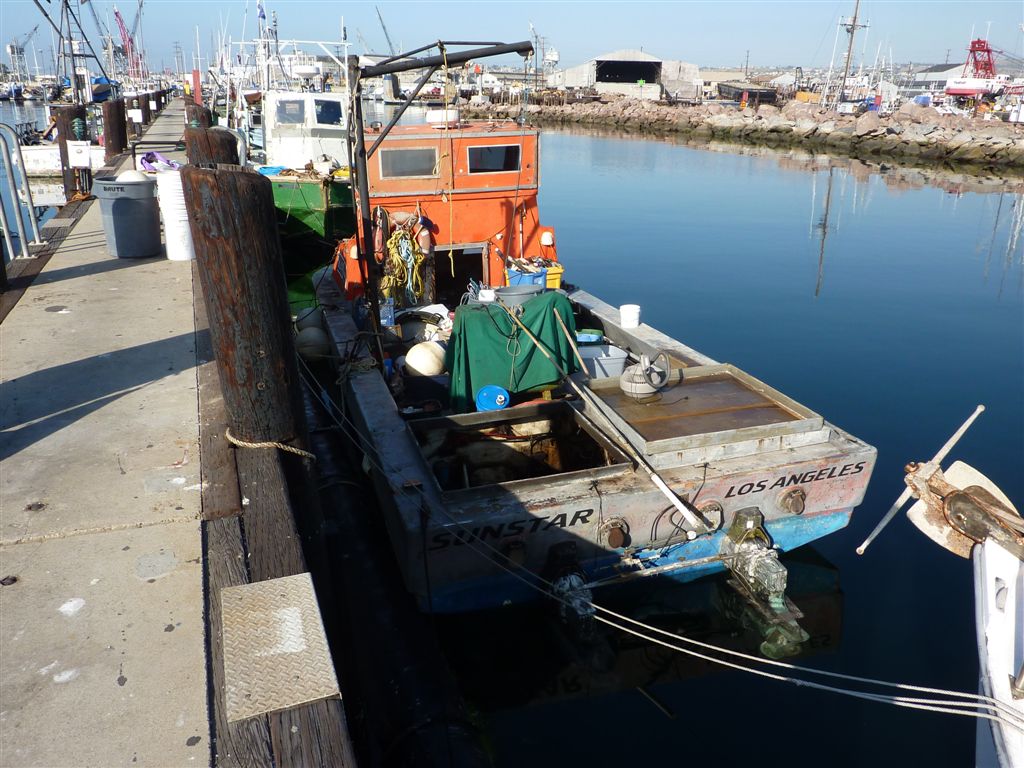
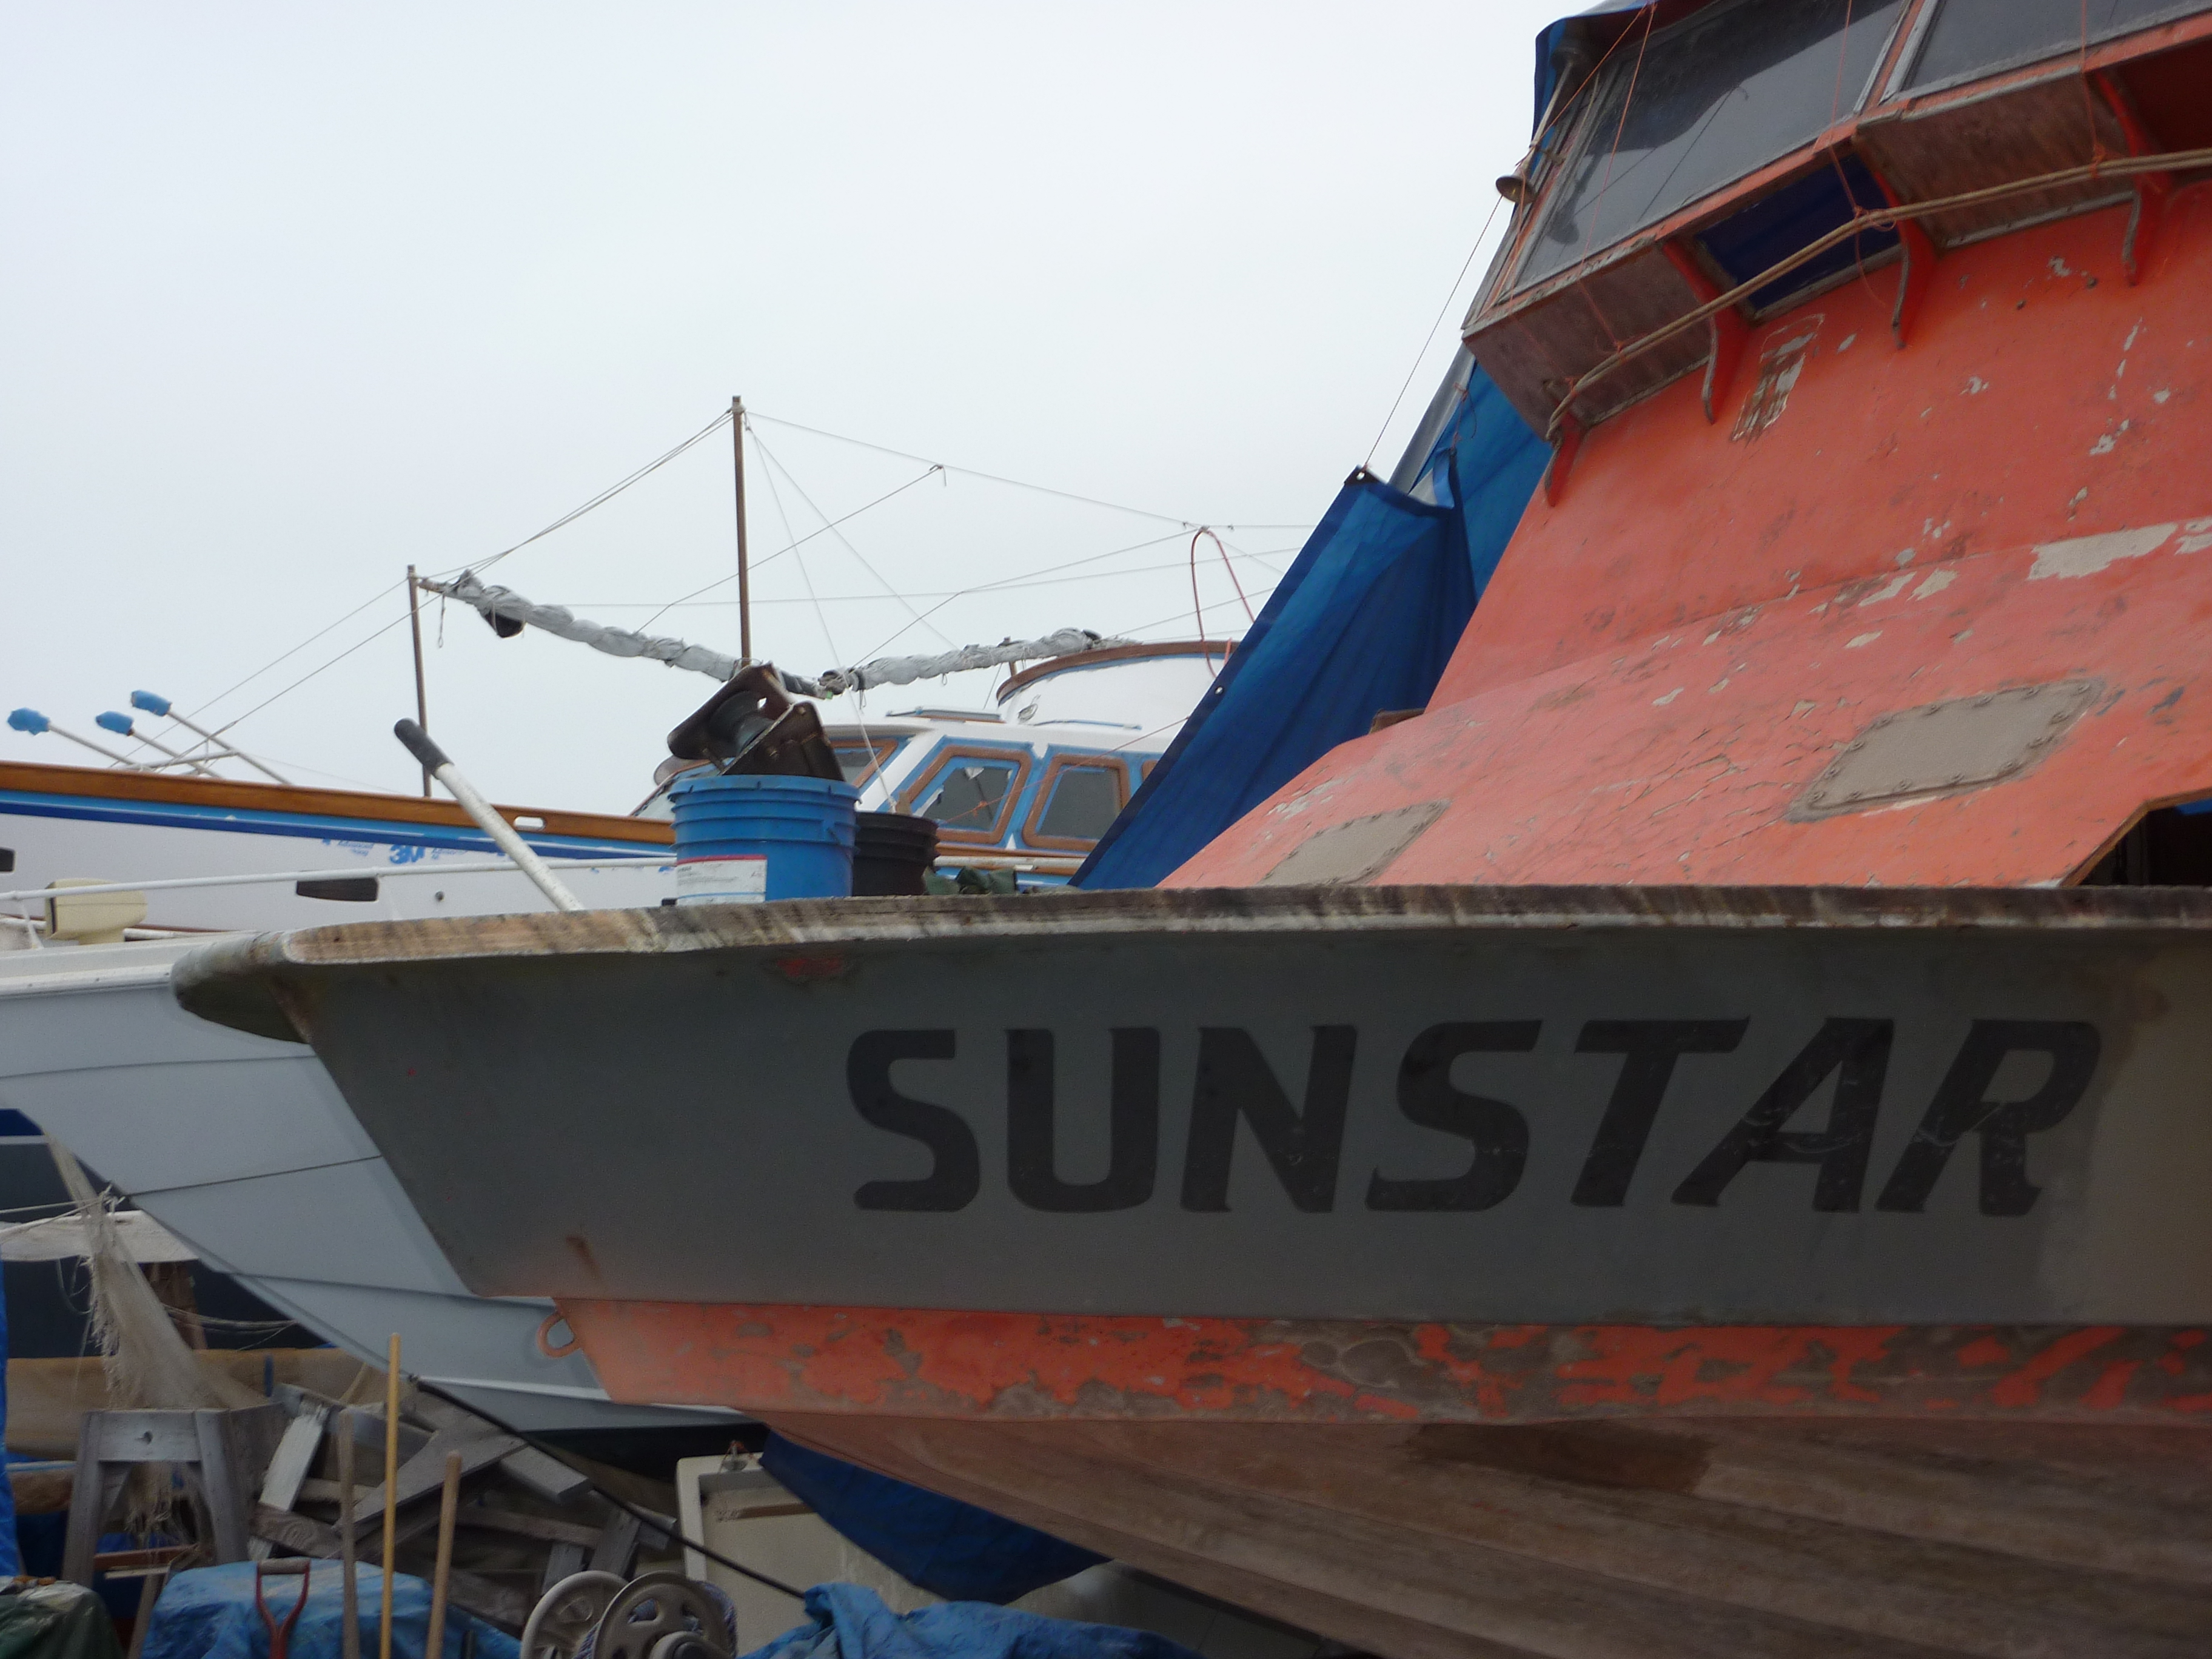
A boat only a mother could love?
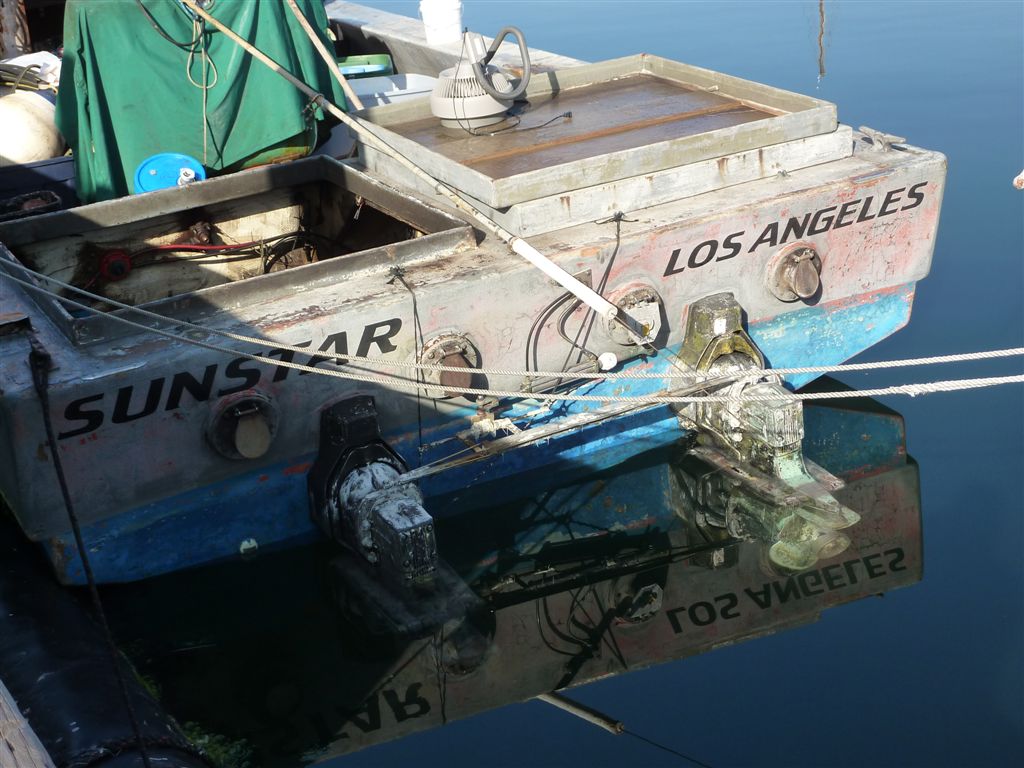
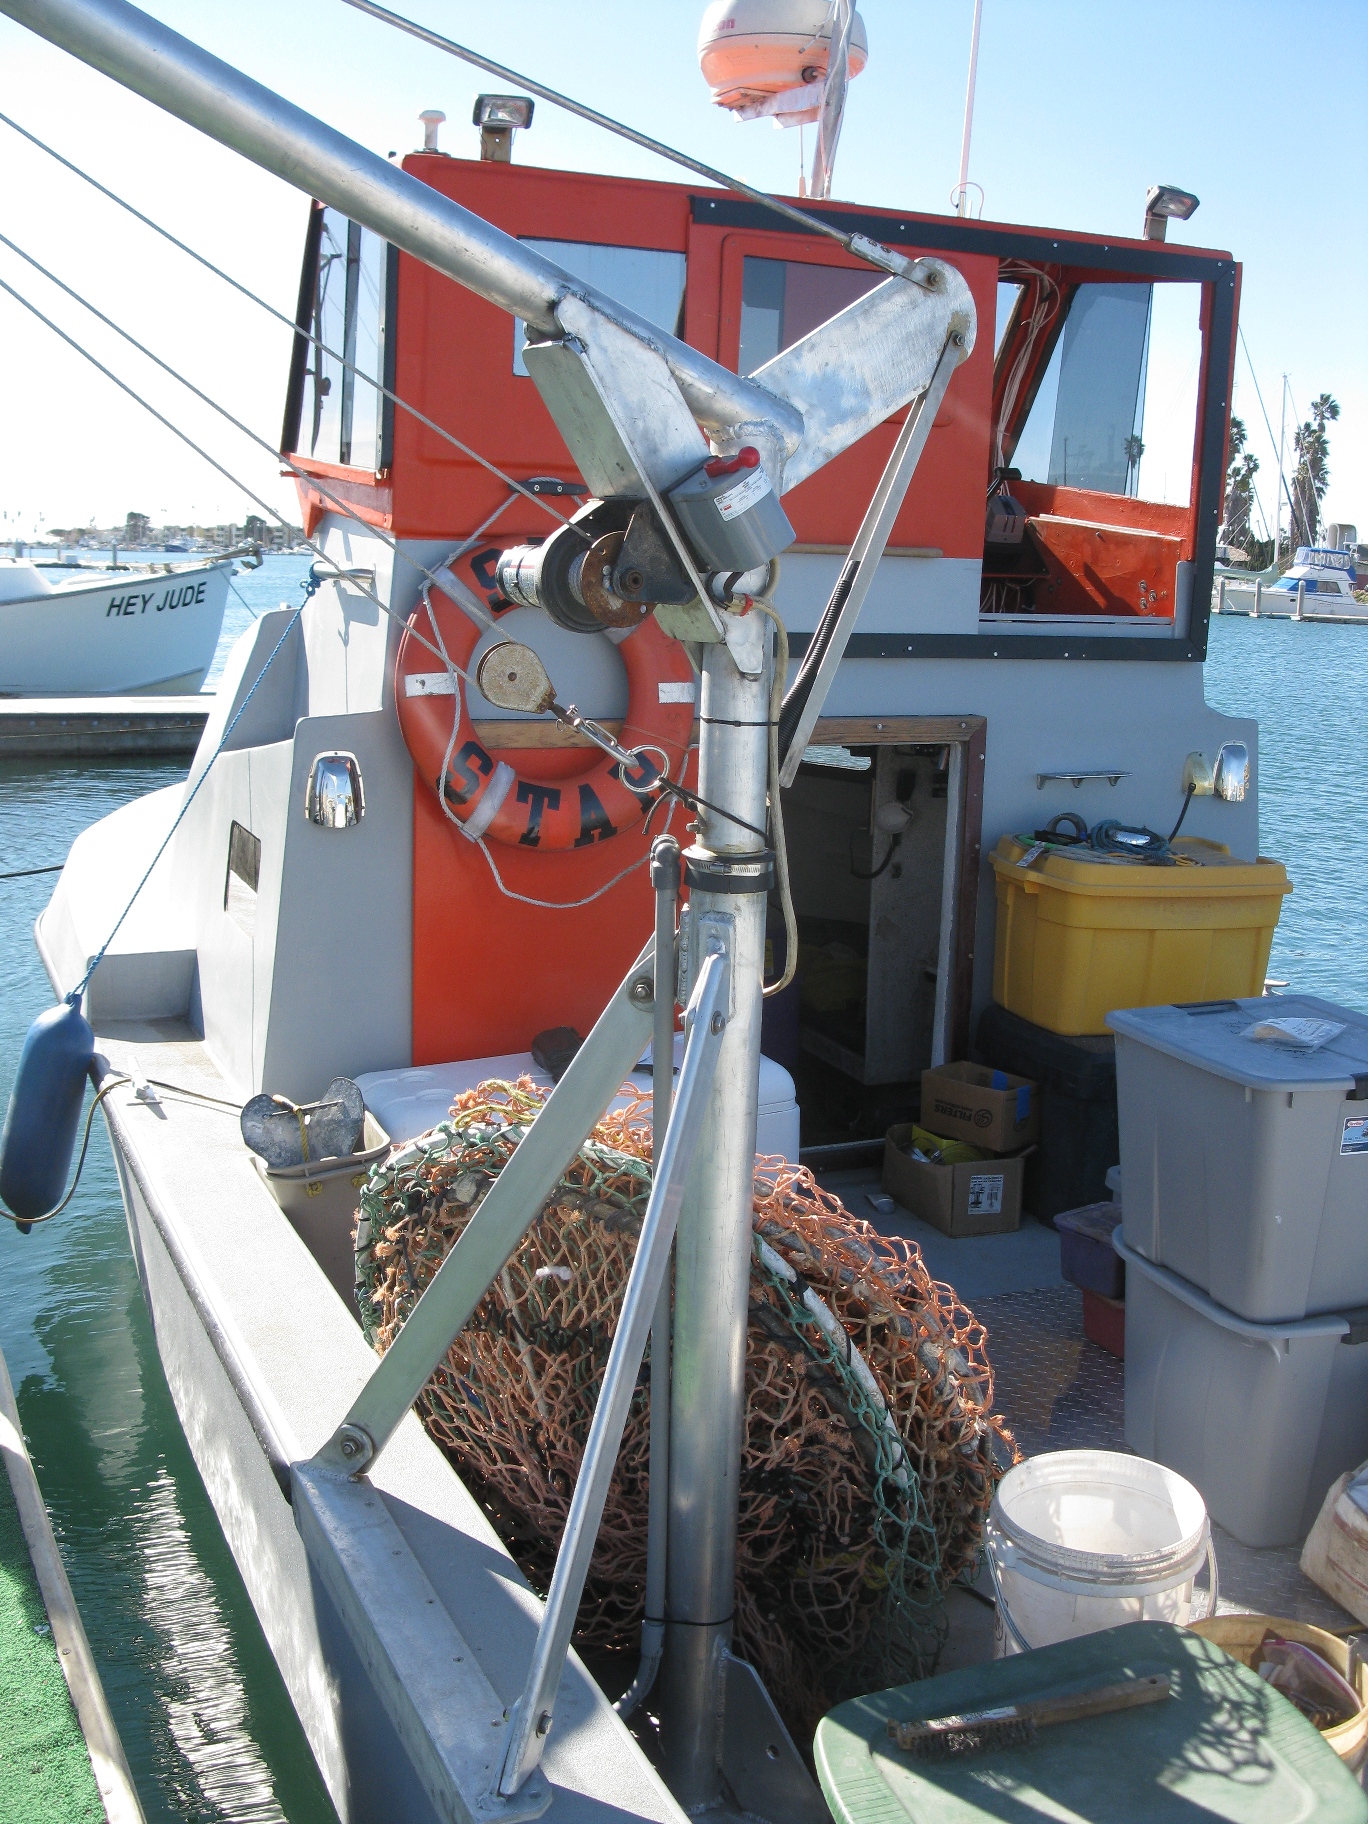
The Sunstar is a very heavy 34 x 13 ft Radon commercial diving vessel which was built in 1973. When we got her in for “restoration” she was still powered with the original Cat 3160 V-8’s (predecessor to the Cat 3208) and Mercury # 3 outdrives. Of course, when I say original, that was with lots of rebuilds and patches along the way. Only an estimate, but we think the “boat” had not less than 80,000 hours on it since new. And believe me, it showed. I don’t know if it was run that hard, but it sure was put away WET. This boat worked hard in the Southern Californian Sea Urchin Industry for the past 38 yrs and earned a good living for the owner who is now in his mid-60’s but is still as tough as nails.
This quote from one of owner’s e-mails to me says it all as to performance – “I neglected to mention that I am doing 6-7 kts at 1100 rpm. I used to do 10 kts routinely when the engines were fresher. My outdrives are mismatched, one with 1.5:1 gears, one with 2:1 gears. One prop 20/17, one 19/21”.
Cat 3160 V-8’s (predecessor to the Cat 3208)
But now, the time has come for the Sunstar to be restored to her past glory and with the help of some EPA money and a lot of work from the owners and us, what follows is how we restored this vessel to better than new by drawing on our past experience in this type of work.
The journey from nothing to something
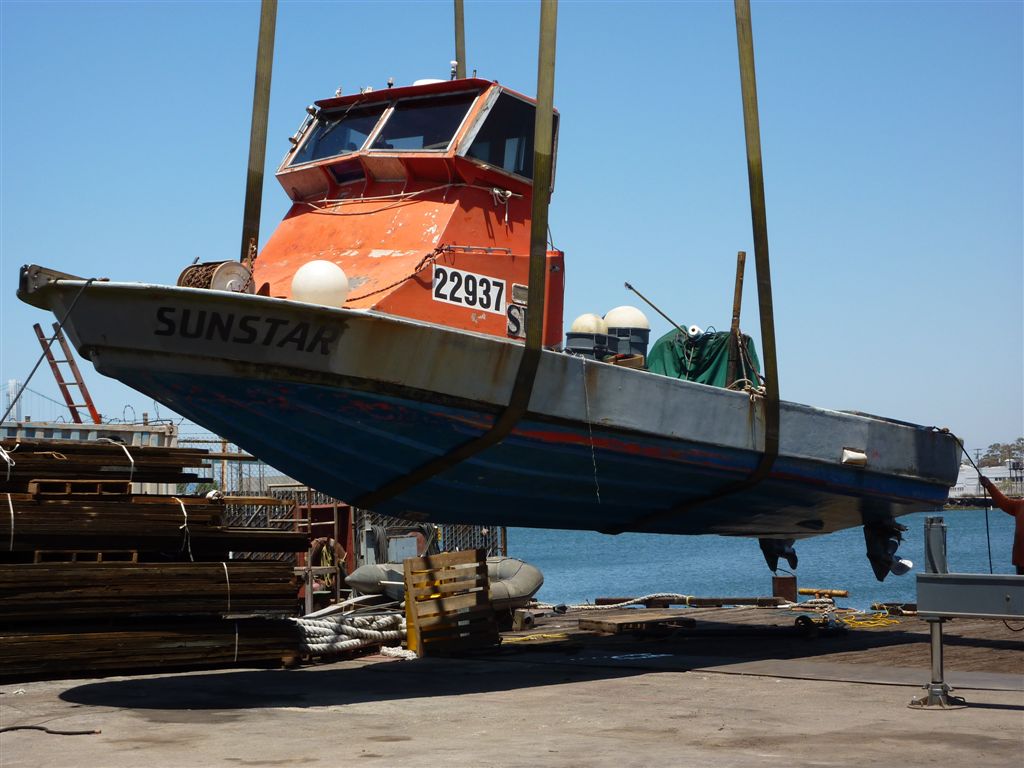
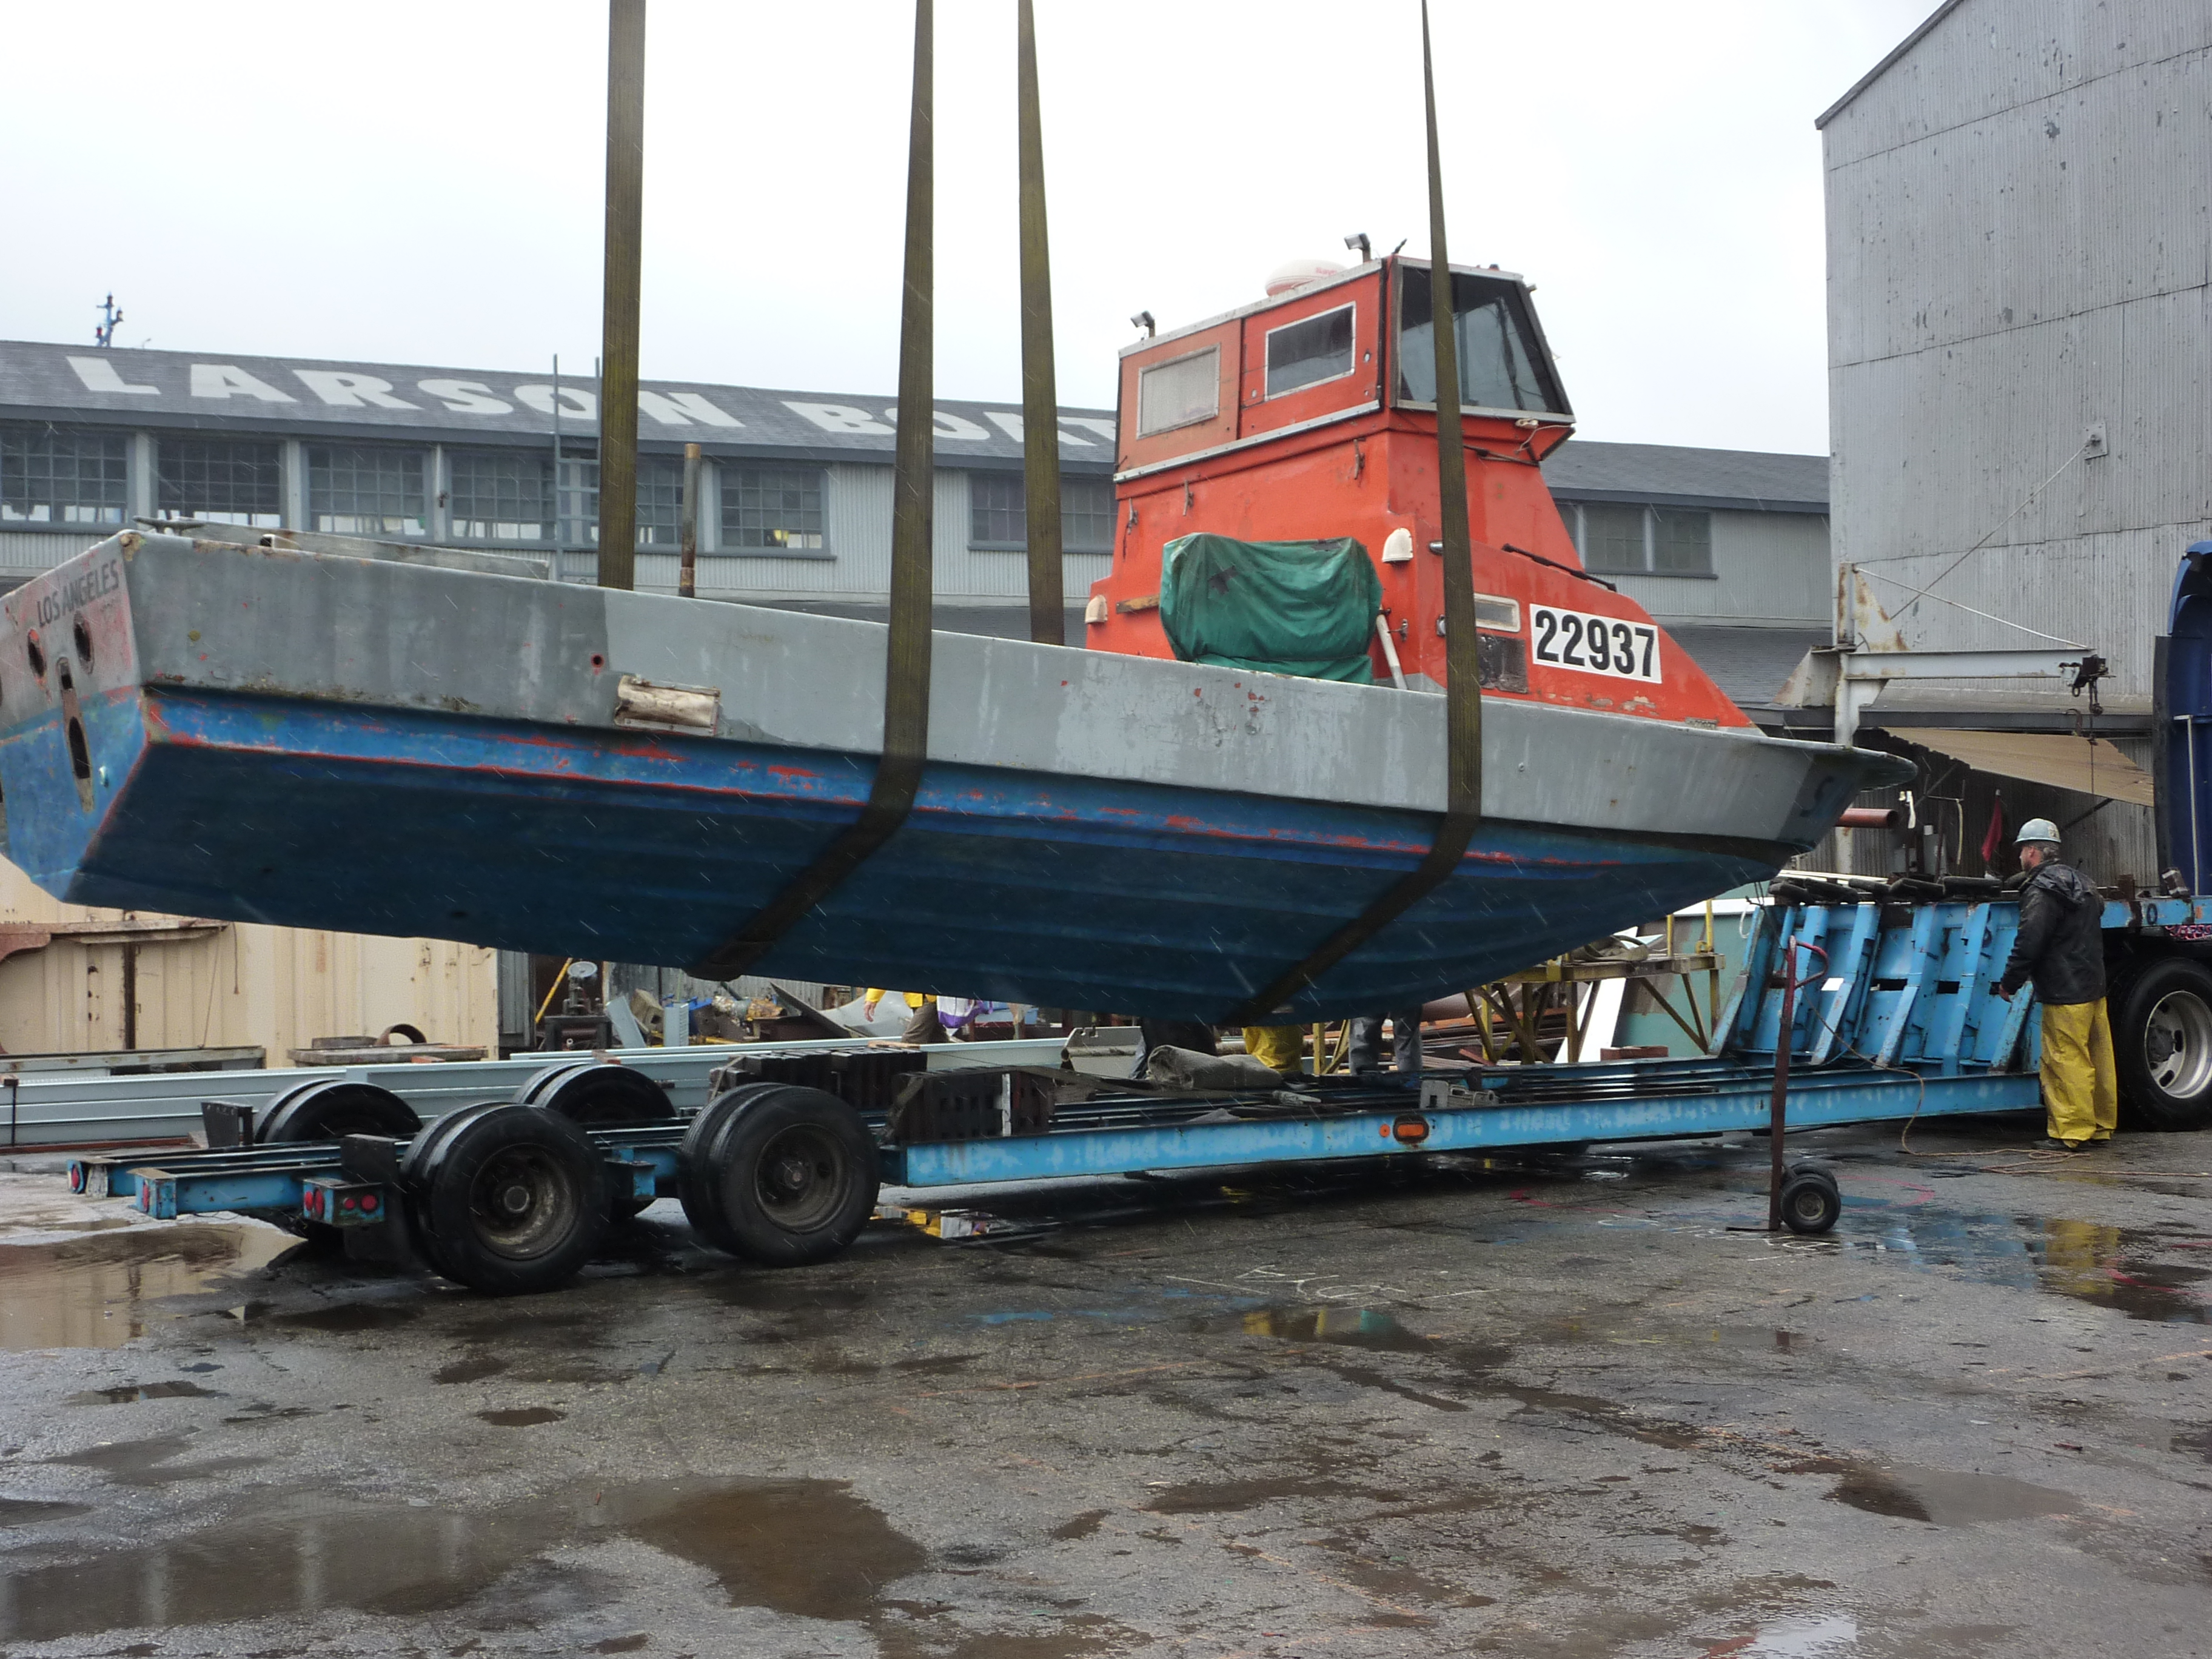
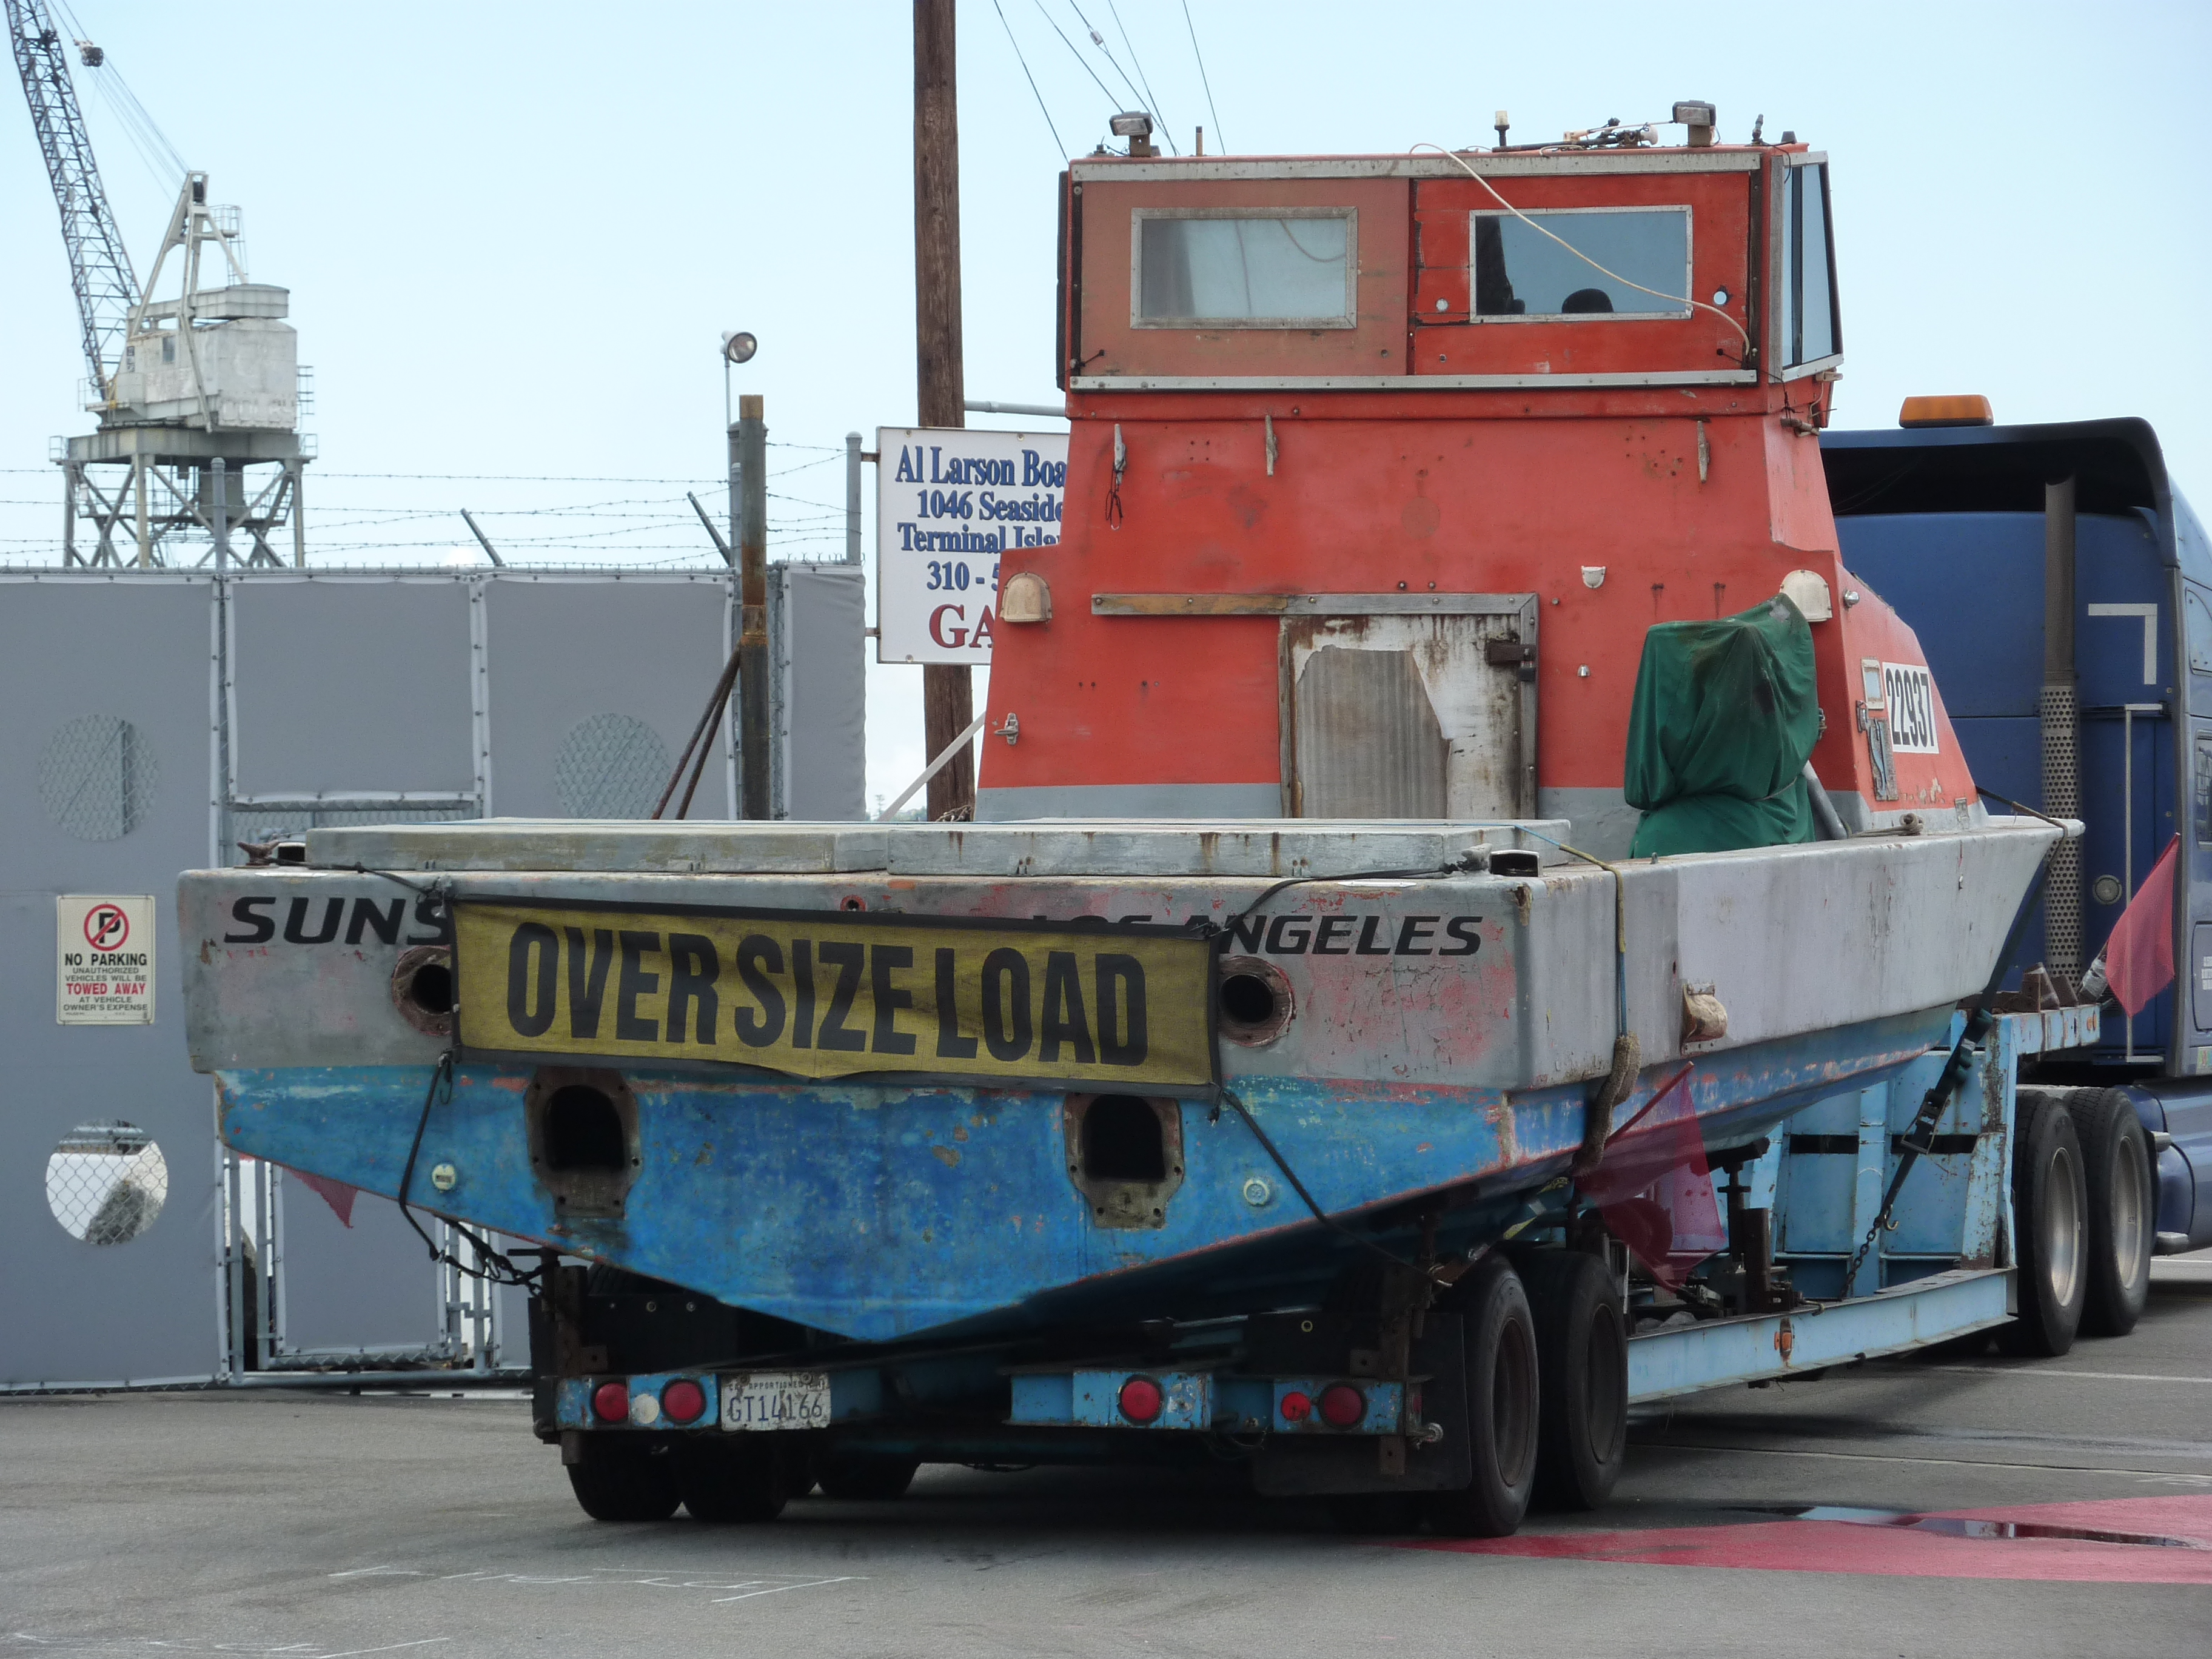
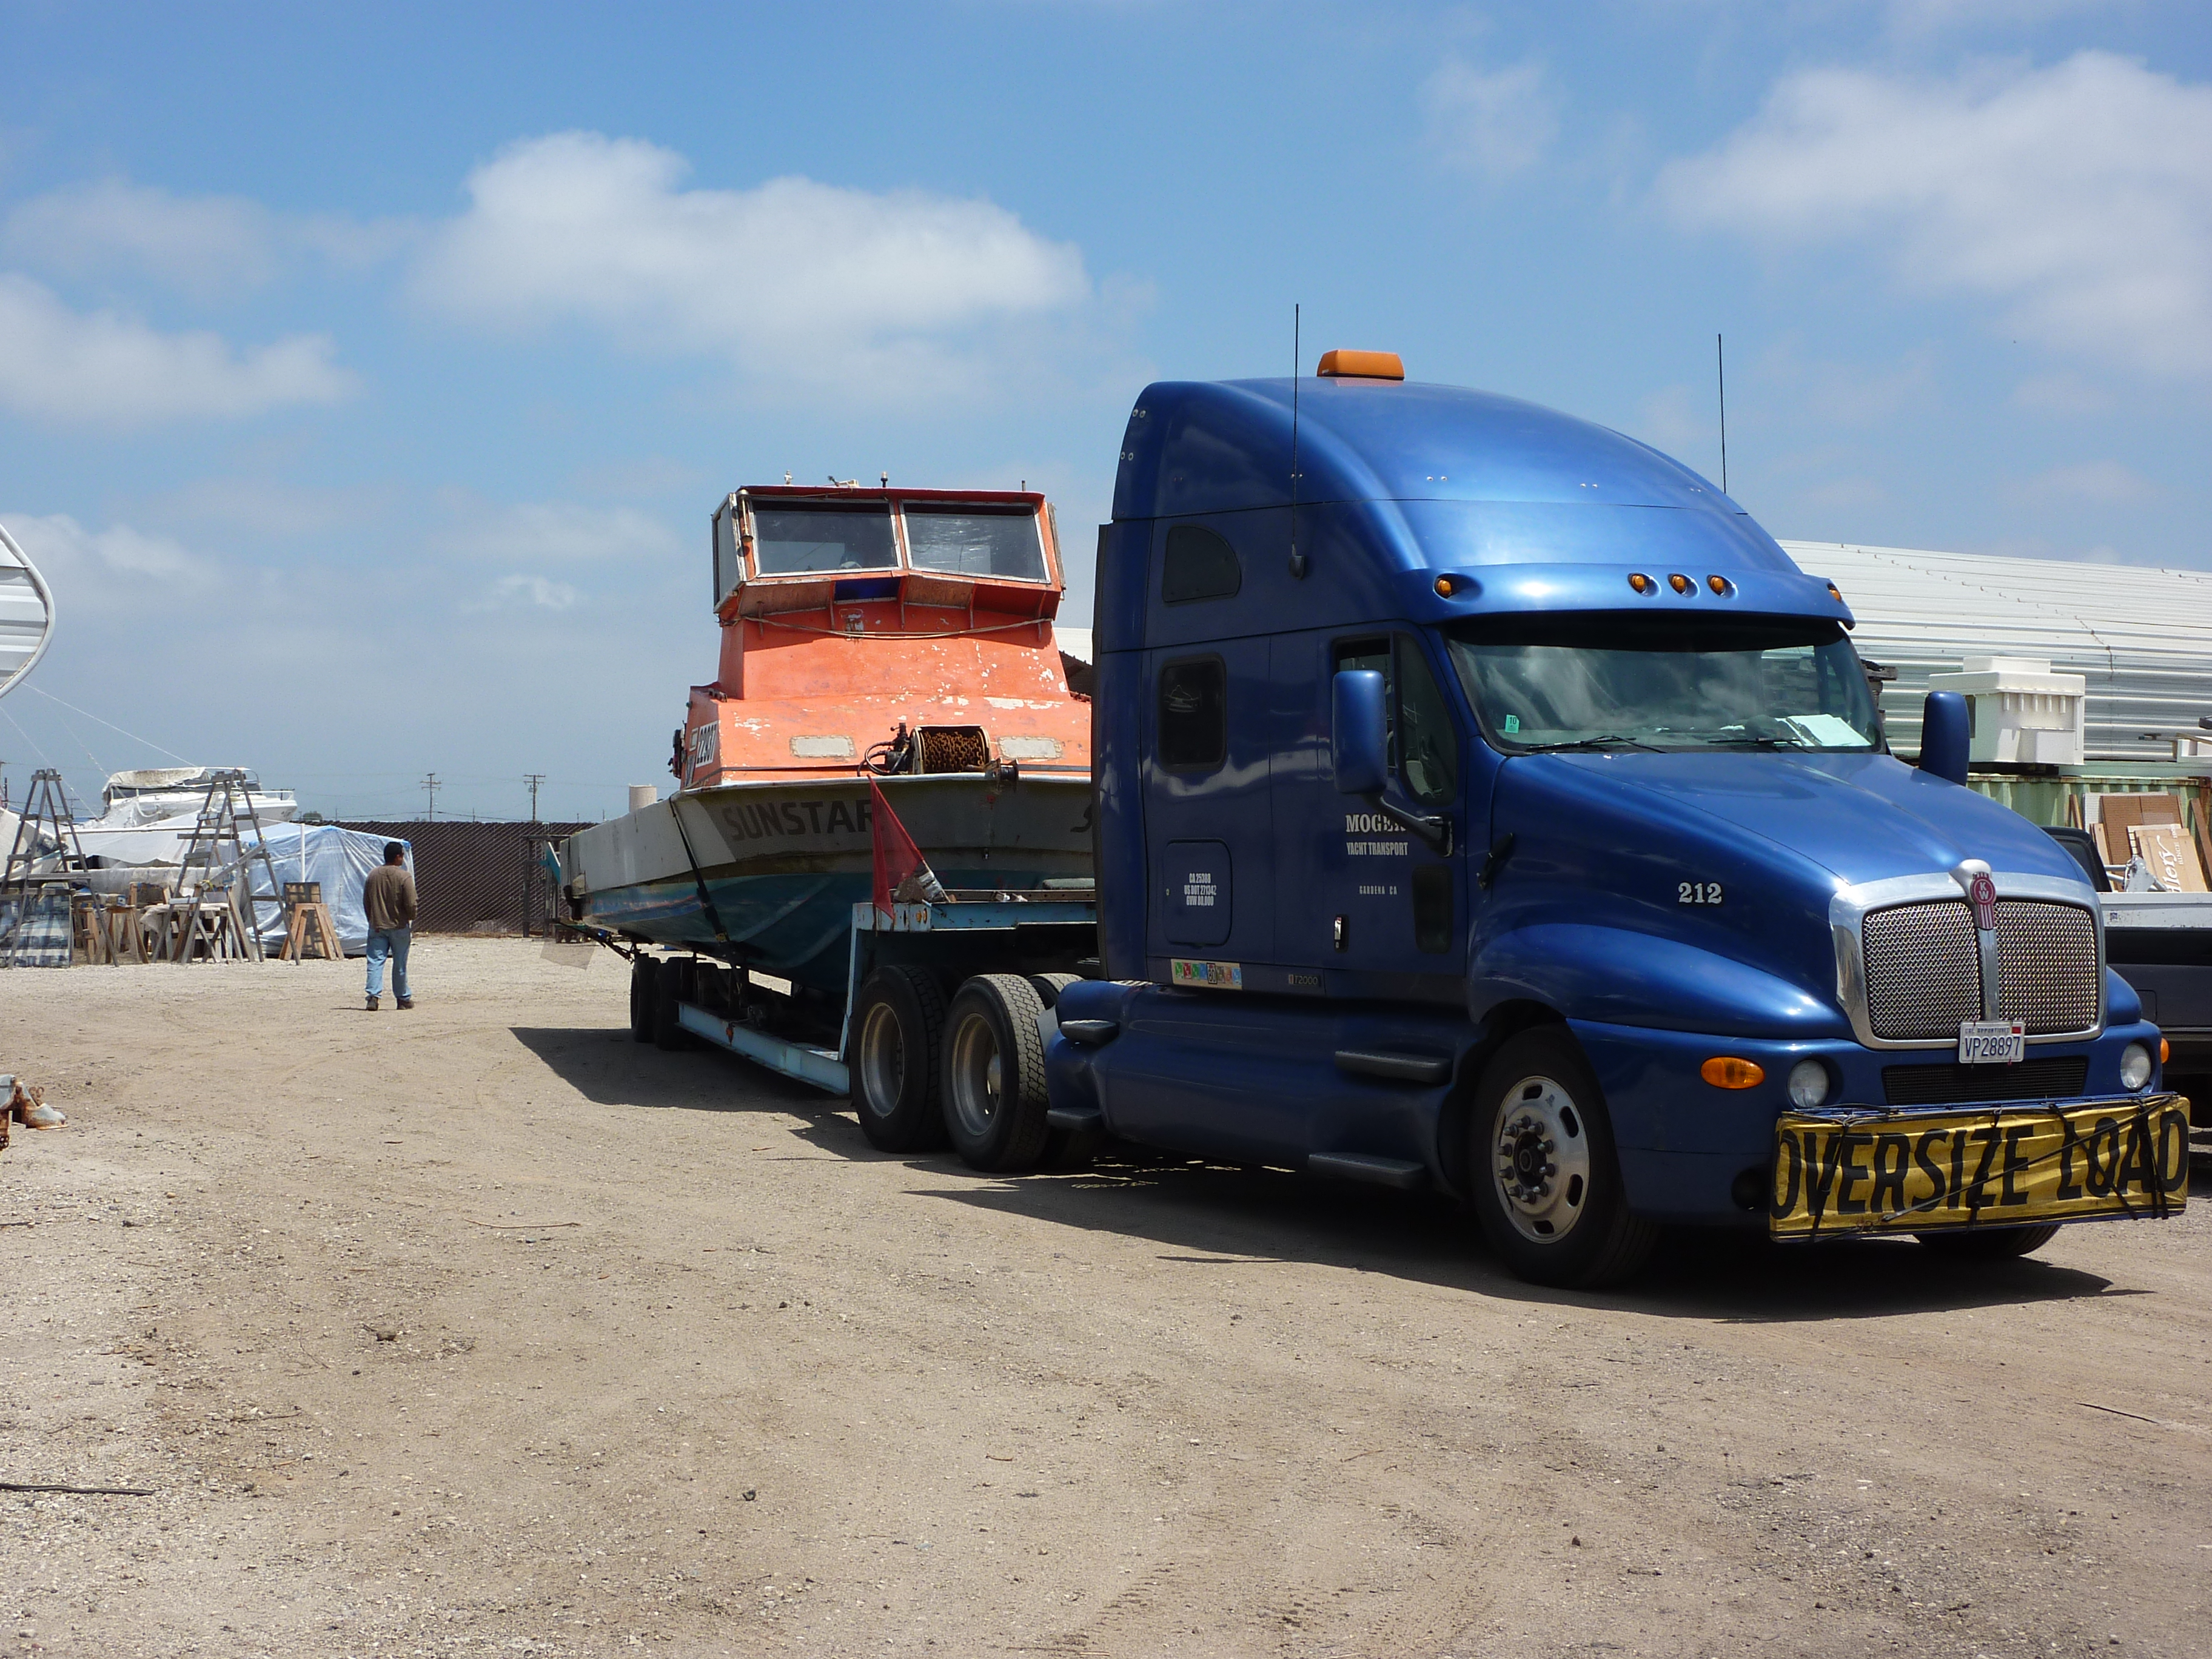
Lift out and transport to Seaboard Marine
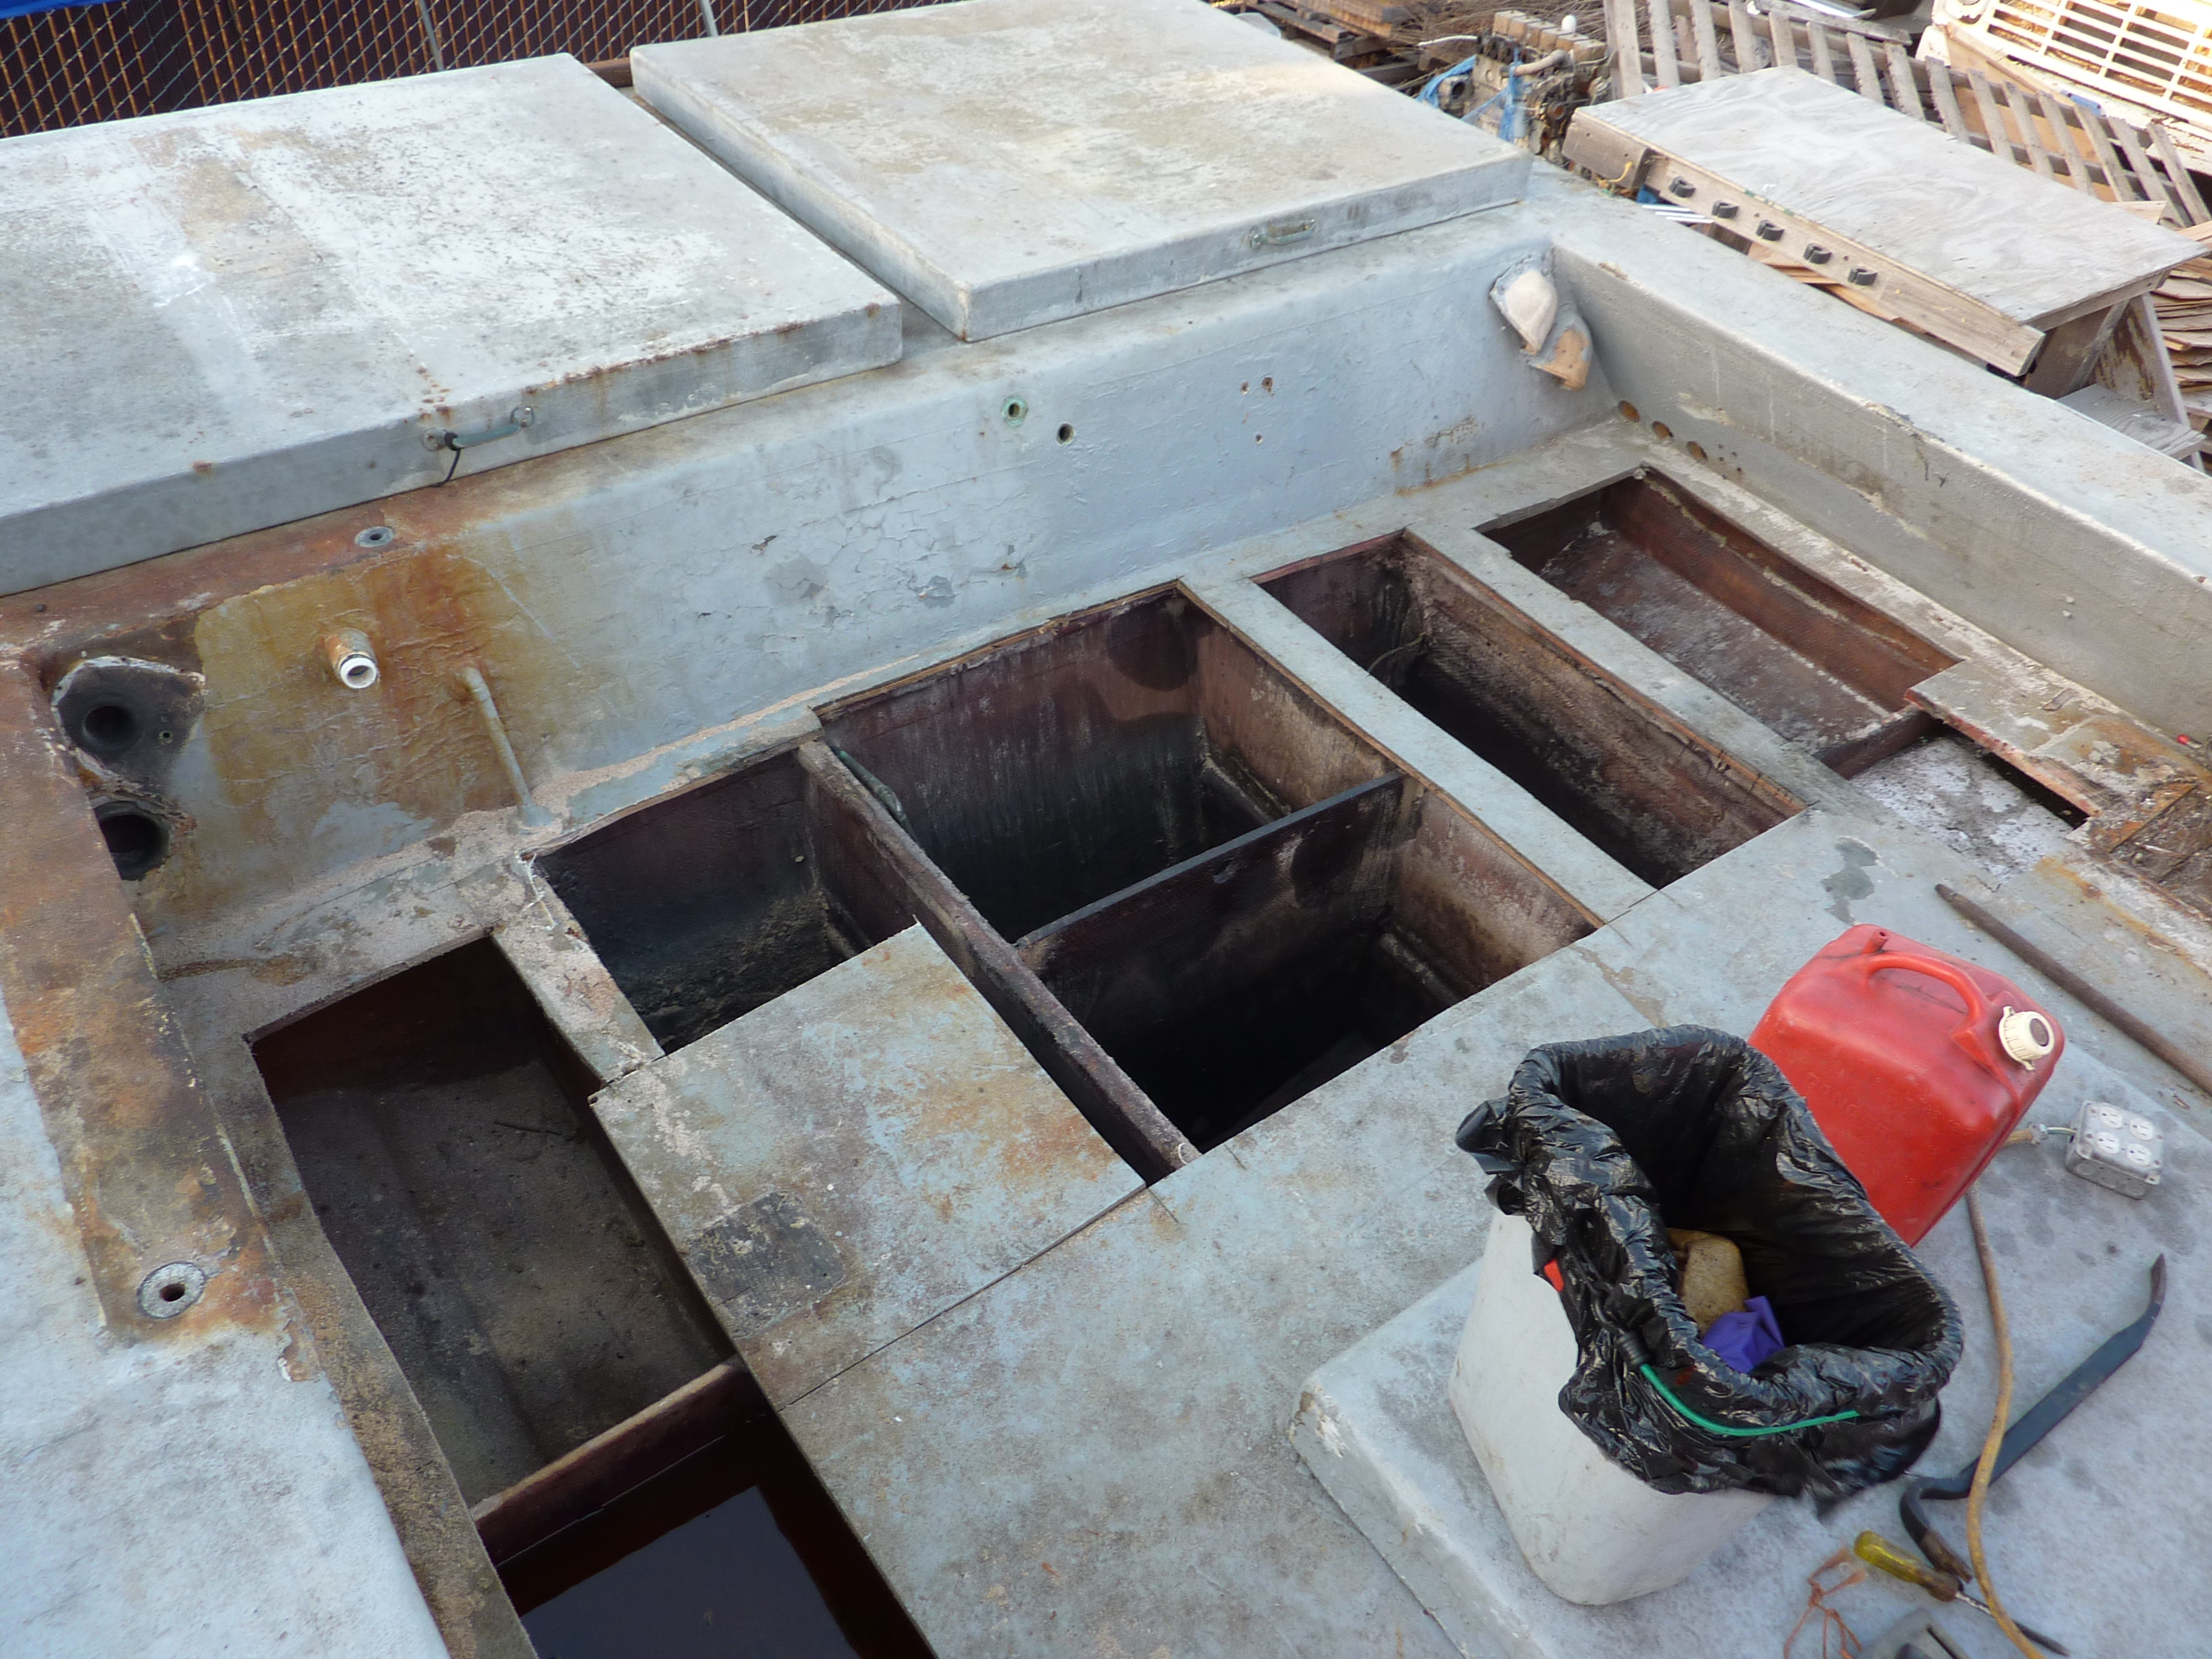
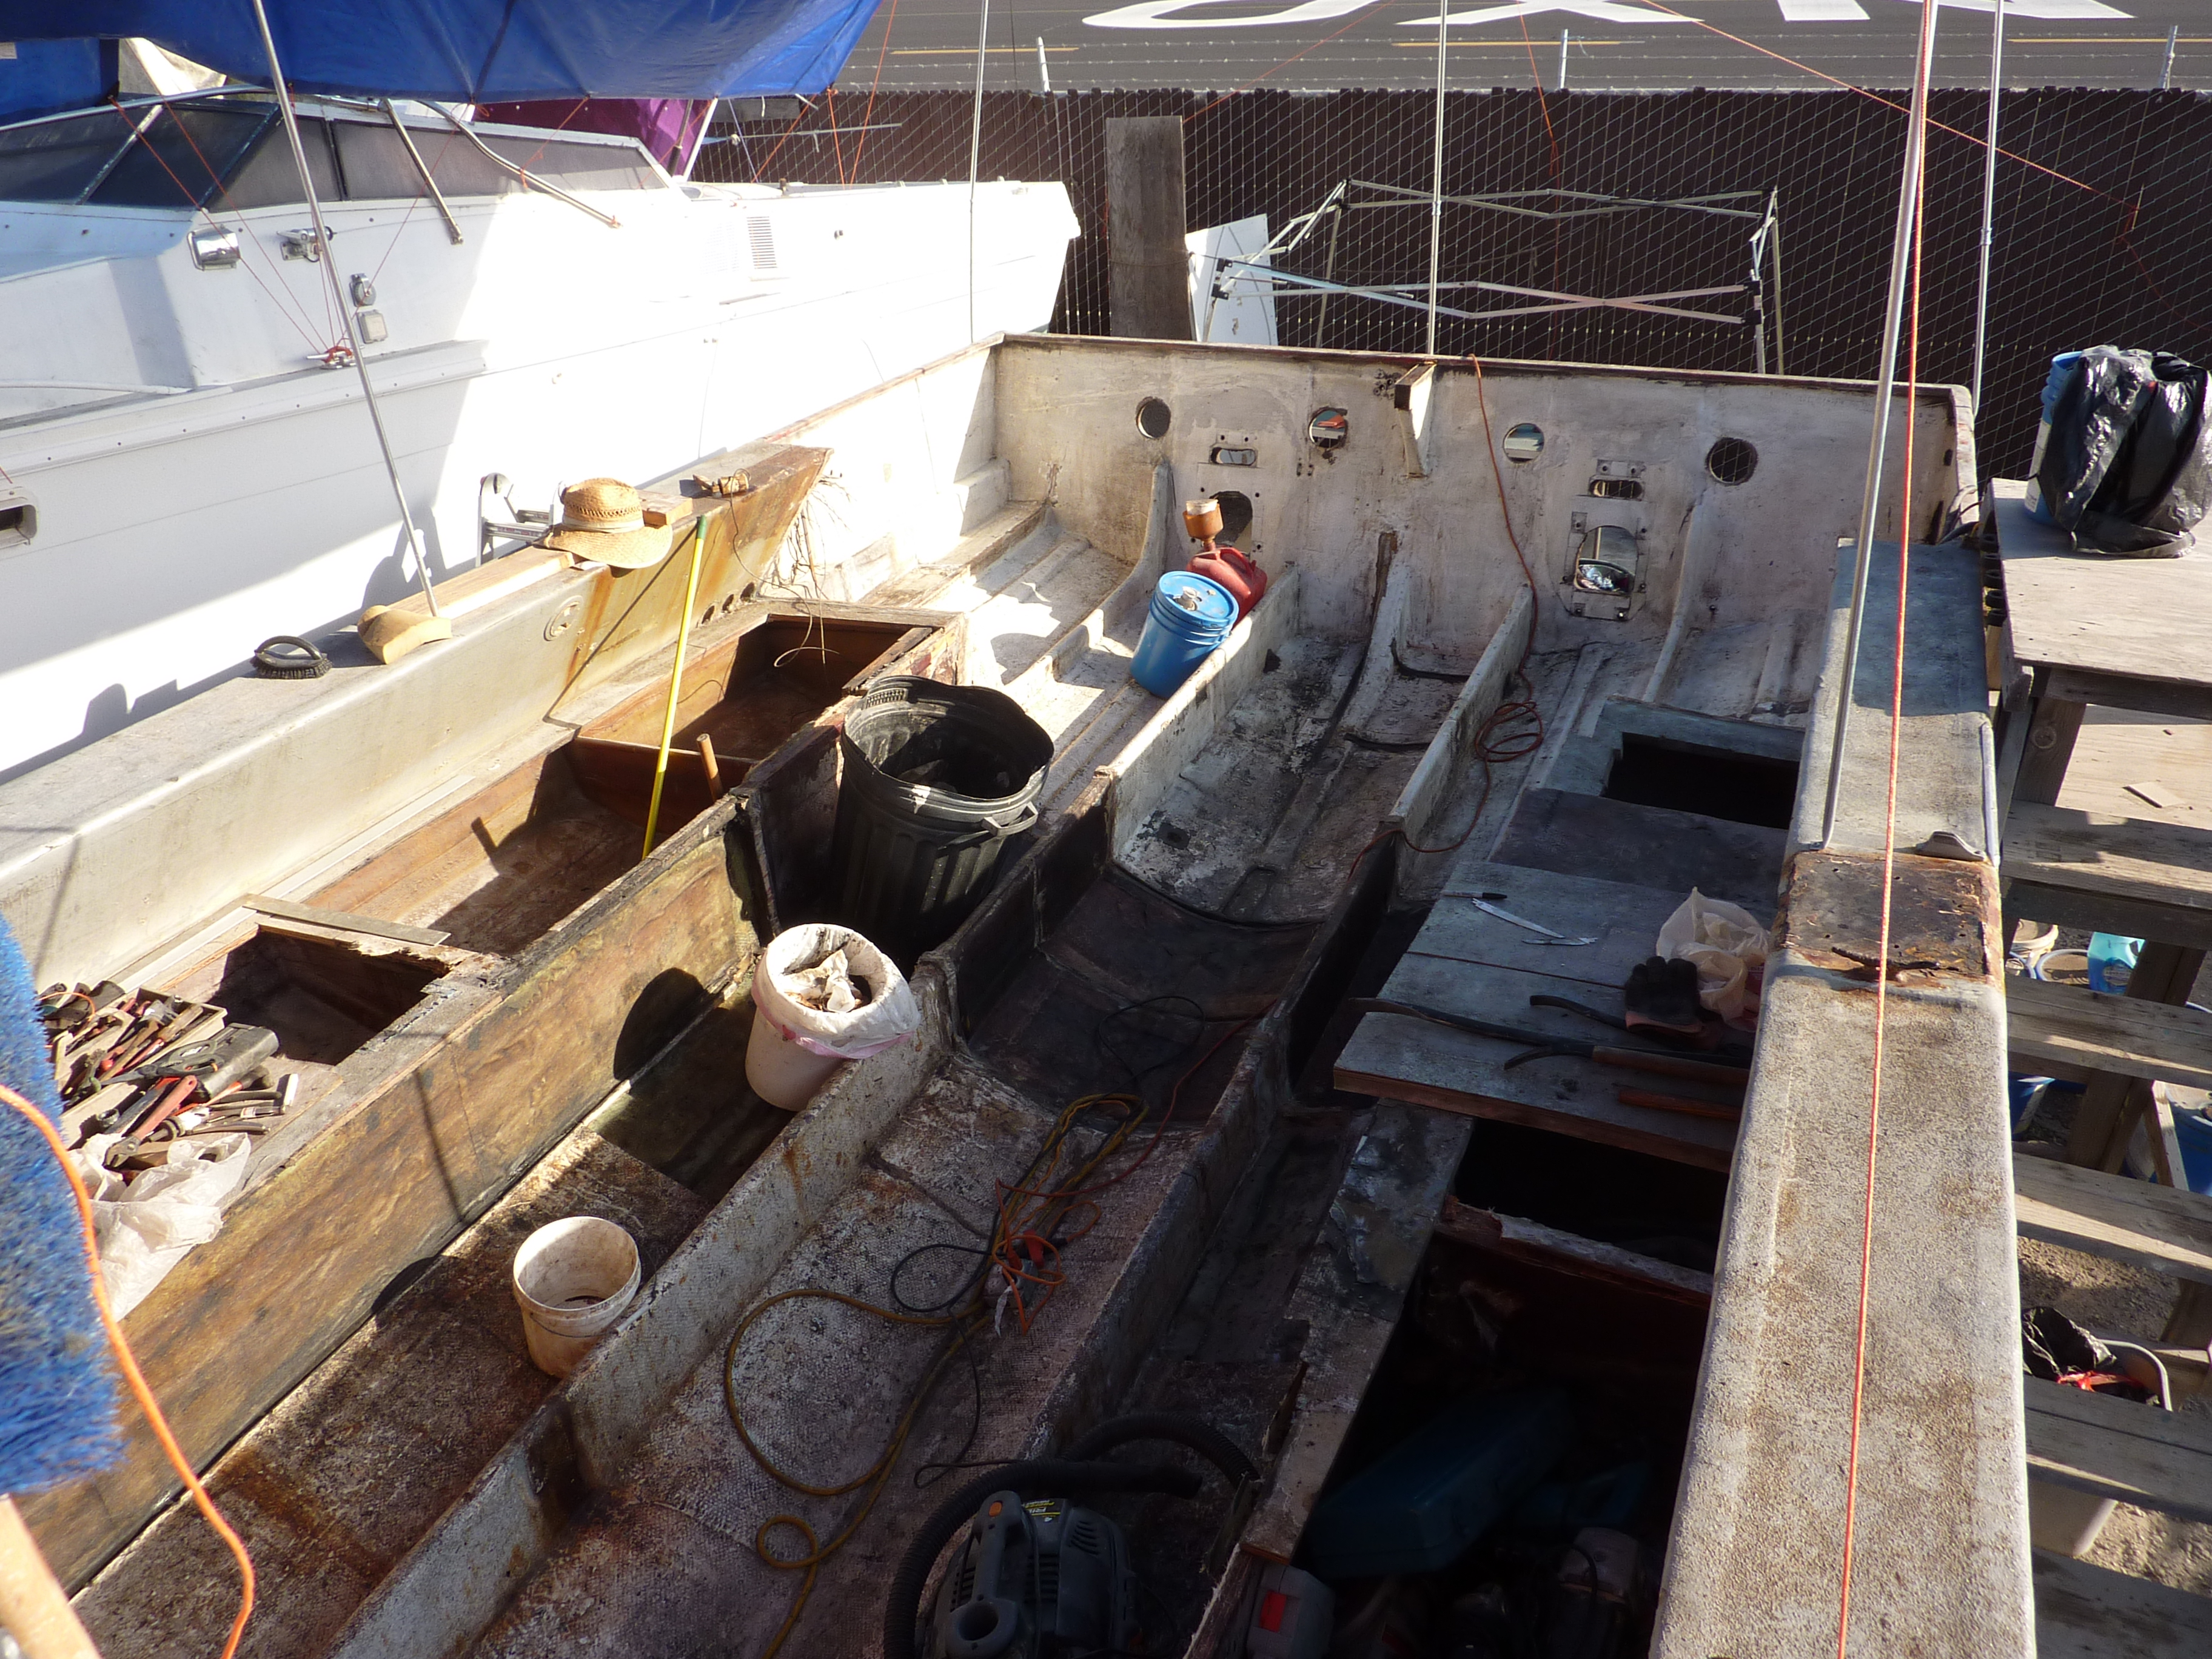
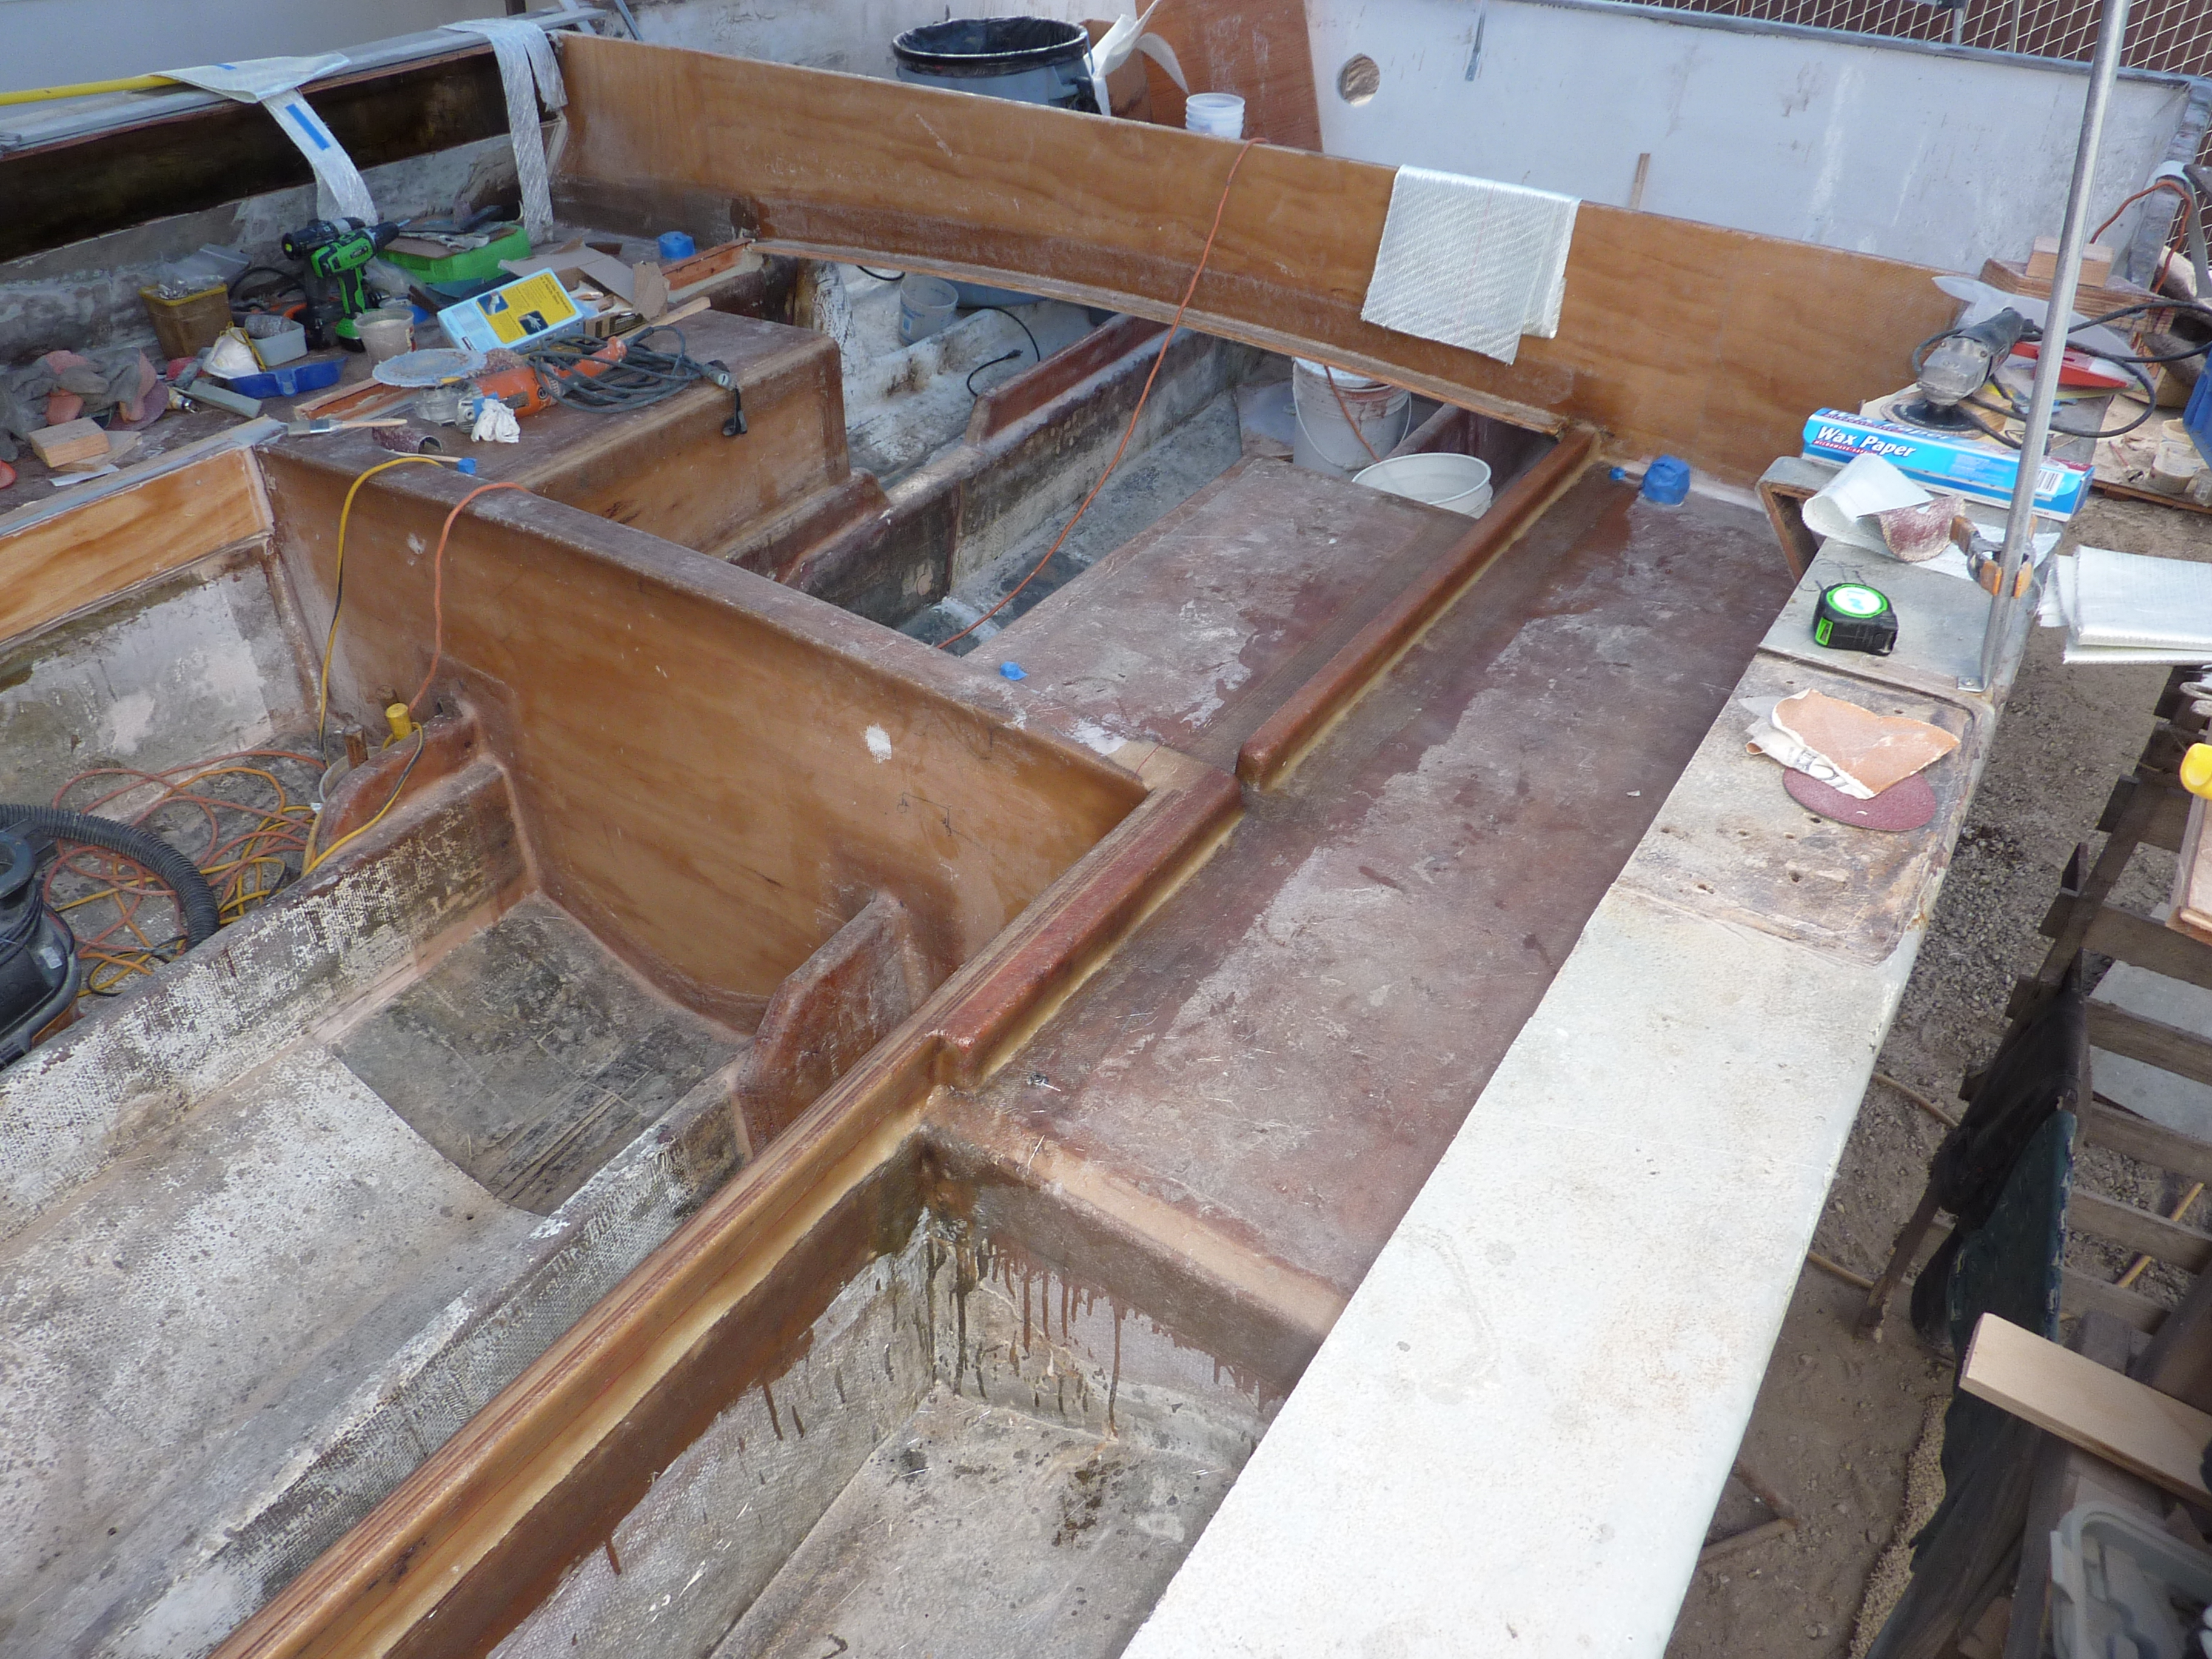
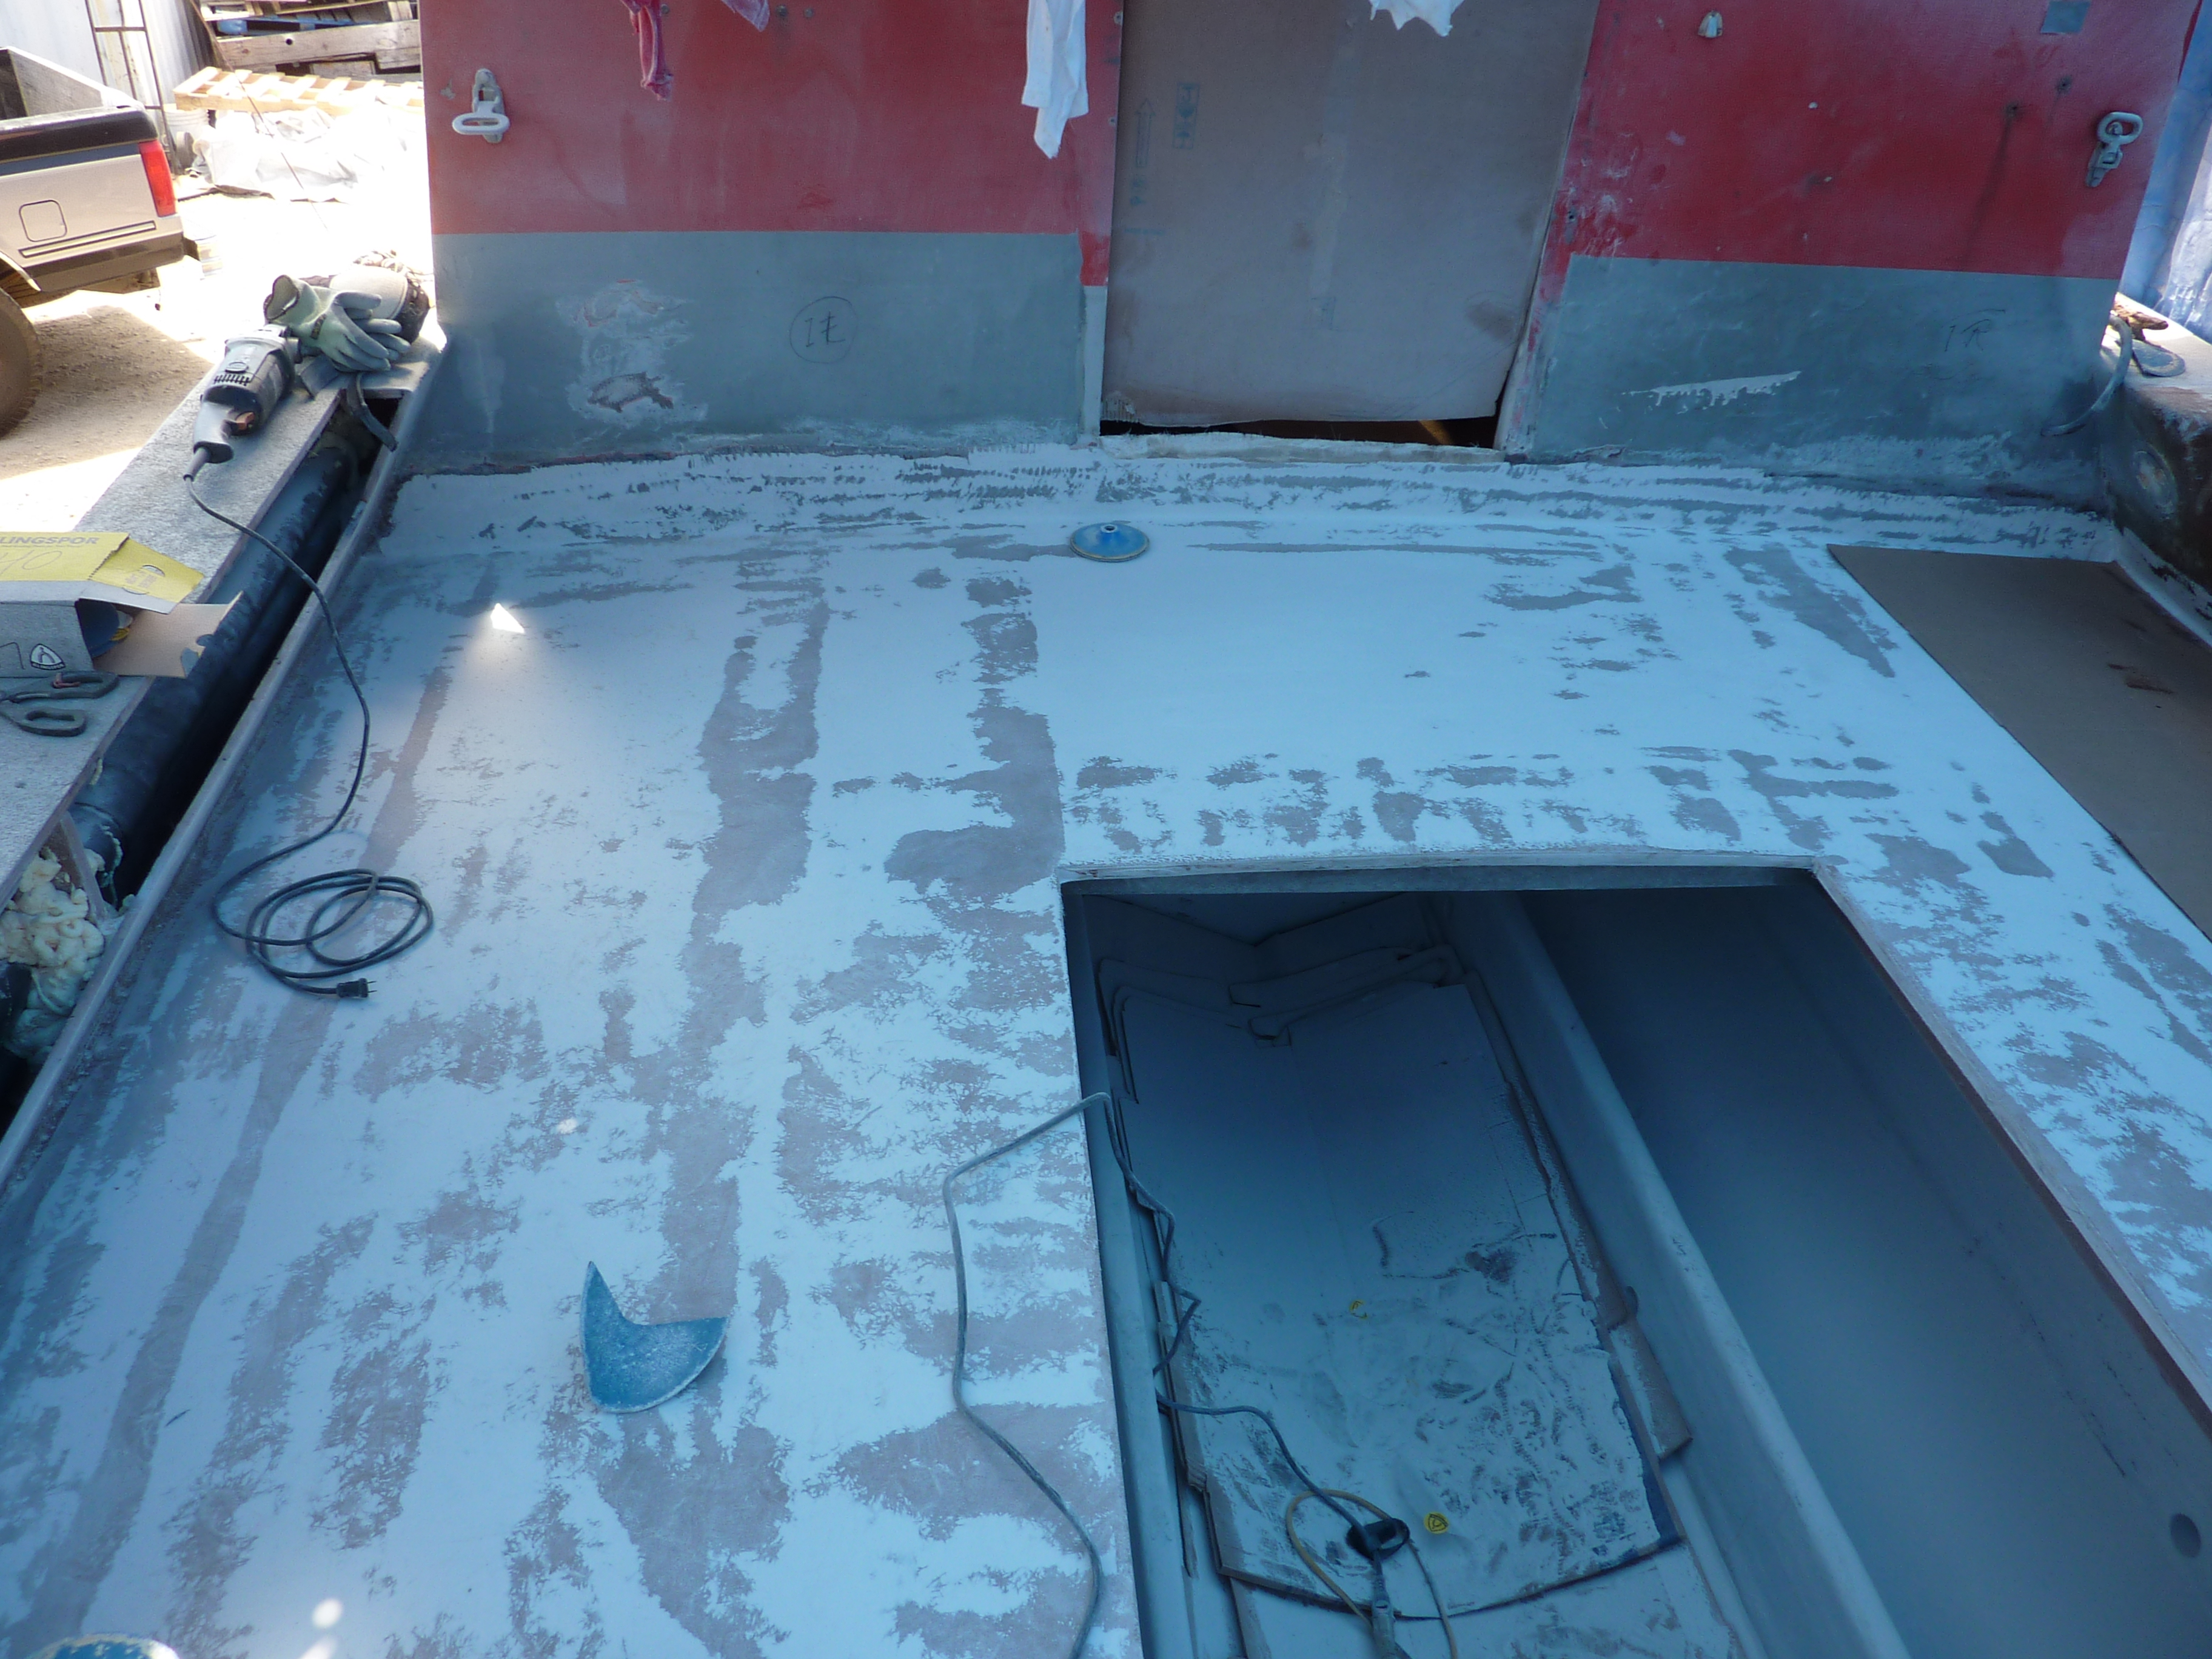
Initial cutting of the deck
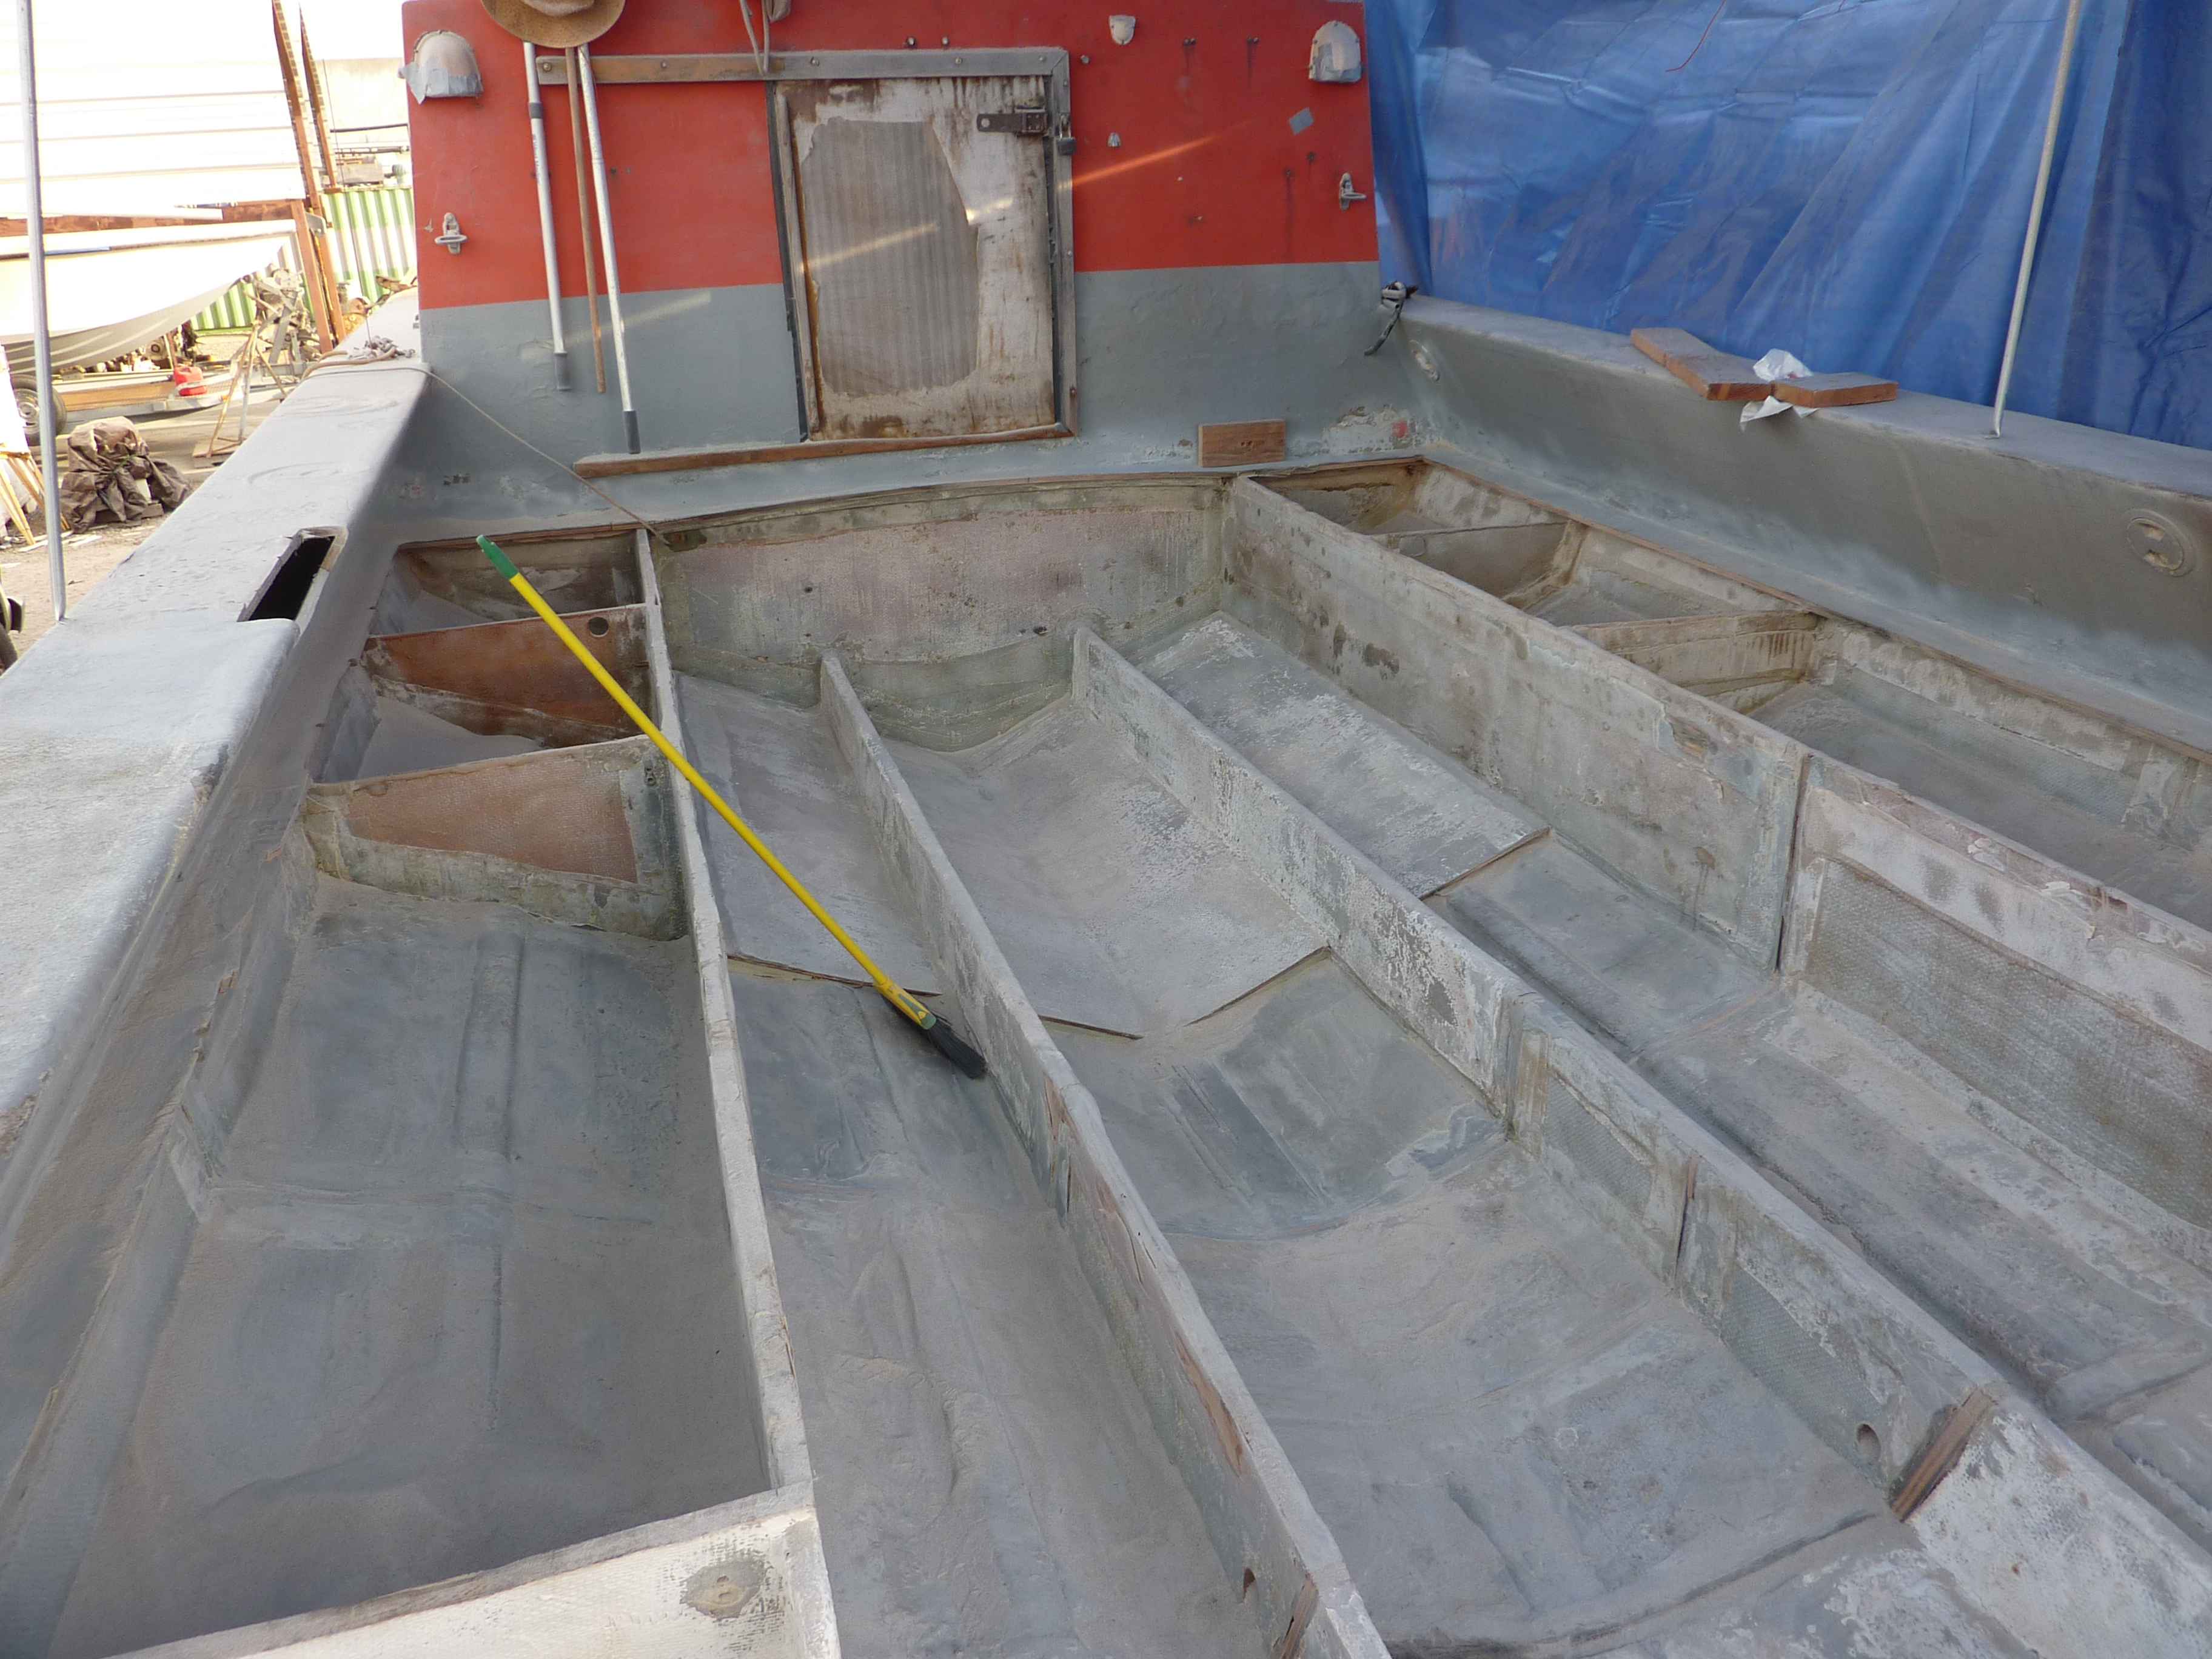
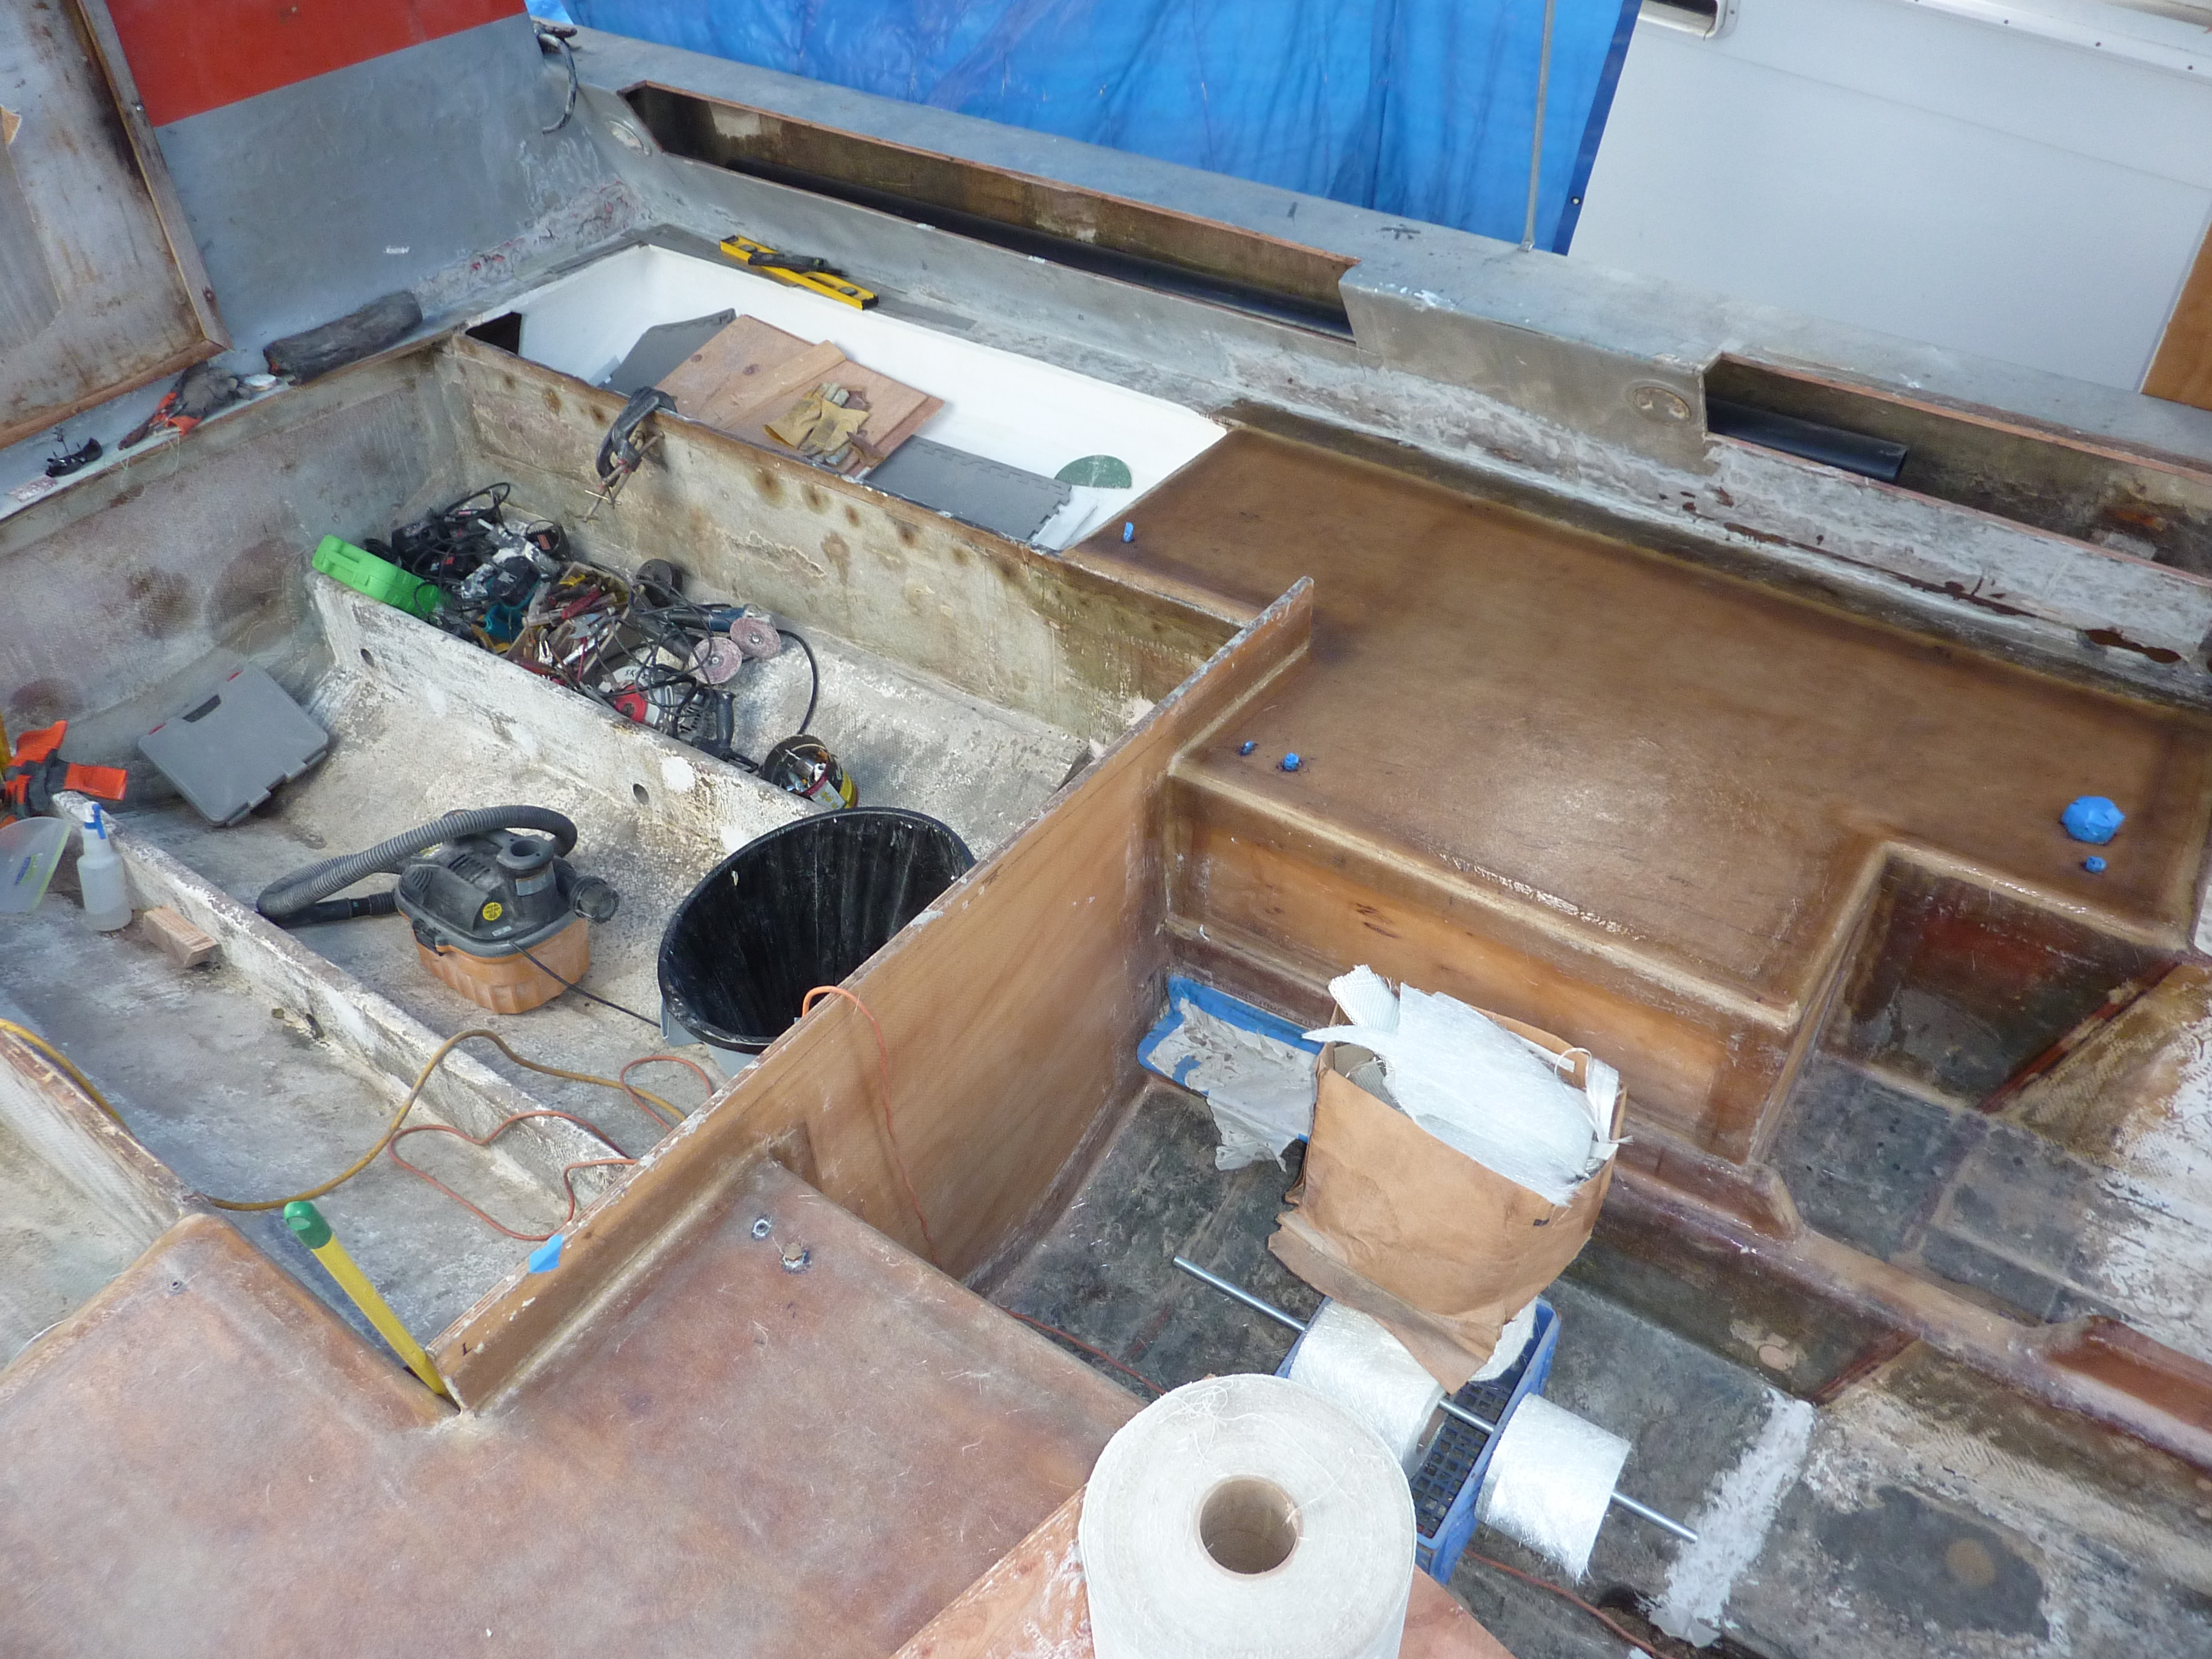
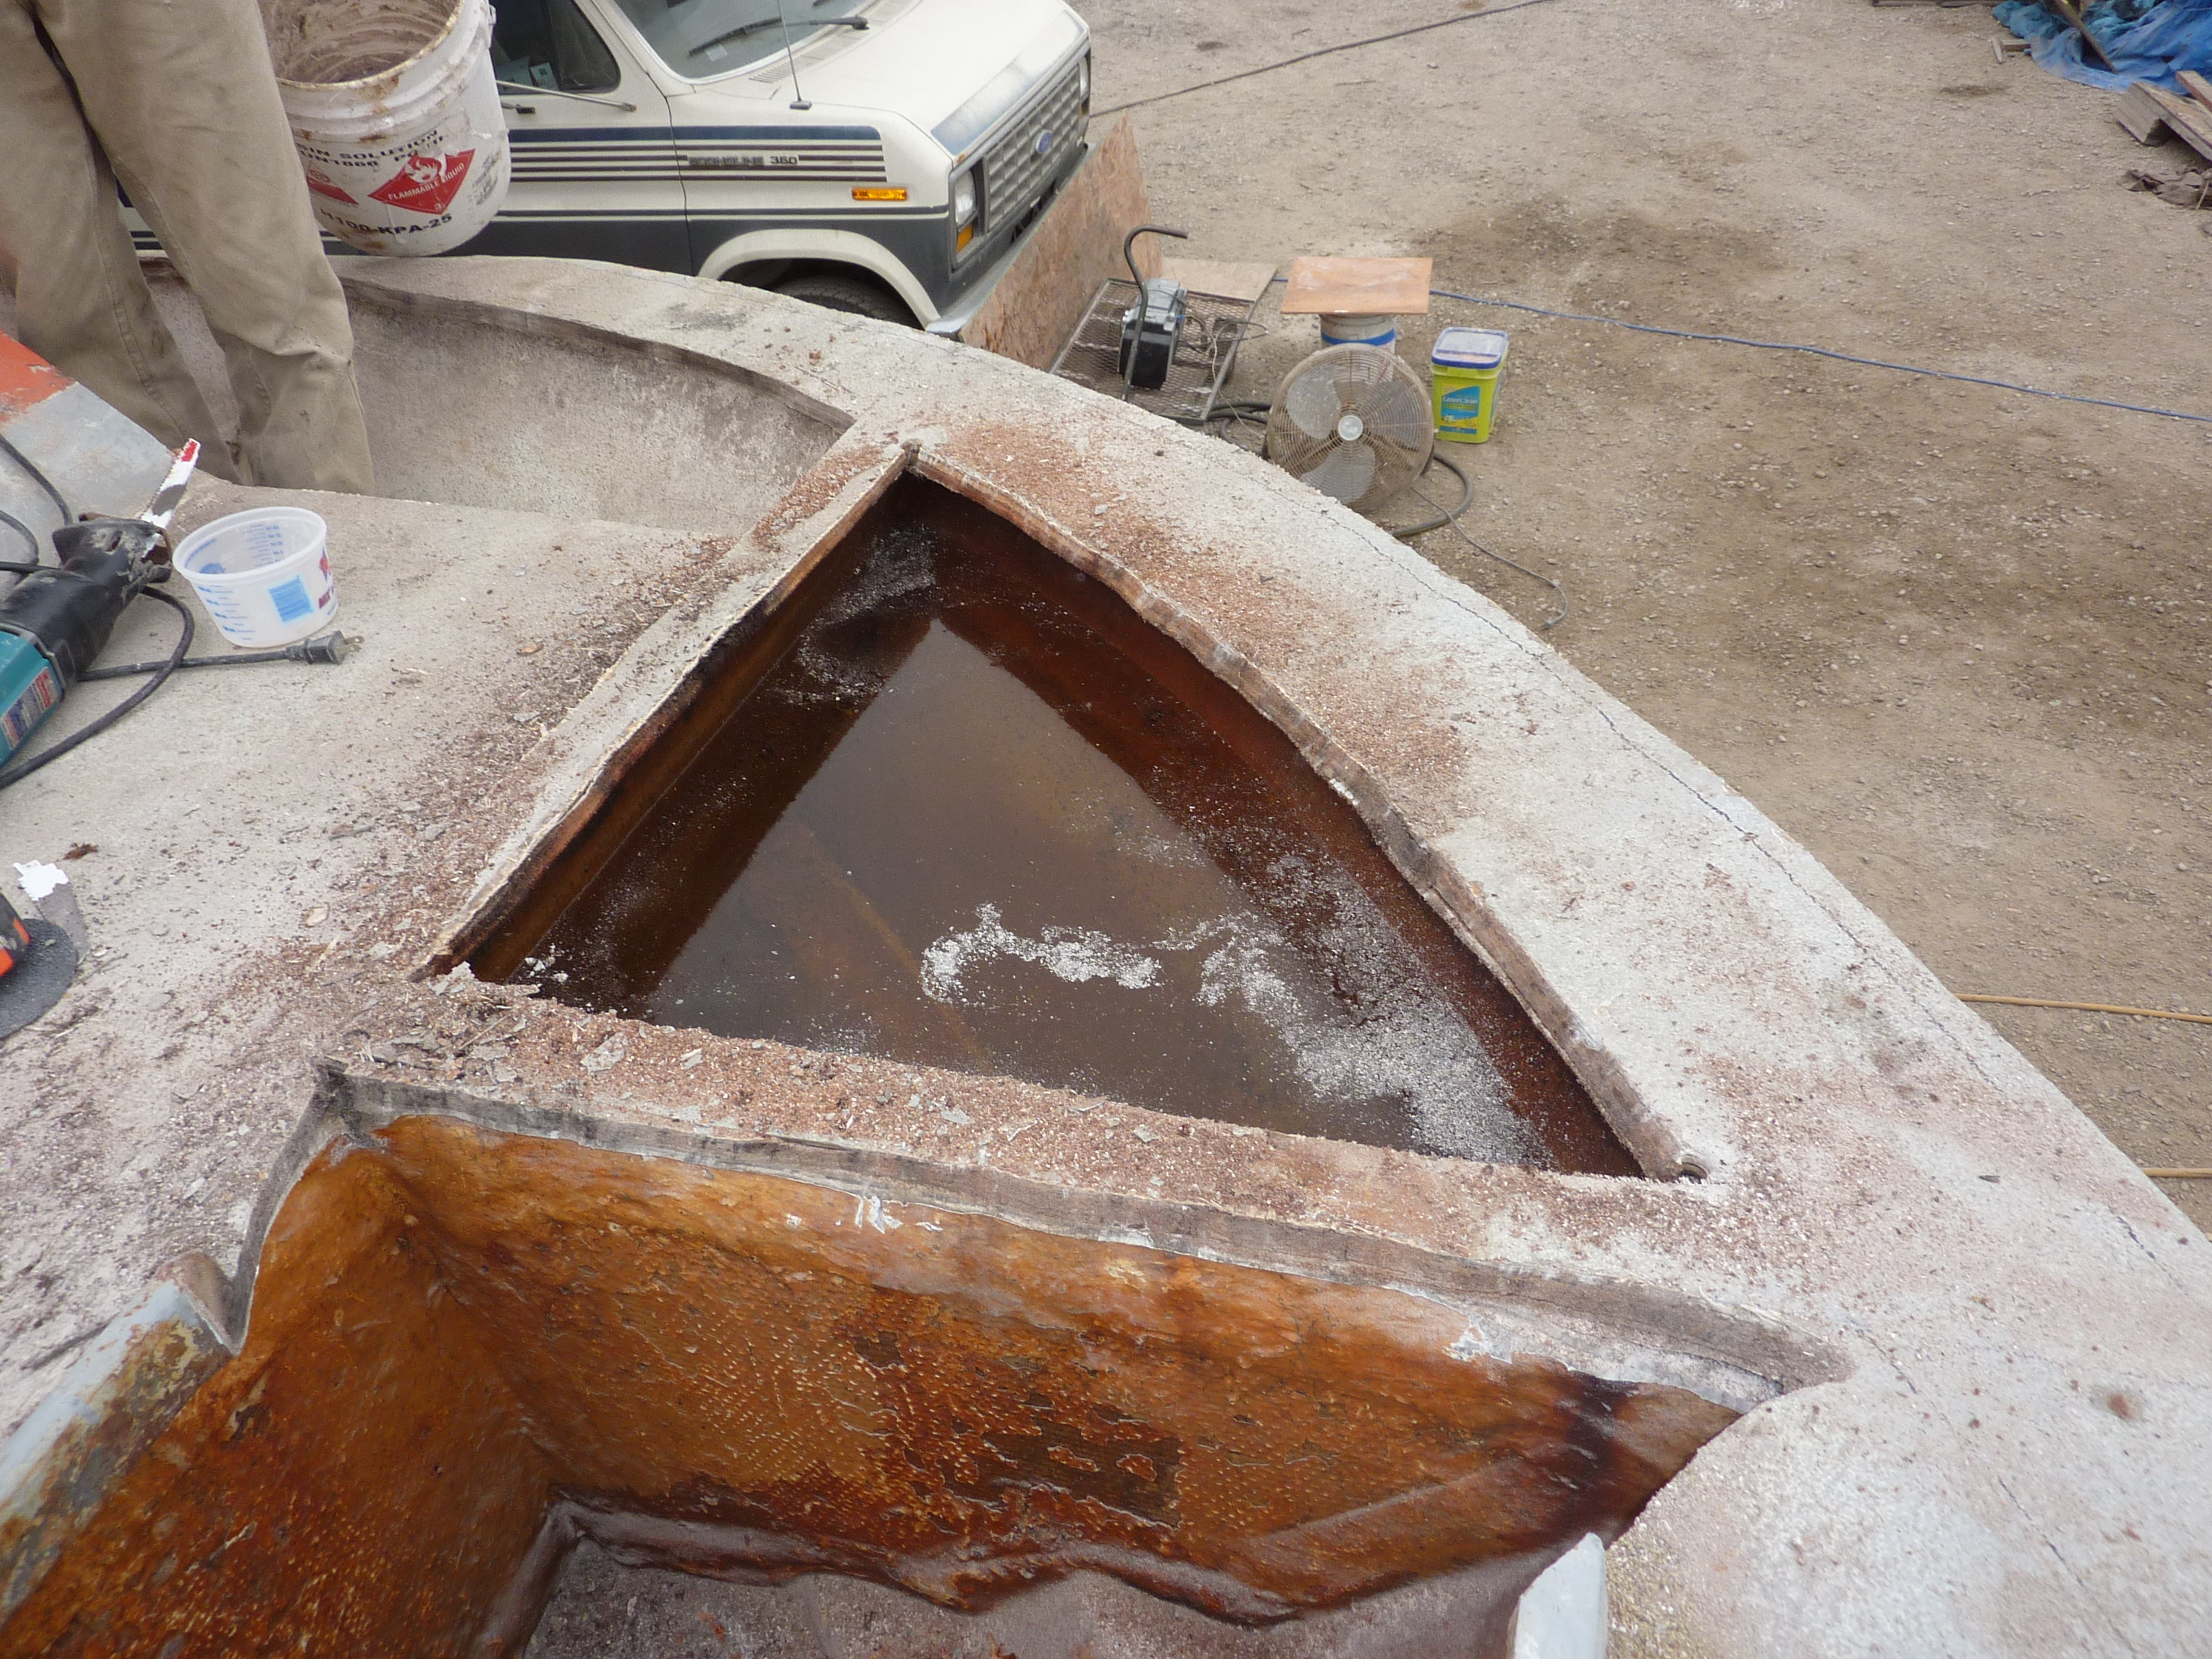
Deck cutting – Even worse than I expected. This part of the job was really nasty, but was a real eye-opener for the owners who now realized just how bad things were under the deck. This boat was shot!!
Getting things ready…
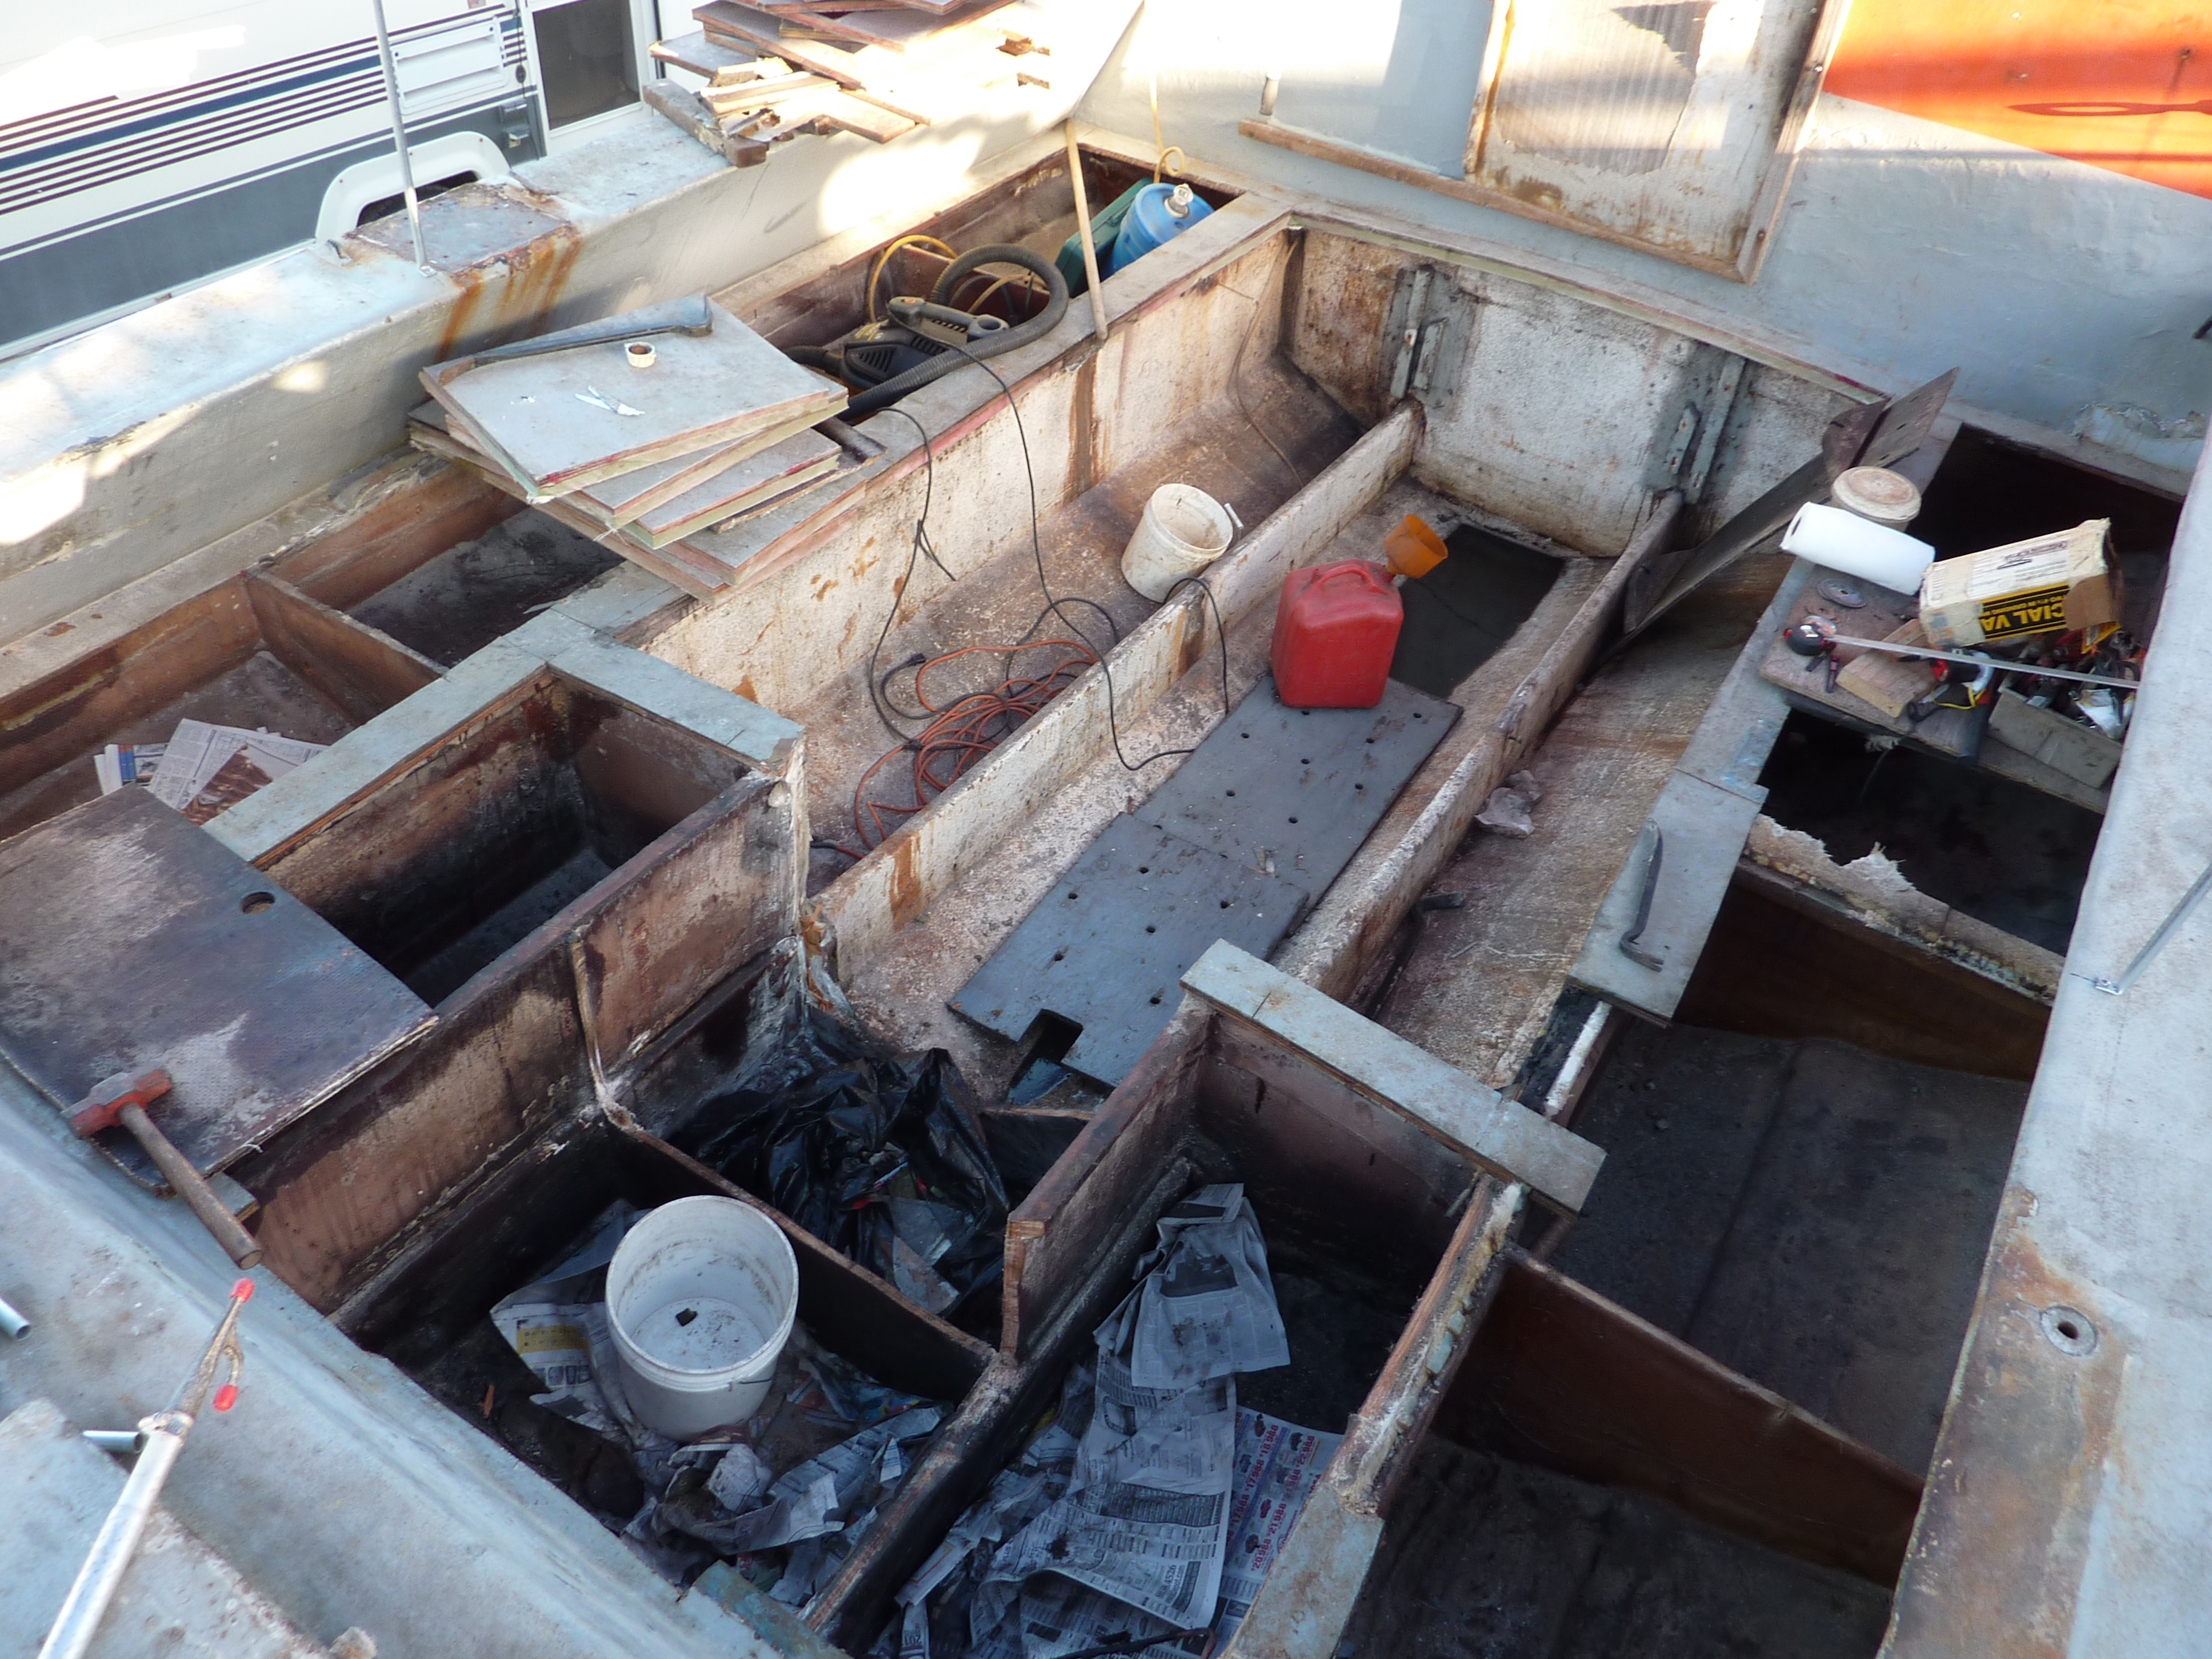
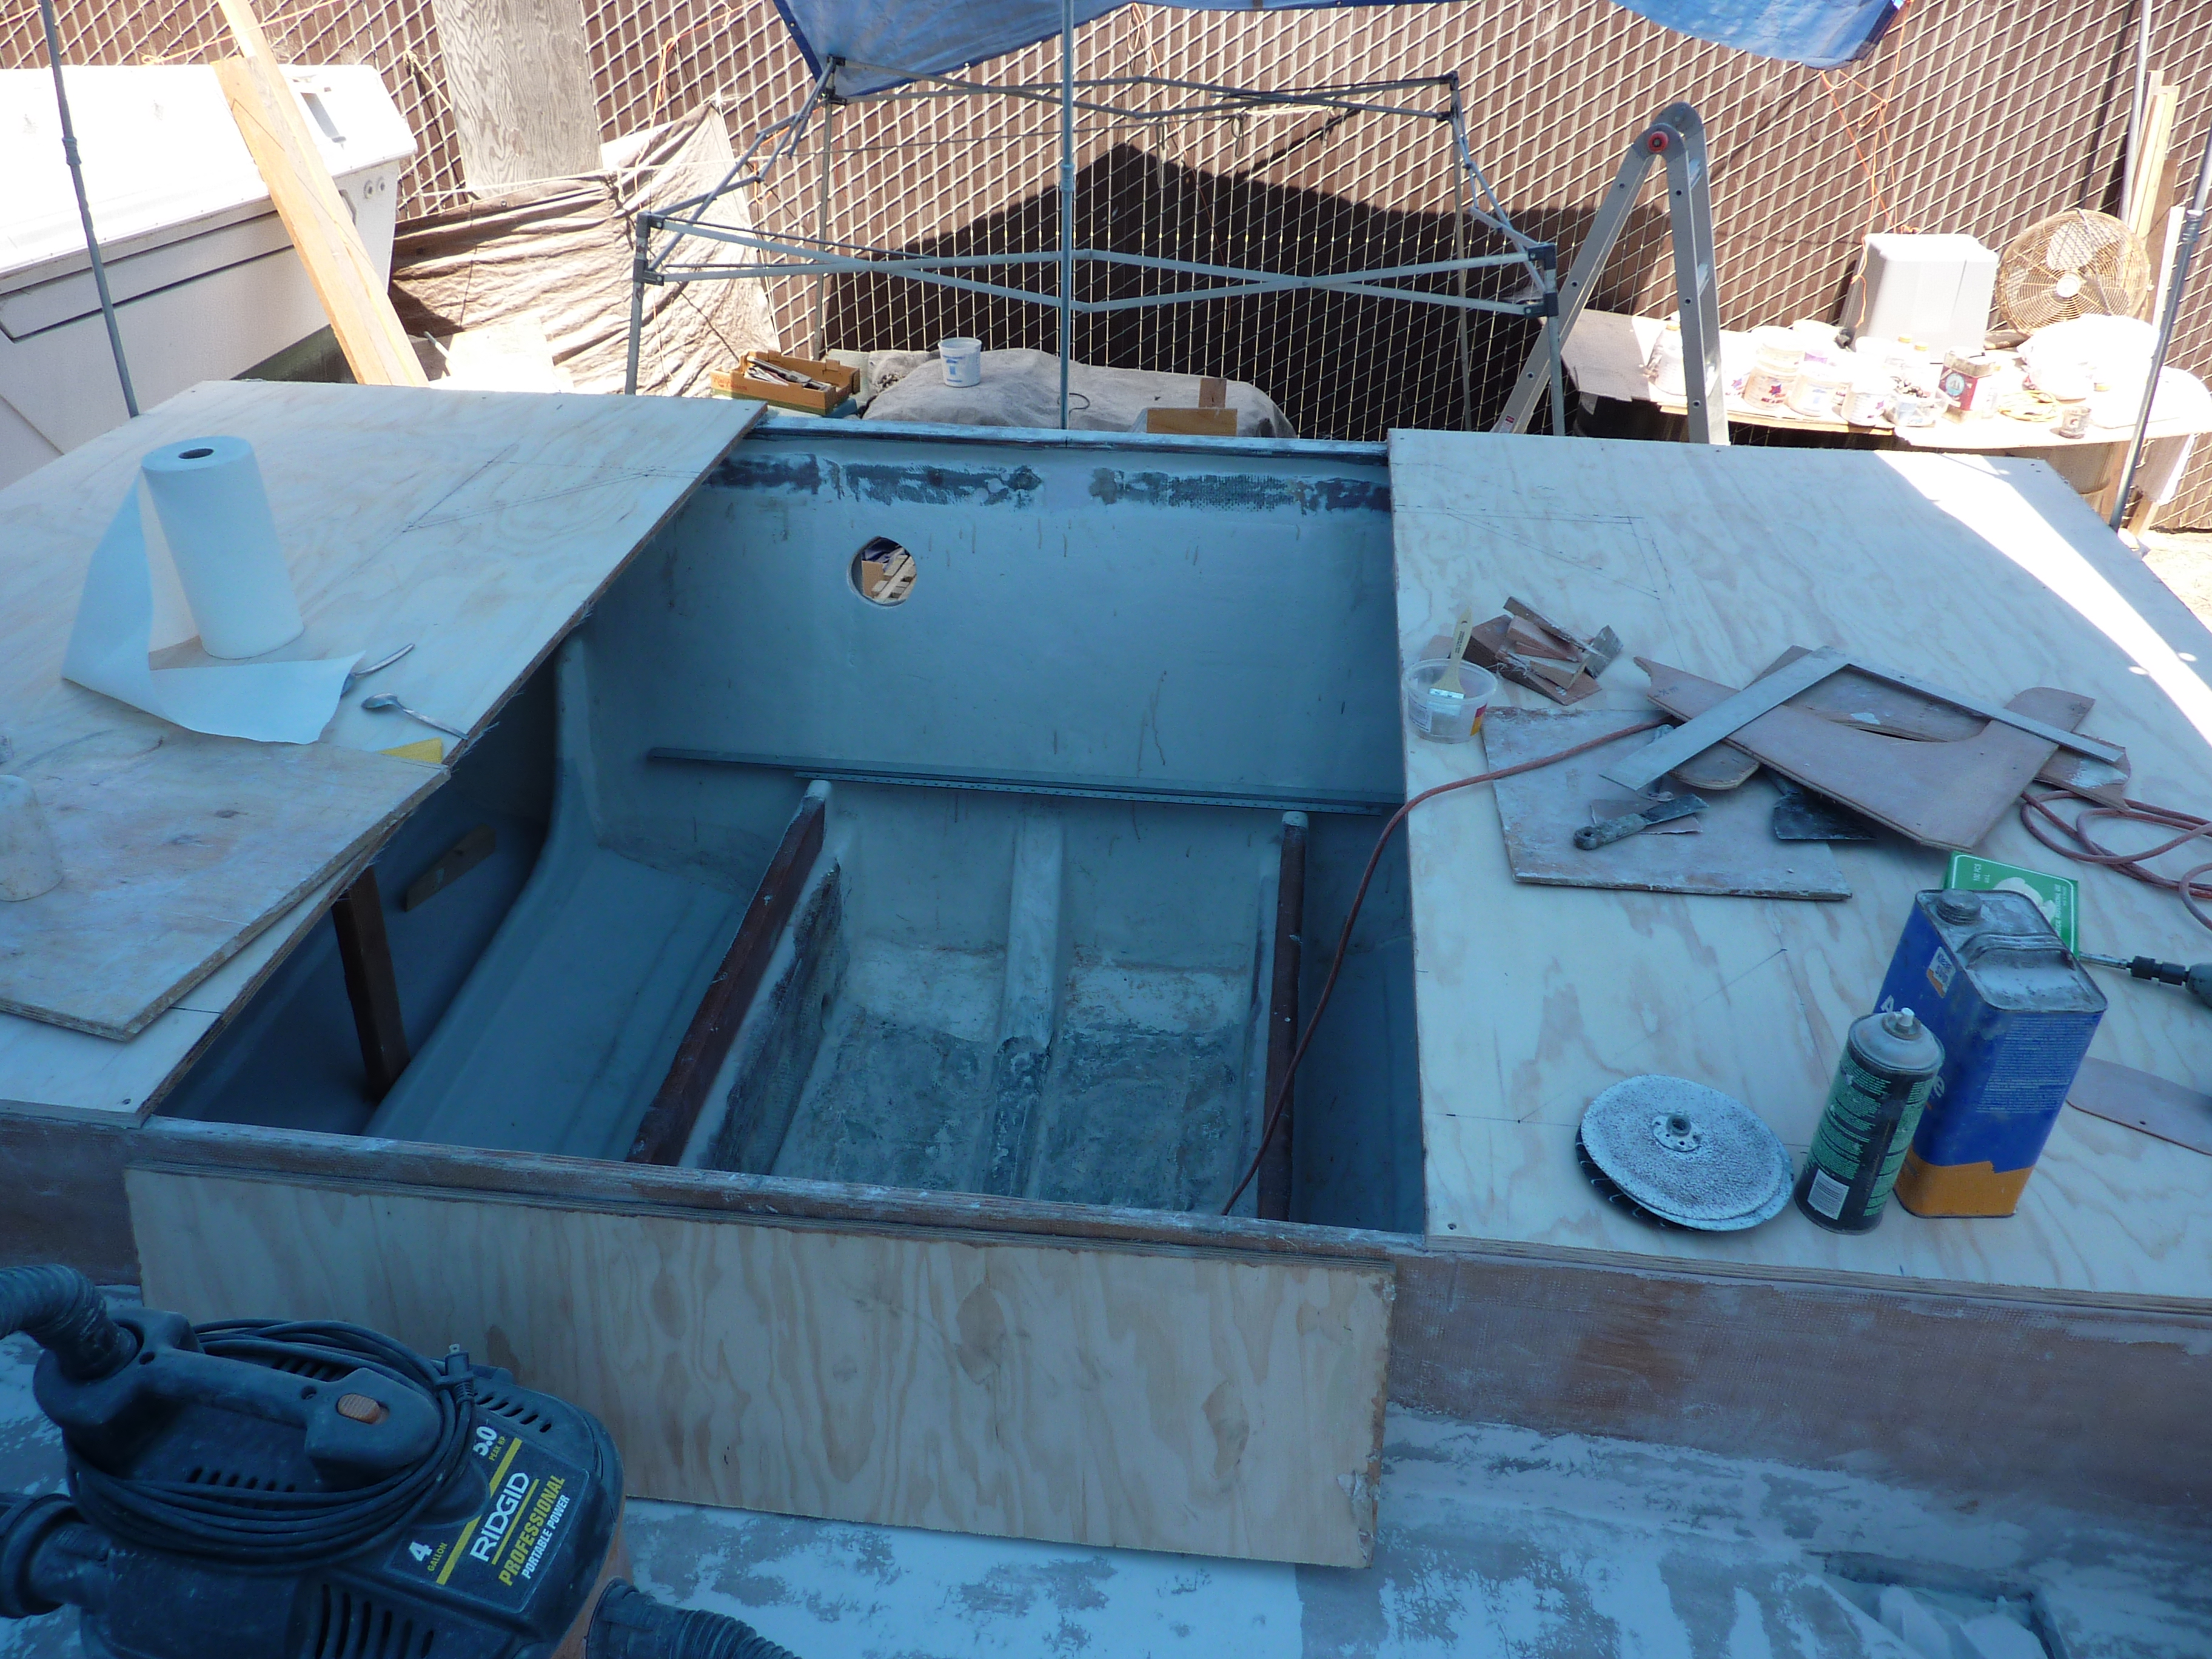
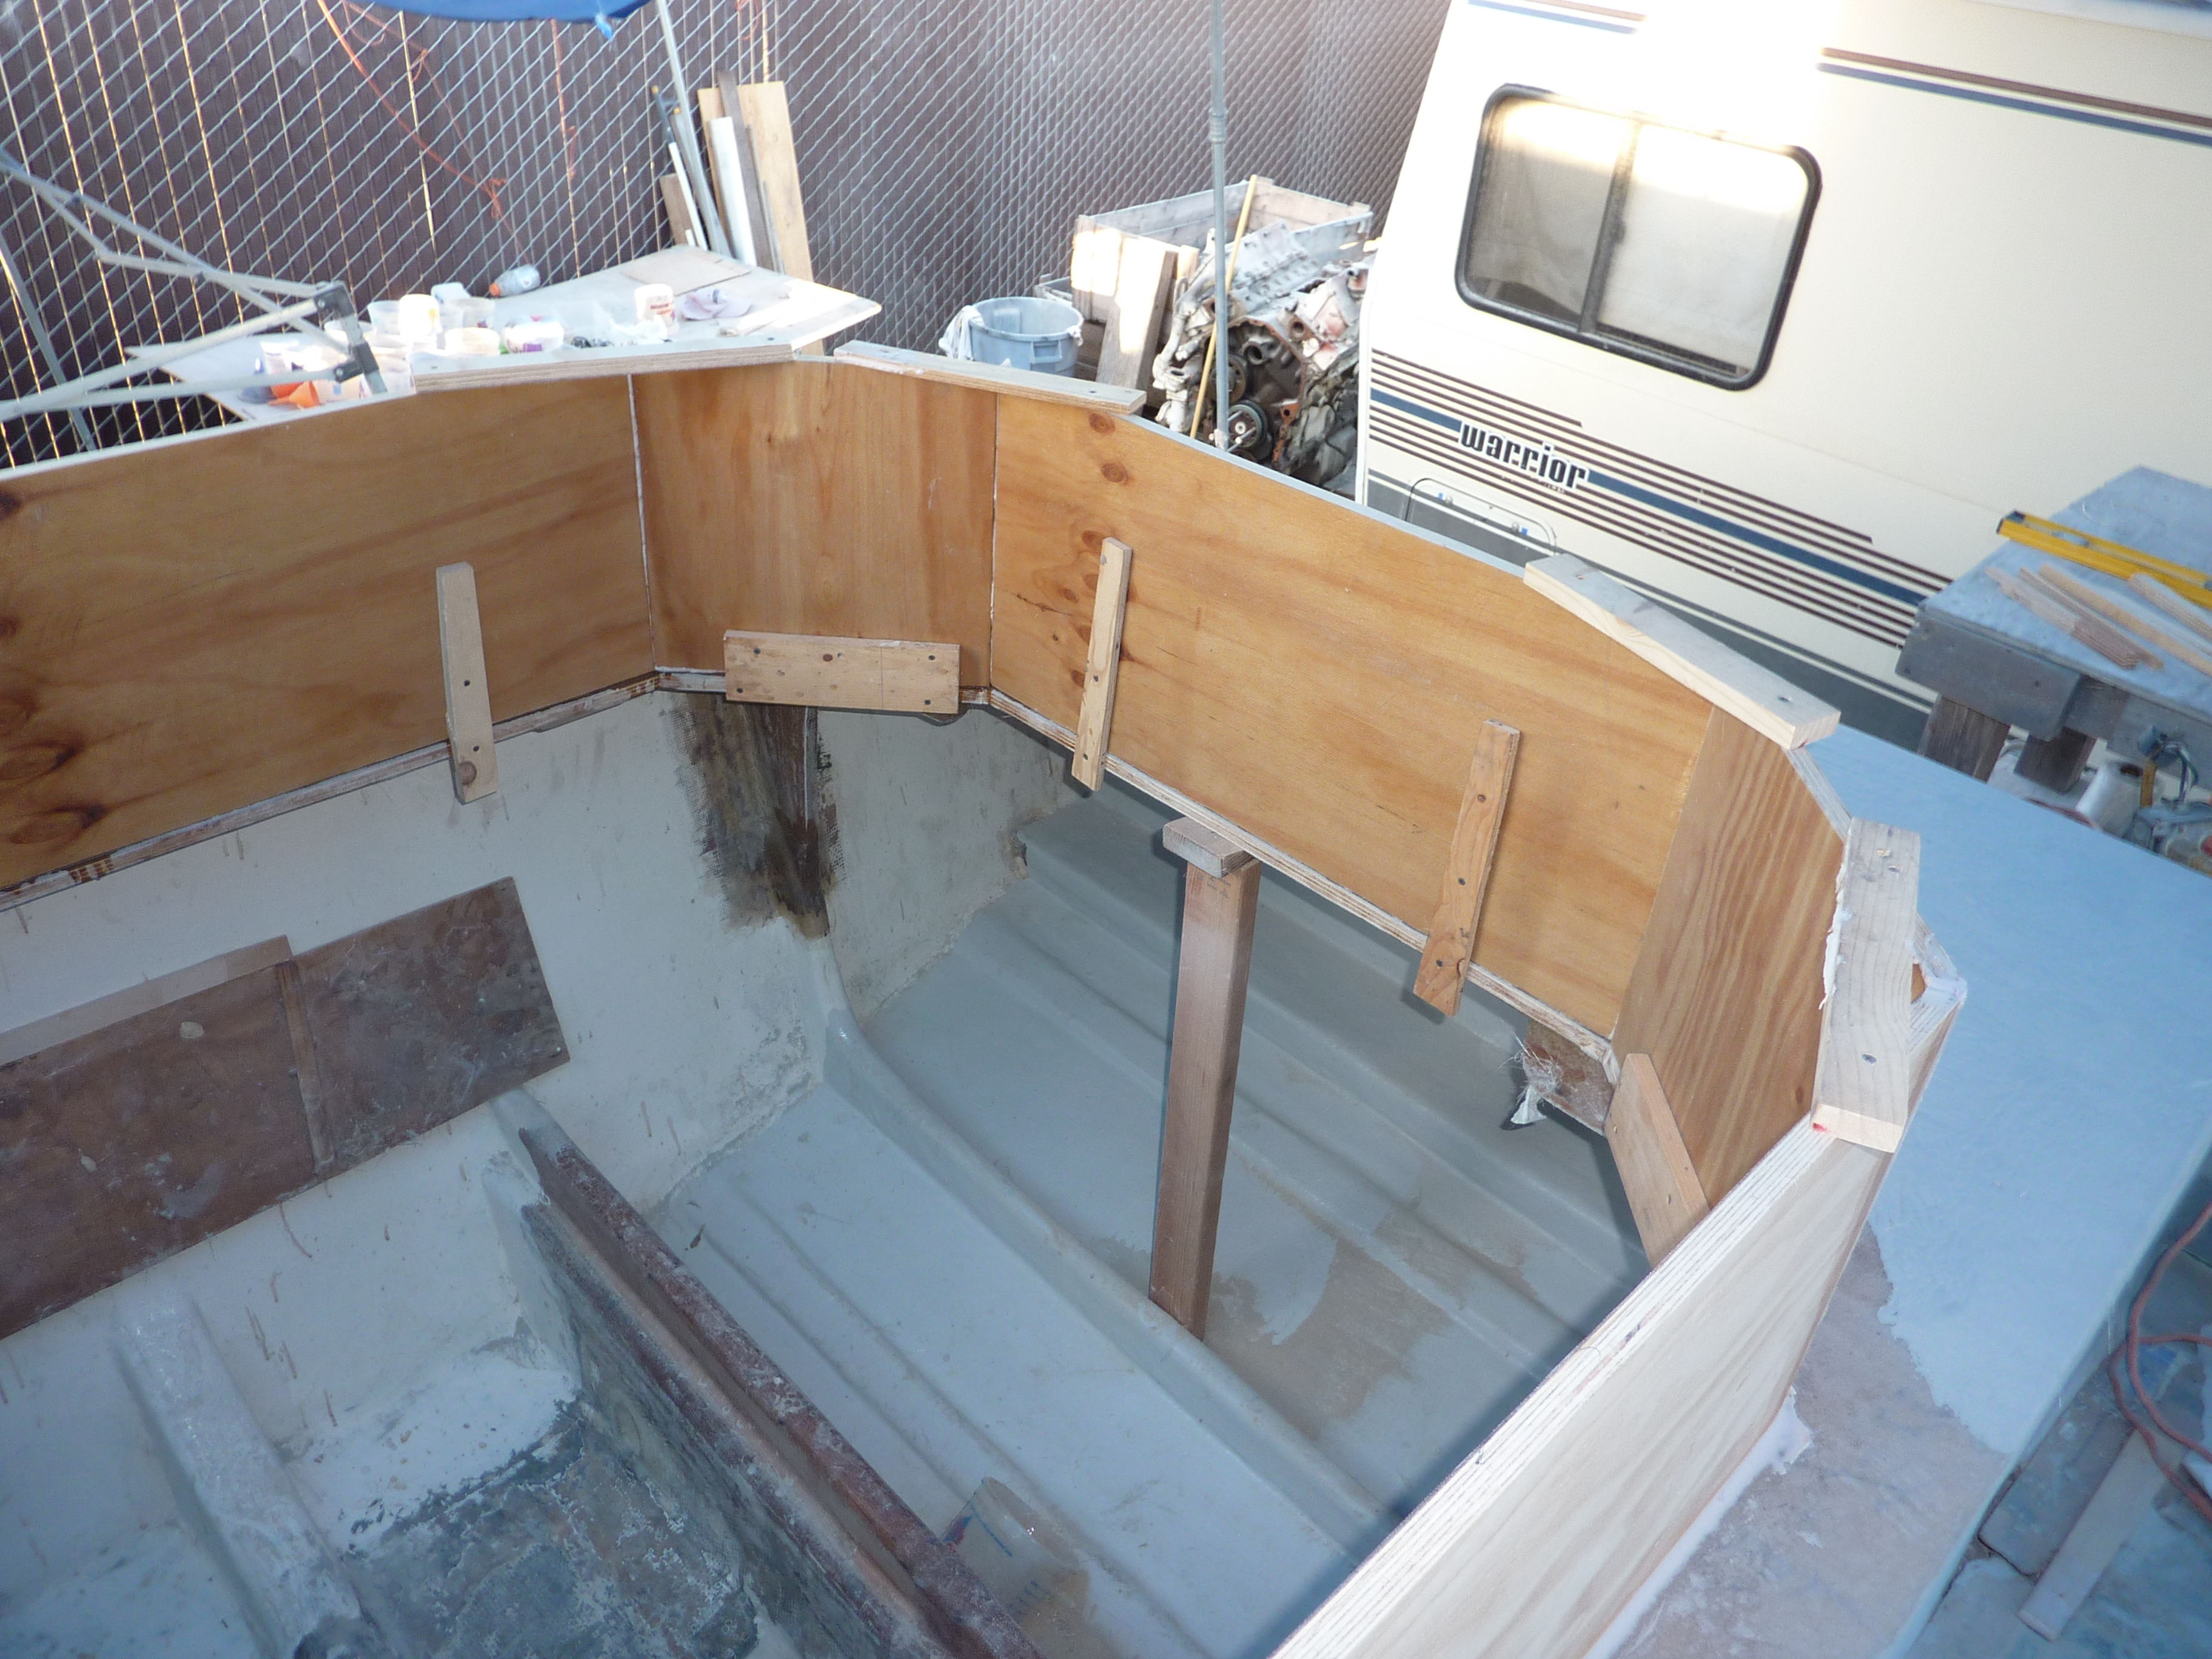
Then came the SAWSZALL with about 2 dozen 12” course blades, and not construction, but “DE-CONSTRUCTION.” The rear decks were cut and removed, along with all of the under deck compartment & walls, and the old leaking fuel tanks down to a bare hull. Then we sandblasted the interior to expose some clean fiberglass or whatever we could that looked solid enough to bond to. Took a solid 3 weeks to “gut” this boat down to a “workable structure”.
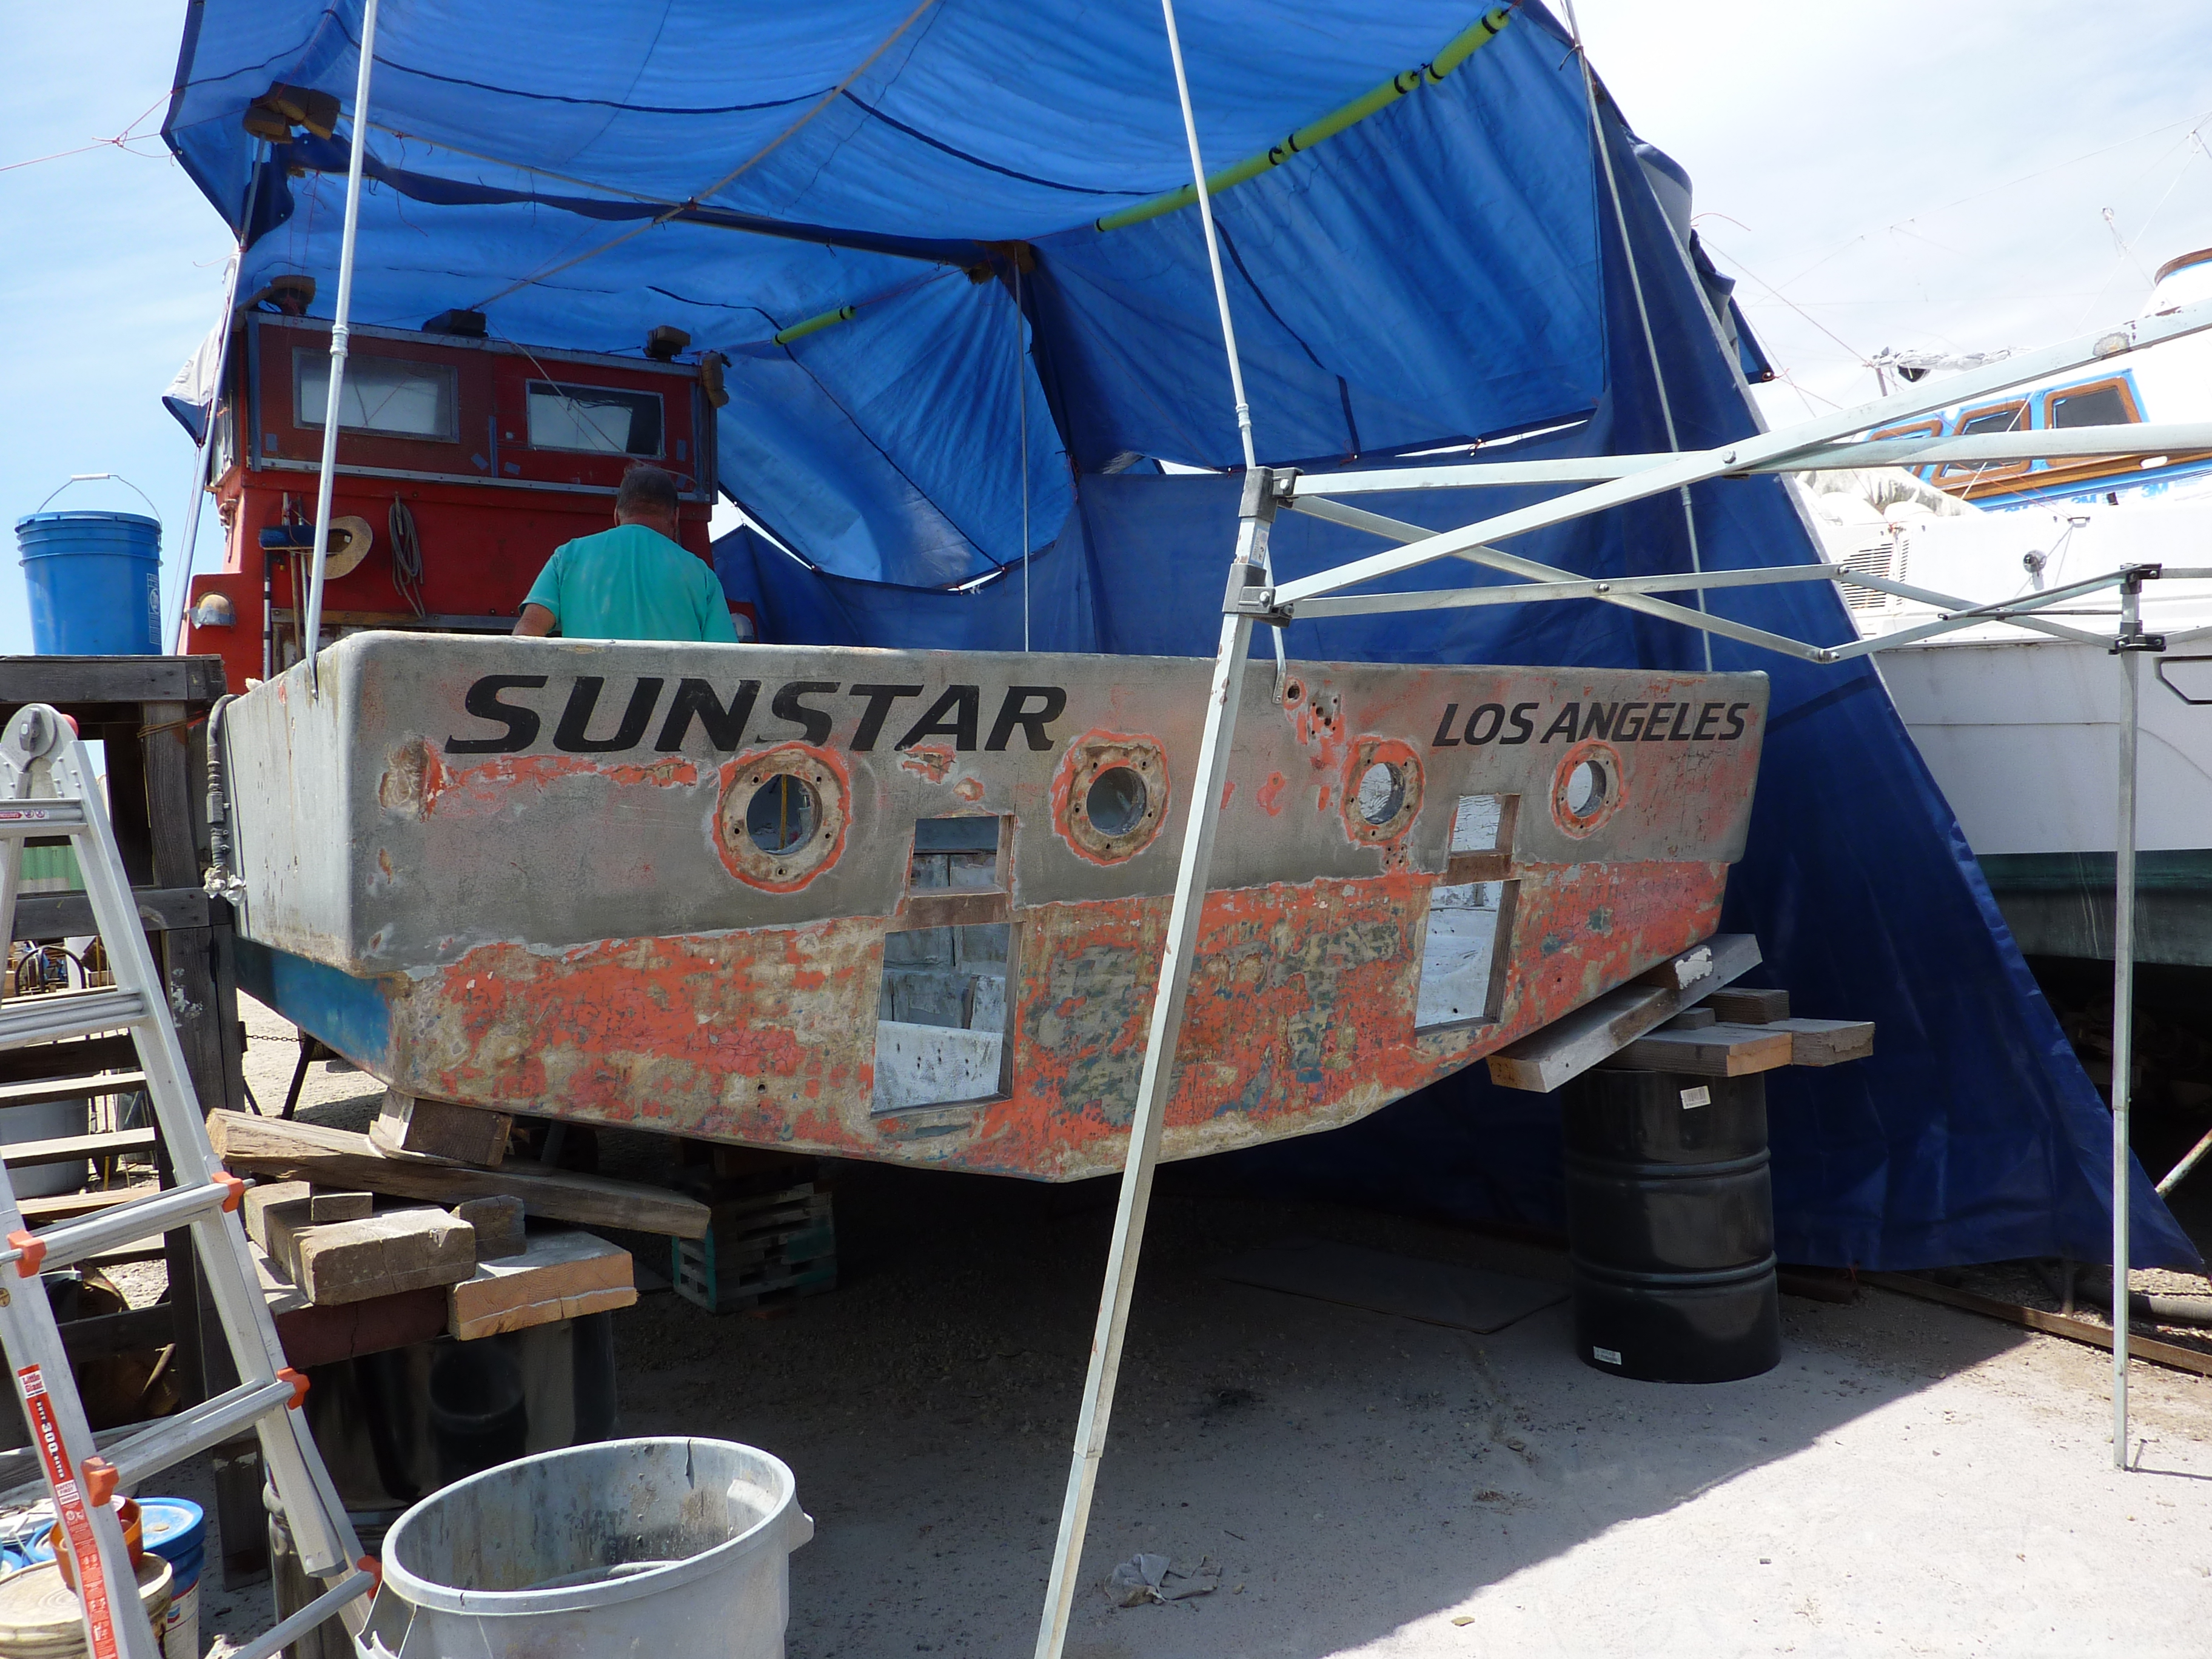
Ugly worn transom sans outdrives.
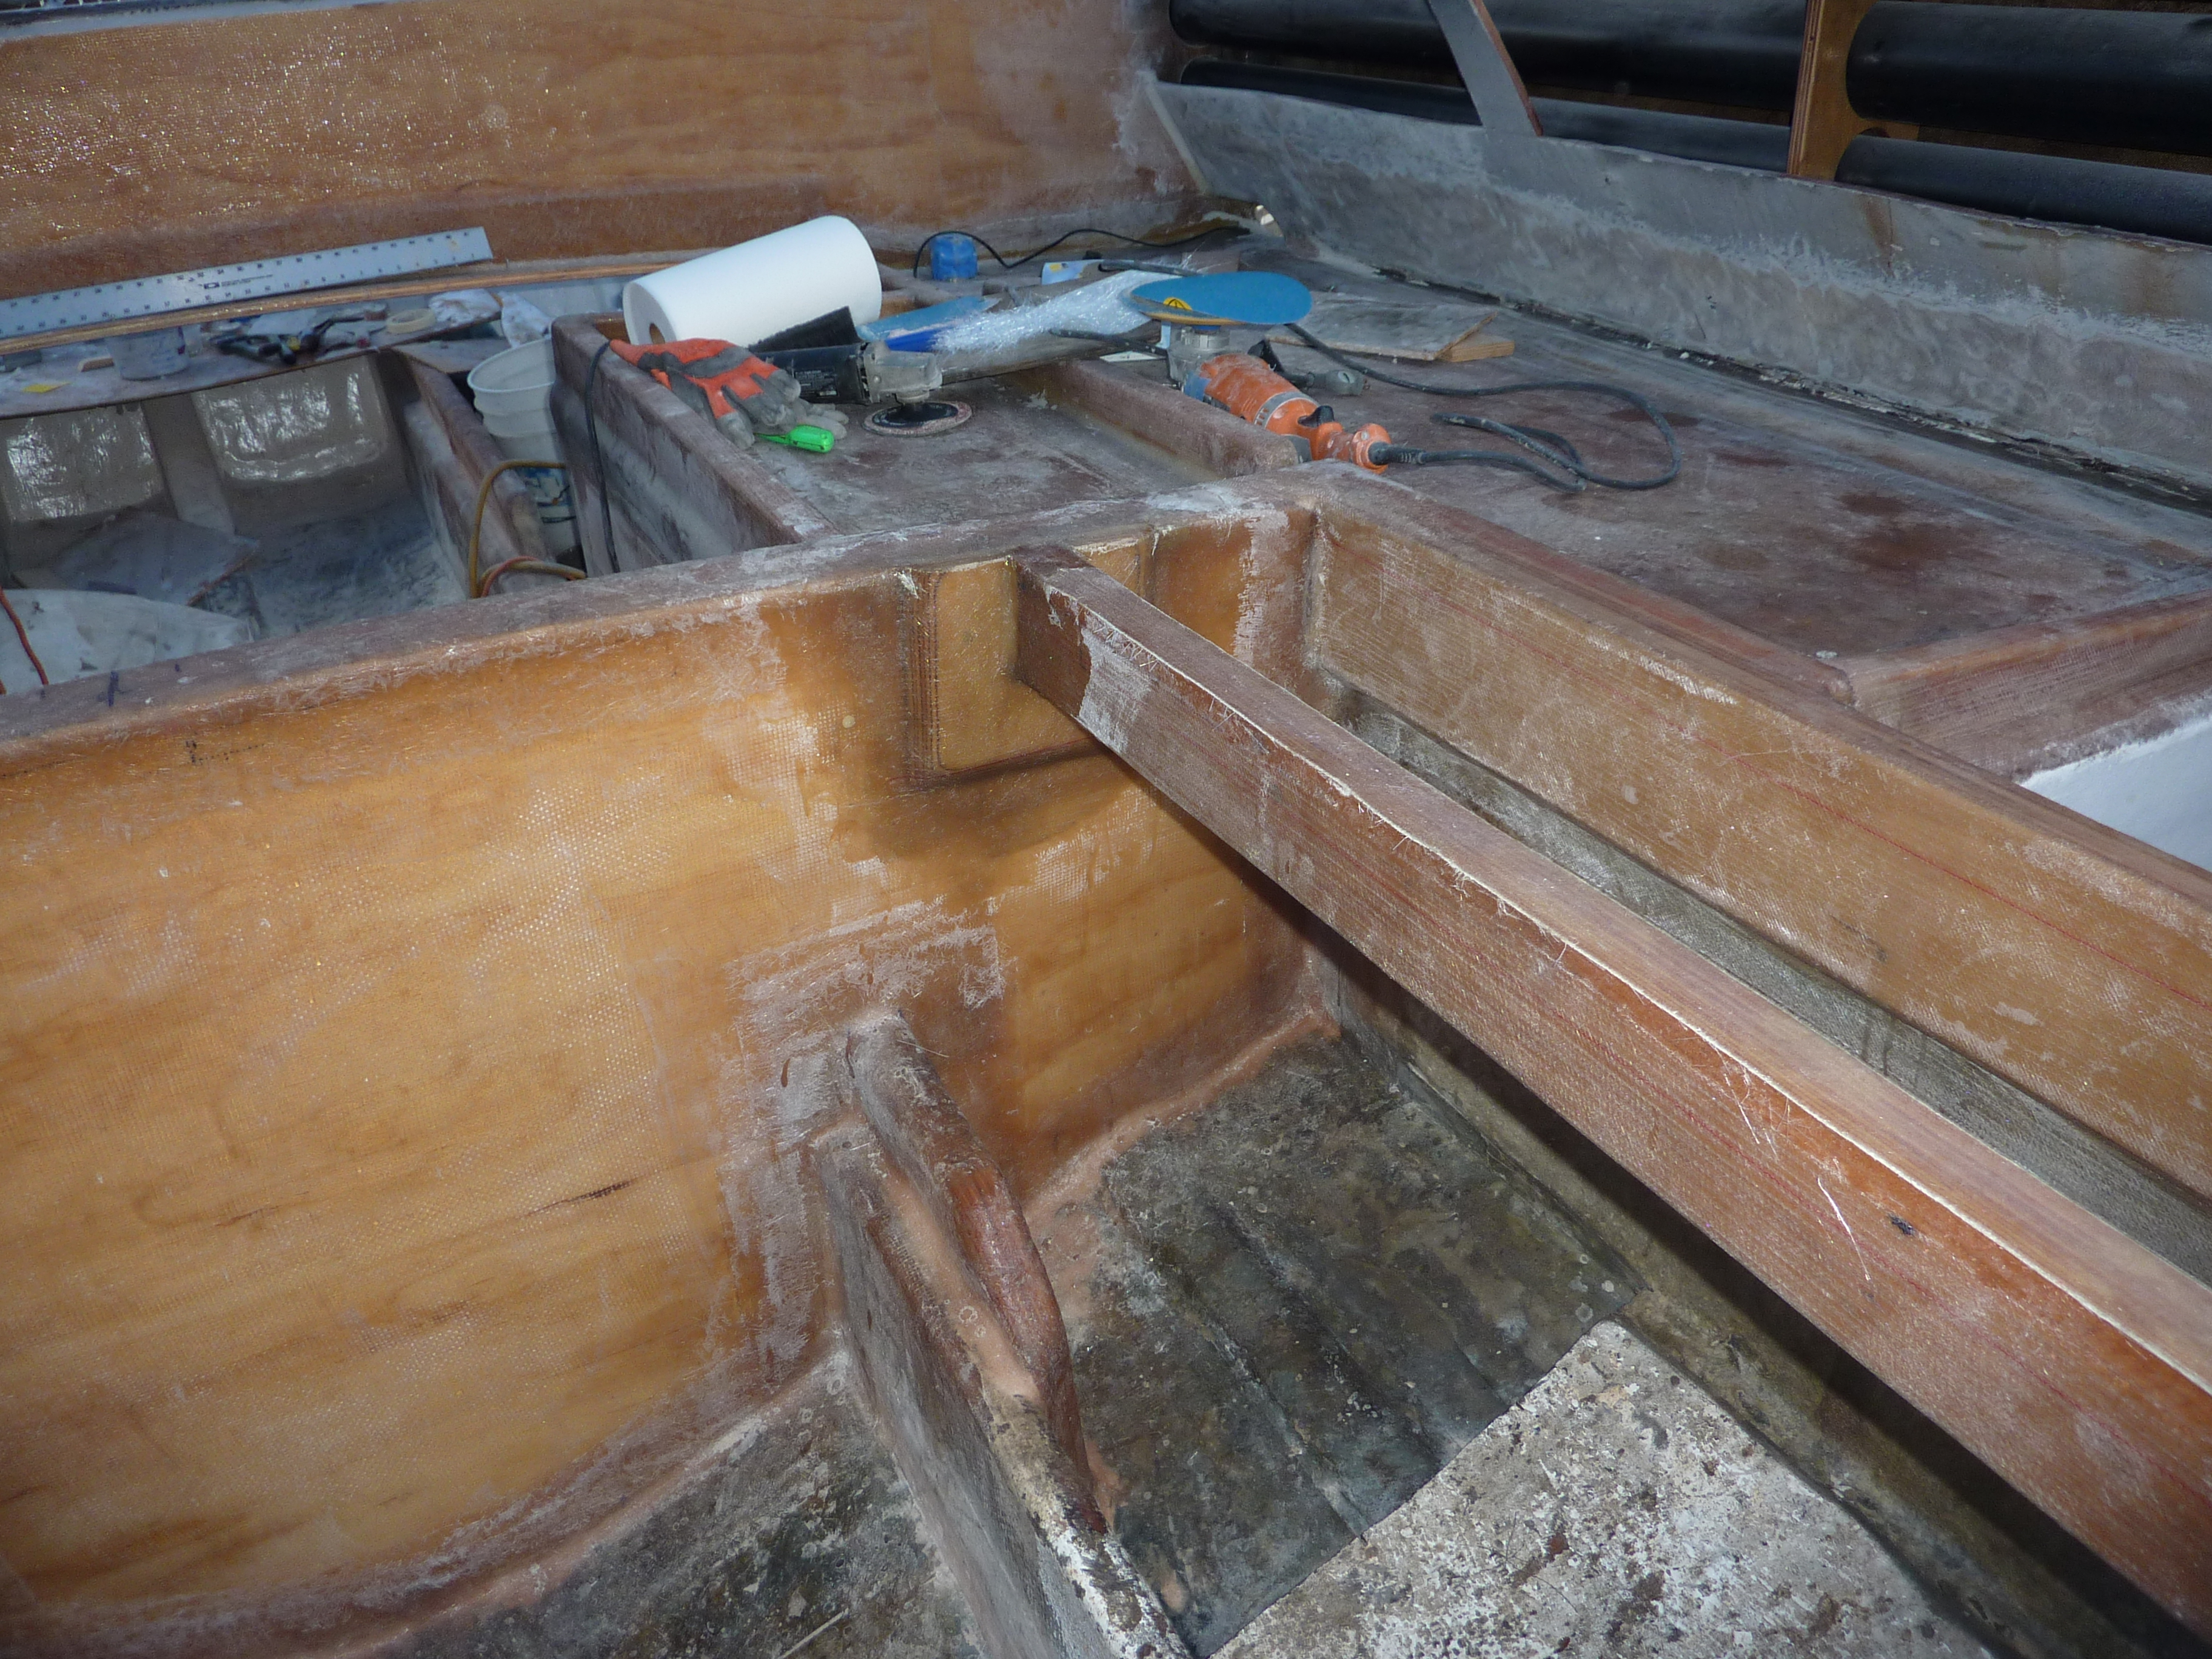
New stringers and forward engine room bulkhead
“Microlam” Stringers – new main engine & V-drive stringers that form the “backbone” needed for this type of propulsion system. Pre-fitted and pre-glassed before installation – Vinyl-ester resin is always used for the 1st coat to insure the best bond available.
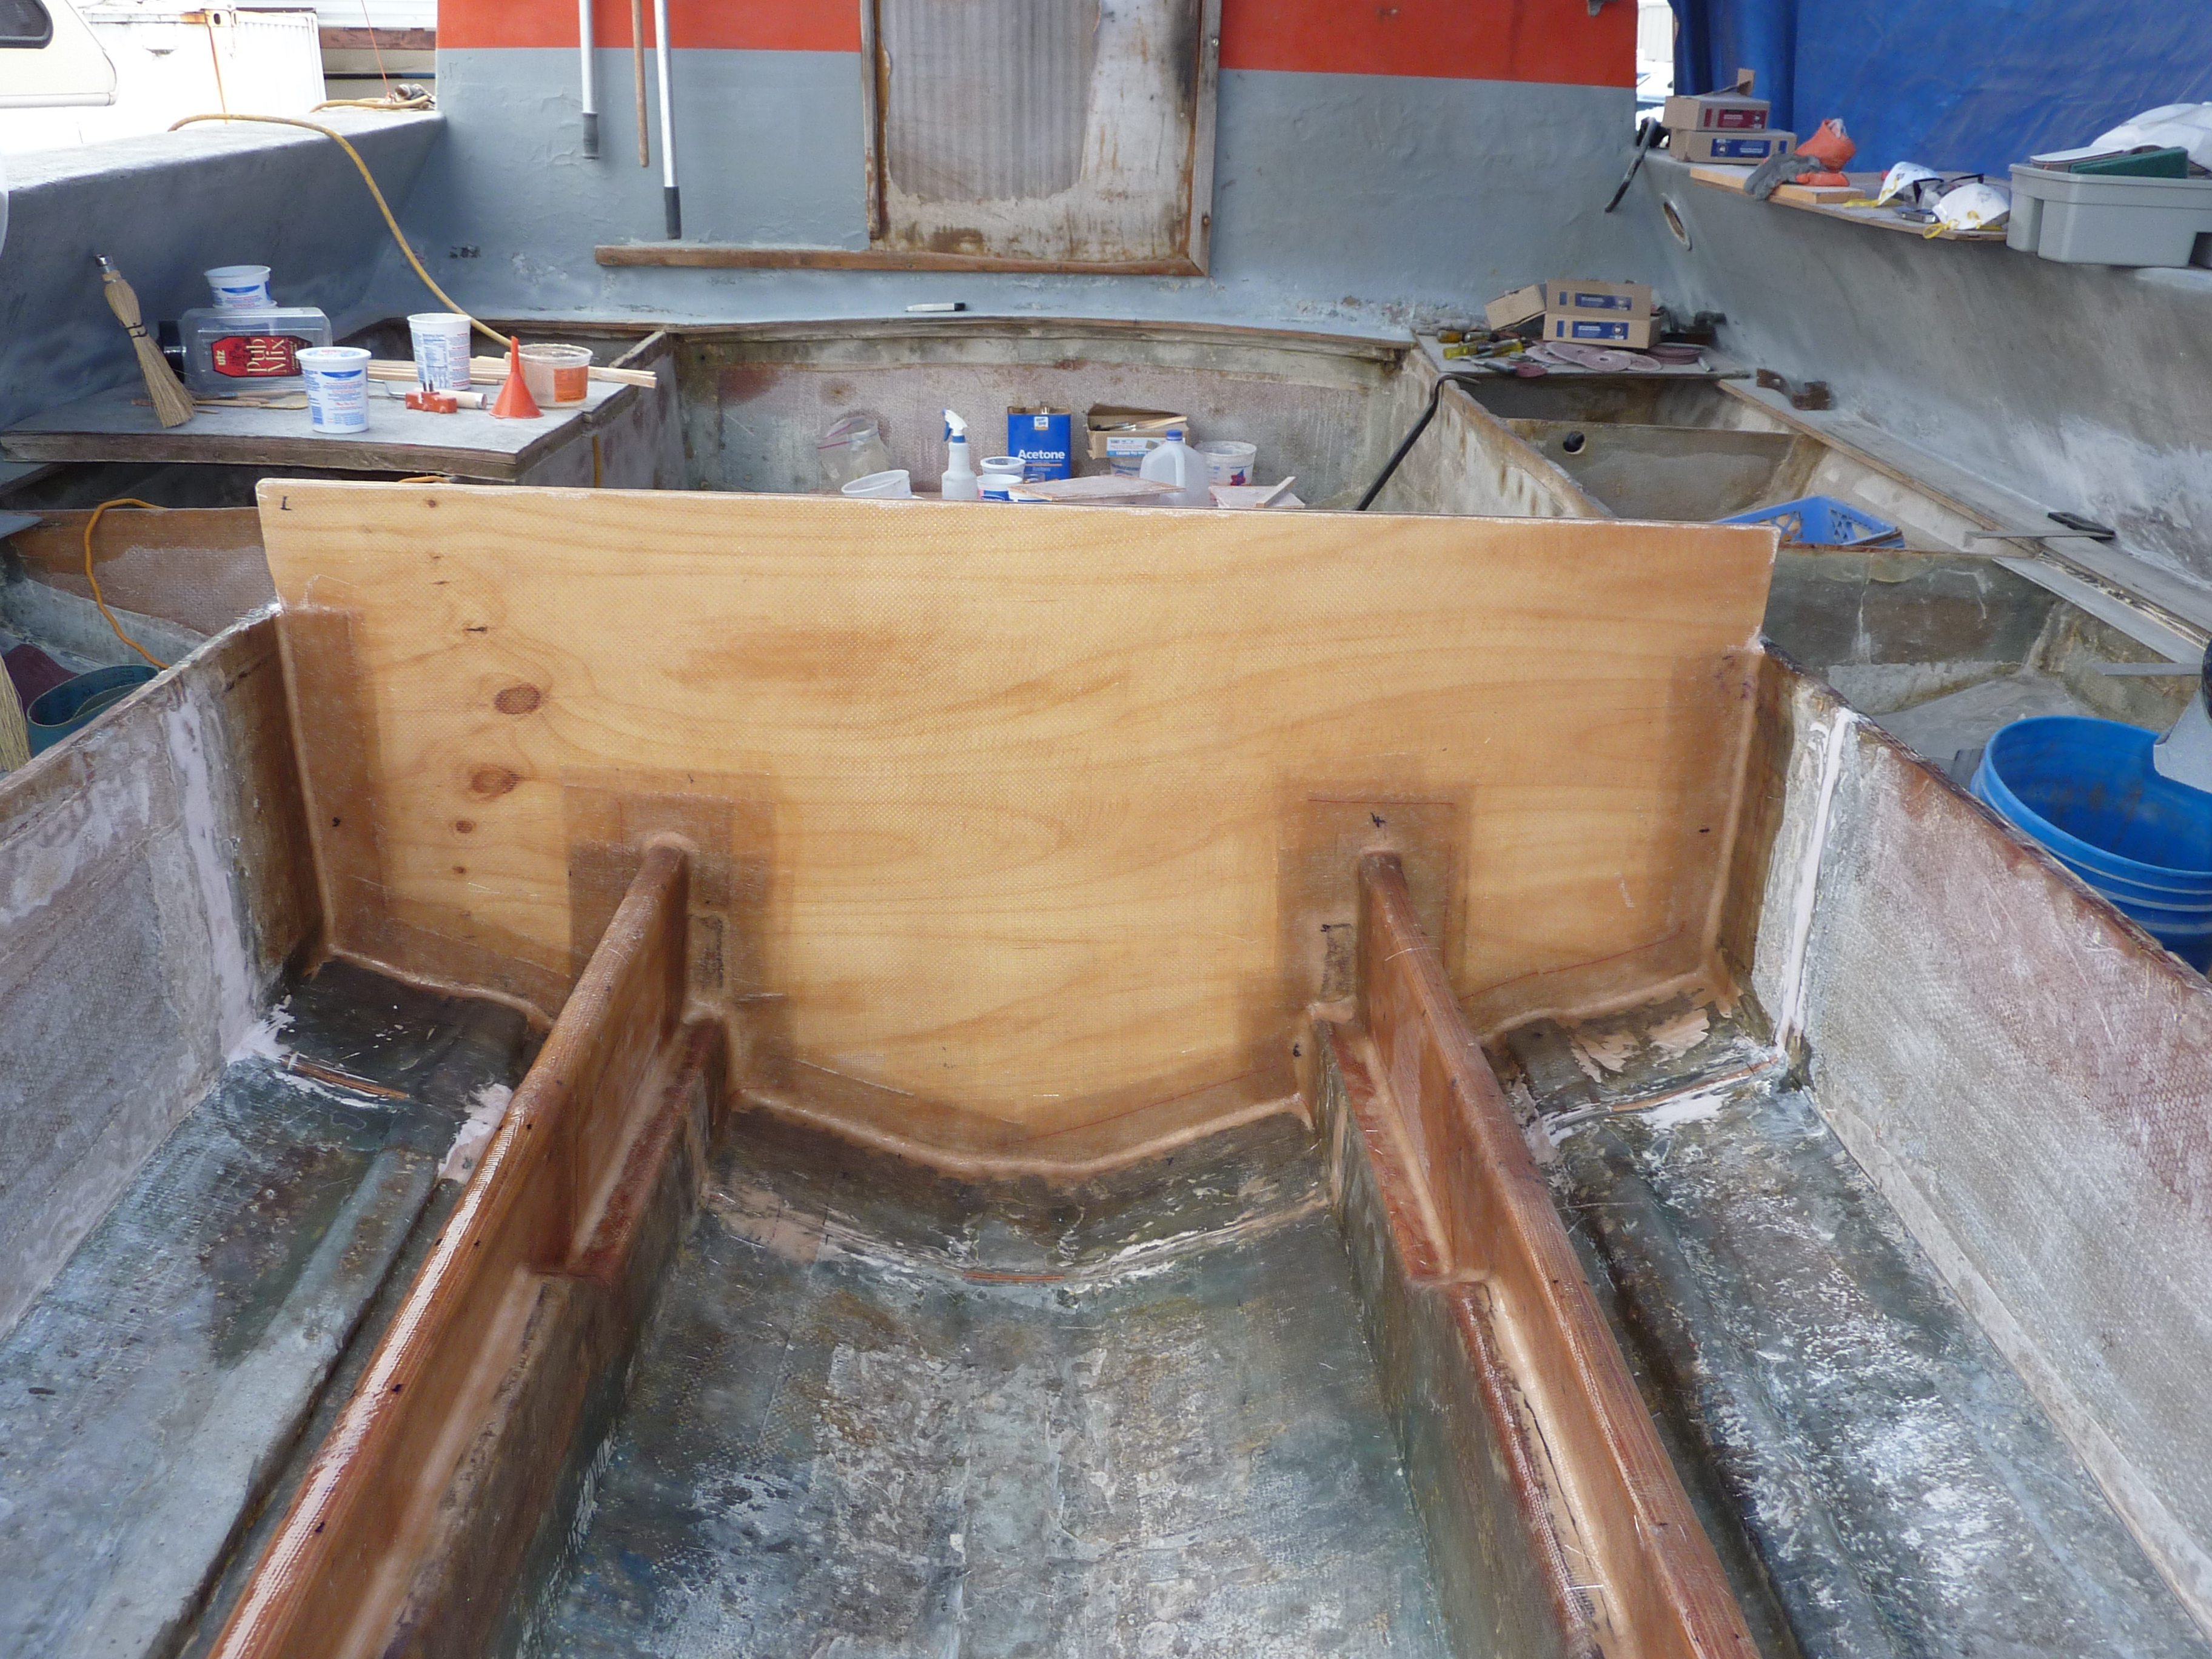
Moving forward, finally the first NEW PARTS this boat has seen for well over 30 yrs – Bulkhead template
New forward engine room bulkhead
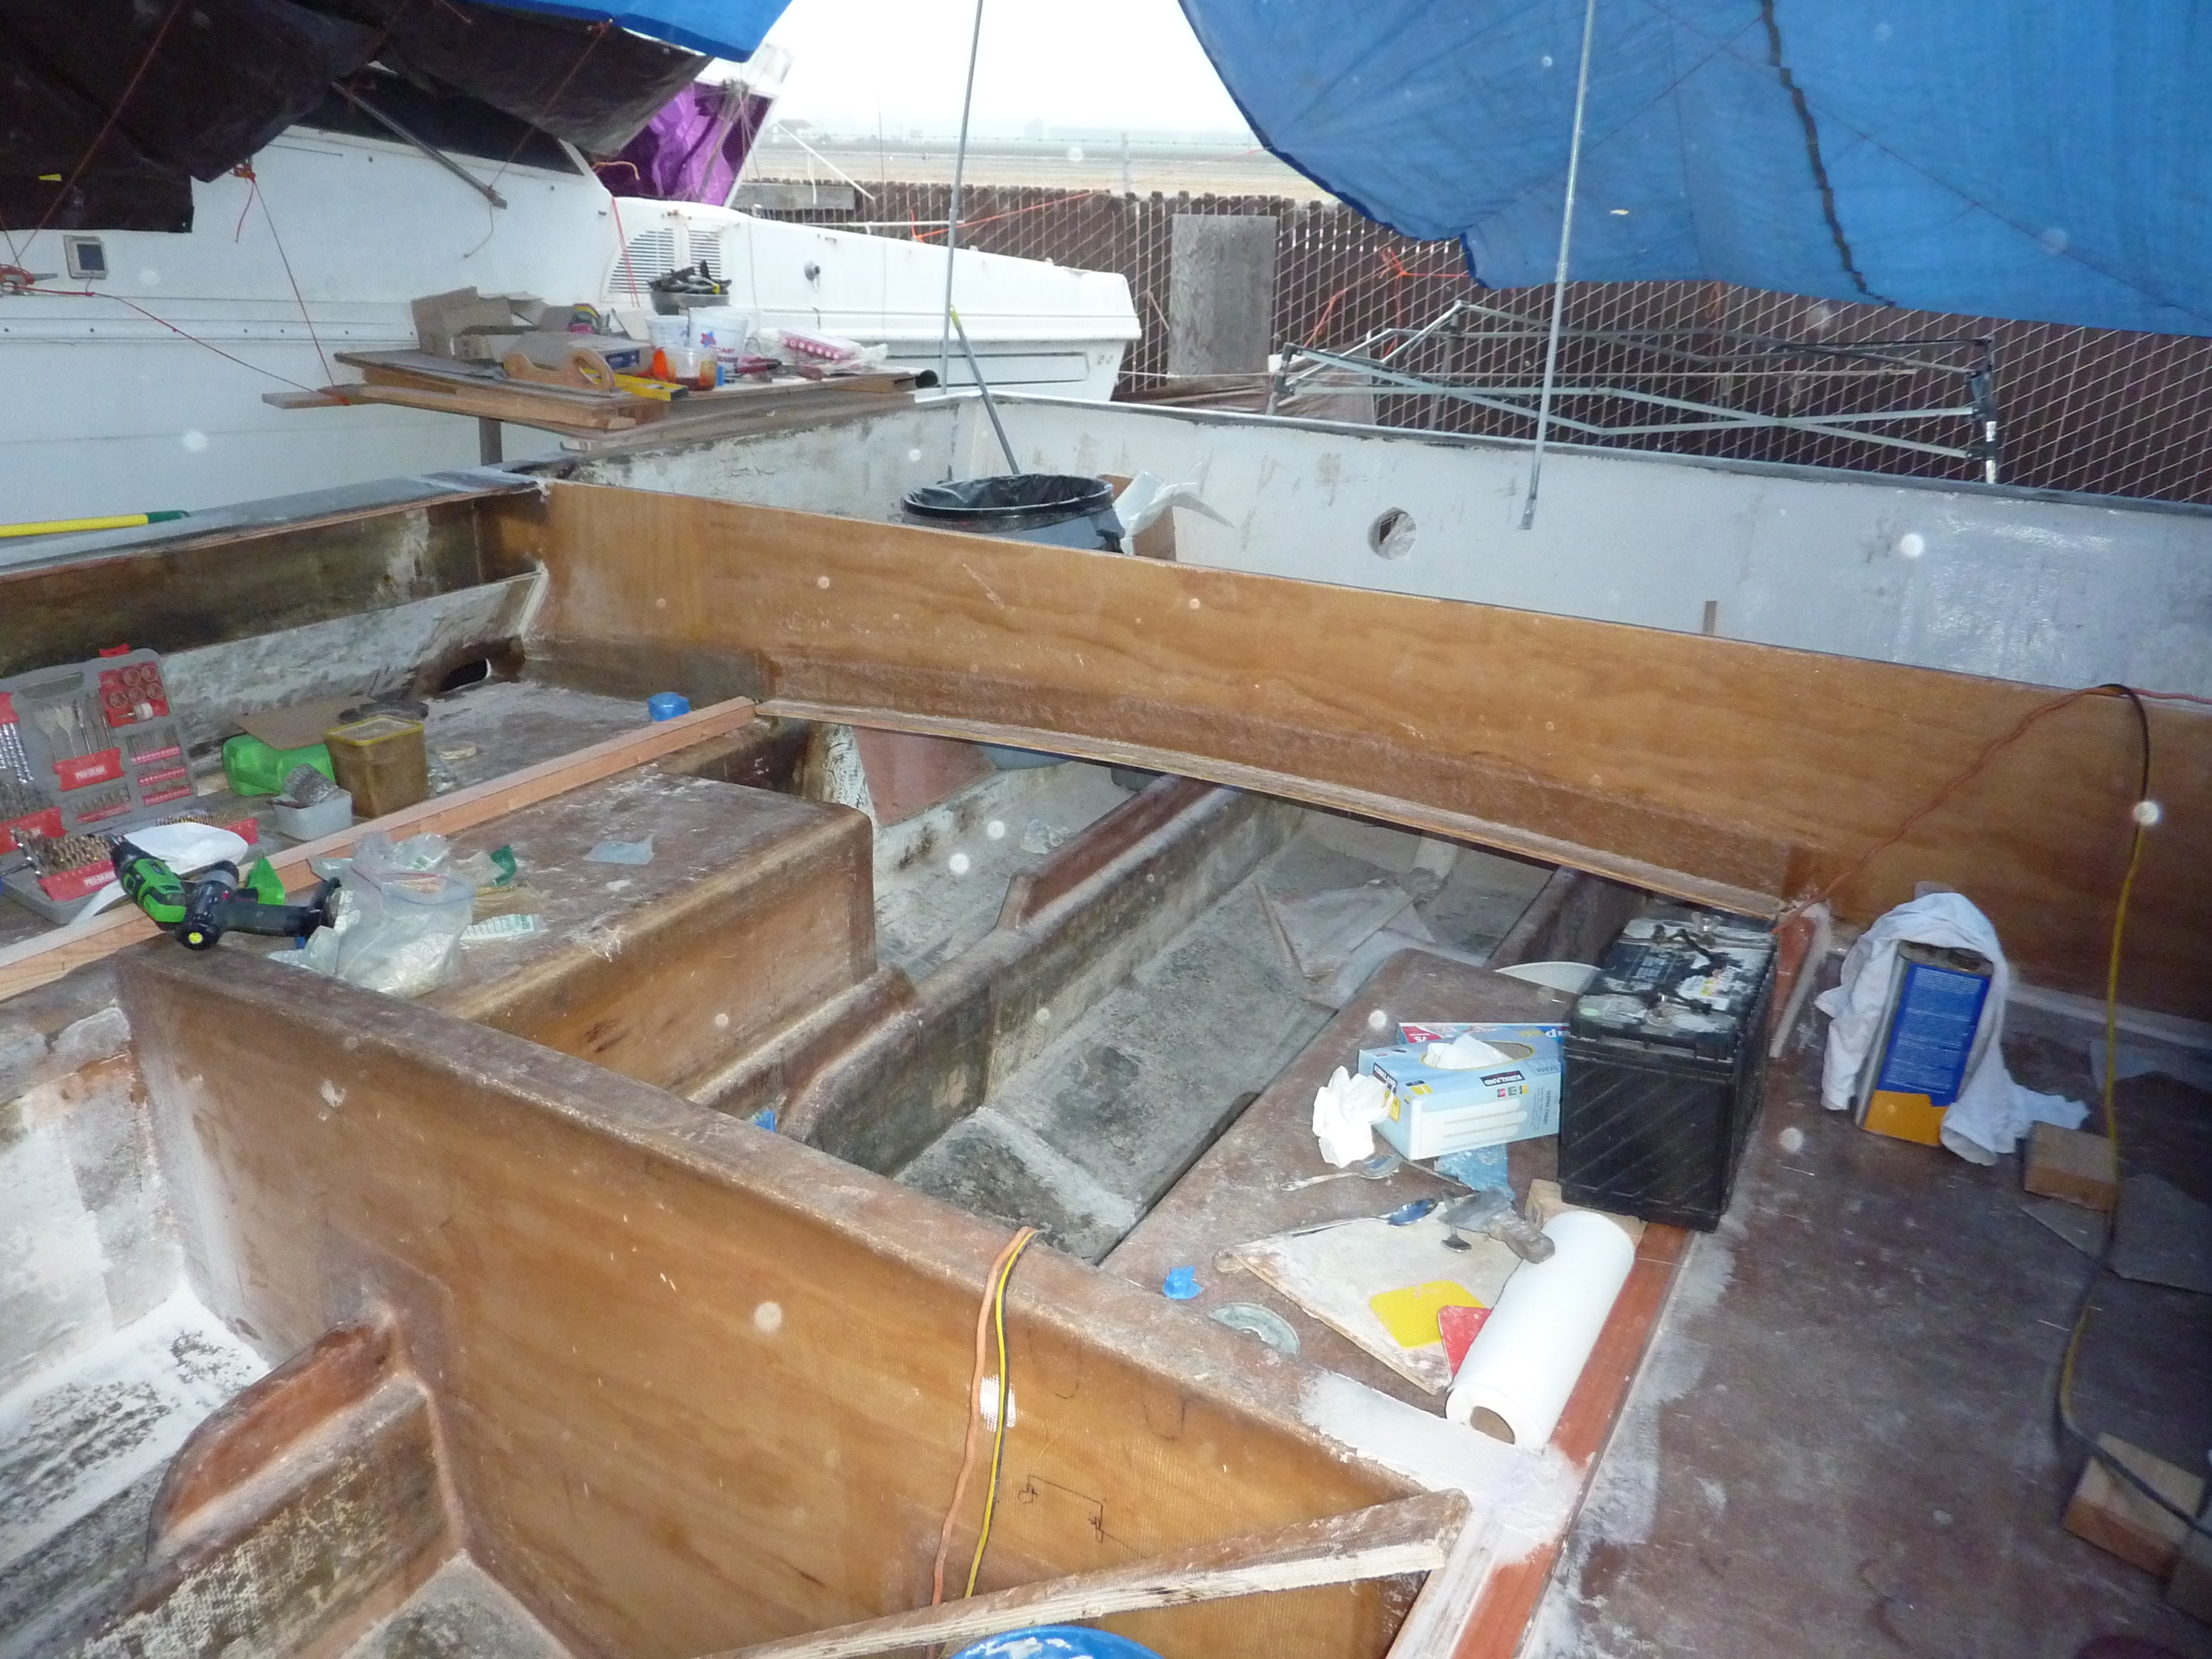
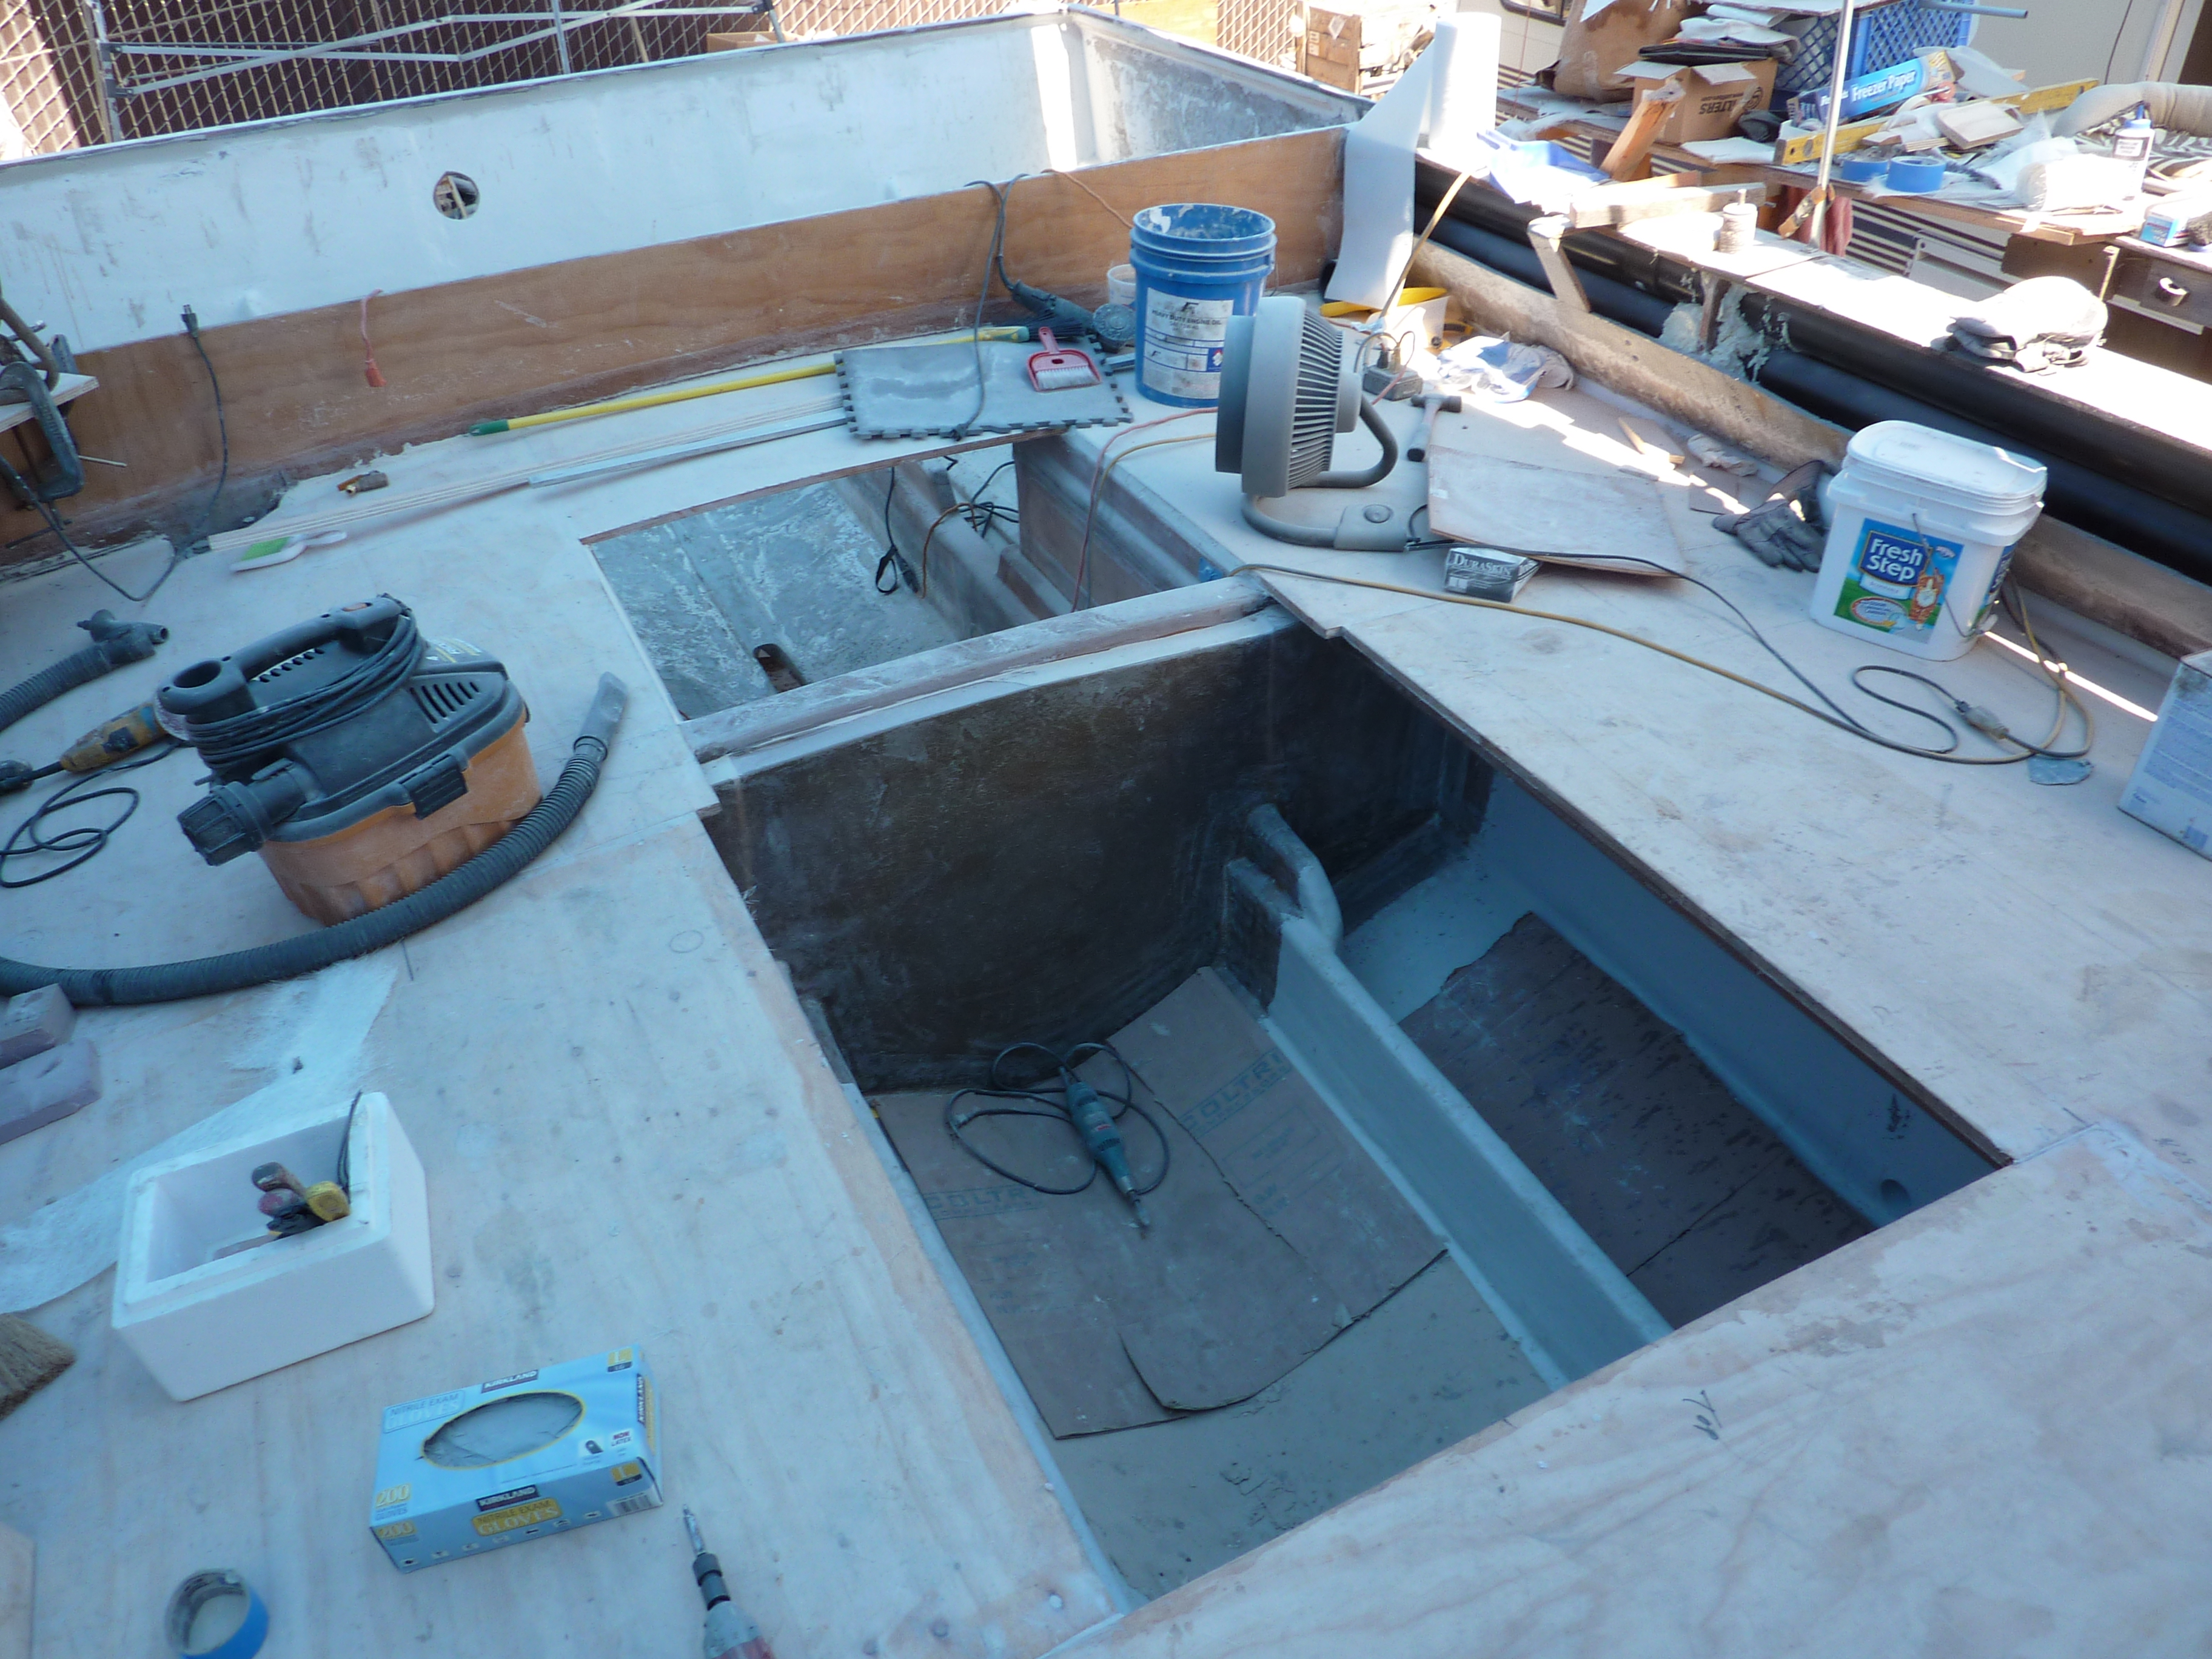
More from under the deck
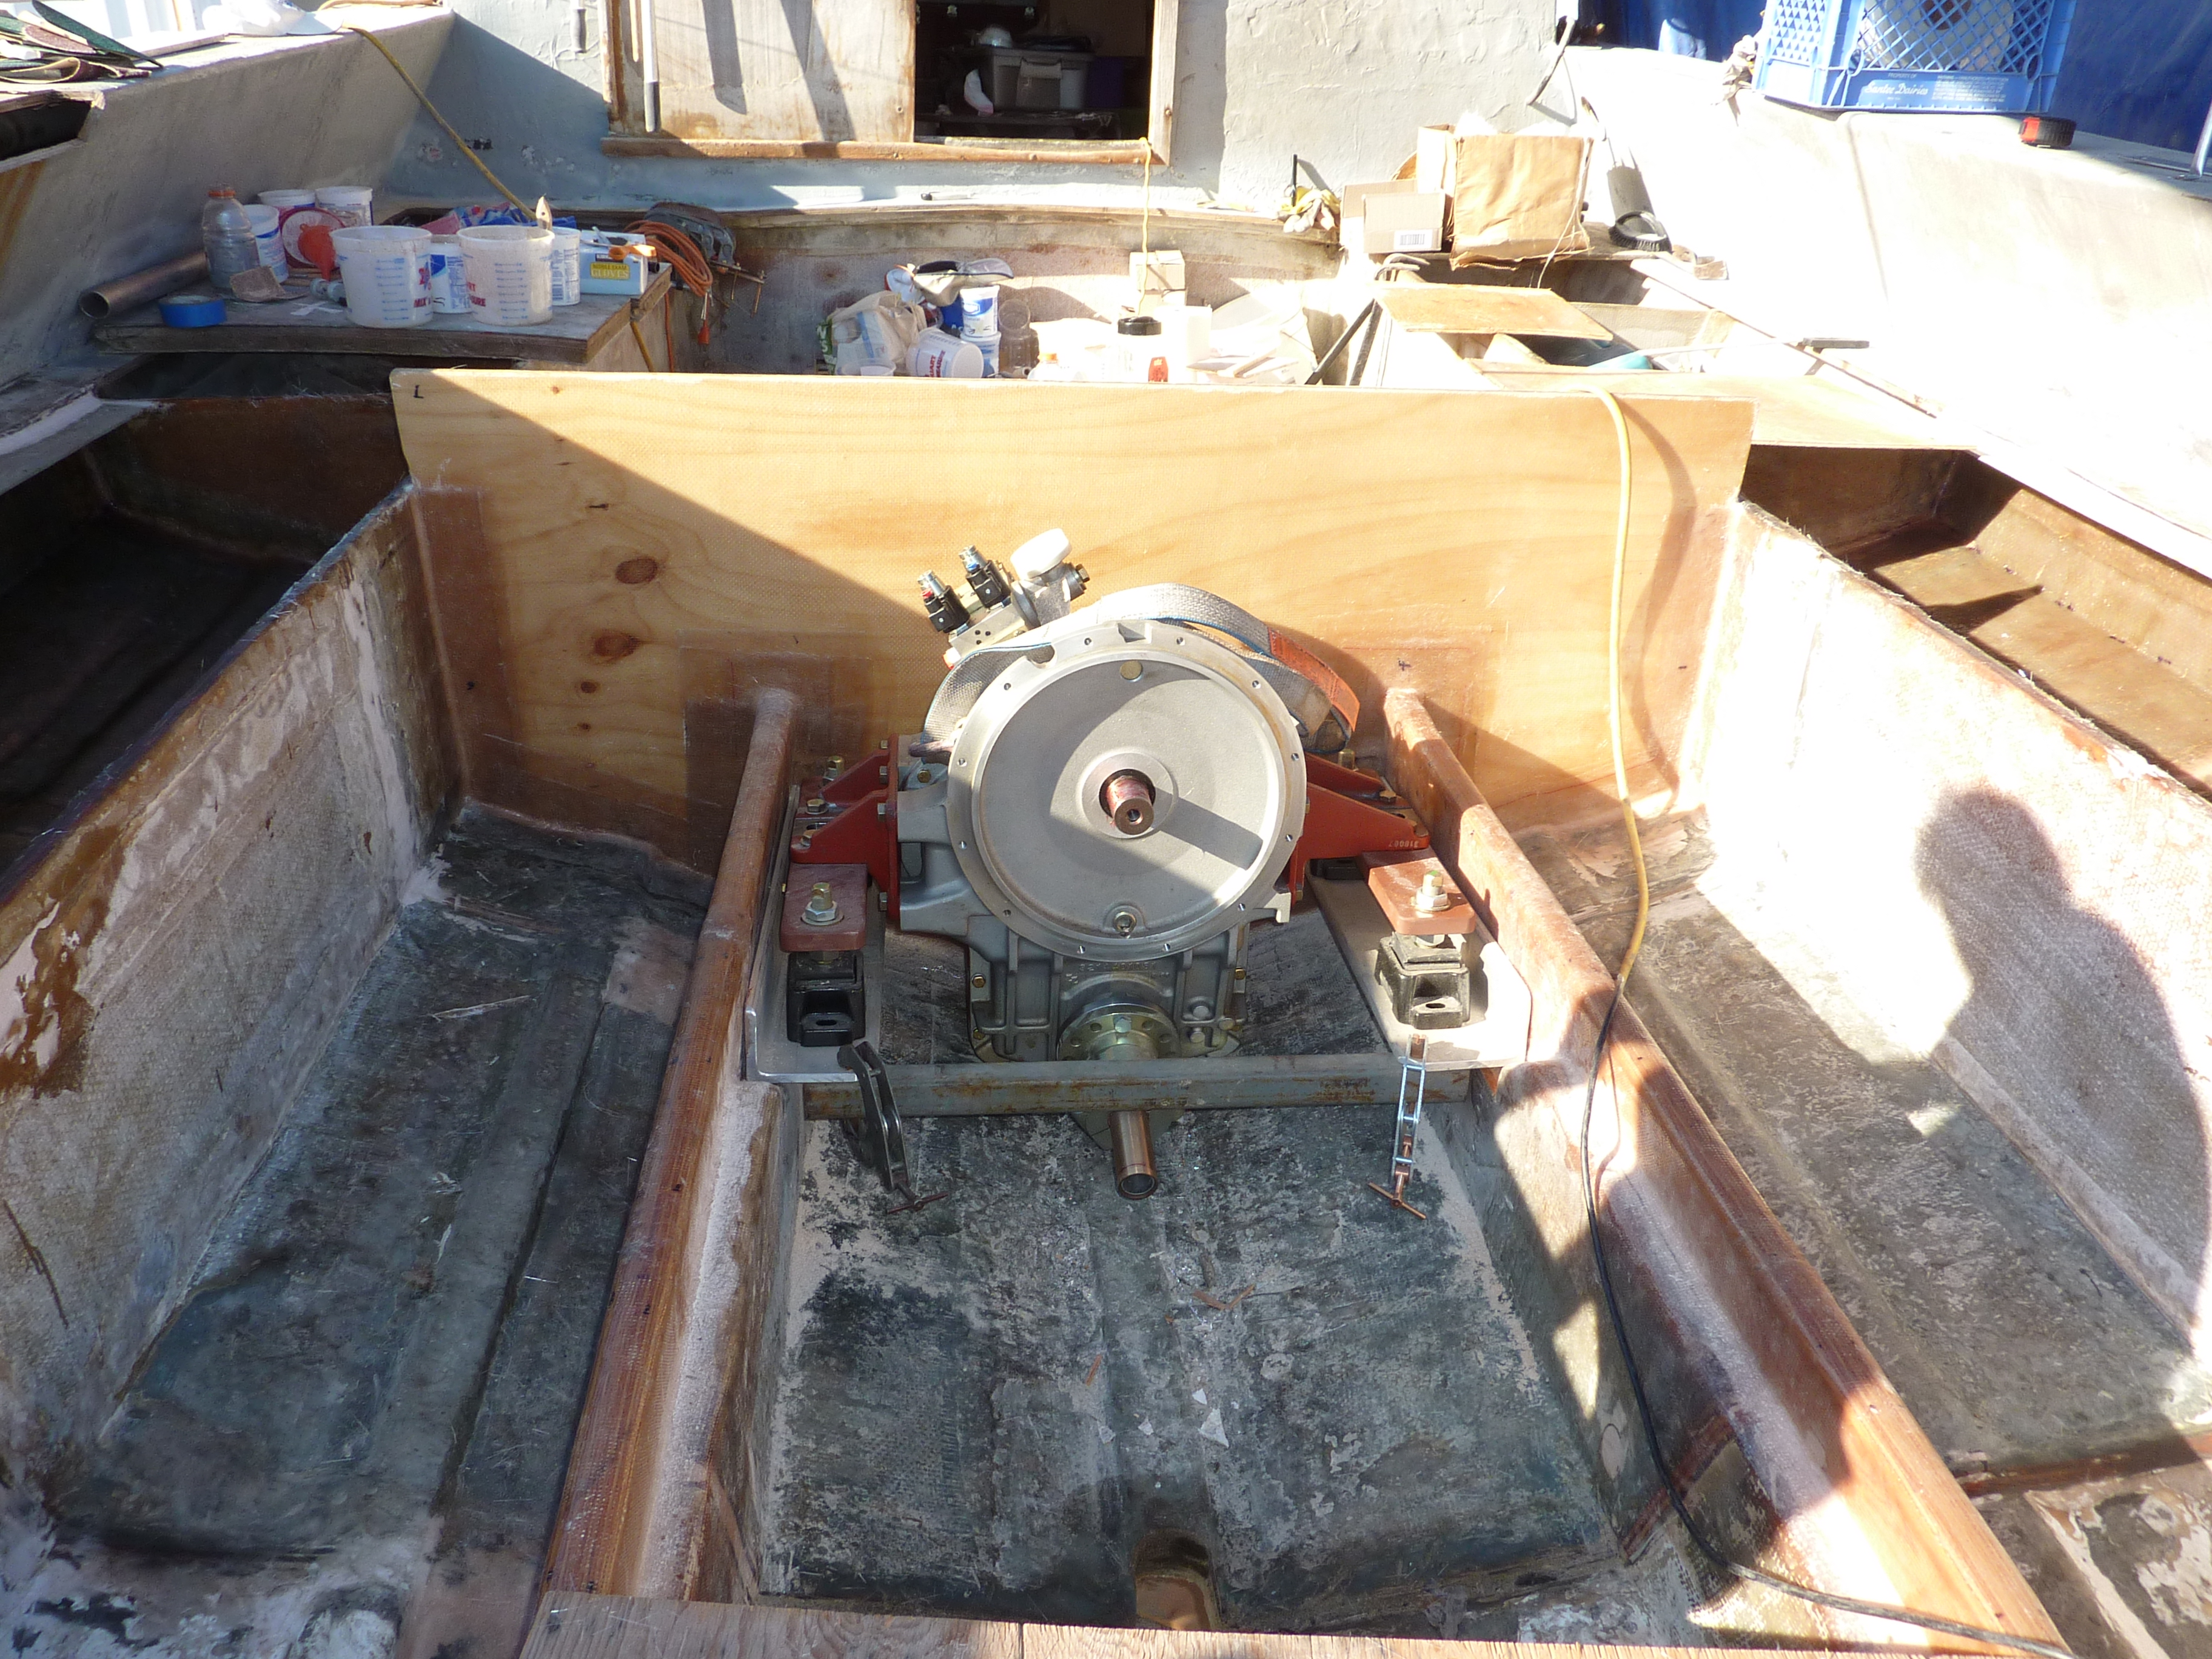
First initial V-drive fit & planning.
V-drive mounts – This is what pushes the boat.
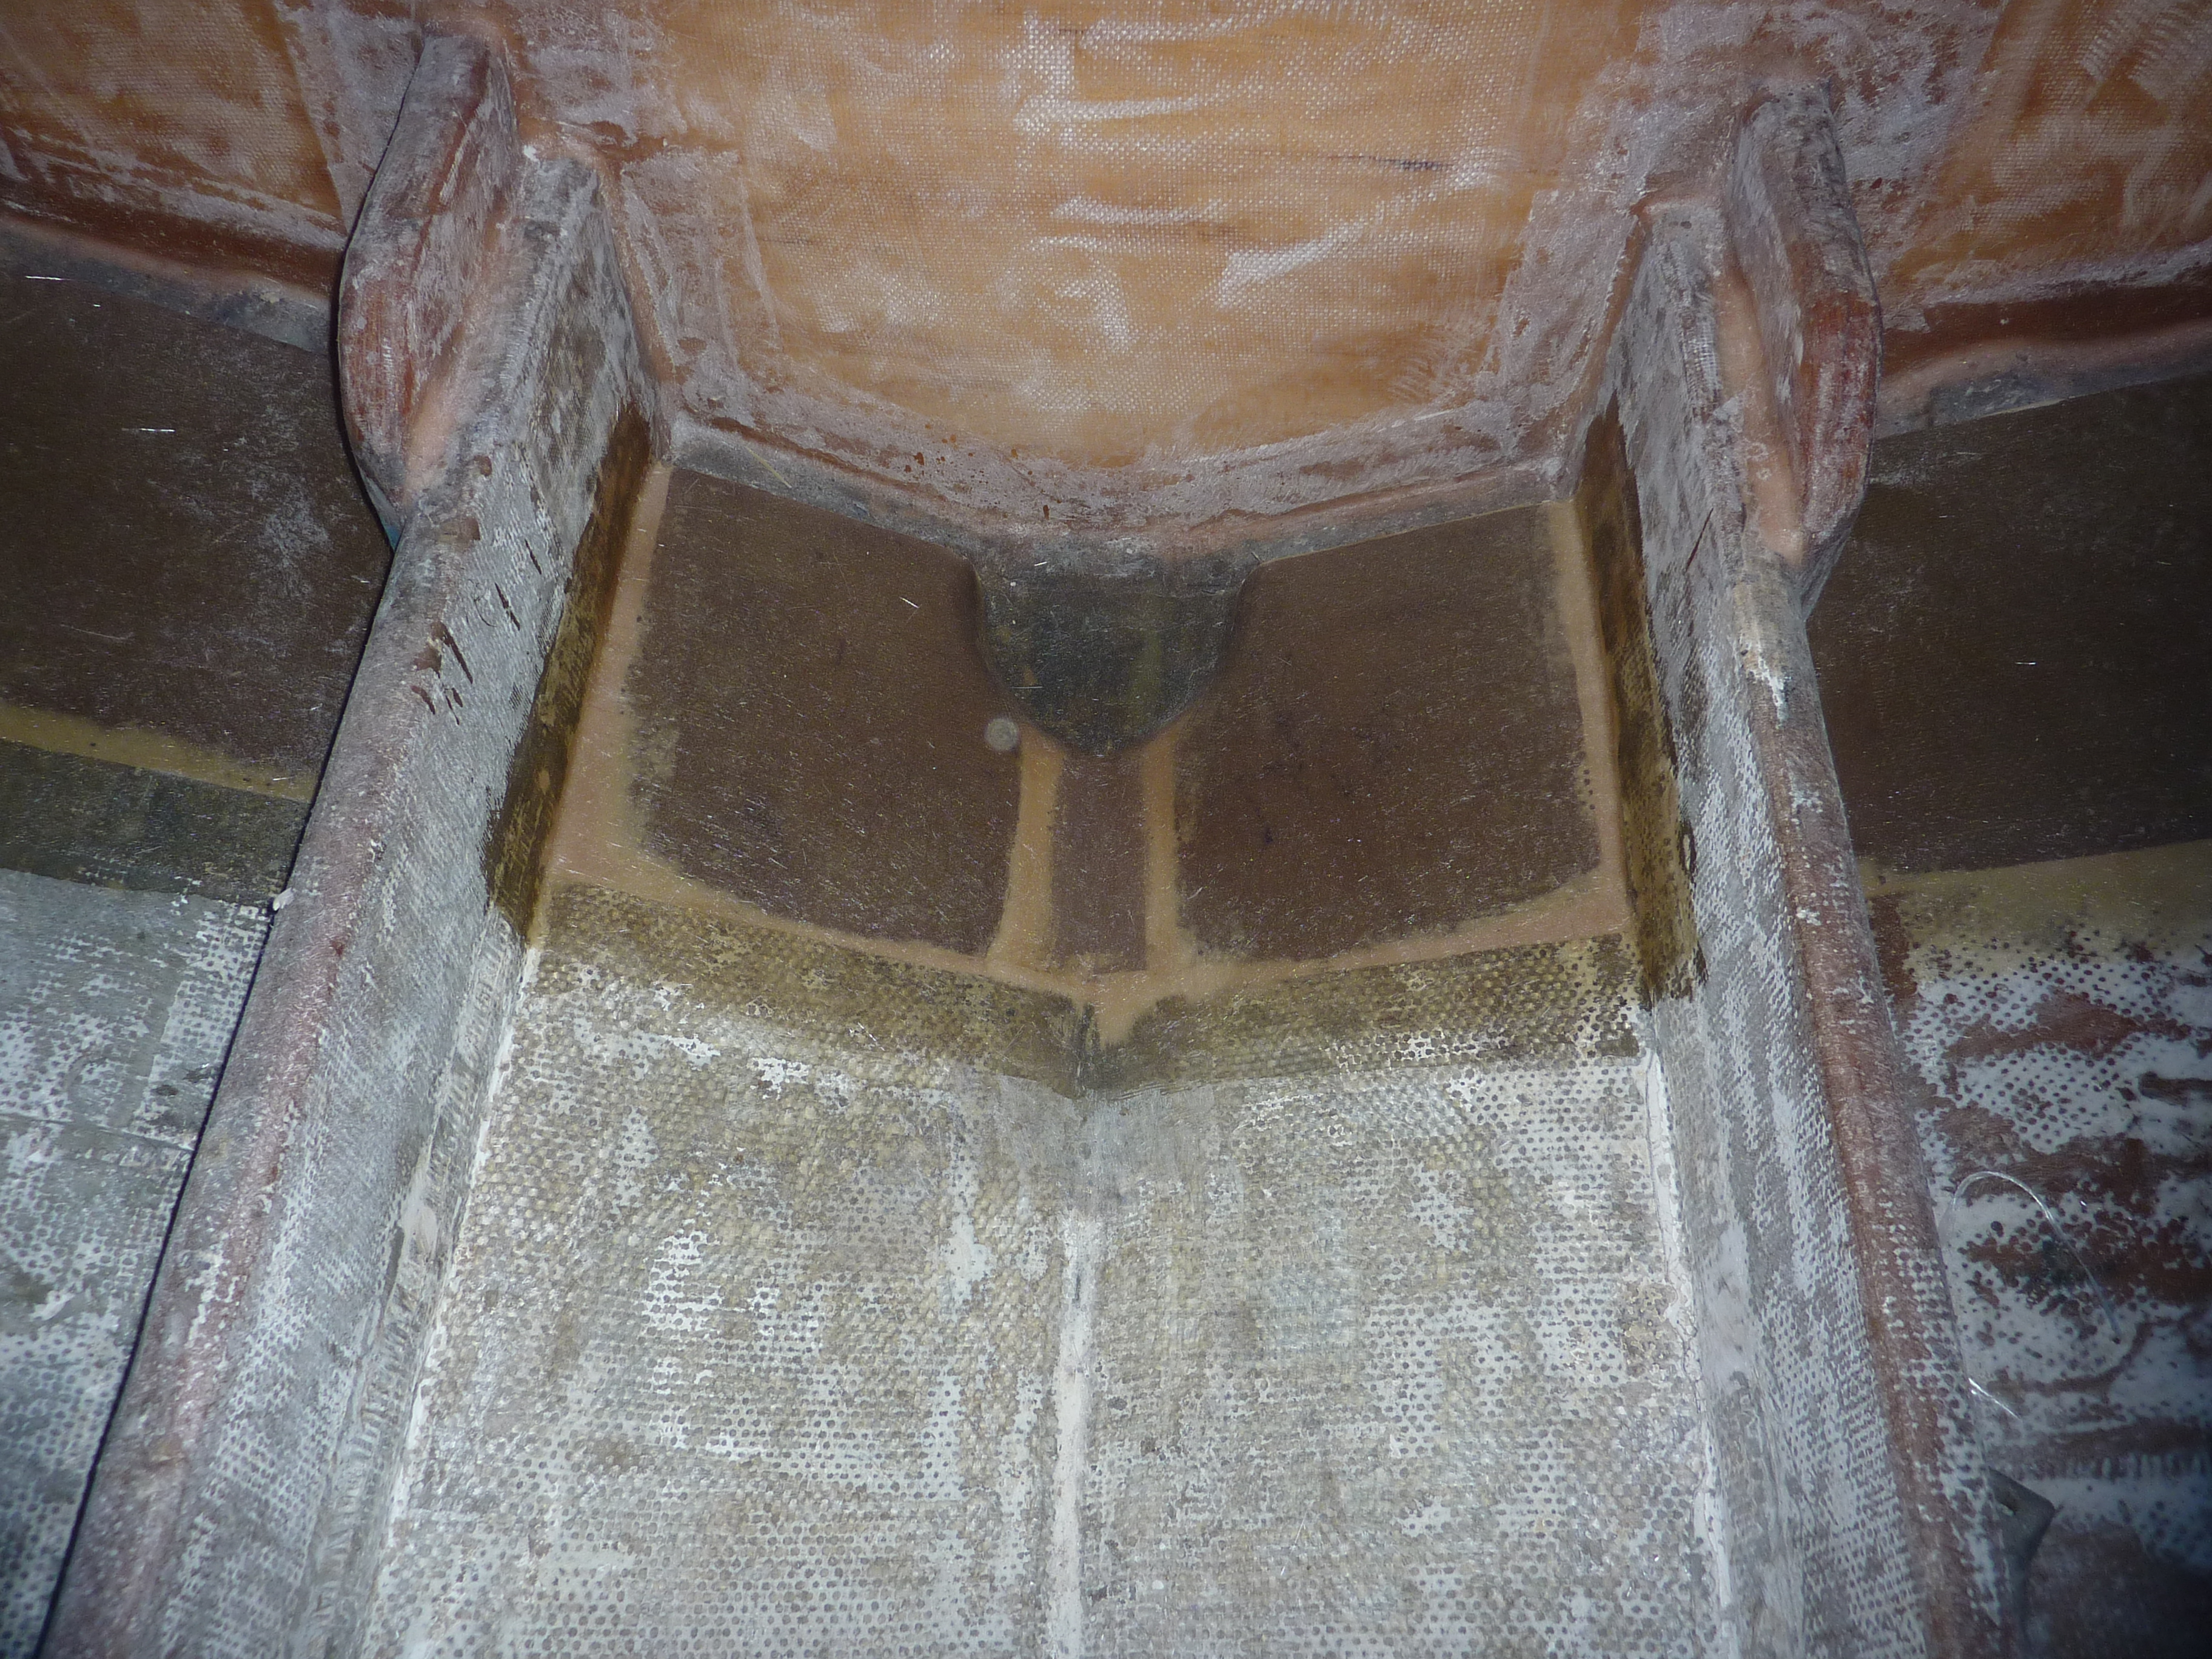
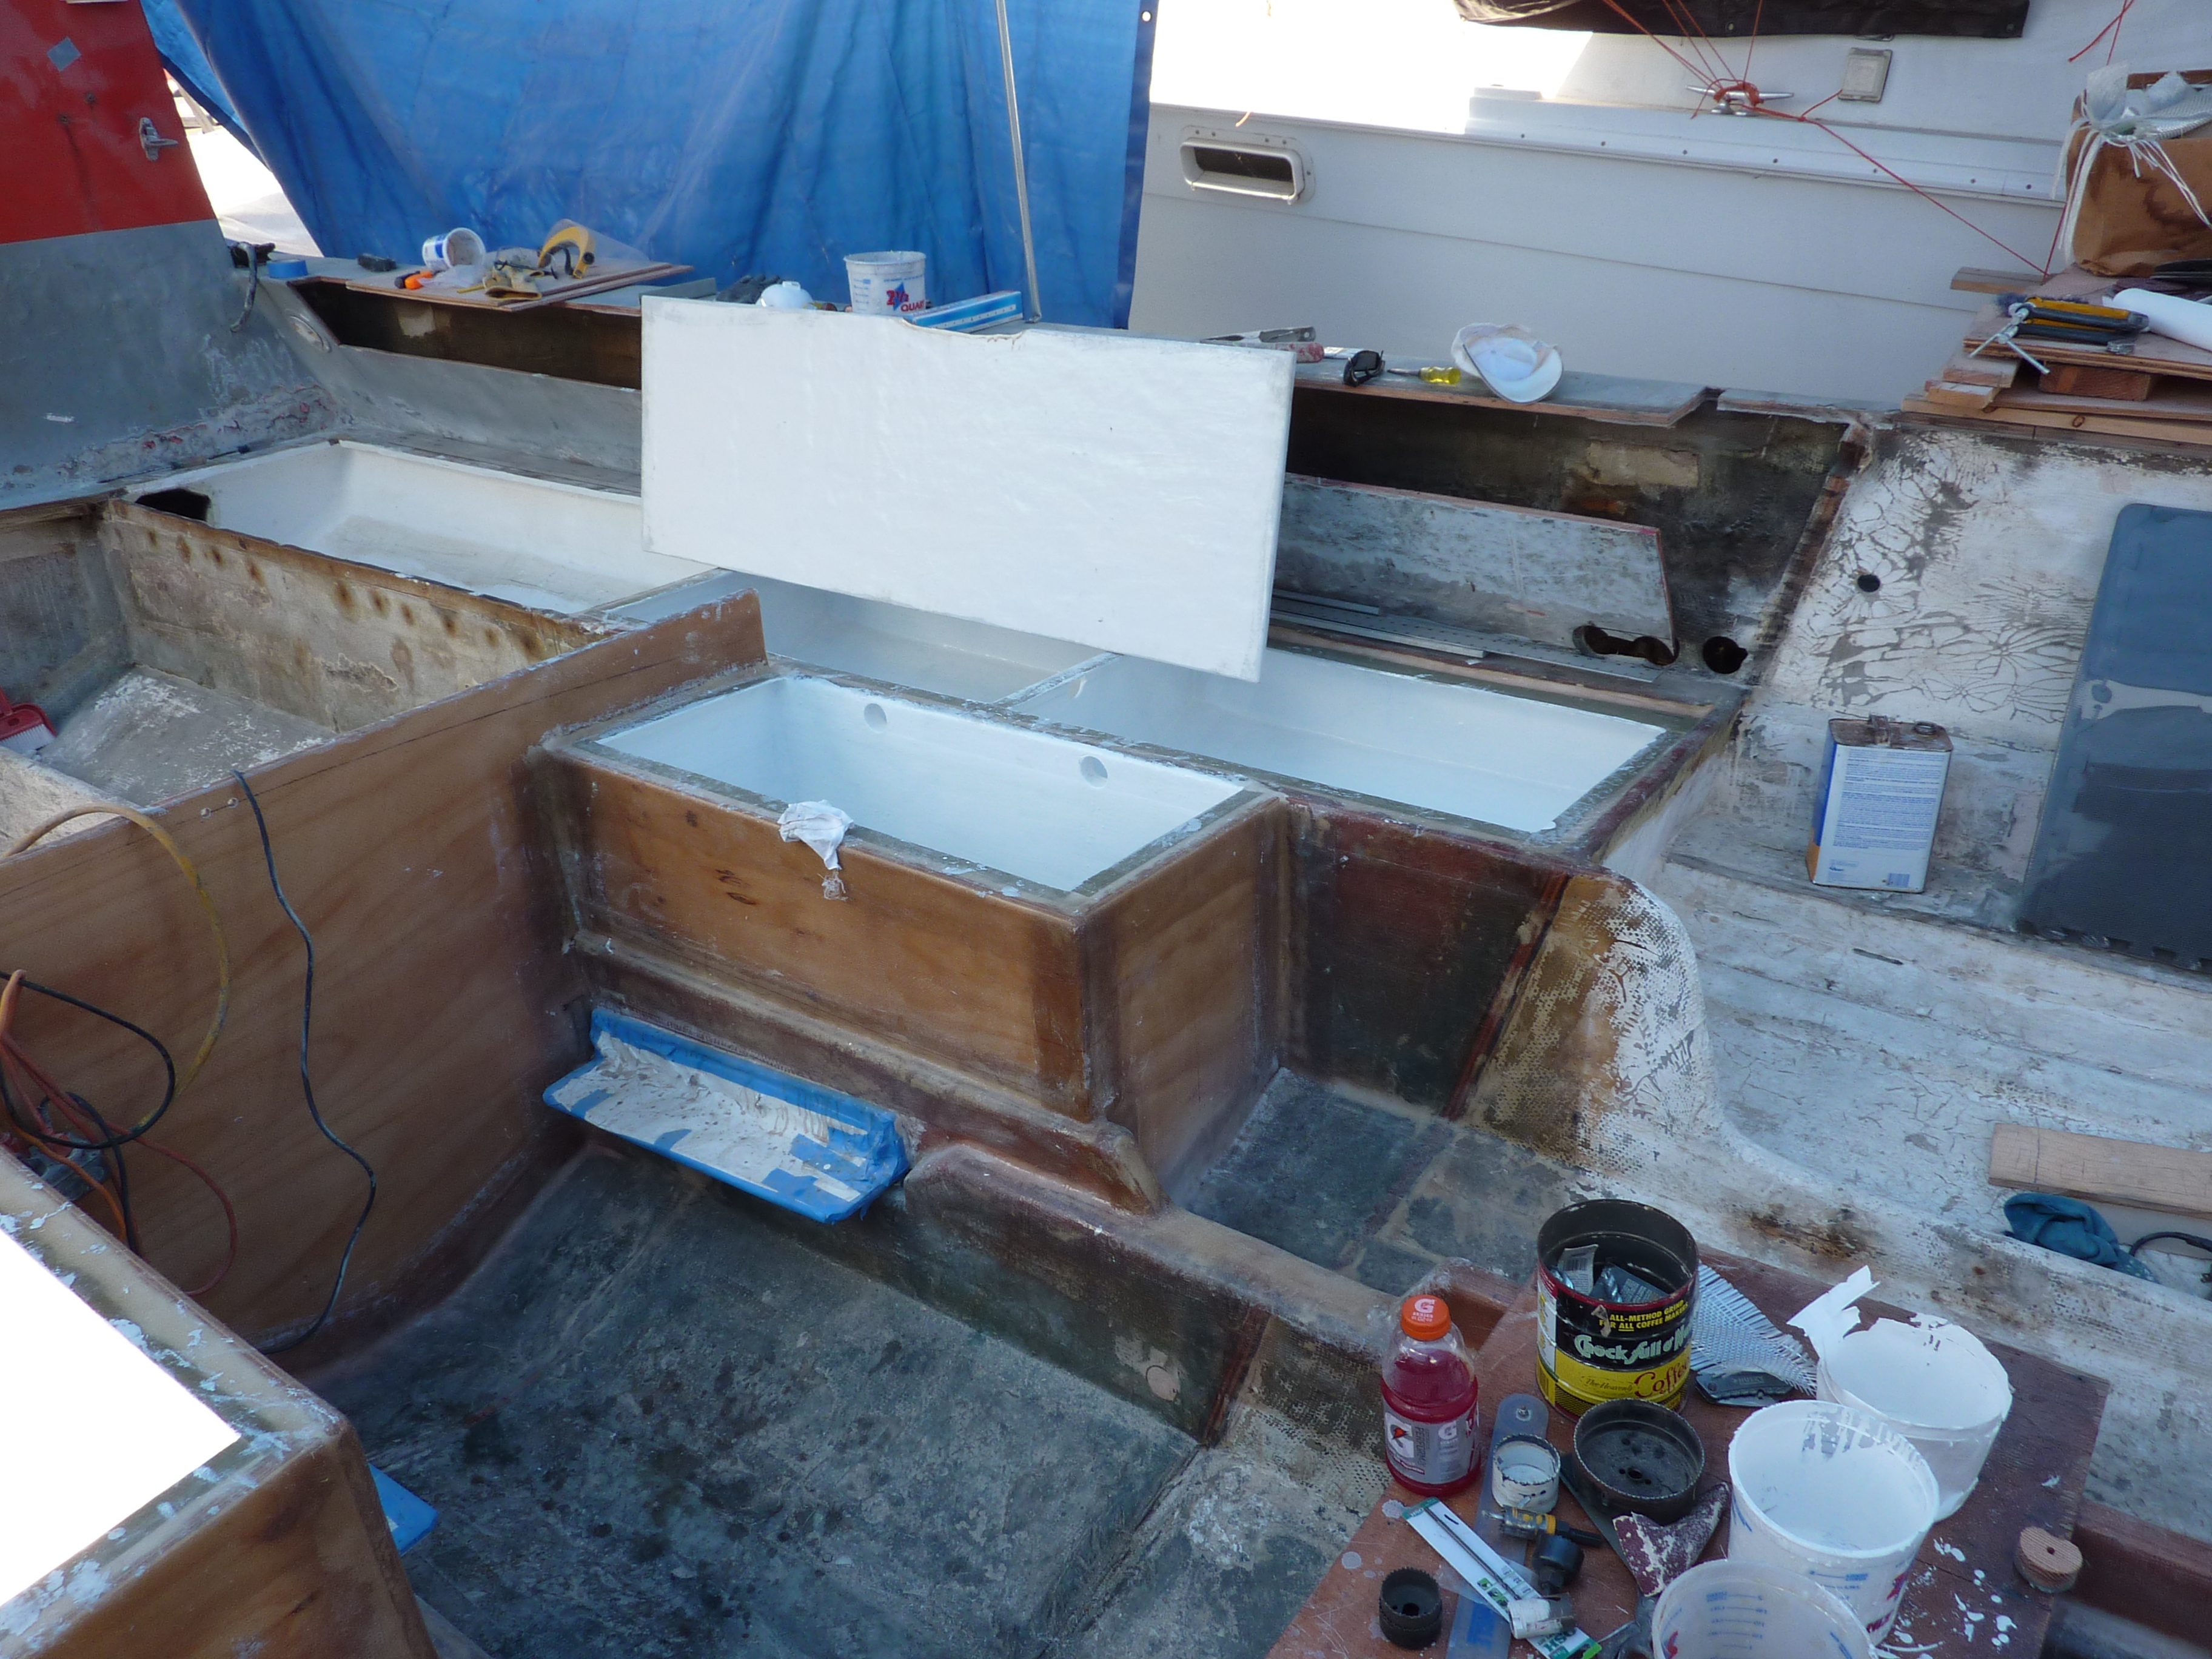
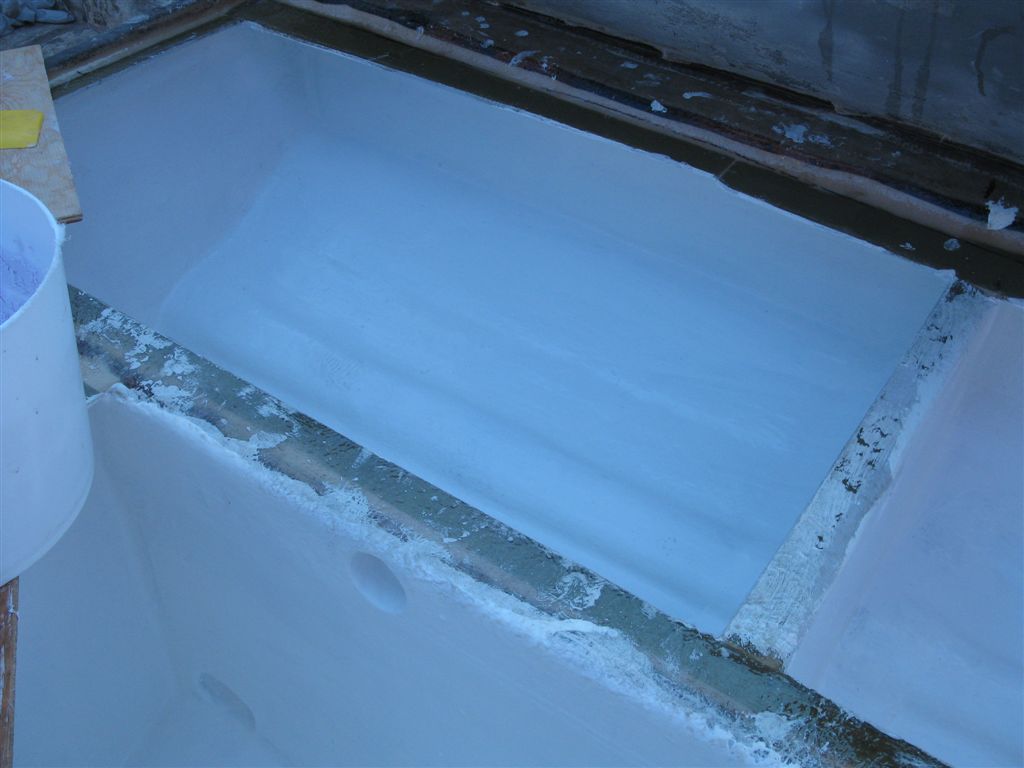
By the time the fuel tanks were done inside and the lids installed and structurally glassed in place, the vessel was now extremely stiff and could hold its shaft with a minimum of blocking. Just one of the beauties using this type of construction.
Pictures above show the general way we made new integral tanks for the boat. Using construction techniques we developed back in 1982, and combining them with the new super fuel resistant resins & coatings, along with 30 years of past “experience,” we prefer this type of diesel tank construction for most of the projects we do.
Lids down and a good view of the all important propeller shaft hole.
Main engine room front bulkhead and upper engine room deck support.
Adding under deck support to the top of the integral fuel tanks.
Microlam rear deck beams.
Microlam rear deck supports running from the transom to the front engine room bulkhead, and the first coating of gel coat in the engine room.
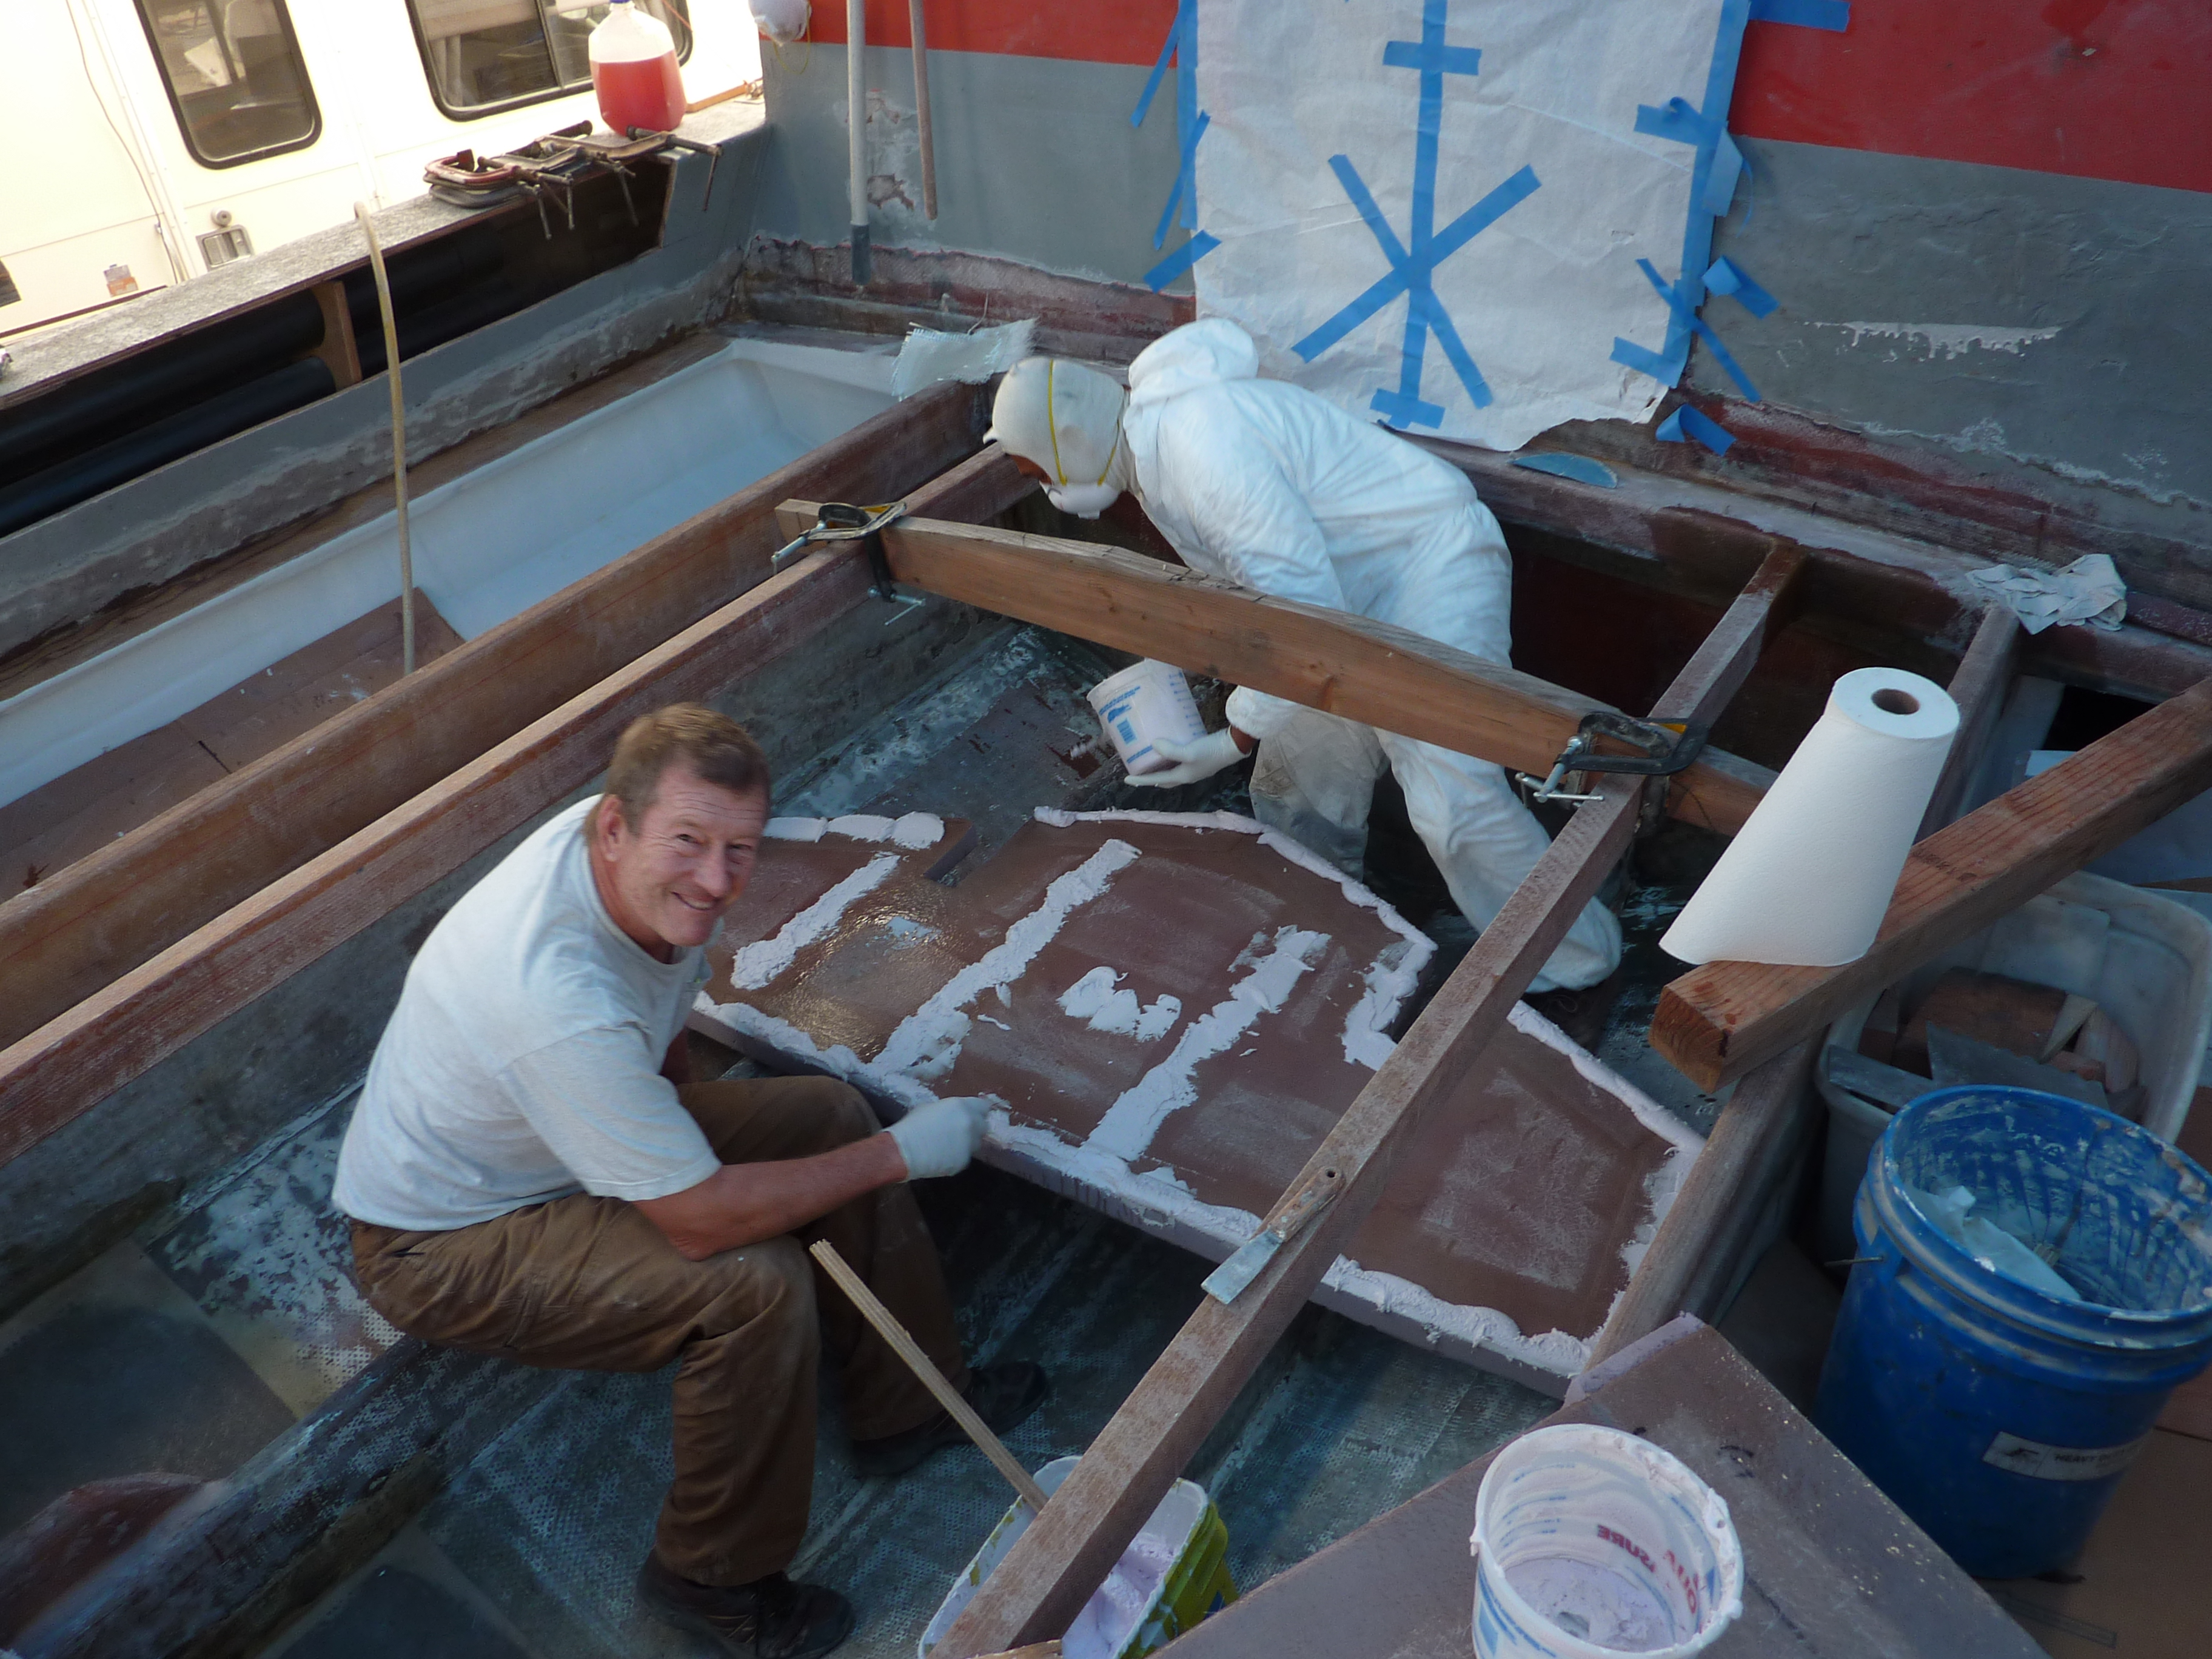
Fuel tank construction
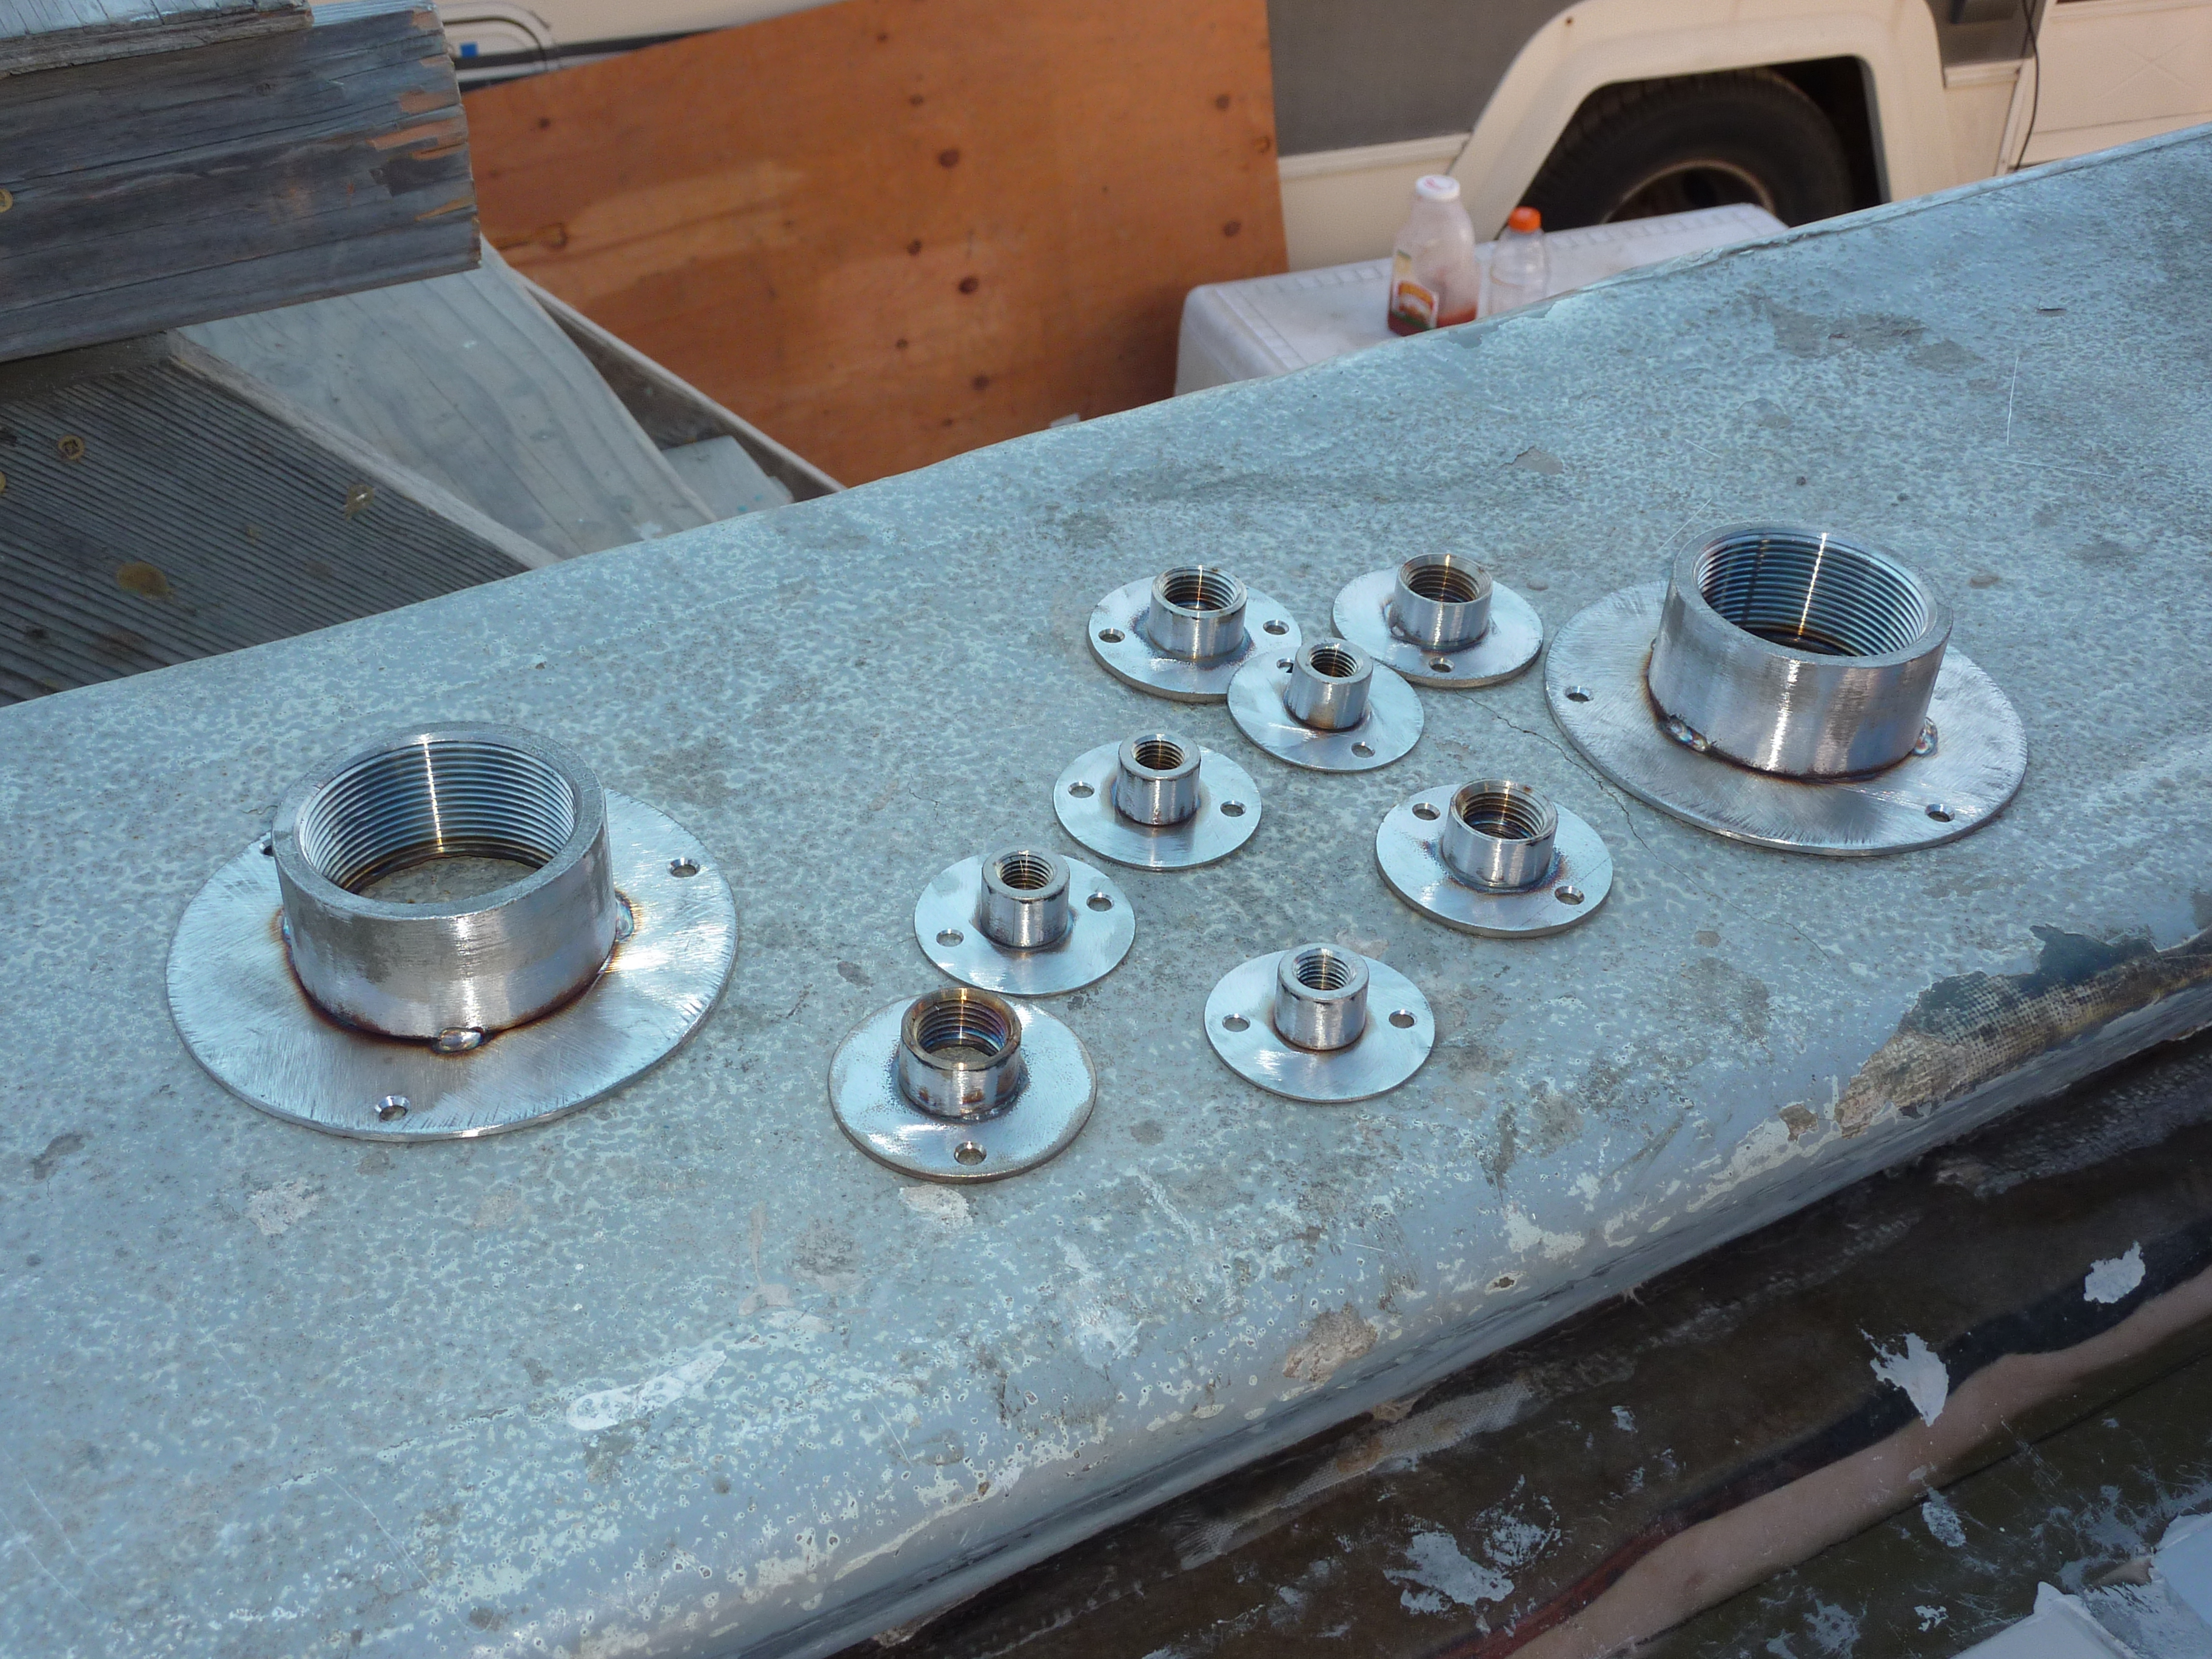
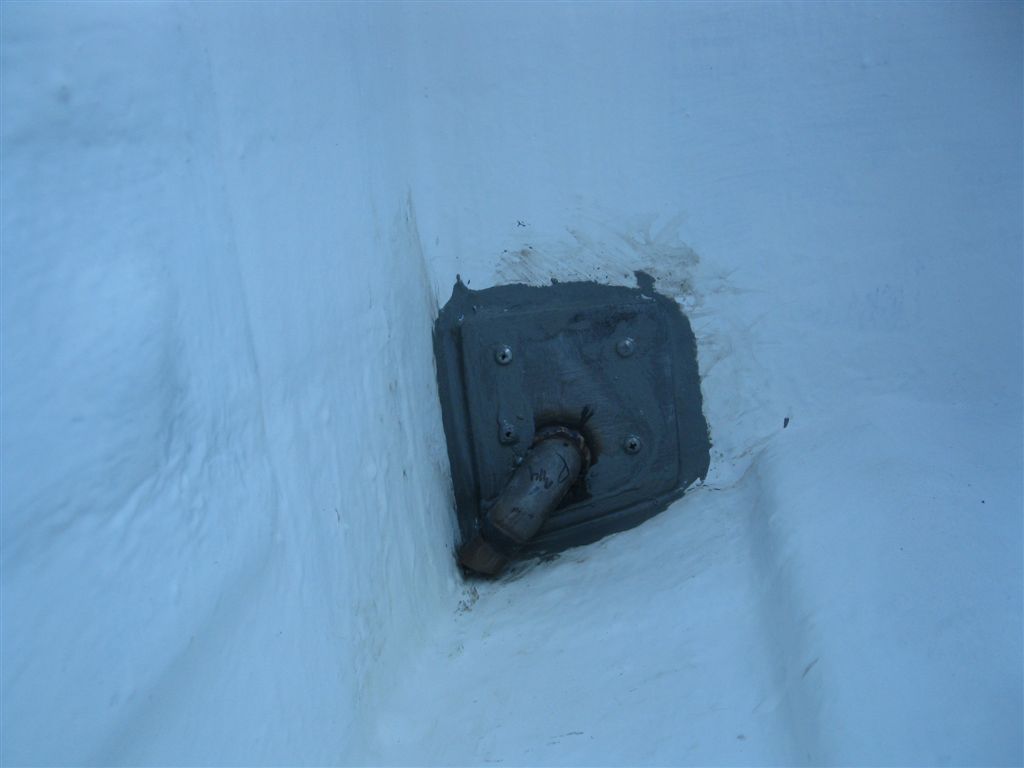
For those that may be interested in building integral fuel tanks, it’s really very basic but still it’s not for the in-experienced “glasser,” carpenter or shipwright. Base construction of the parts, the choice of the materials & coatings, the installing of the various fittings all come after proper design, and will come together as the finished tank. Our first integral diesel tank was put in service in 1982 and is still in use today. Over the last 30 years we have improved our construction techniques even more and now “integral” is the “diesel fuel tank of choice”.In case you want to know, the base resin for fuel tank construction these days for us is “Vipel F764” Cross-Linked Isophthalic Resin. A highly corrosion & chemical resistant resin to both inorganic & organic acids, gasoline, #2 diesel, etc etc etc. GOOD STUFF, easy to work with, and fairly priced when bought in 55 gallon drums!Fuel tank fittings – all installed BEFORE the lids go down.
“Glassy” finish for all before the fittings are installed.
We use ET-22 Epoxy for installing all of the fittings.
Applying adhesive.
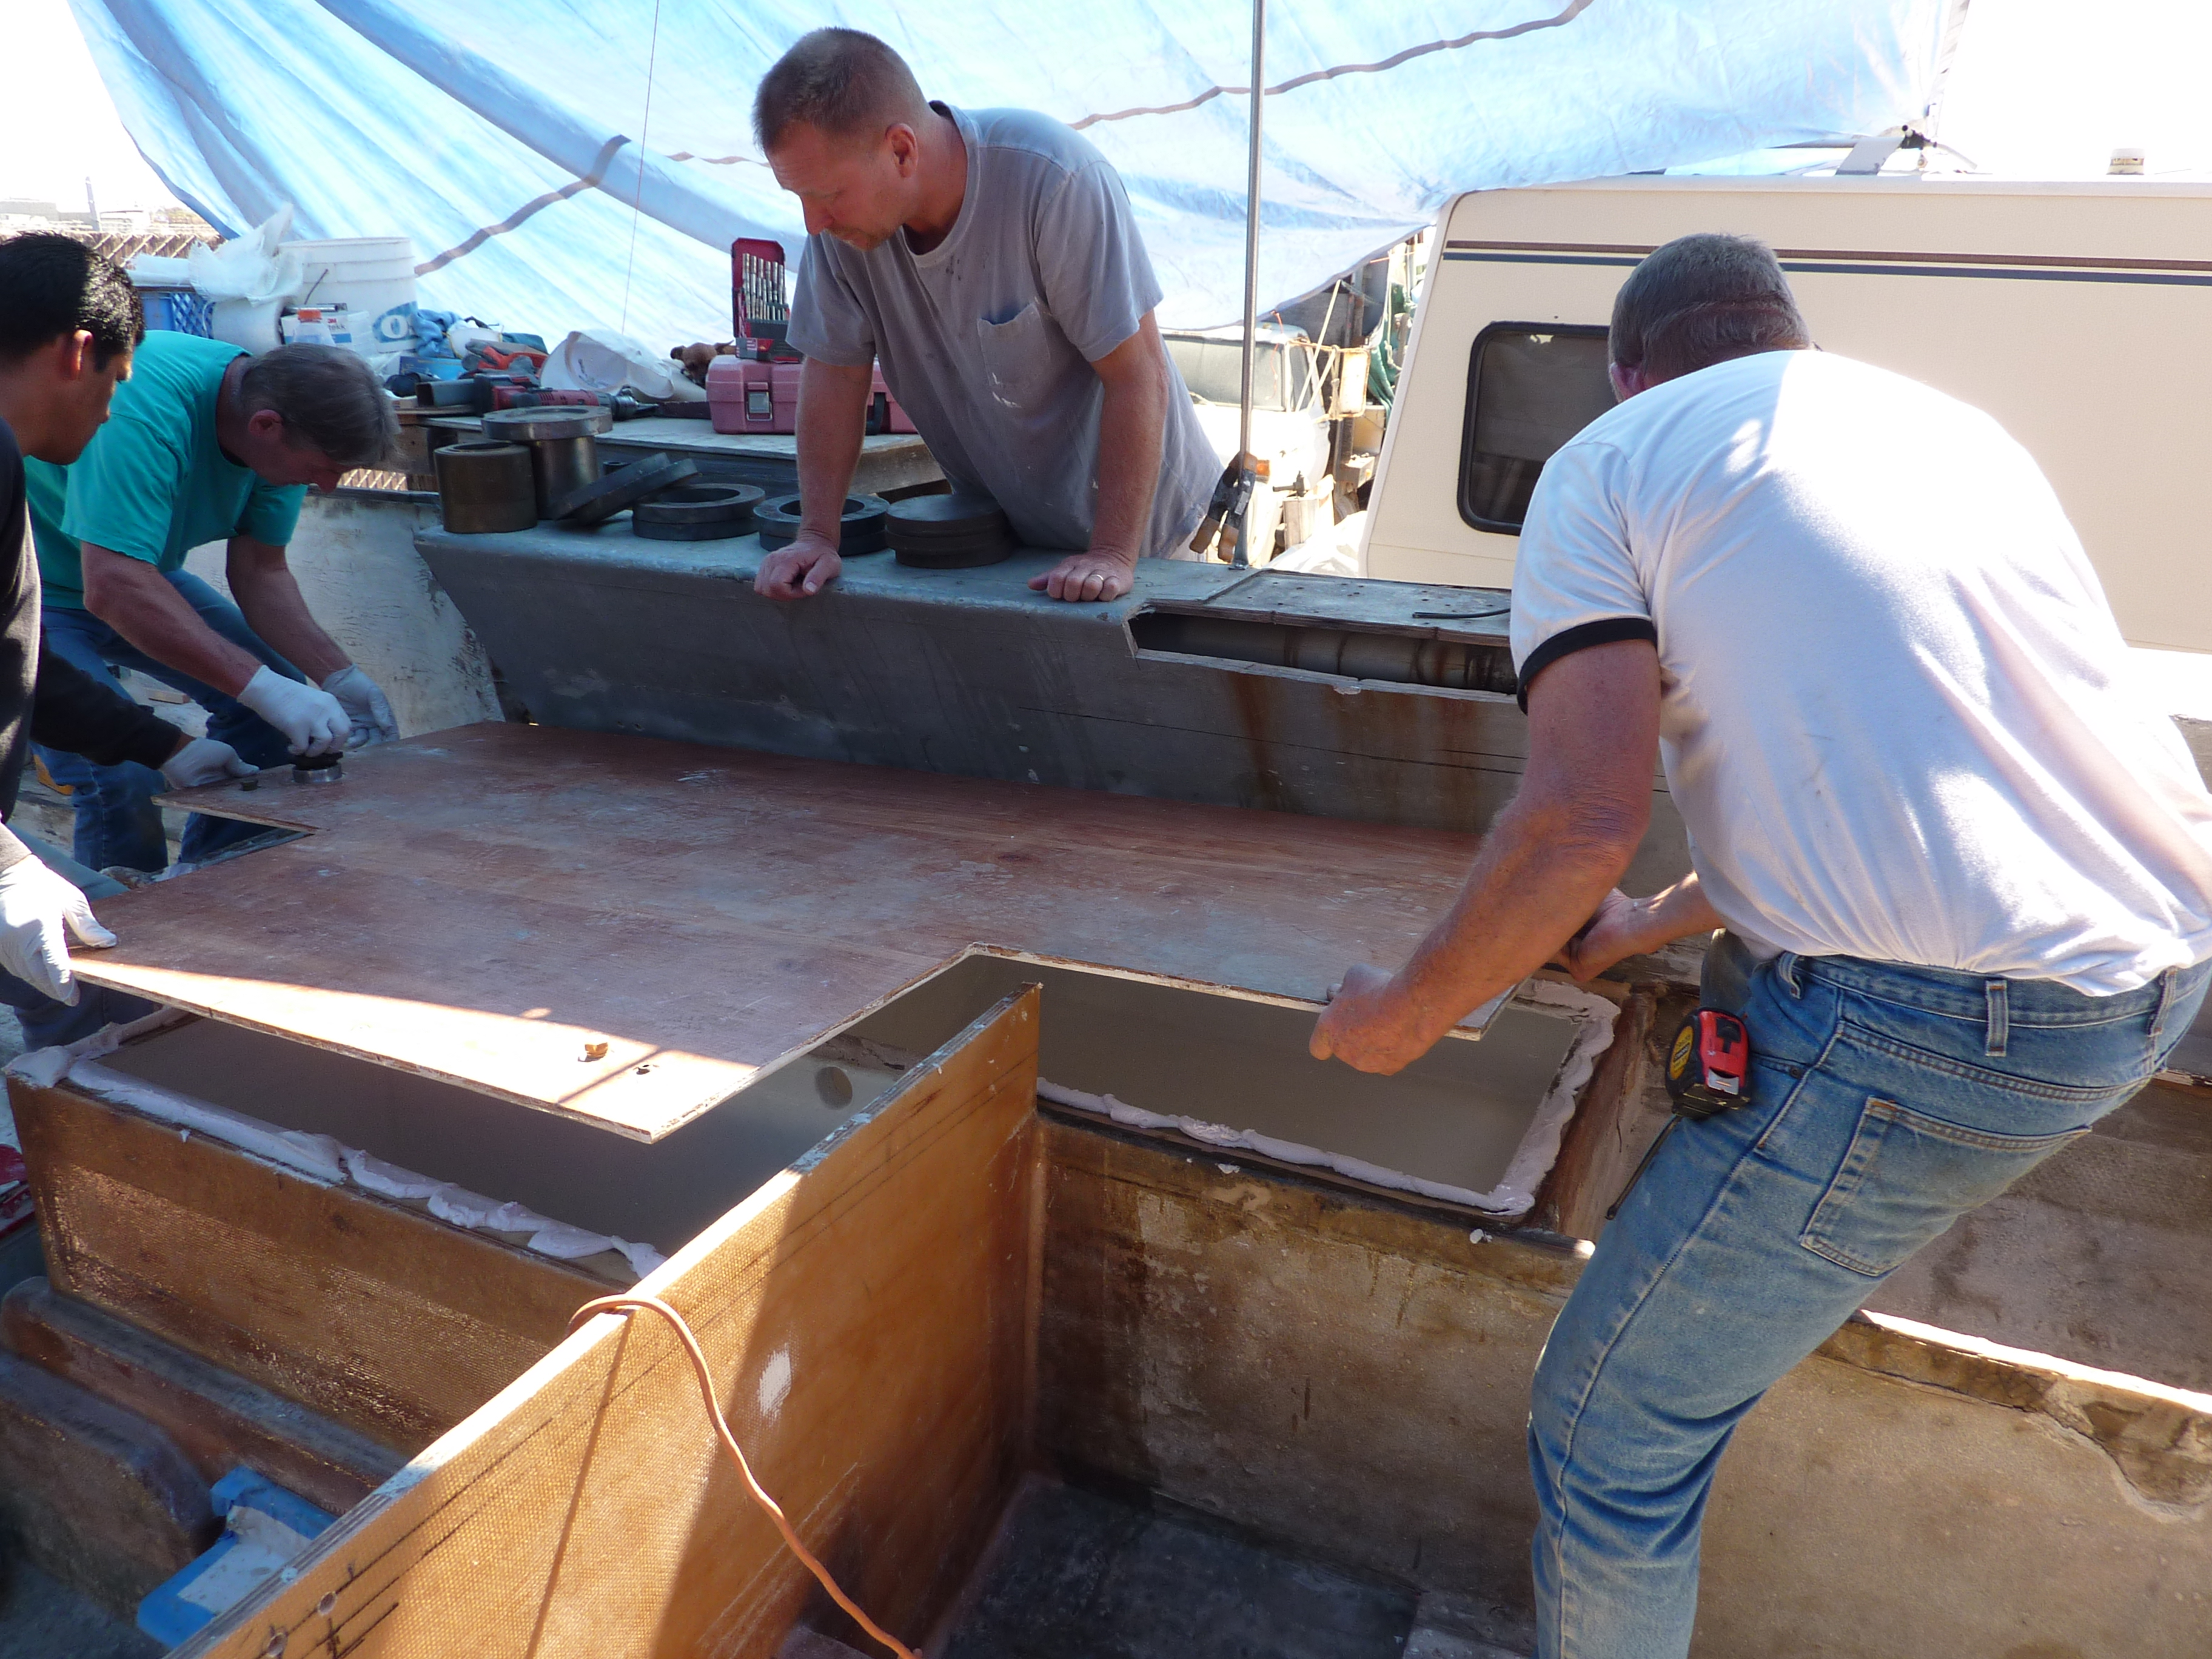
Lifting on & setting of the “all important” fuel tank lids.
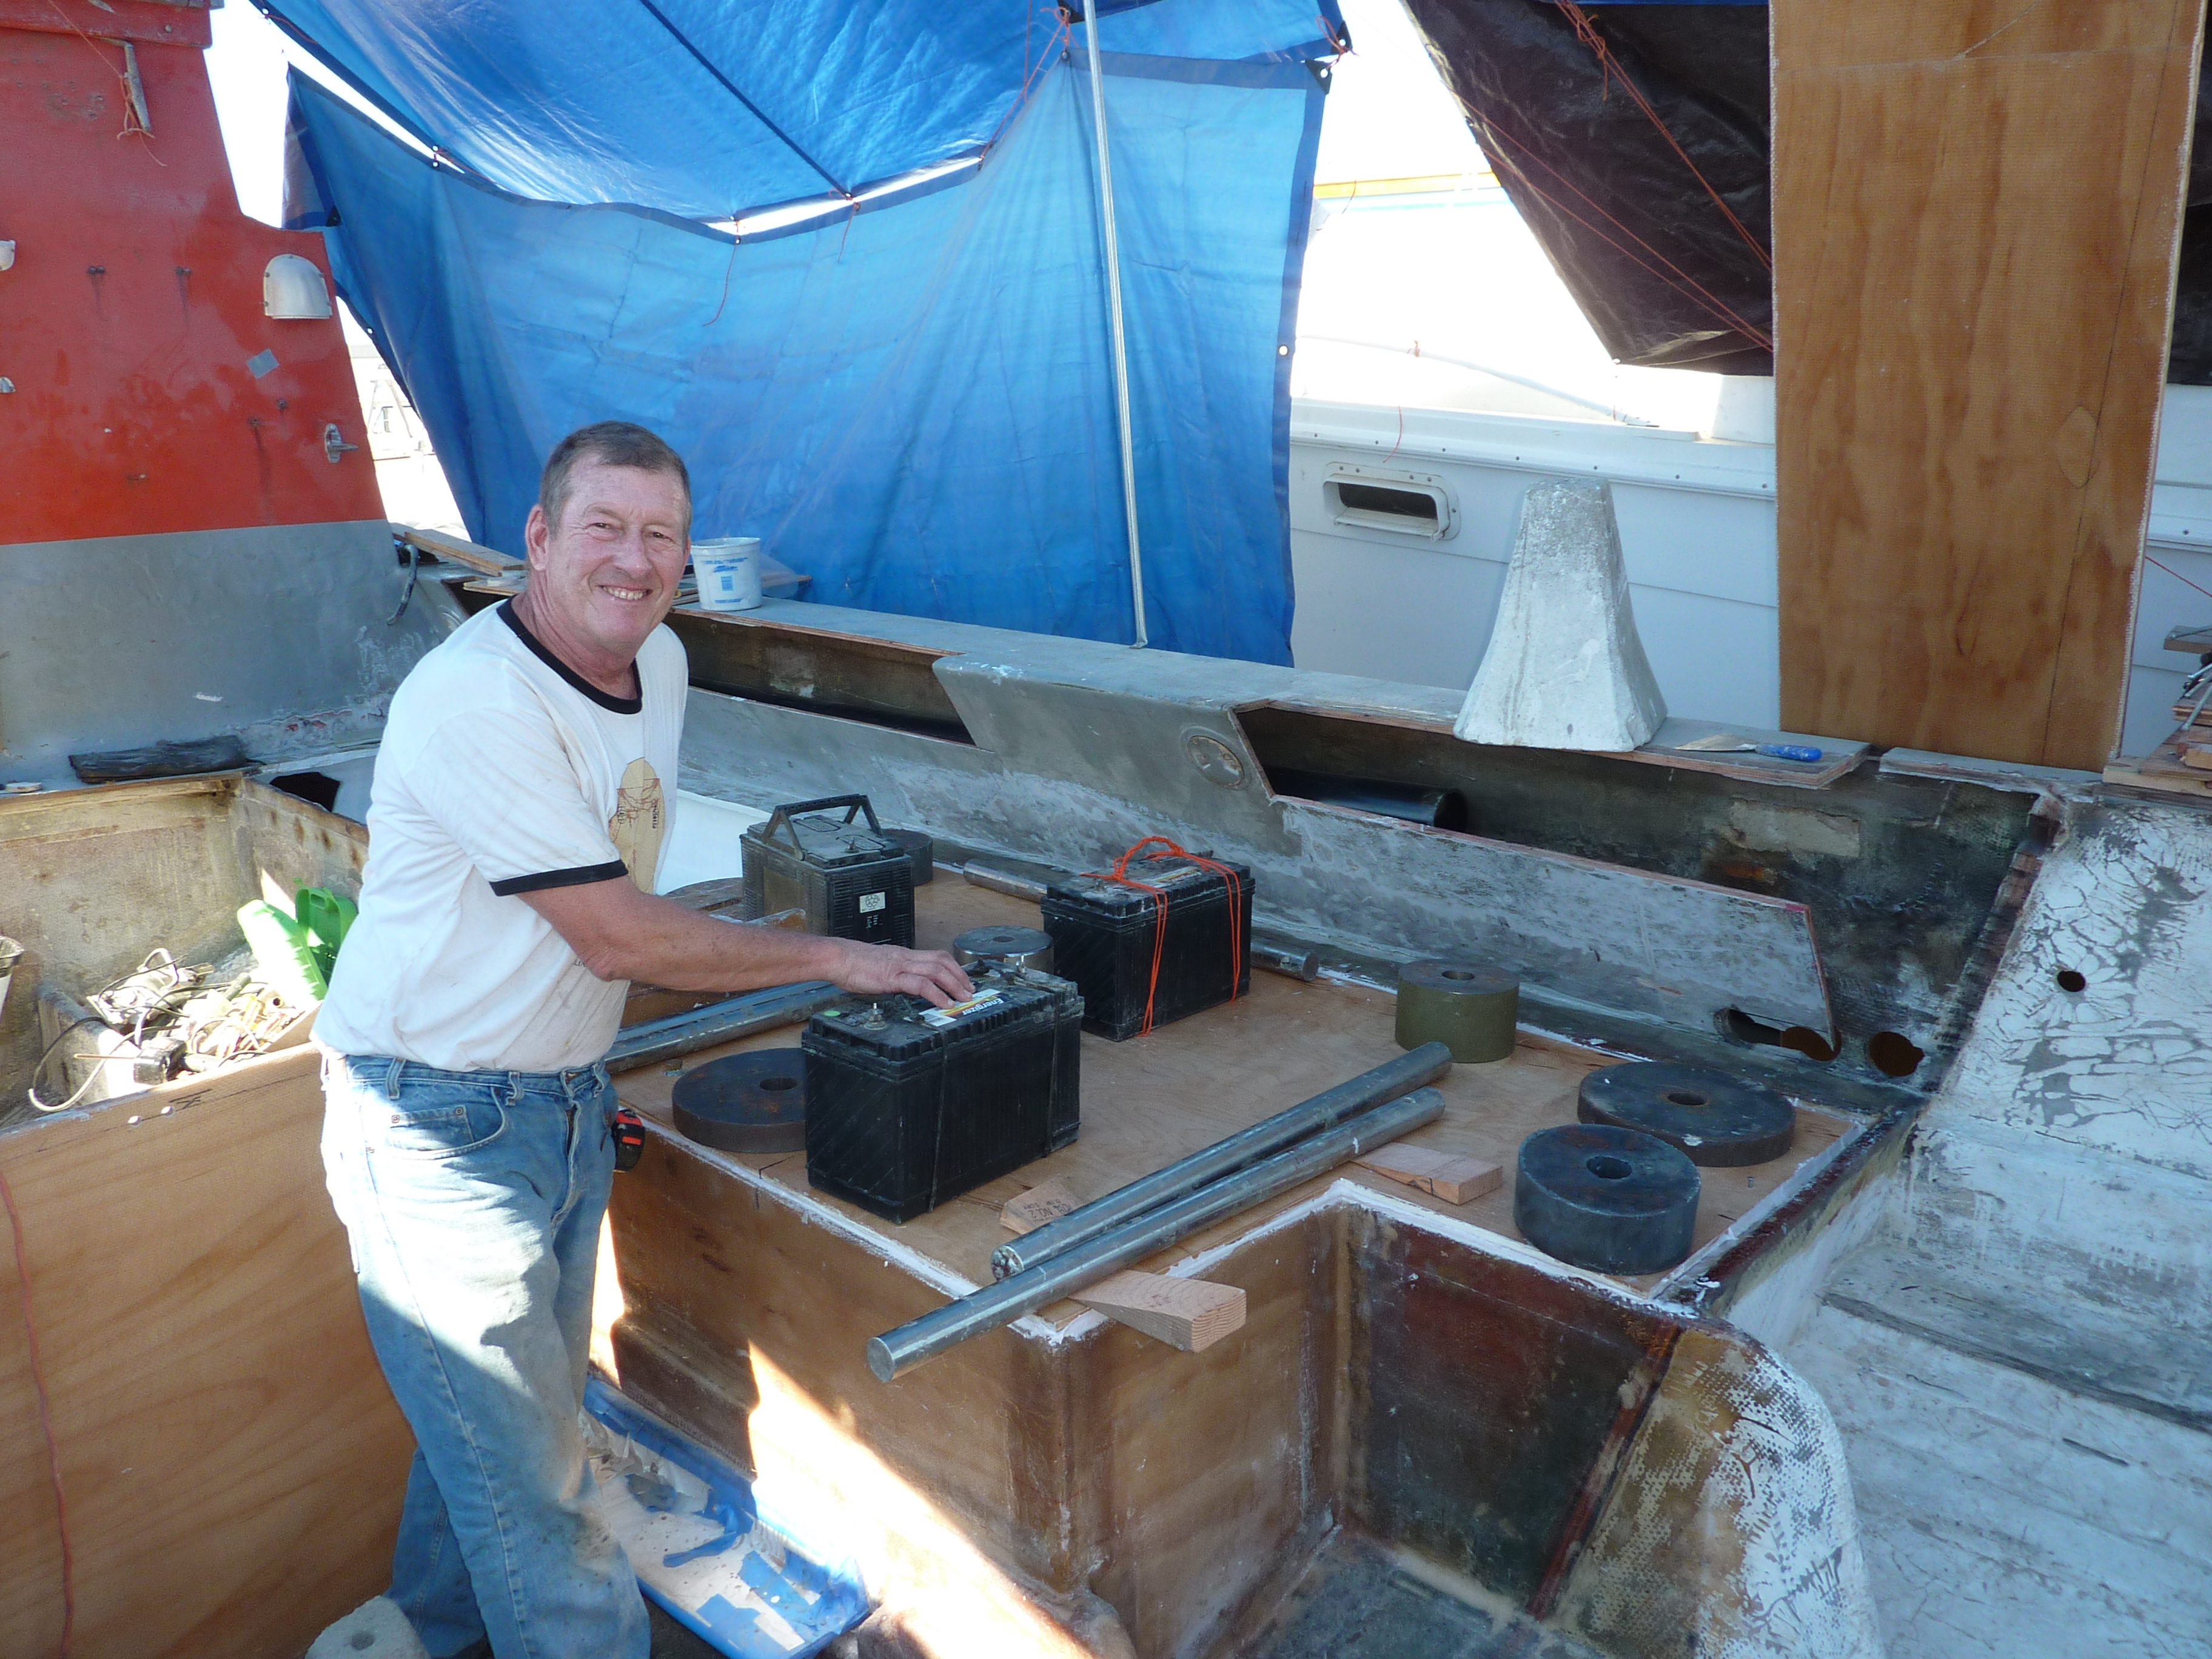
Terry put about 350 lbs of SS bars, old batteries and some steel cut off’s on the tank top to be sure it was “down” and hard against the glue cleats.
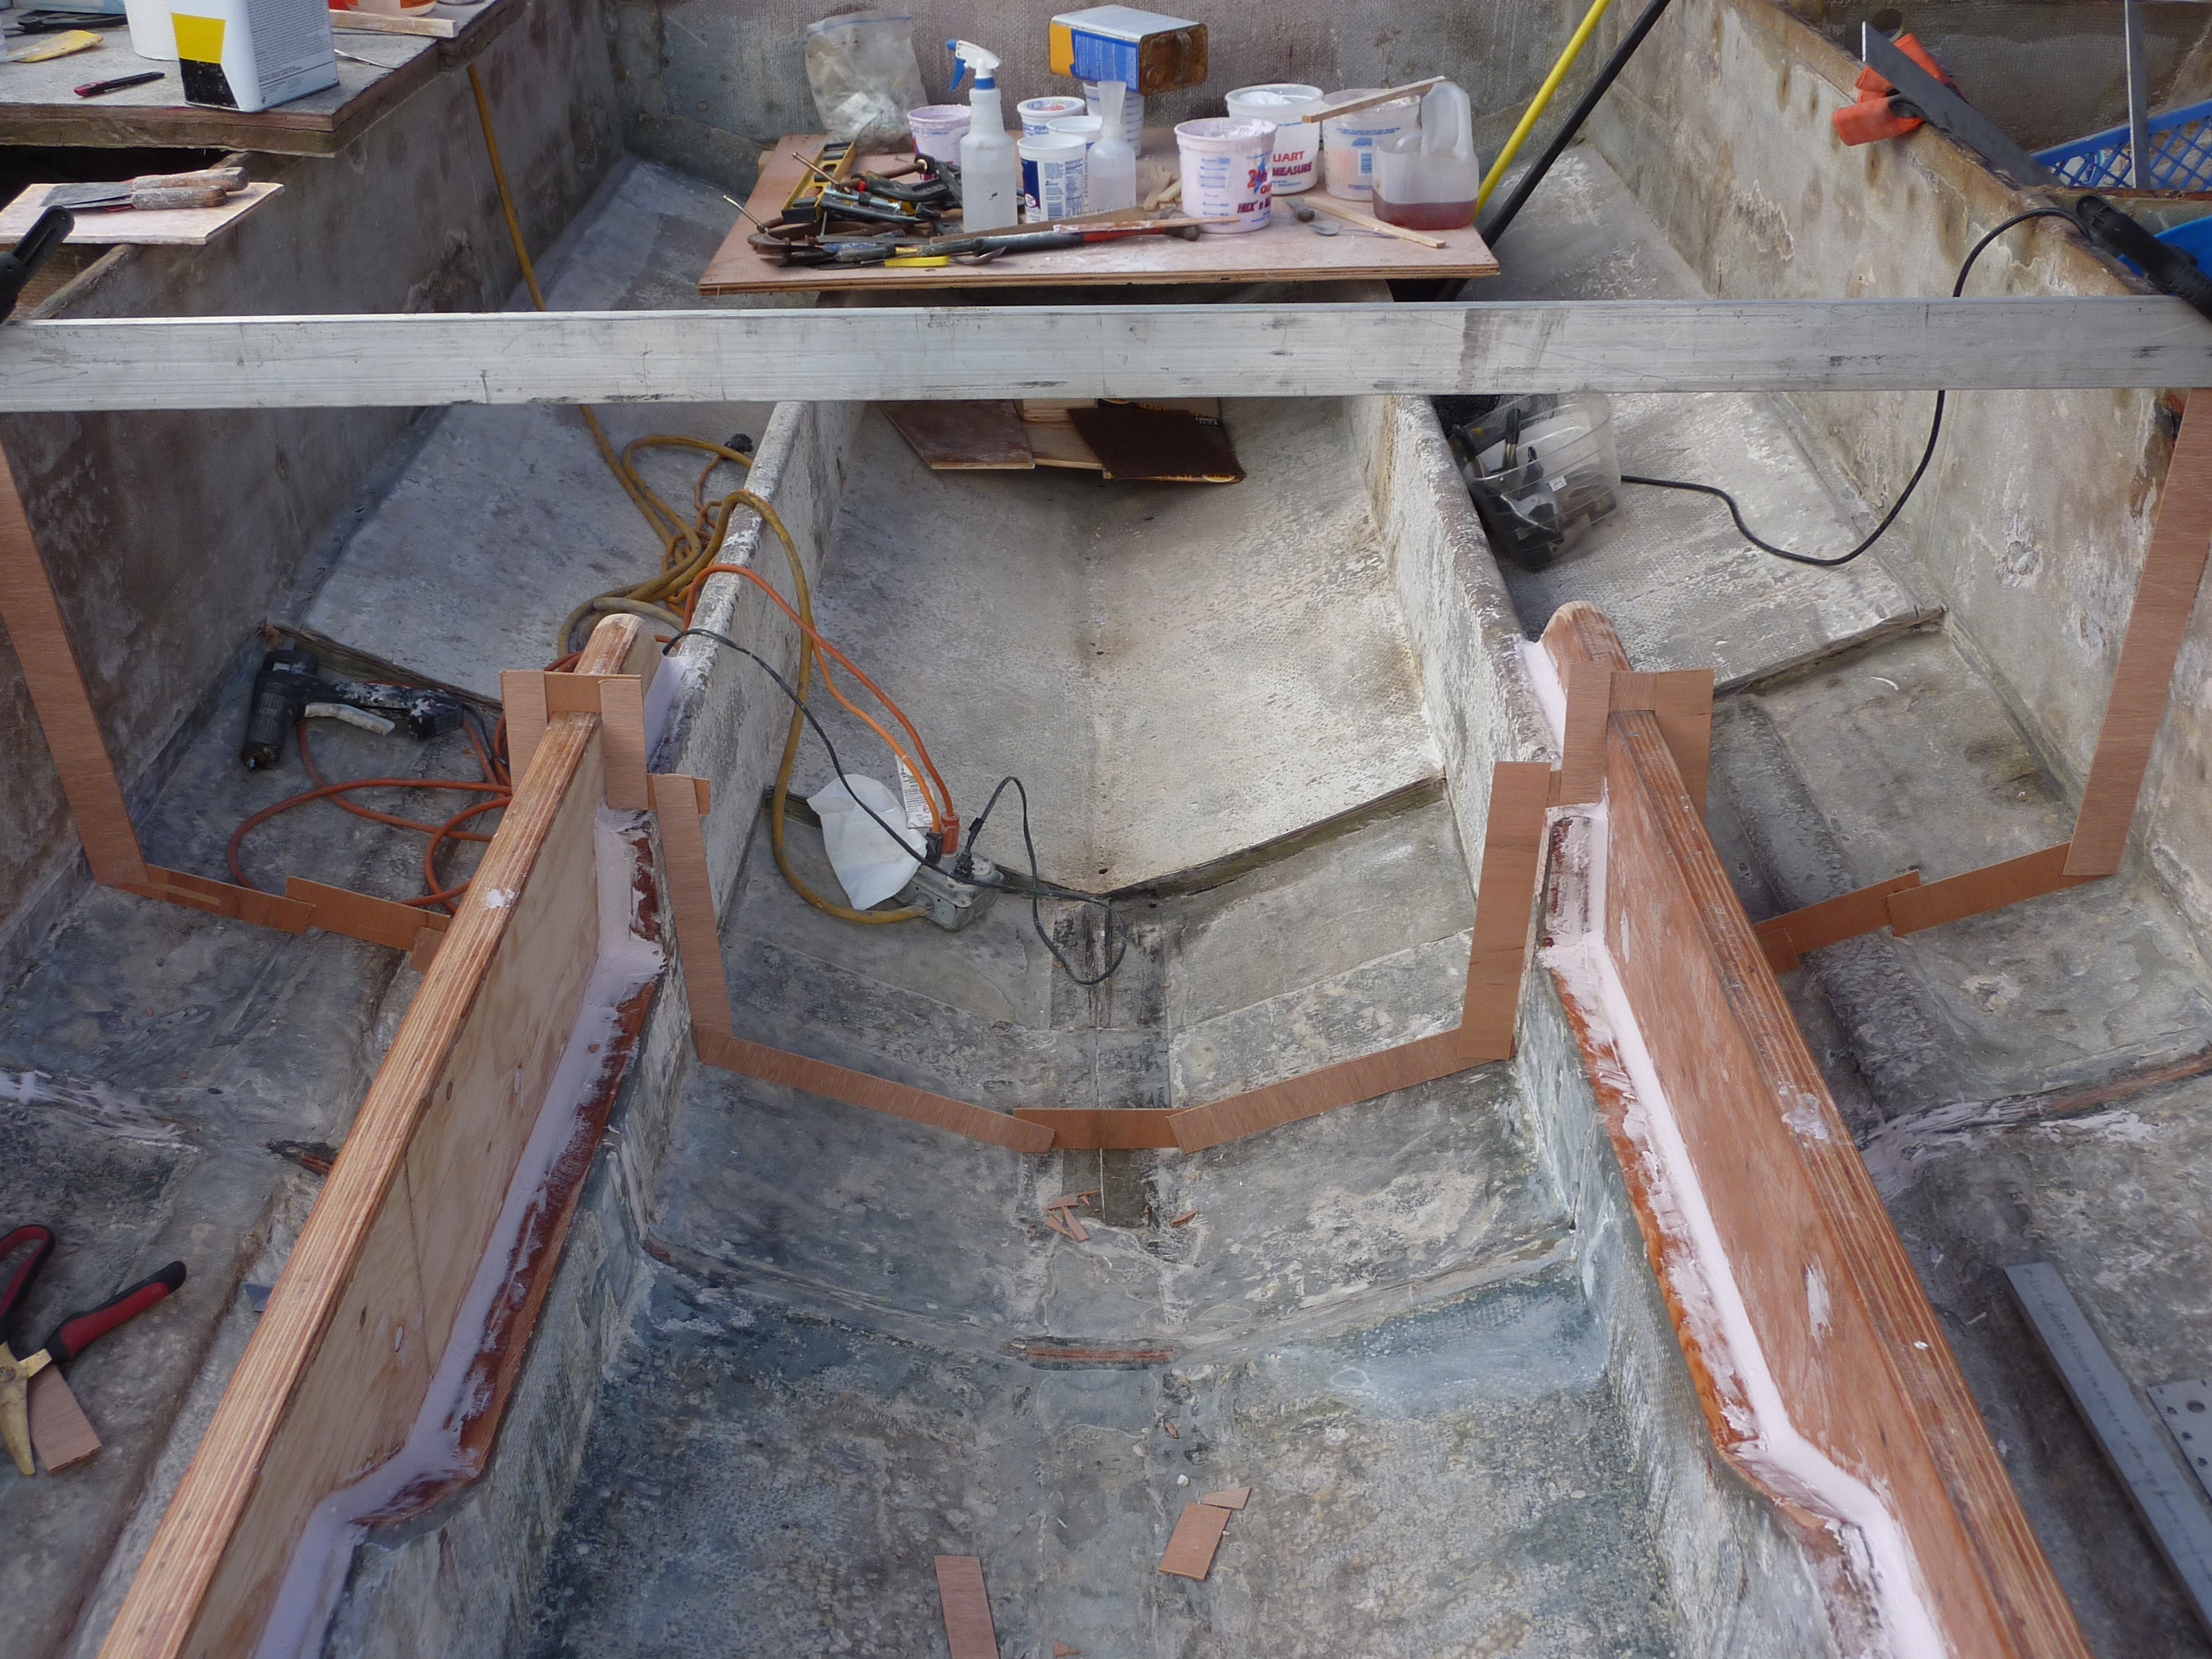
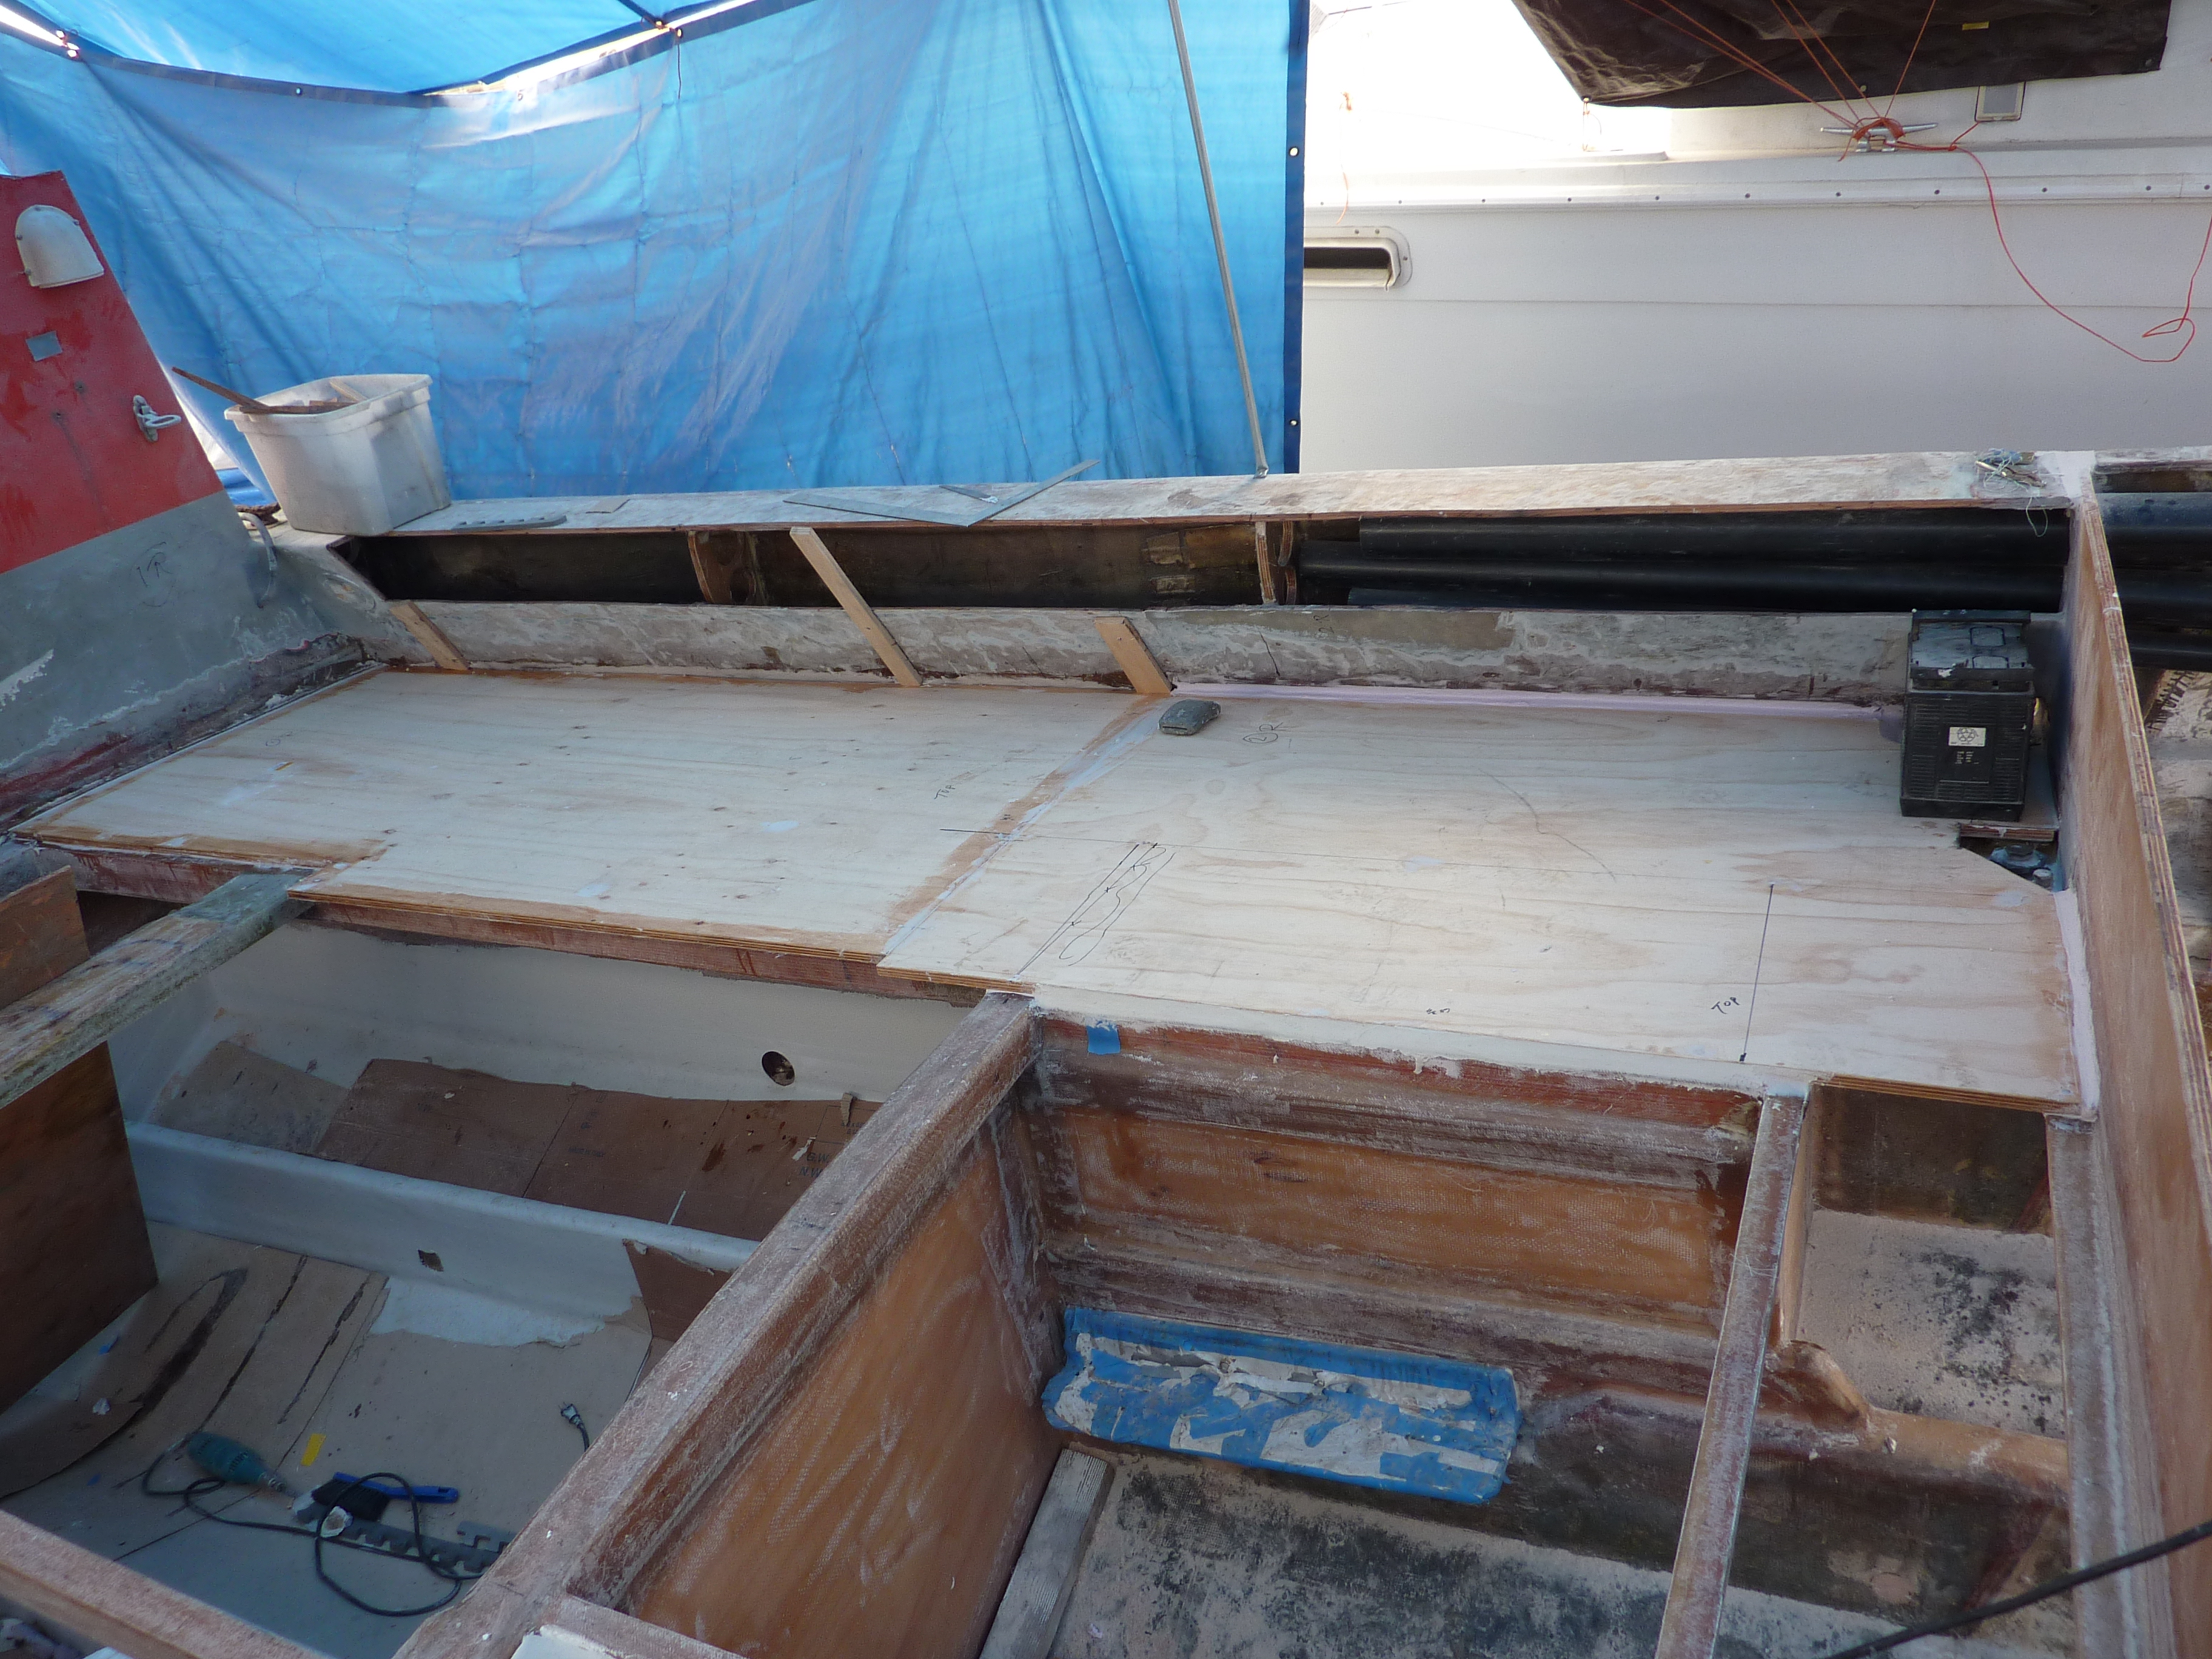
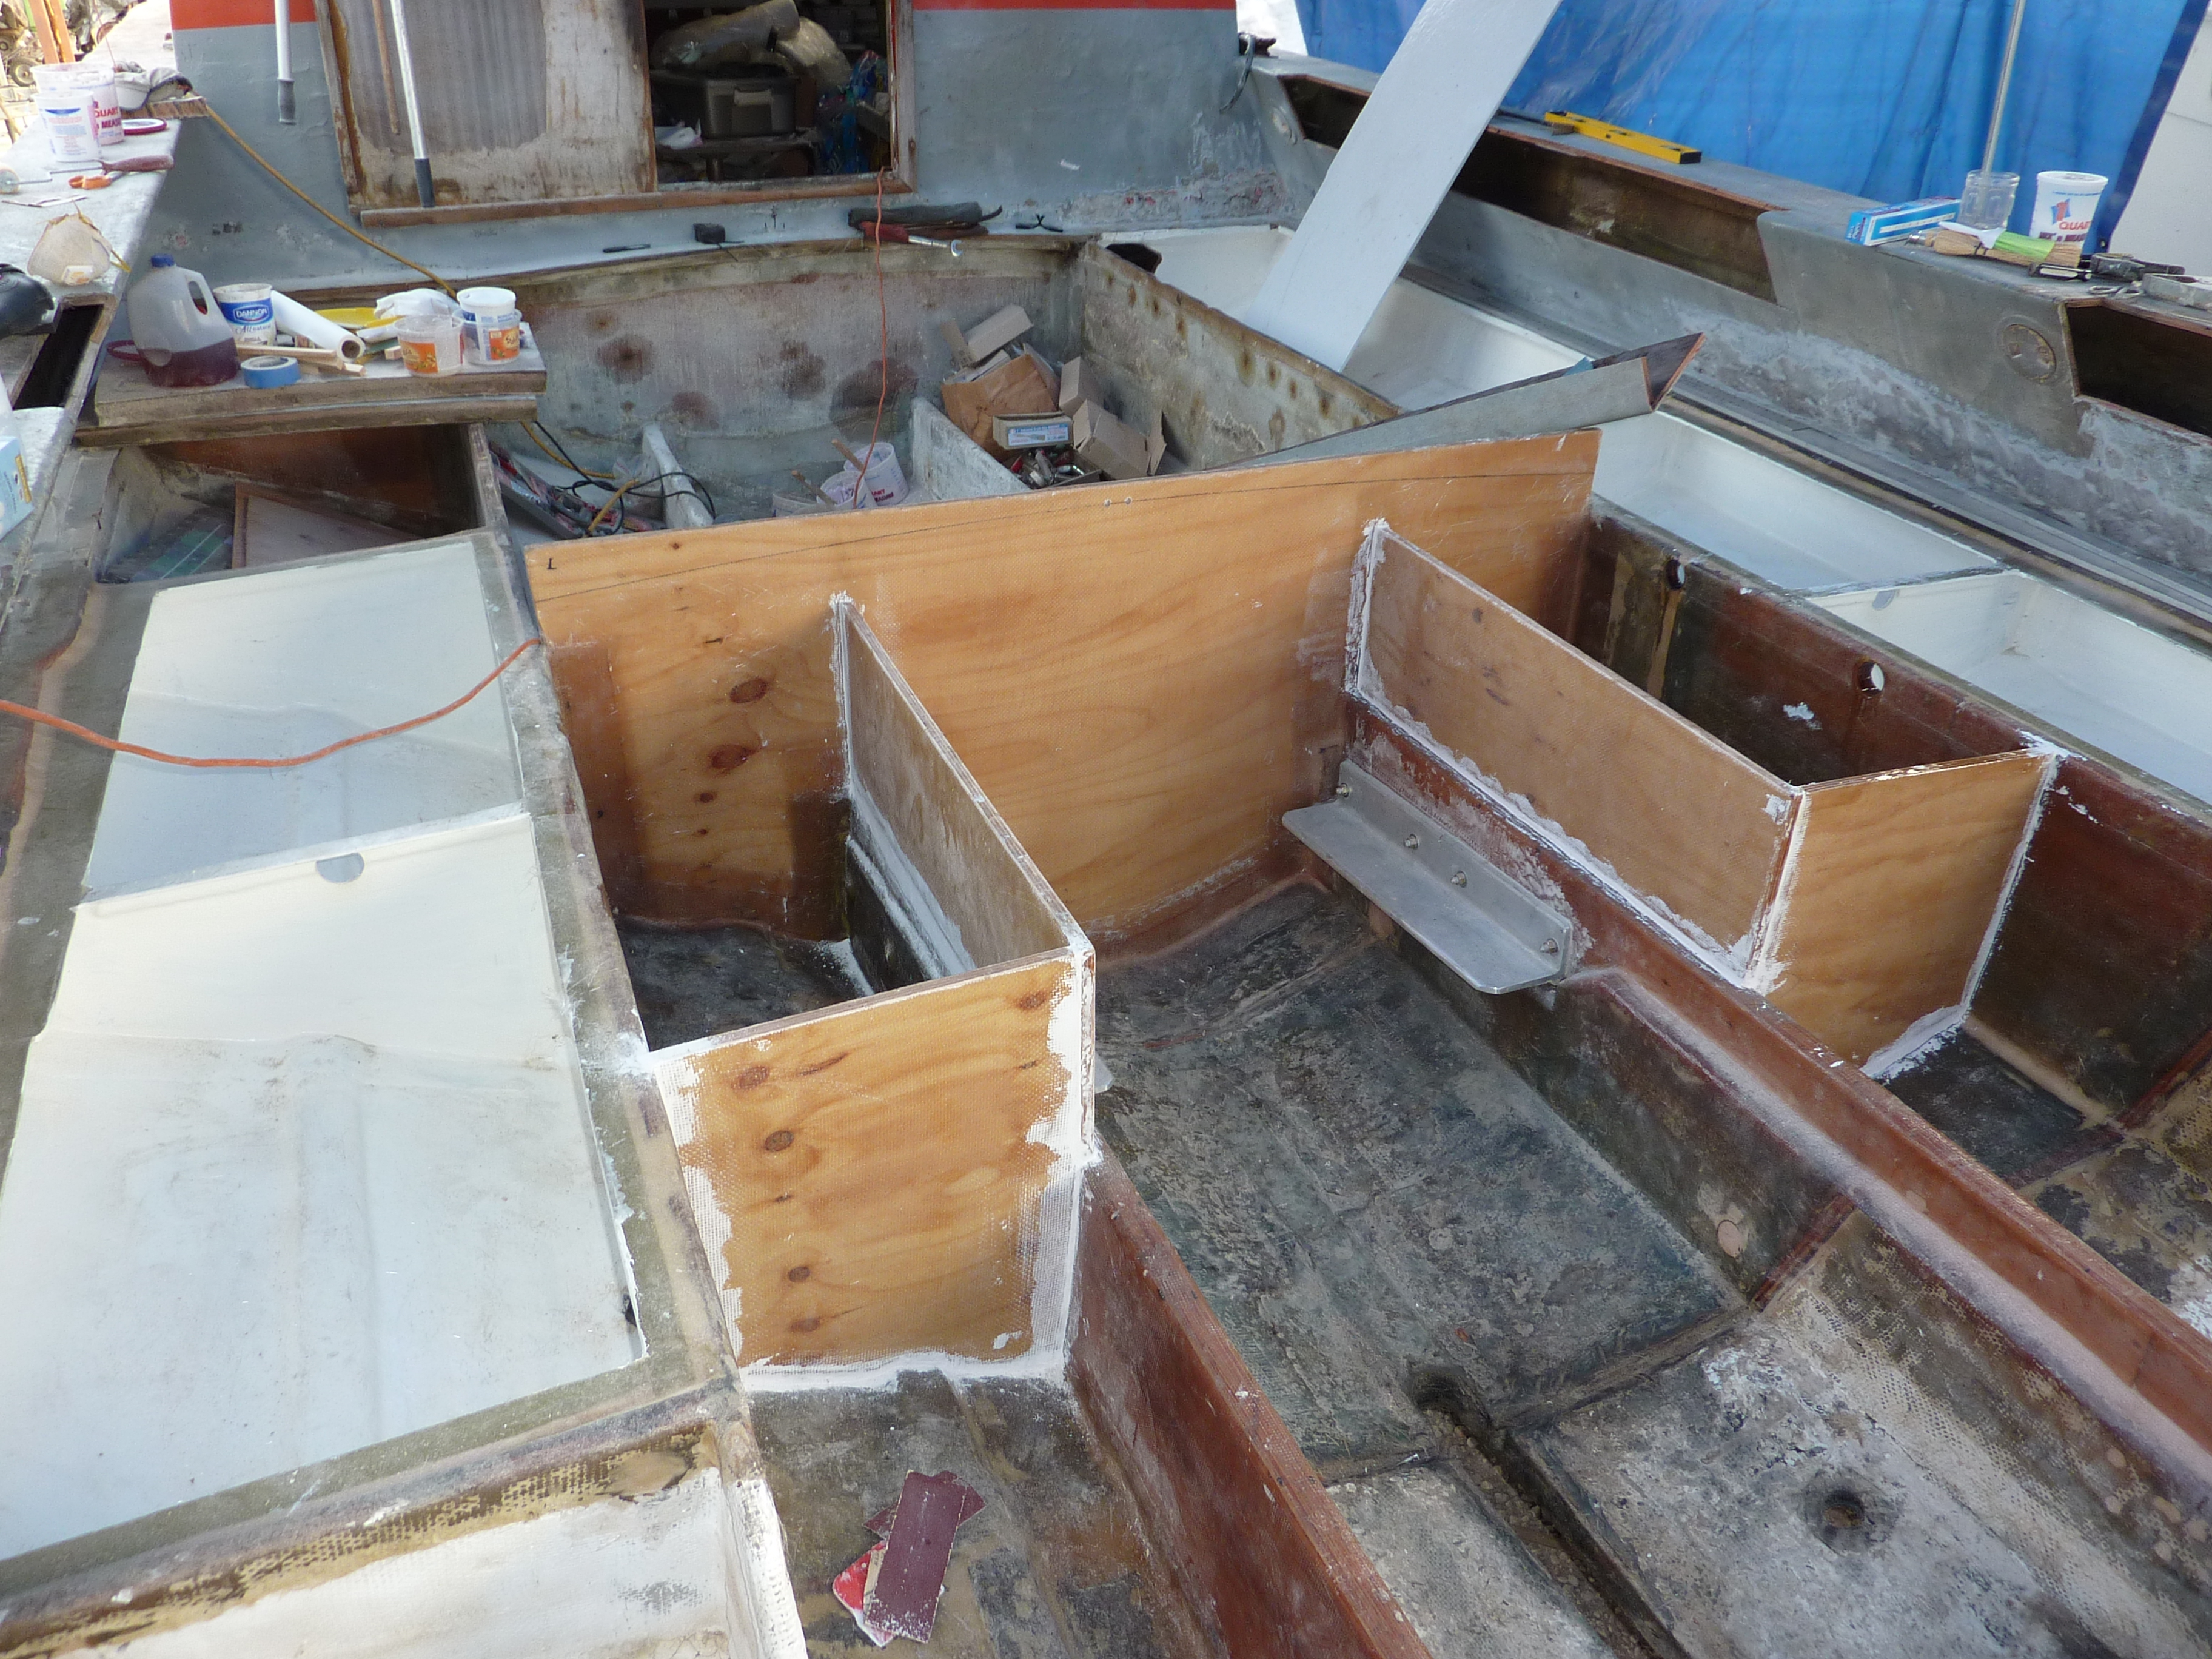
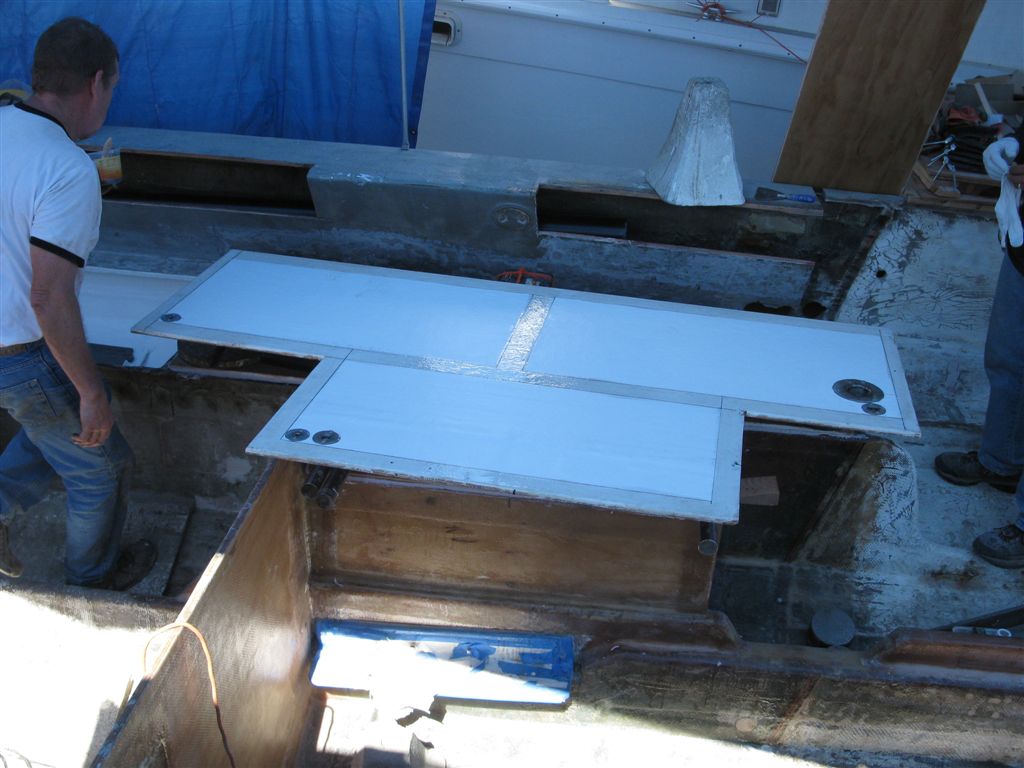
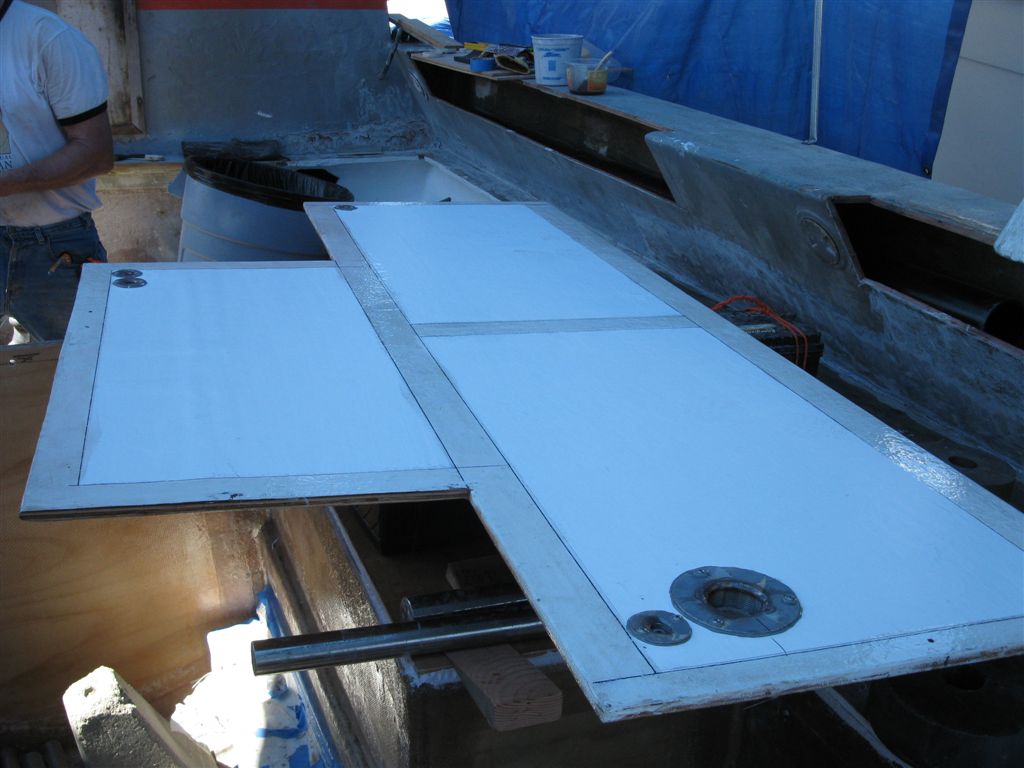
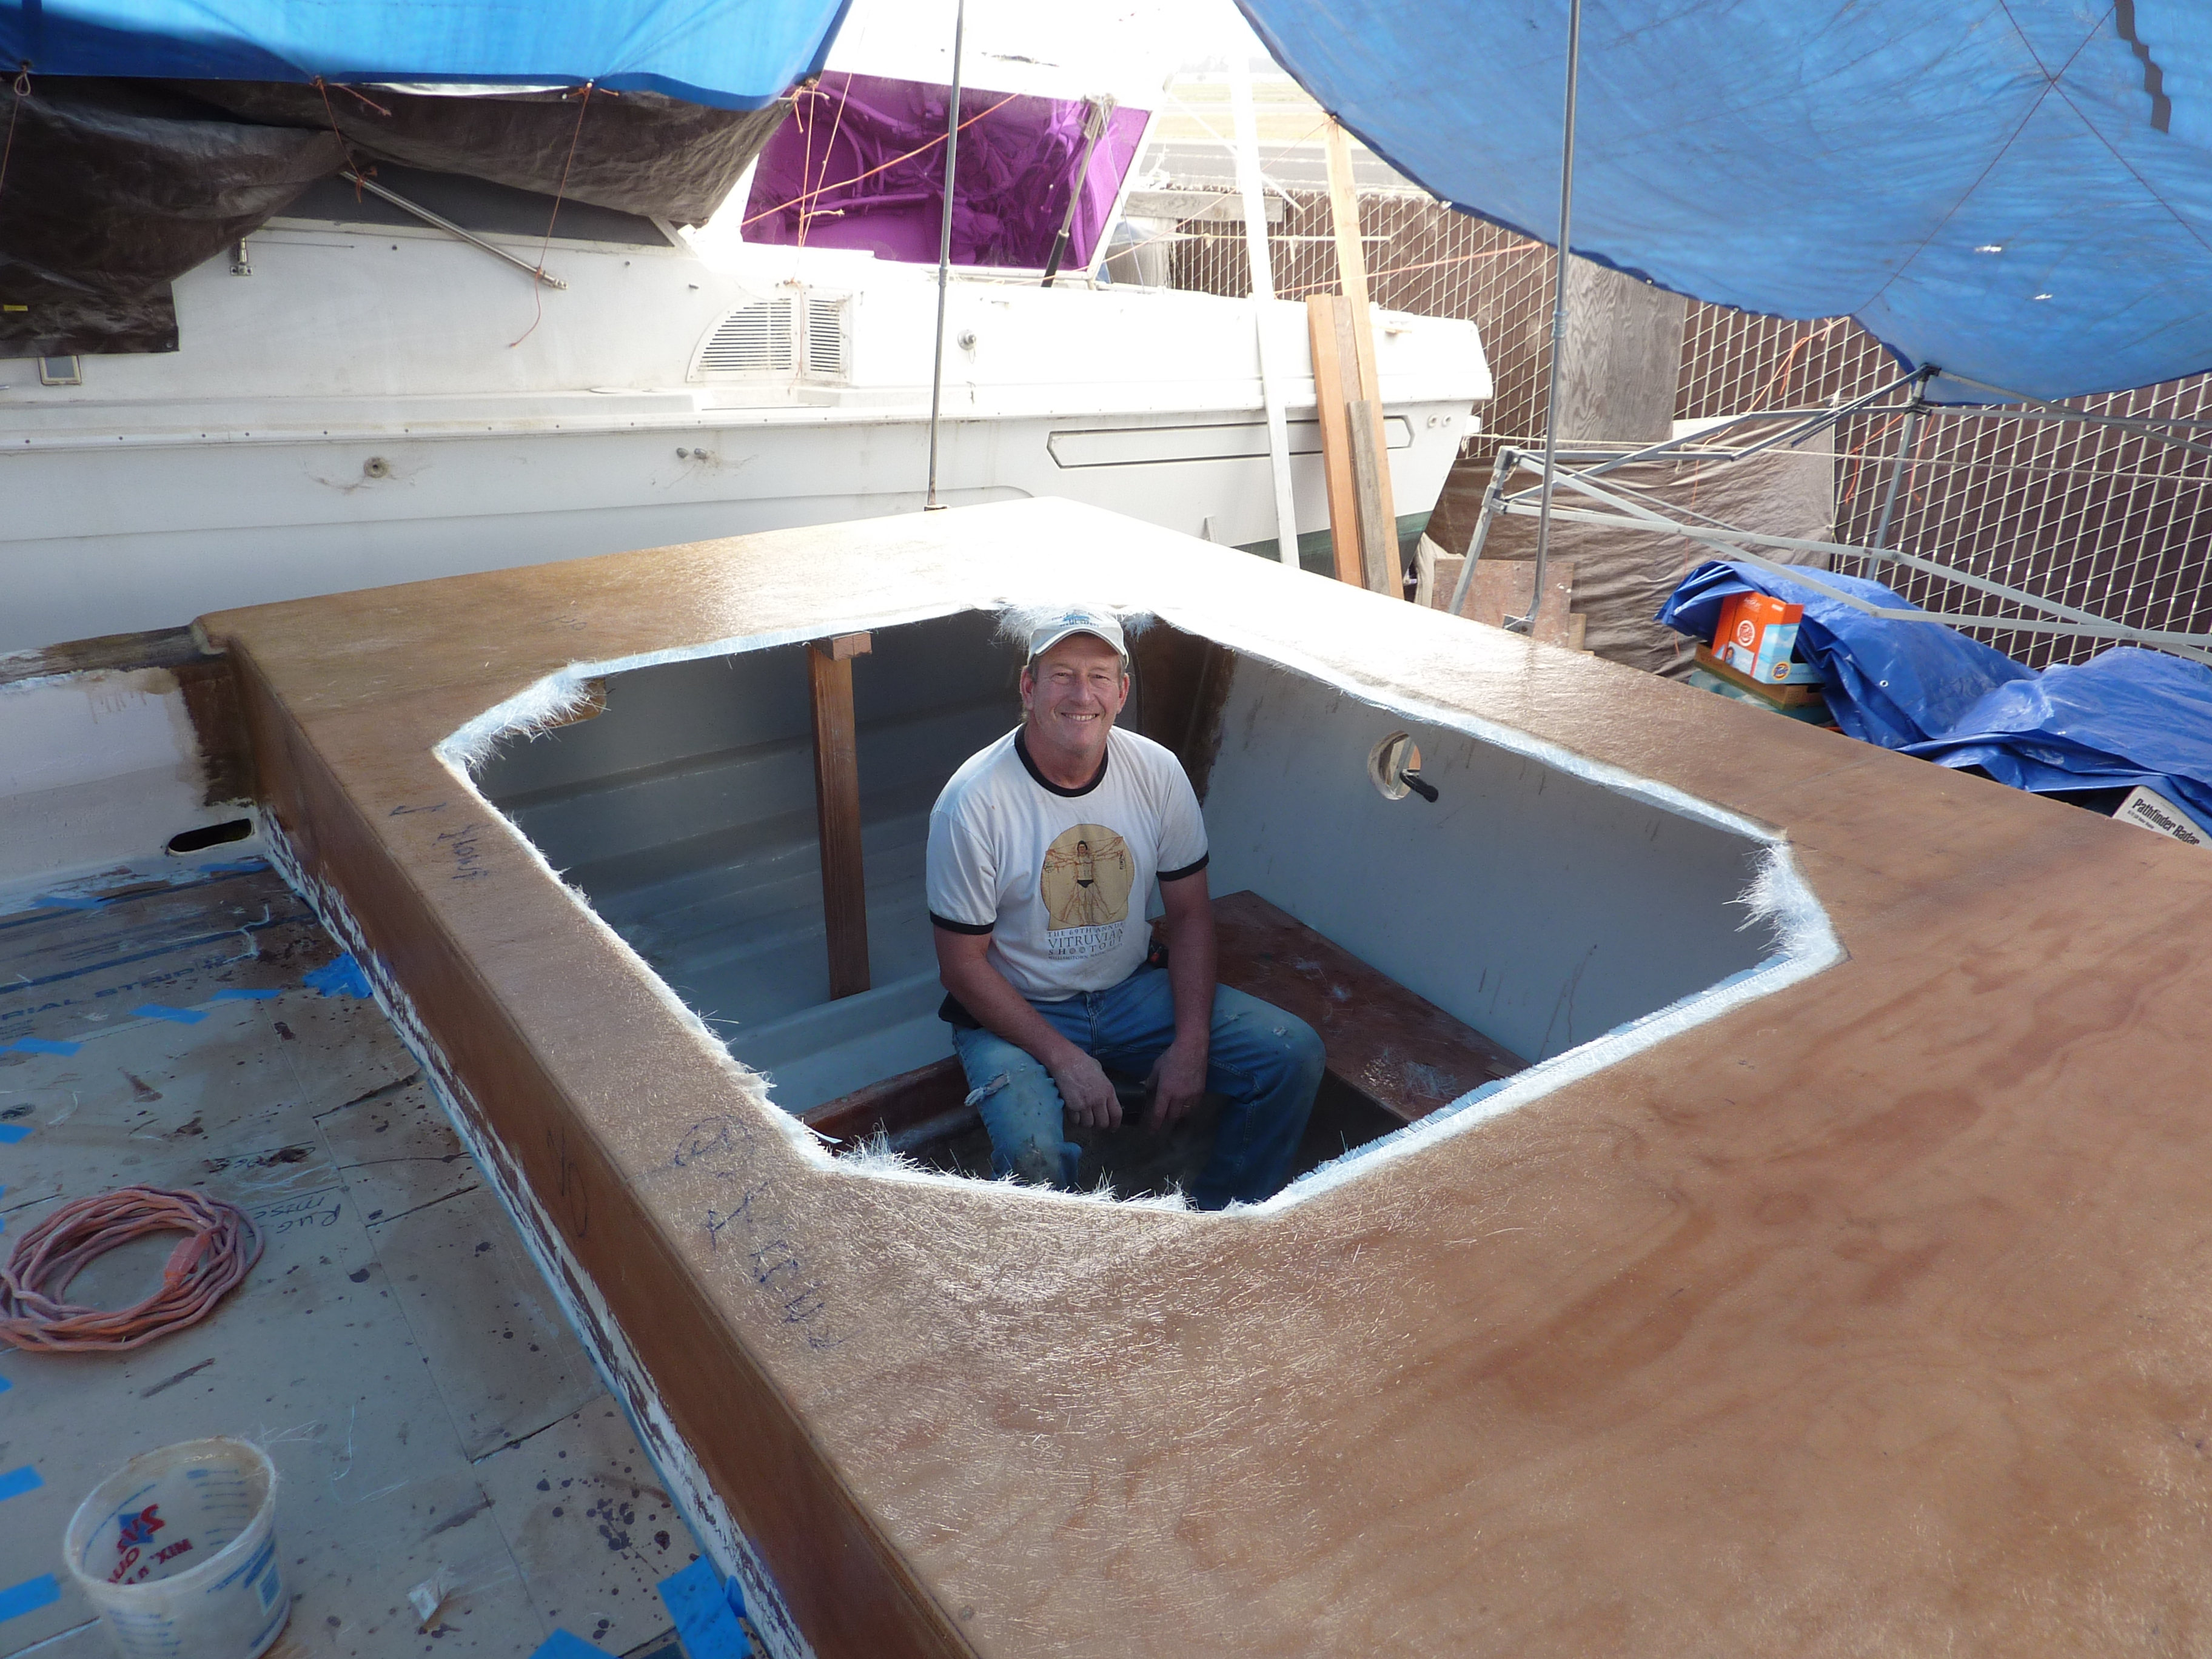
Deck construction
Forward deck installed covering the fish hold.
Engine room side pieces.
View looking aft to engine room shows smaller hatch cutout for V-Drive.
Caprail runs to cabin being installed on both port and starboard sides.
Engine room combing.
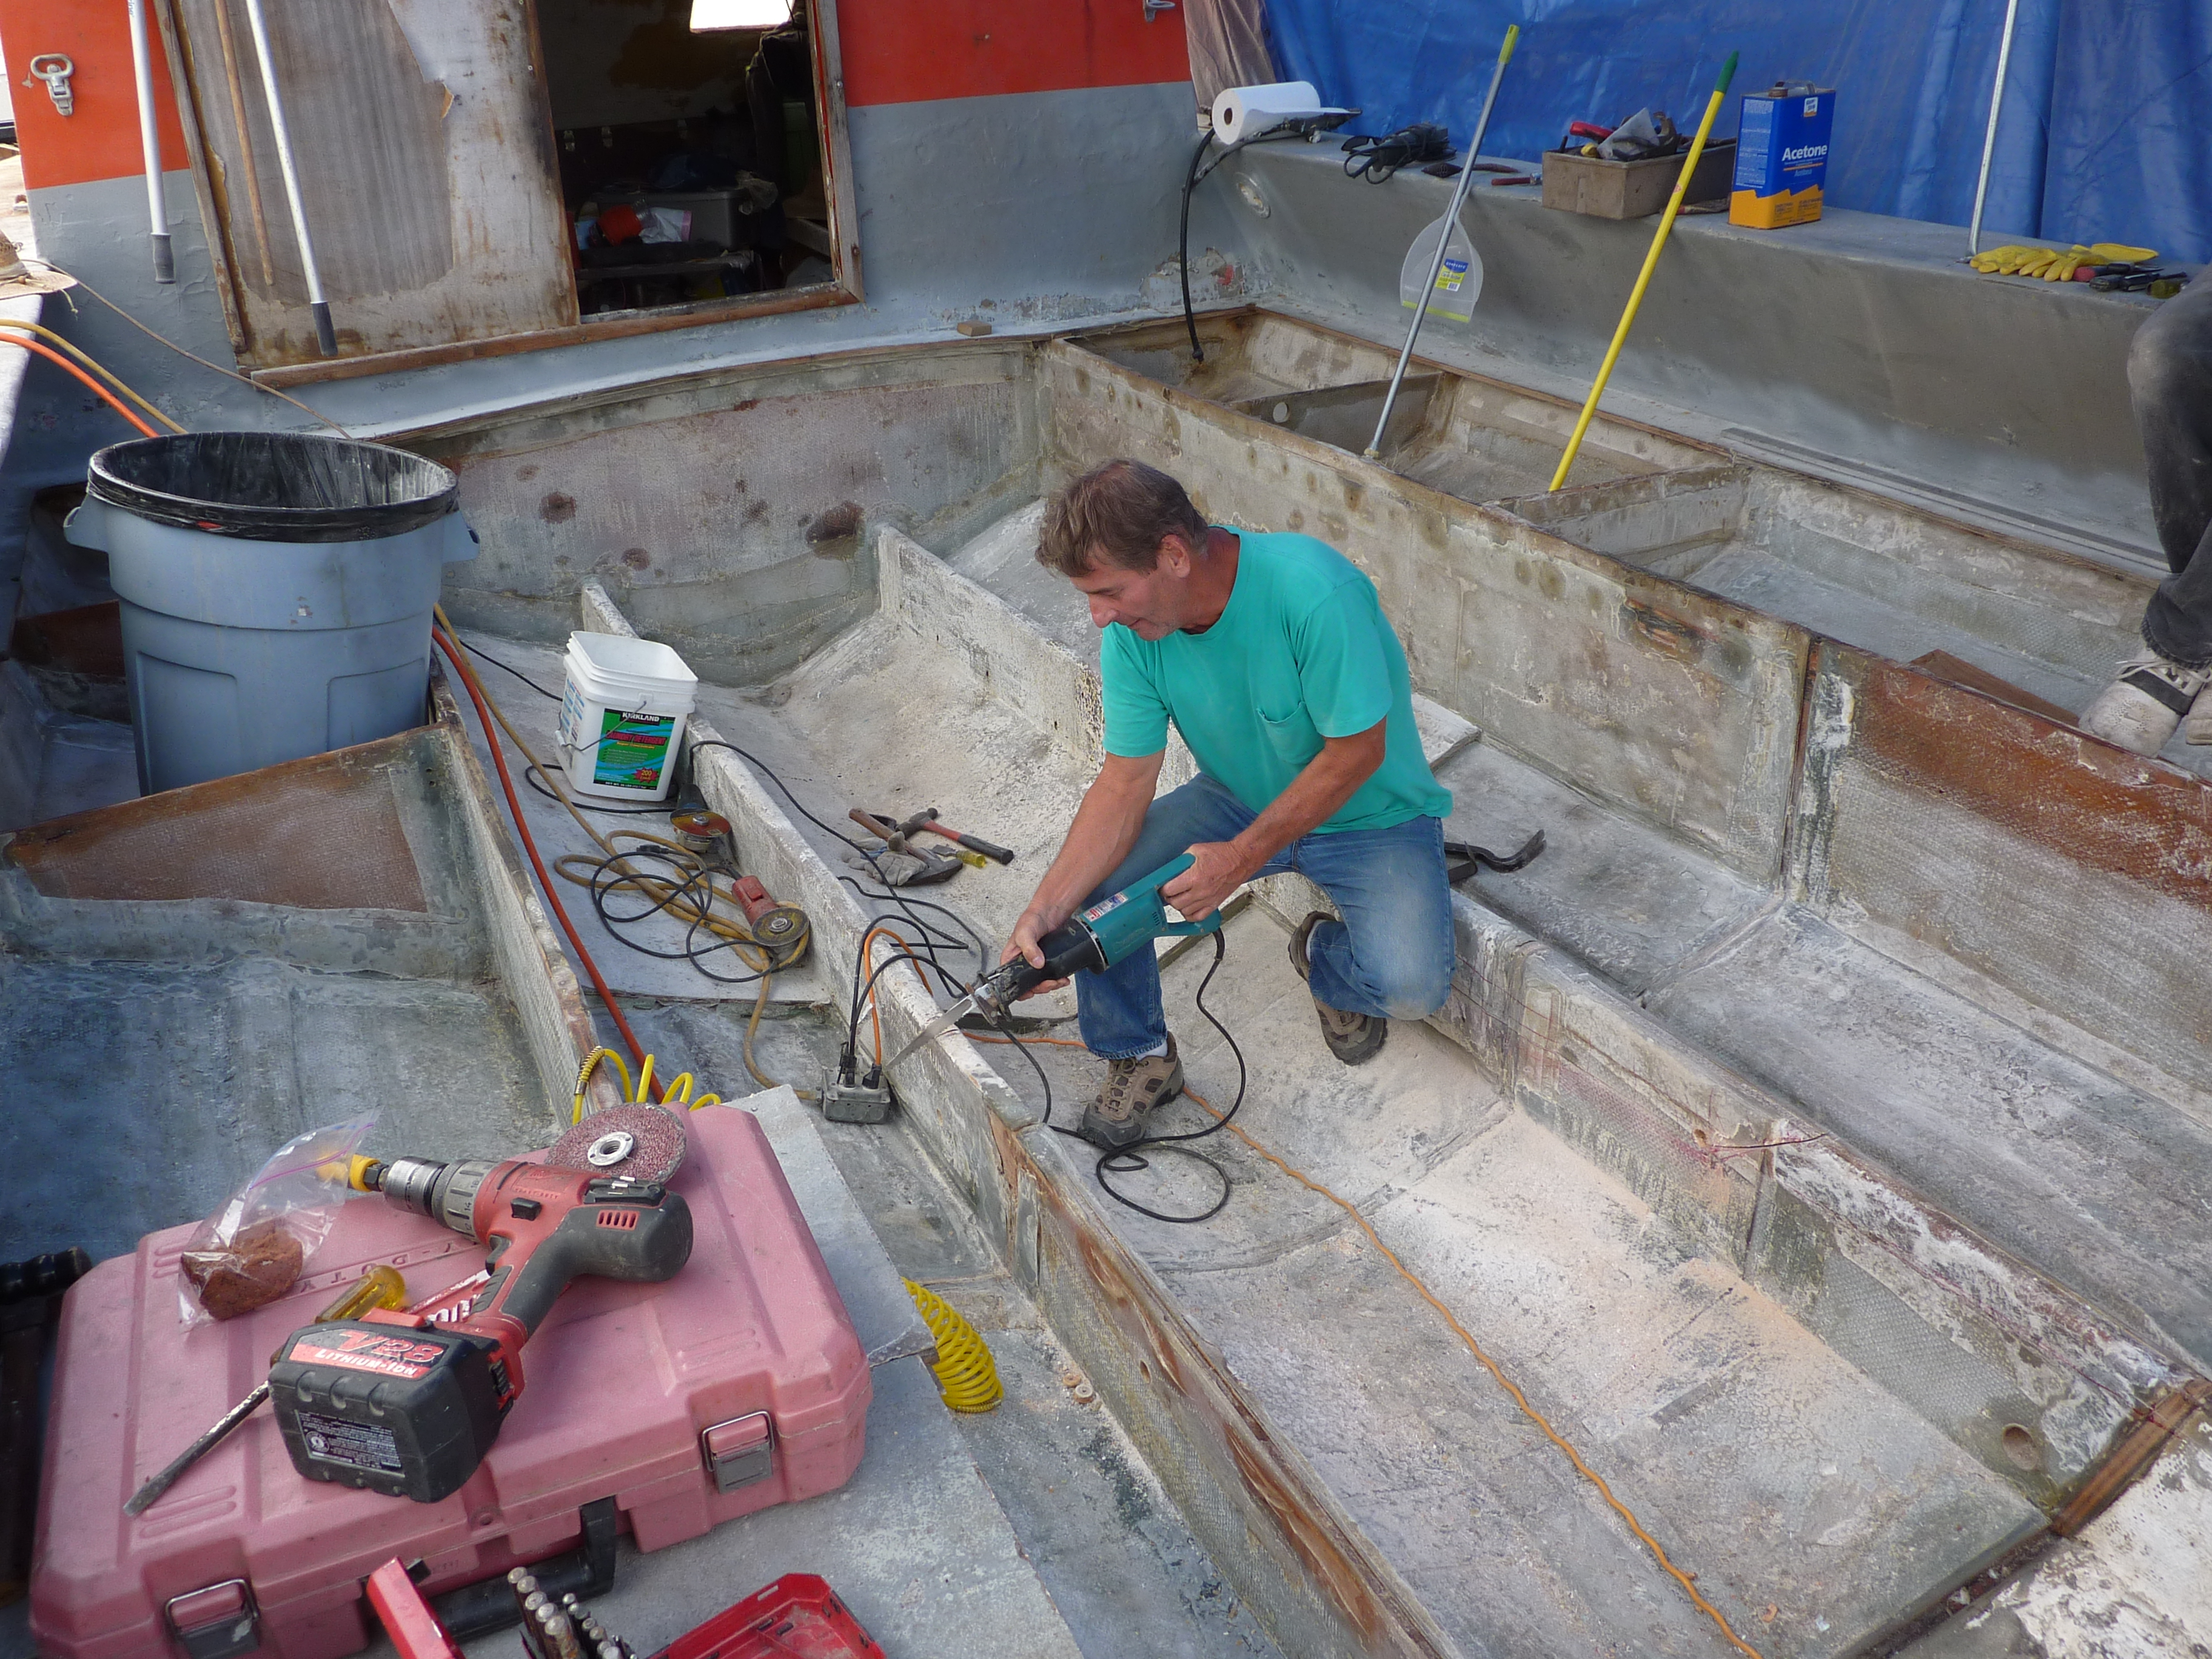
Happy Terry experiencing just how nice it’s going to be with all that engine room and just ONE engine to deal with.
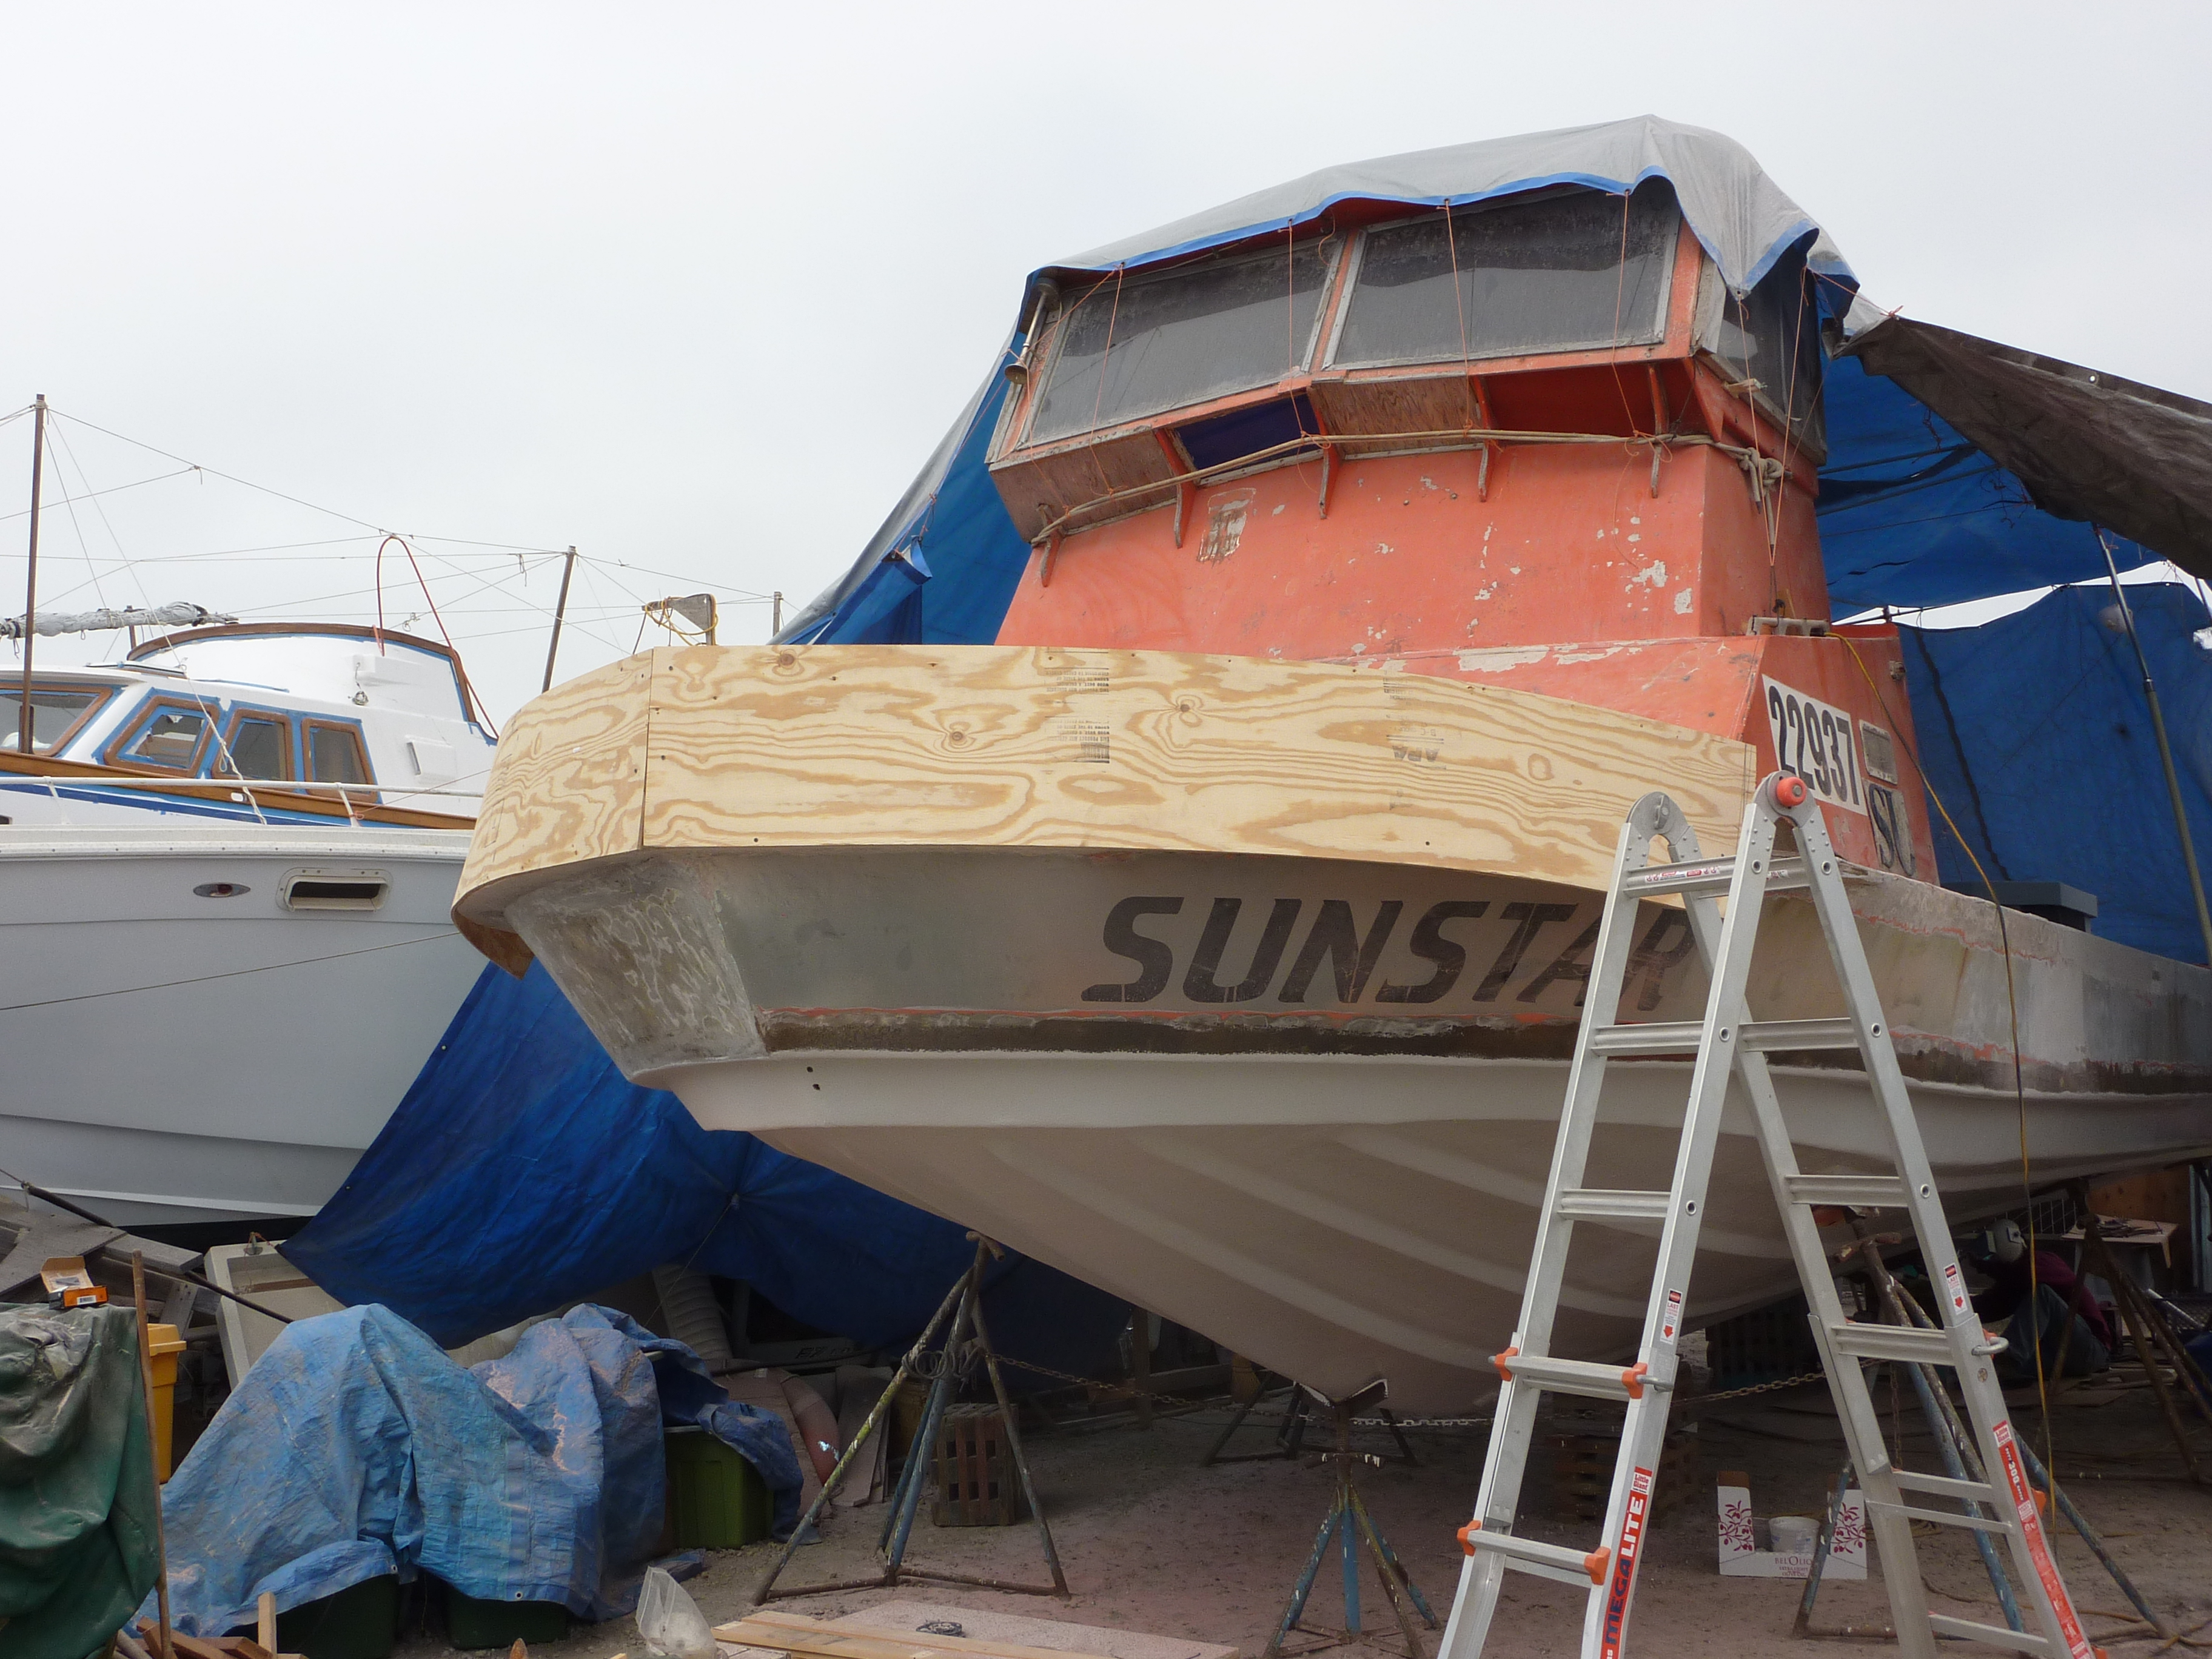
A new bow too…
Talk about a boat that needed some bow work. What was left of it was rotten down to the hull, plus we hated to increase what was under the deck in the forward cabin and anchor locker area.
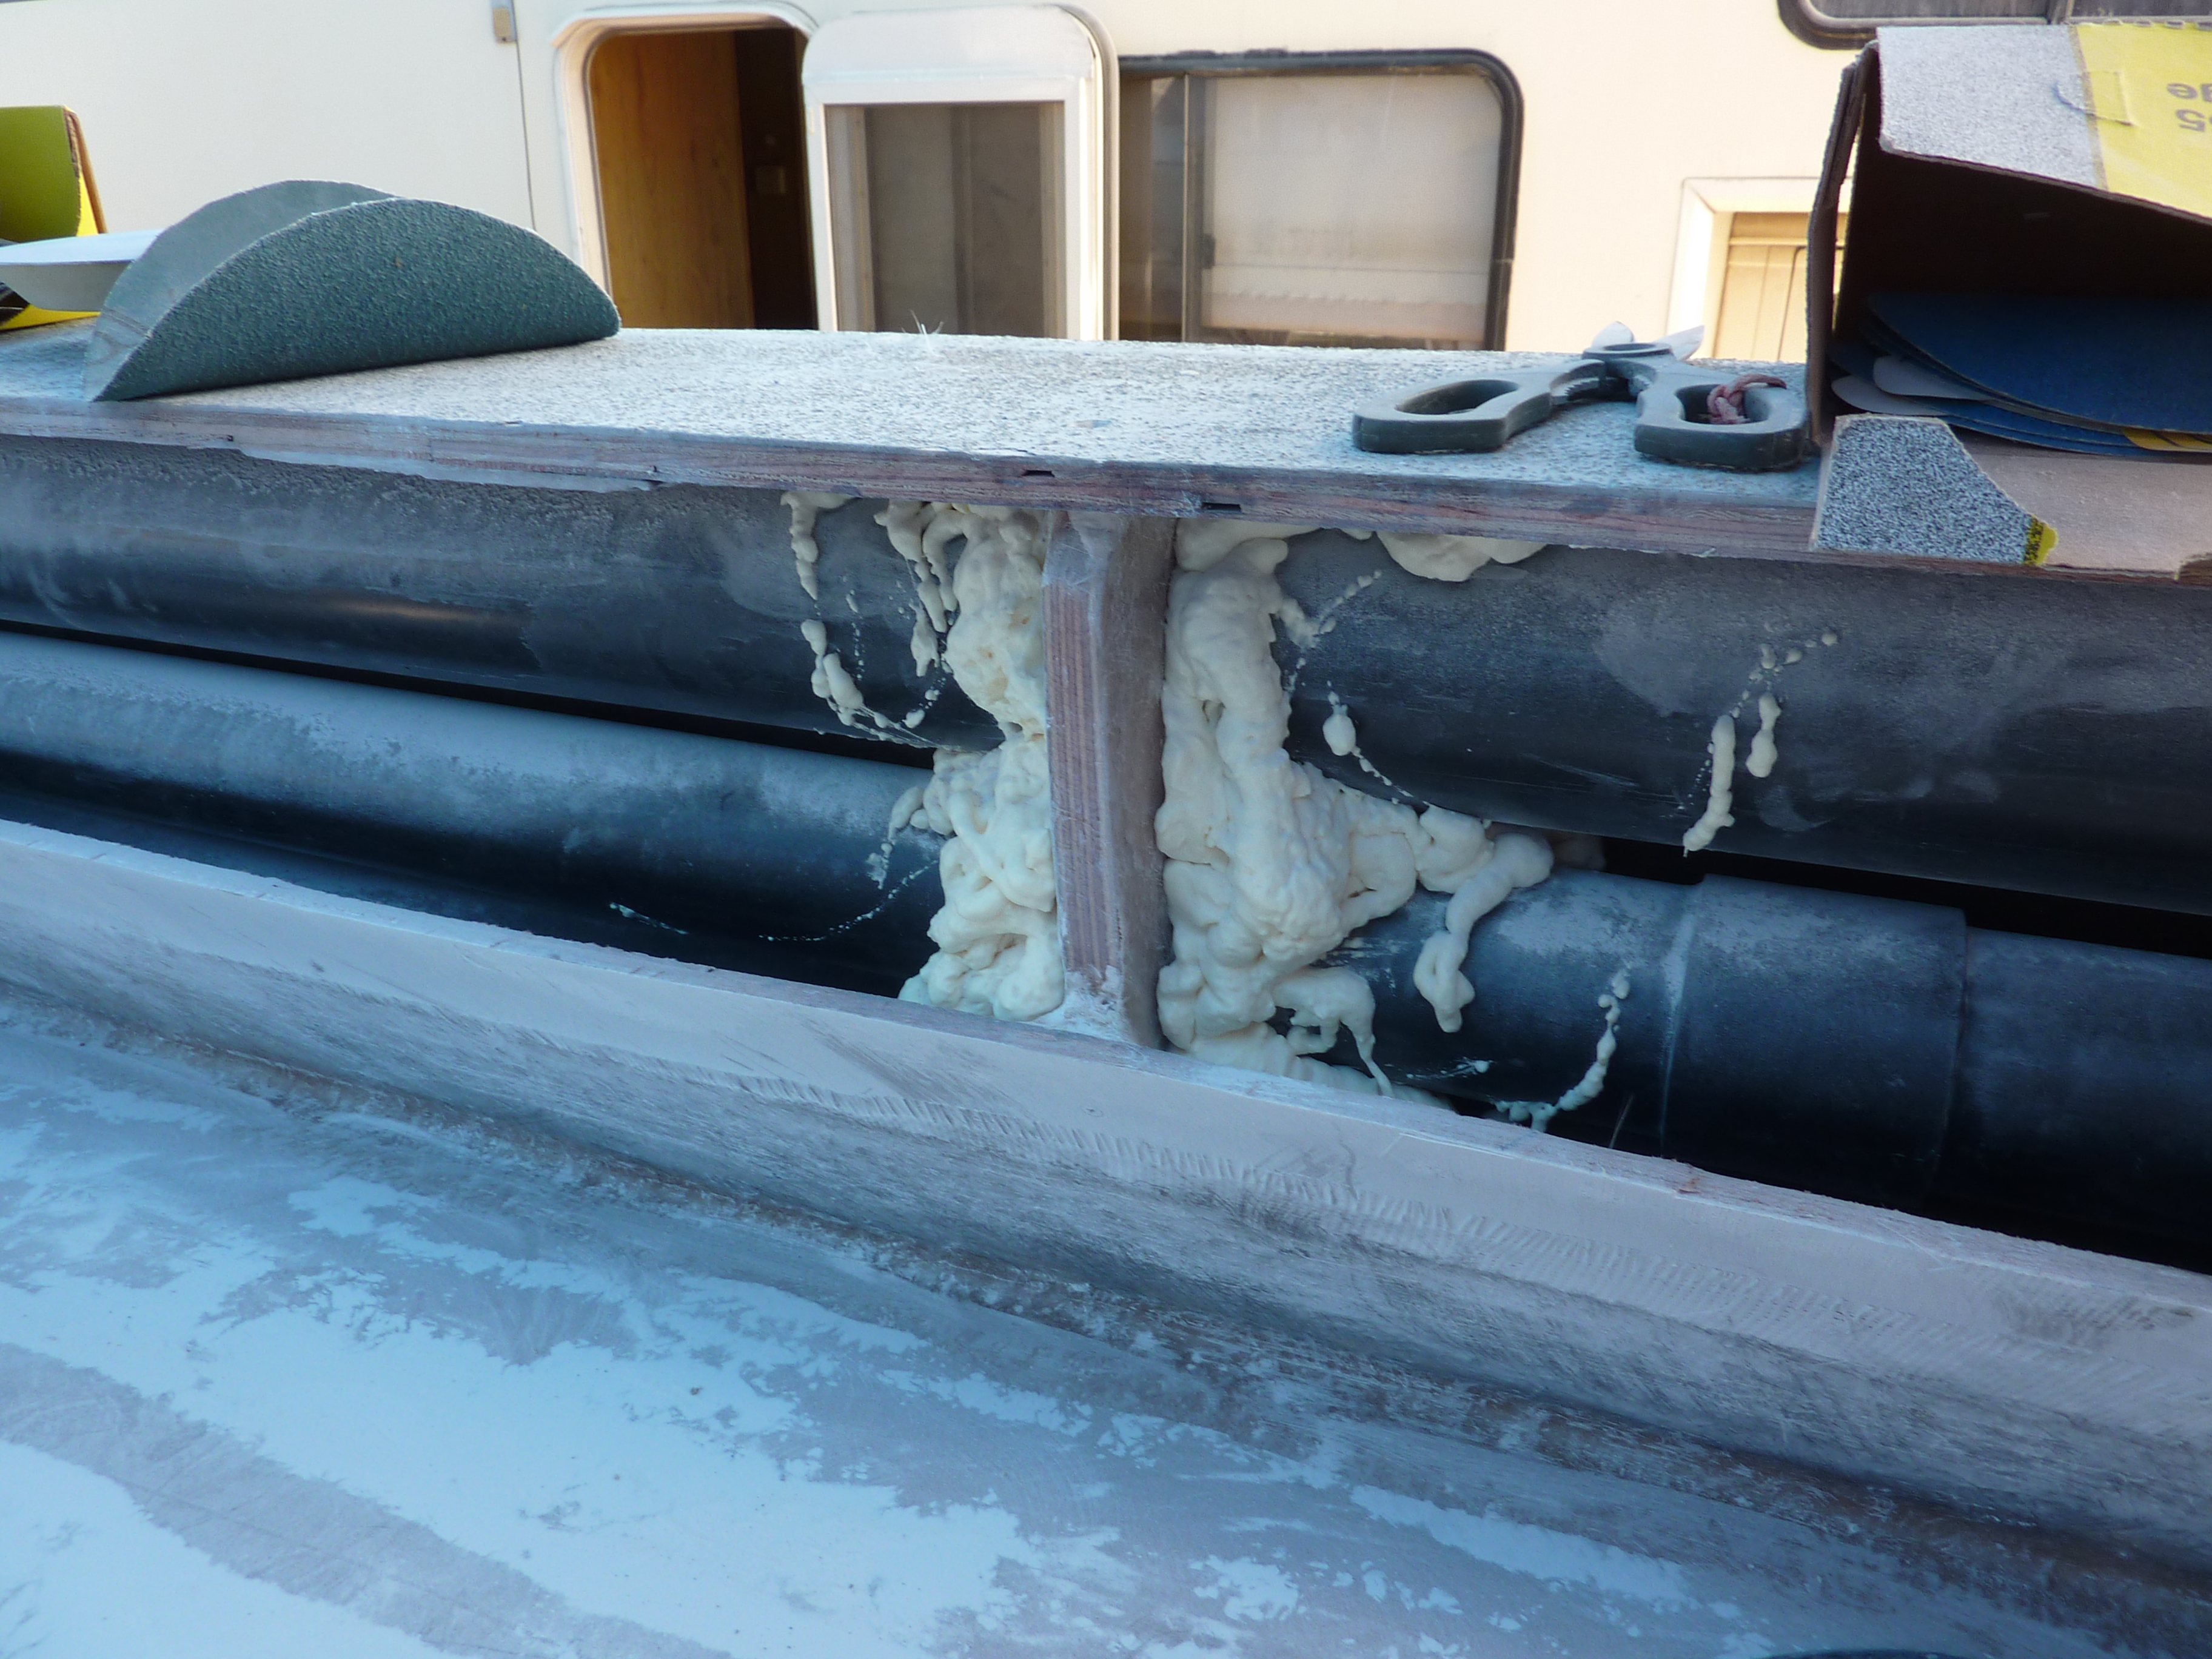
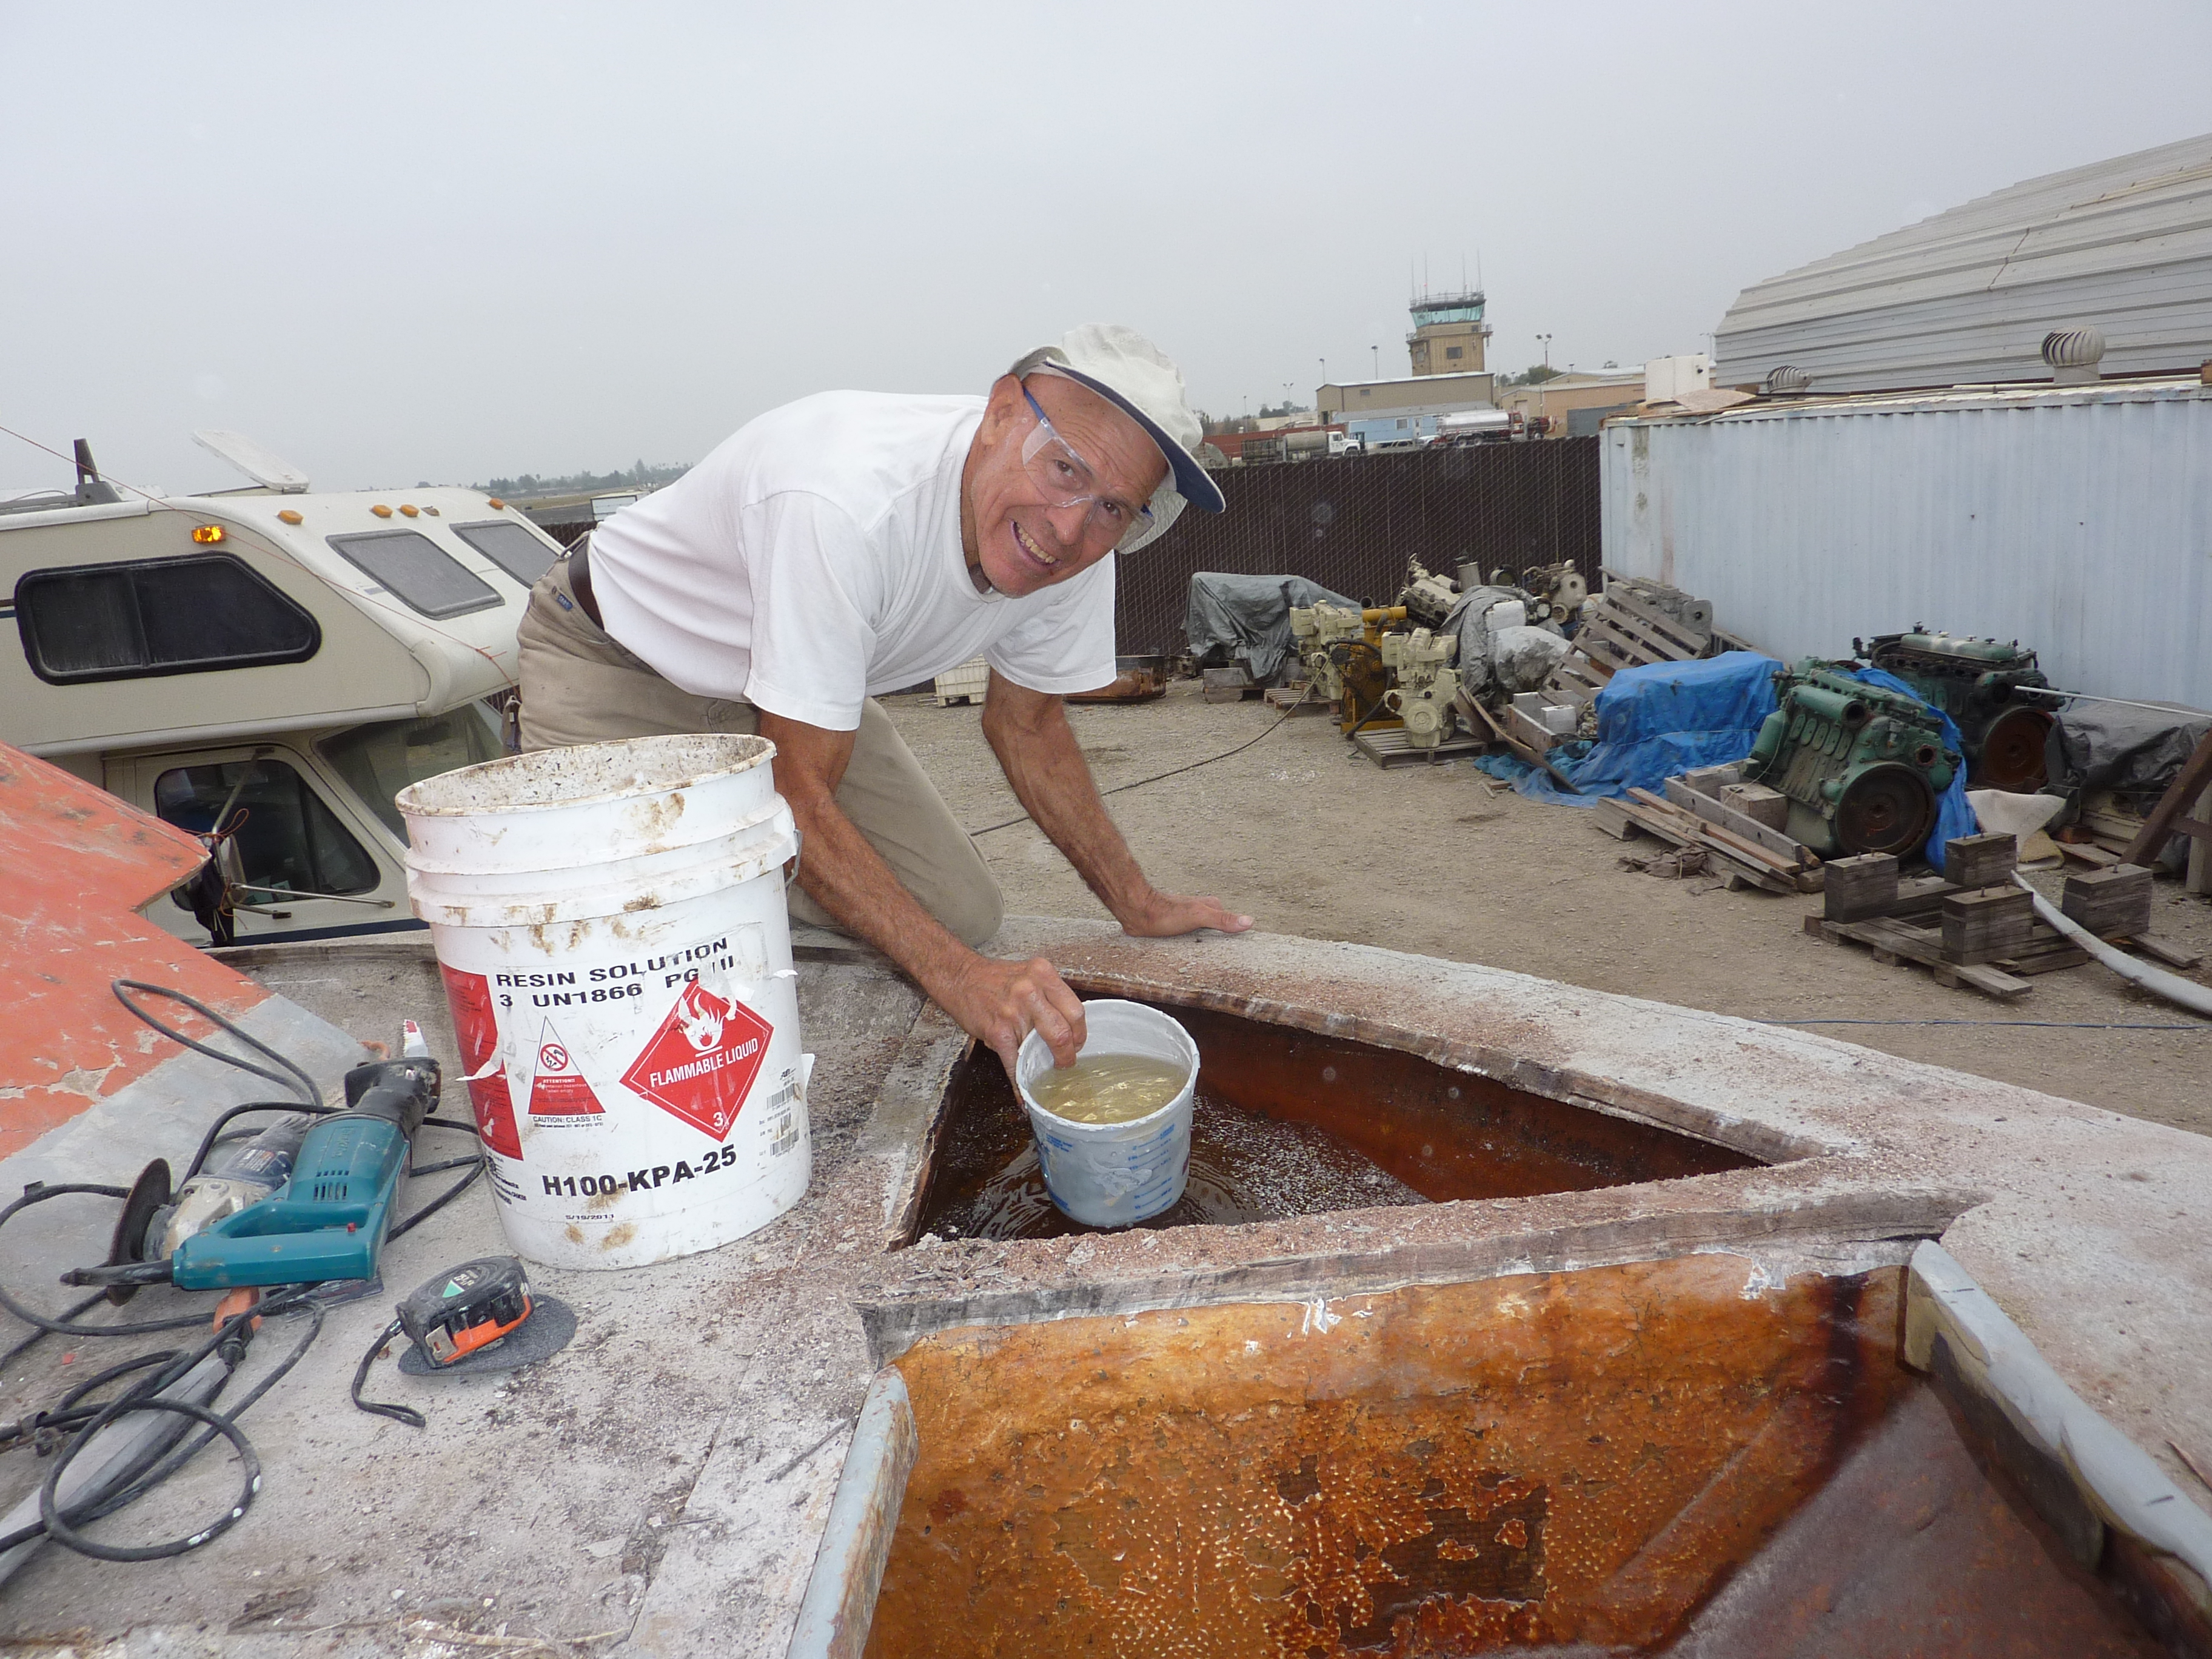
When we cut the old decks through, there was not less than 100 gallons of water in the three “water tight” compartments. Talk about FUNKY water & so much for watertight!!
Glad I didn’t have to do the bailing. Gary drew the short straw for this job!
And the fun begins – “The mechanics of movement”
For those who have never built or re-constructed a boat using fiberglass, the best part of the overall project, or when the Champagne bottle should be served, is not on launch day. It’s really when you can throw away the grinders and close up the fiberglass & resin shed, as now you can go home after a day’s work without itching all night!
My real passion for boats and what we do best is what follows…
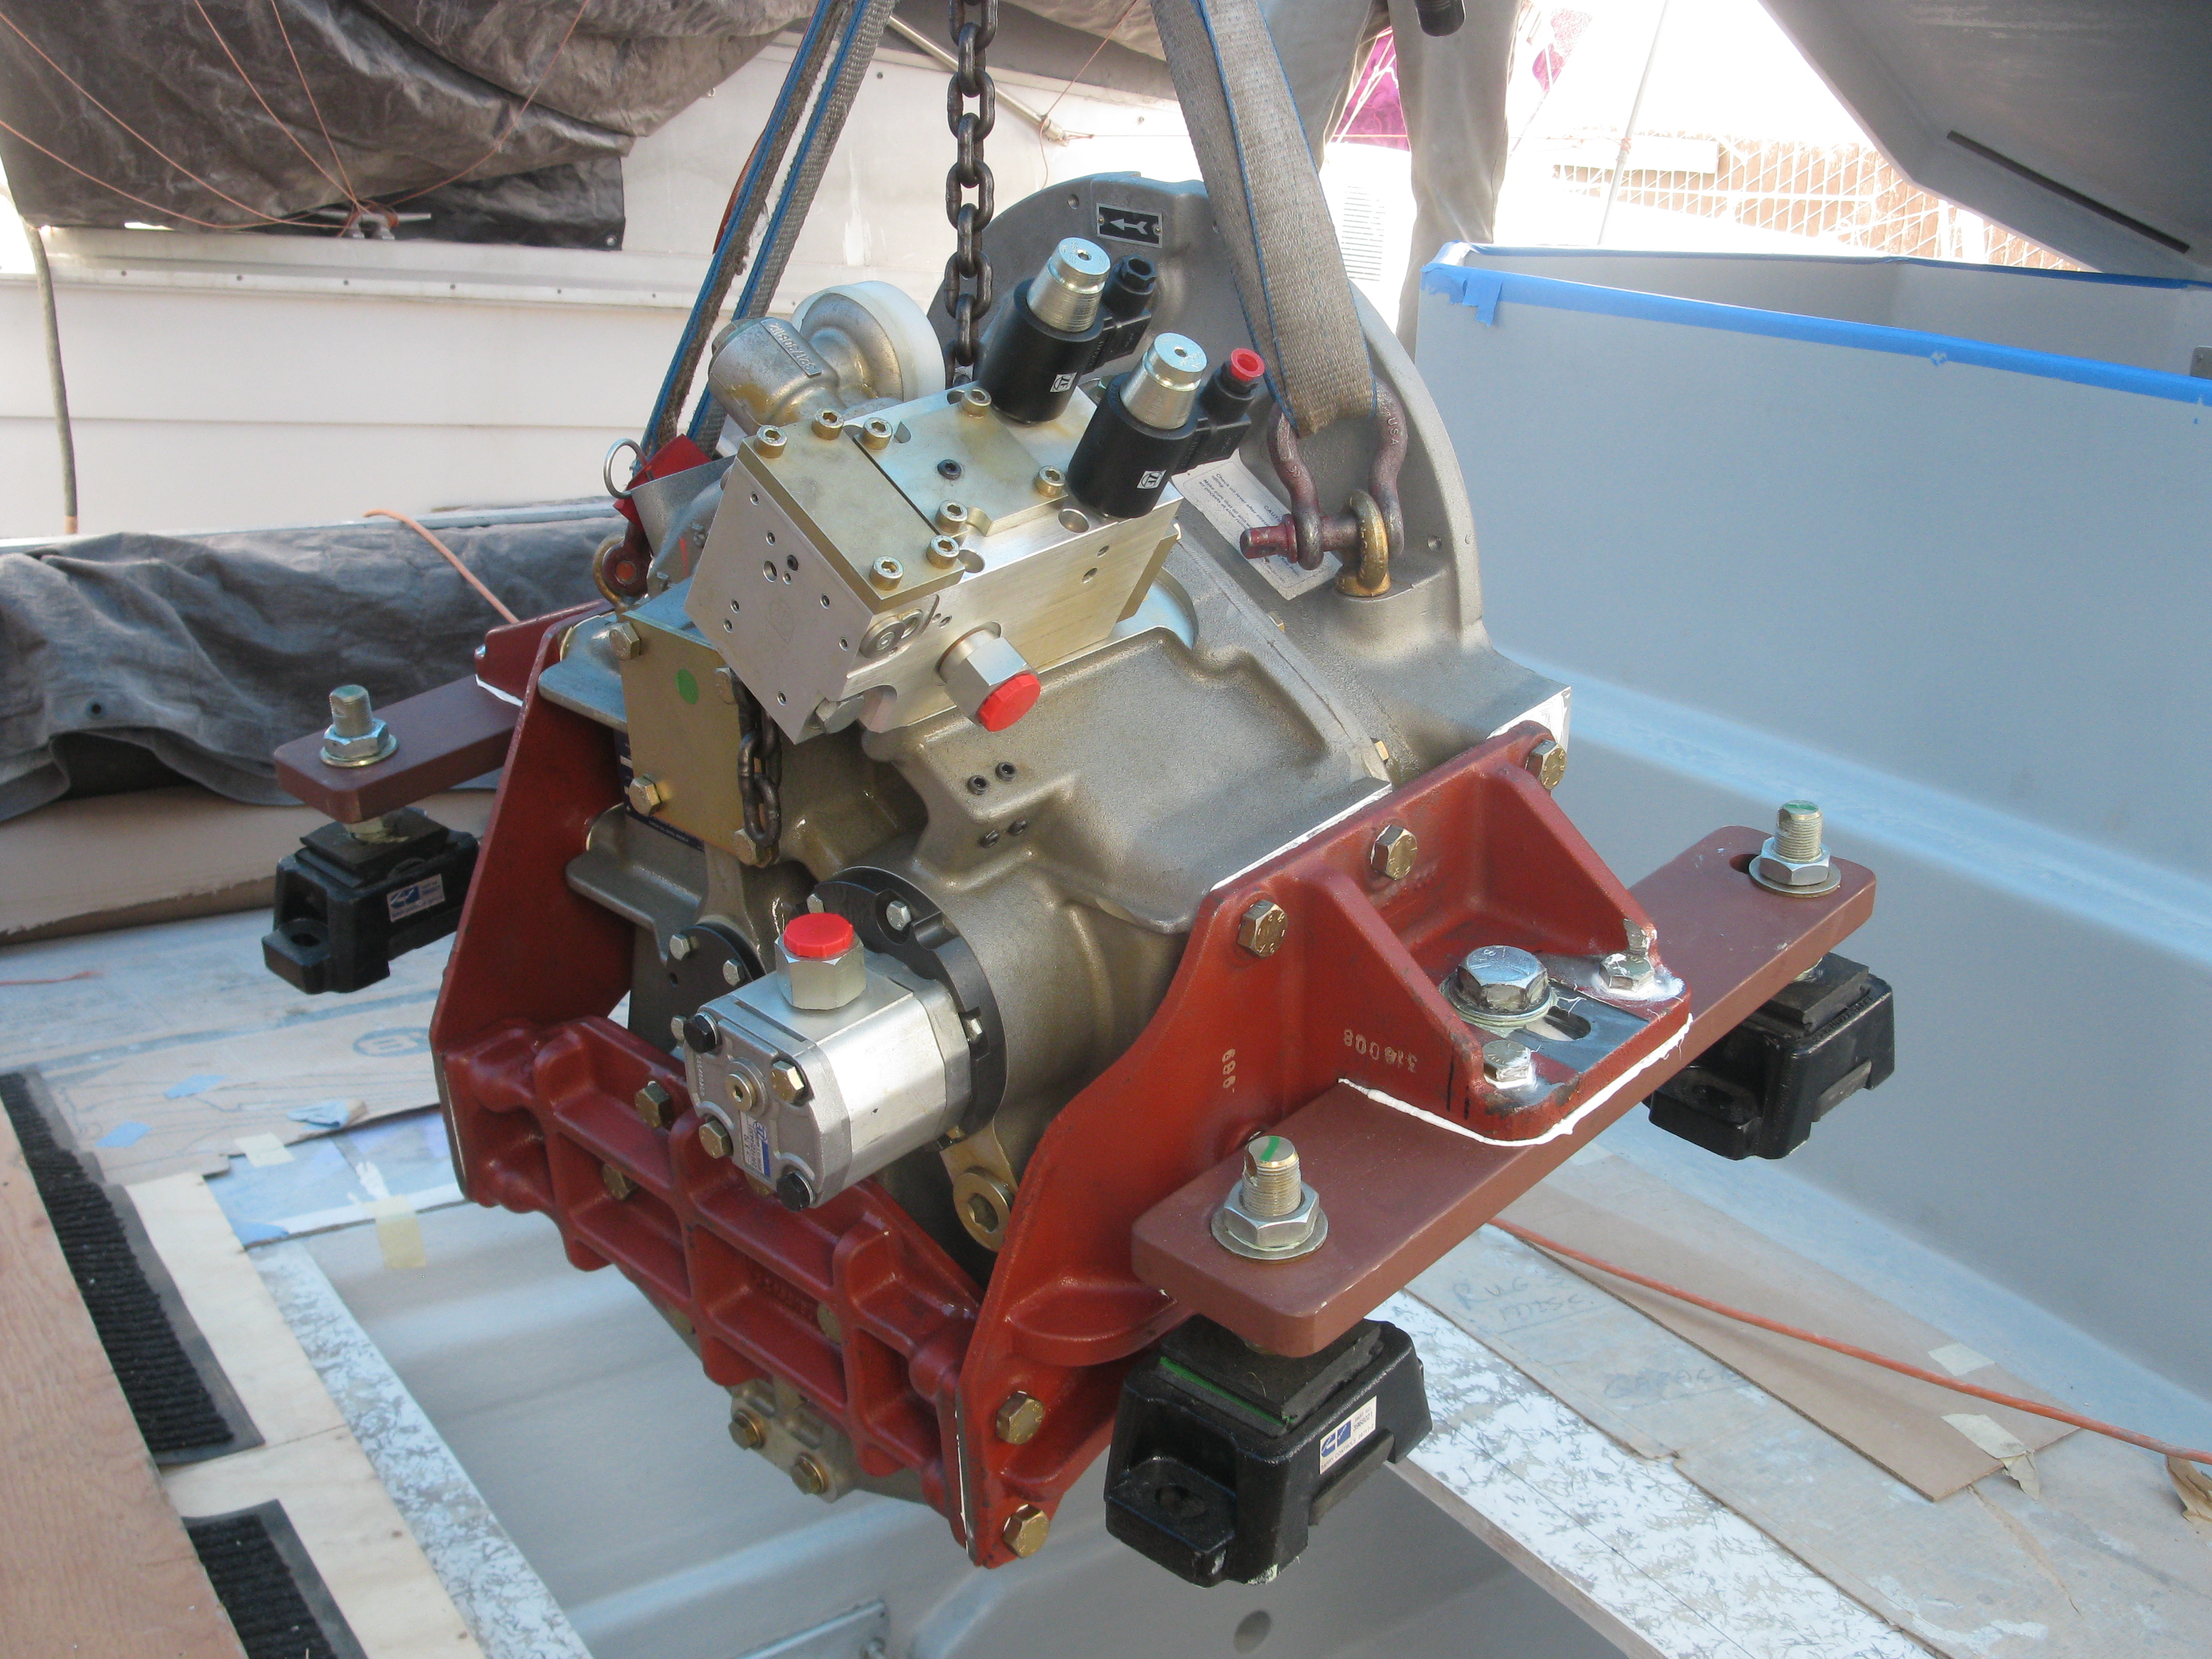
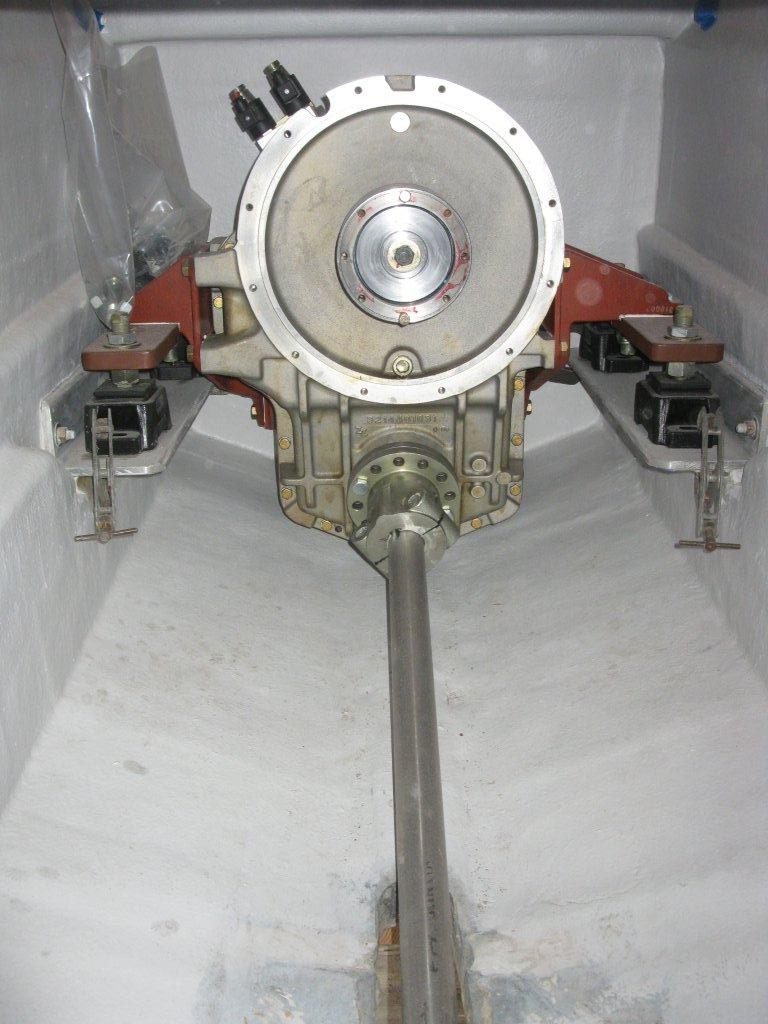
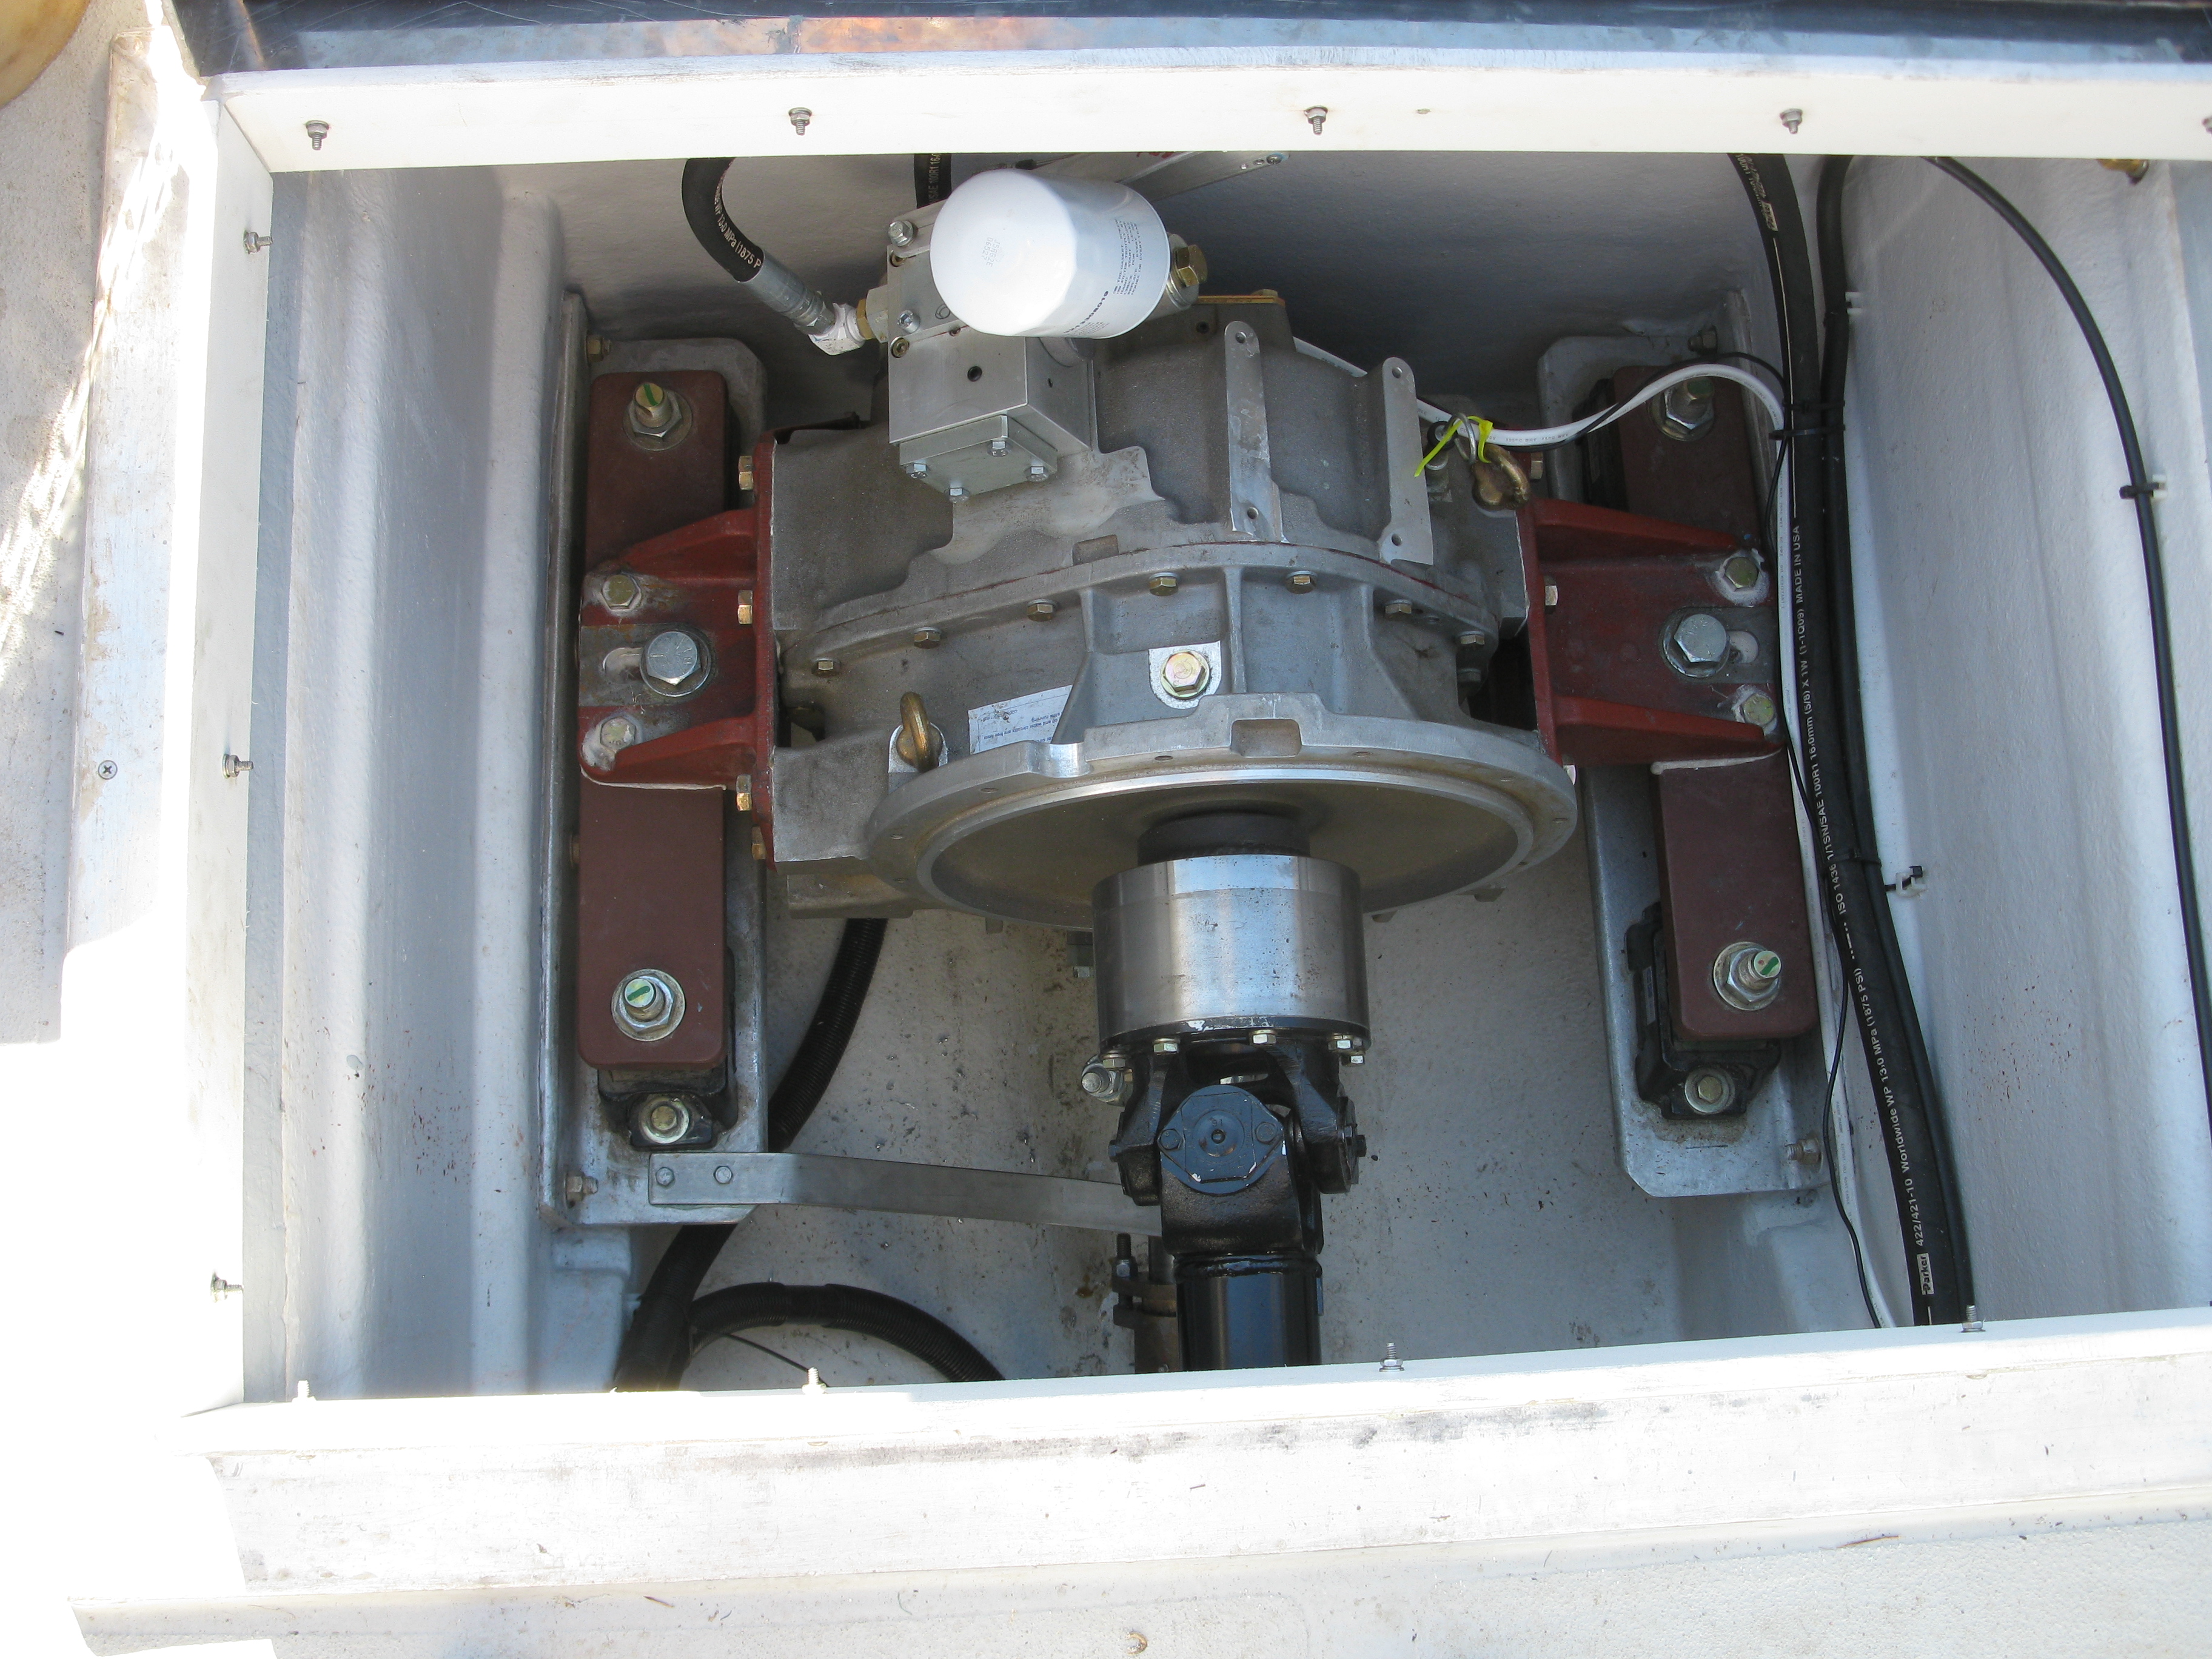
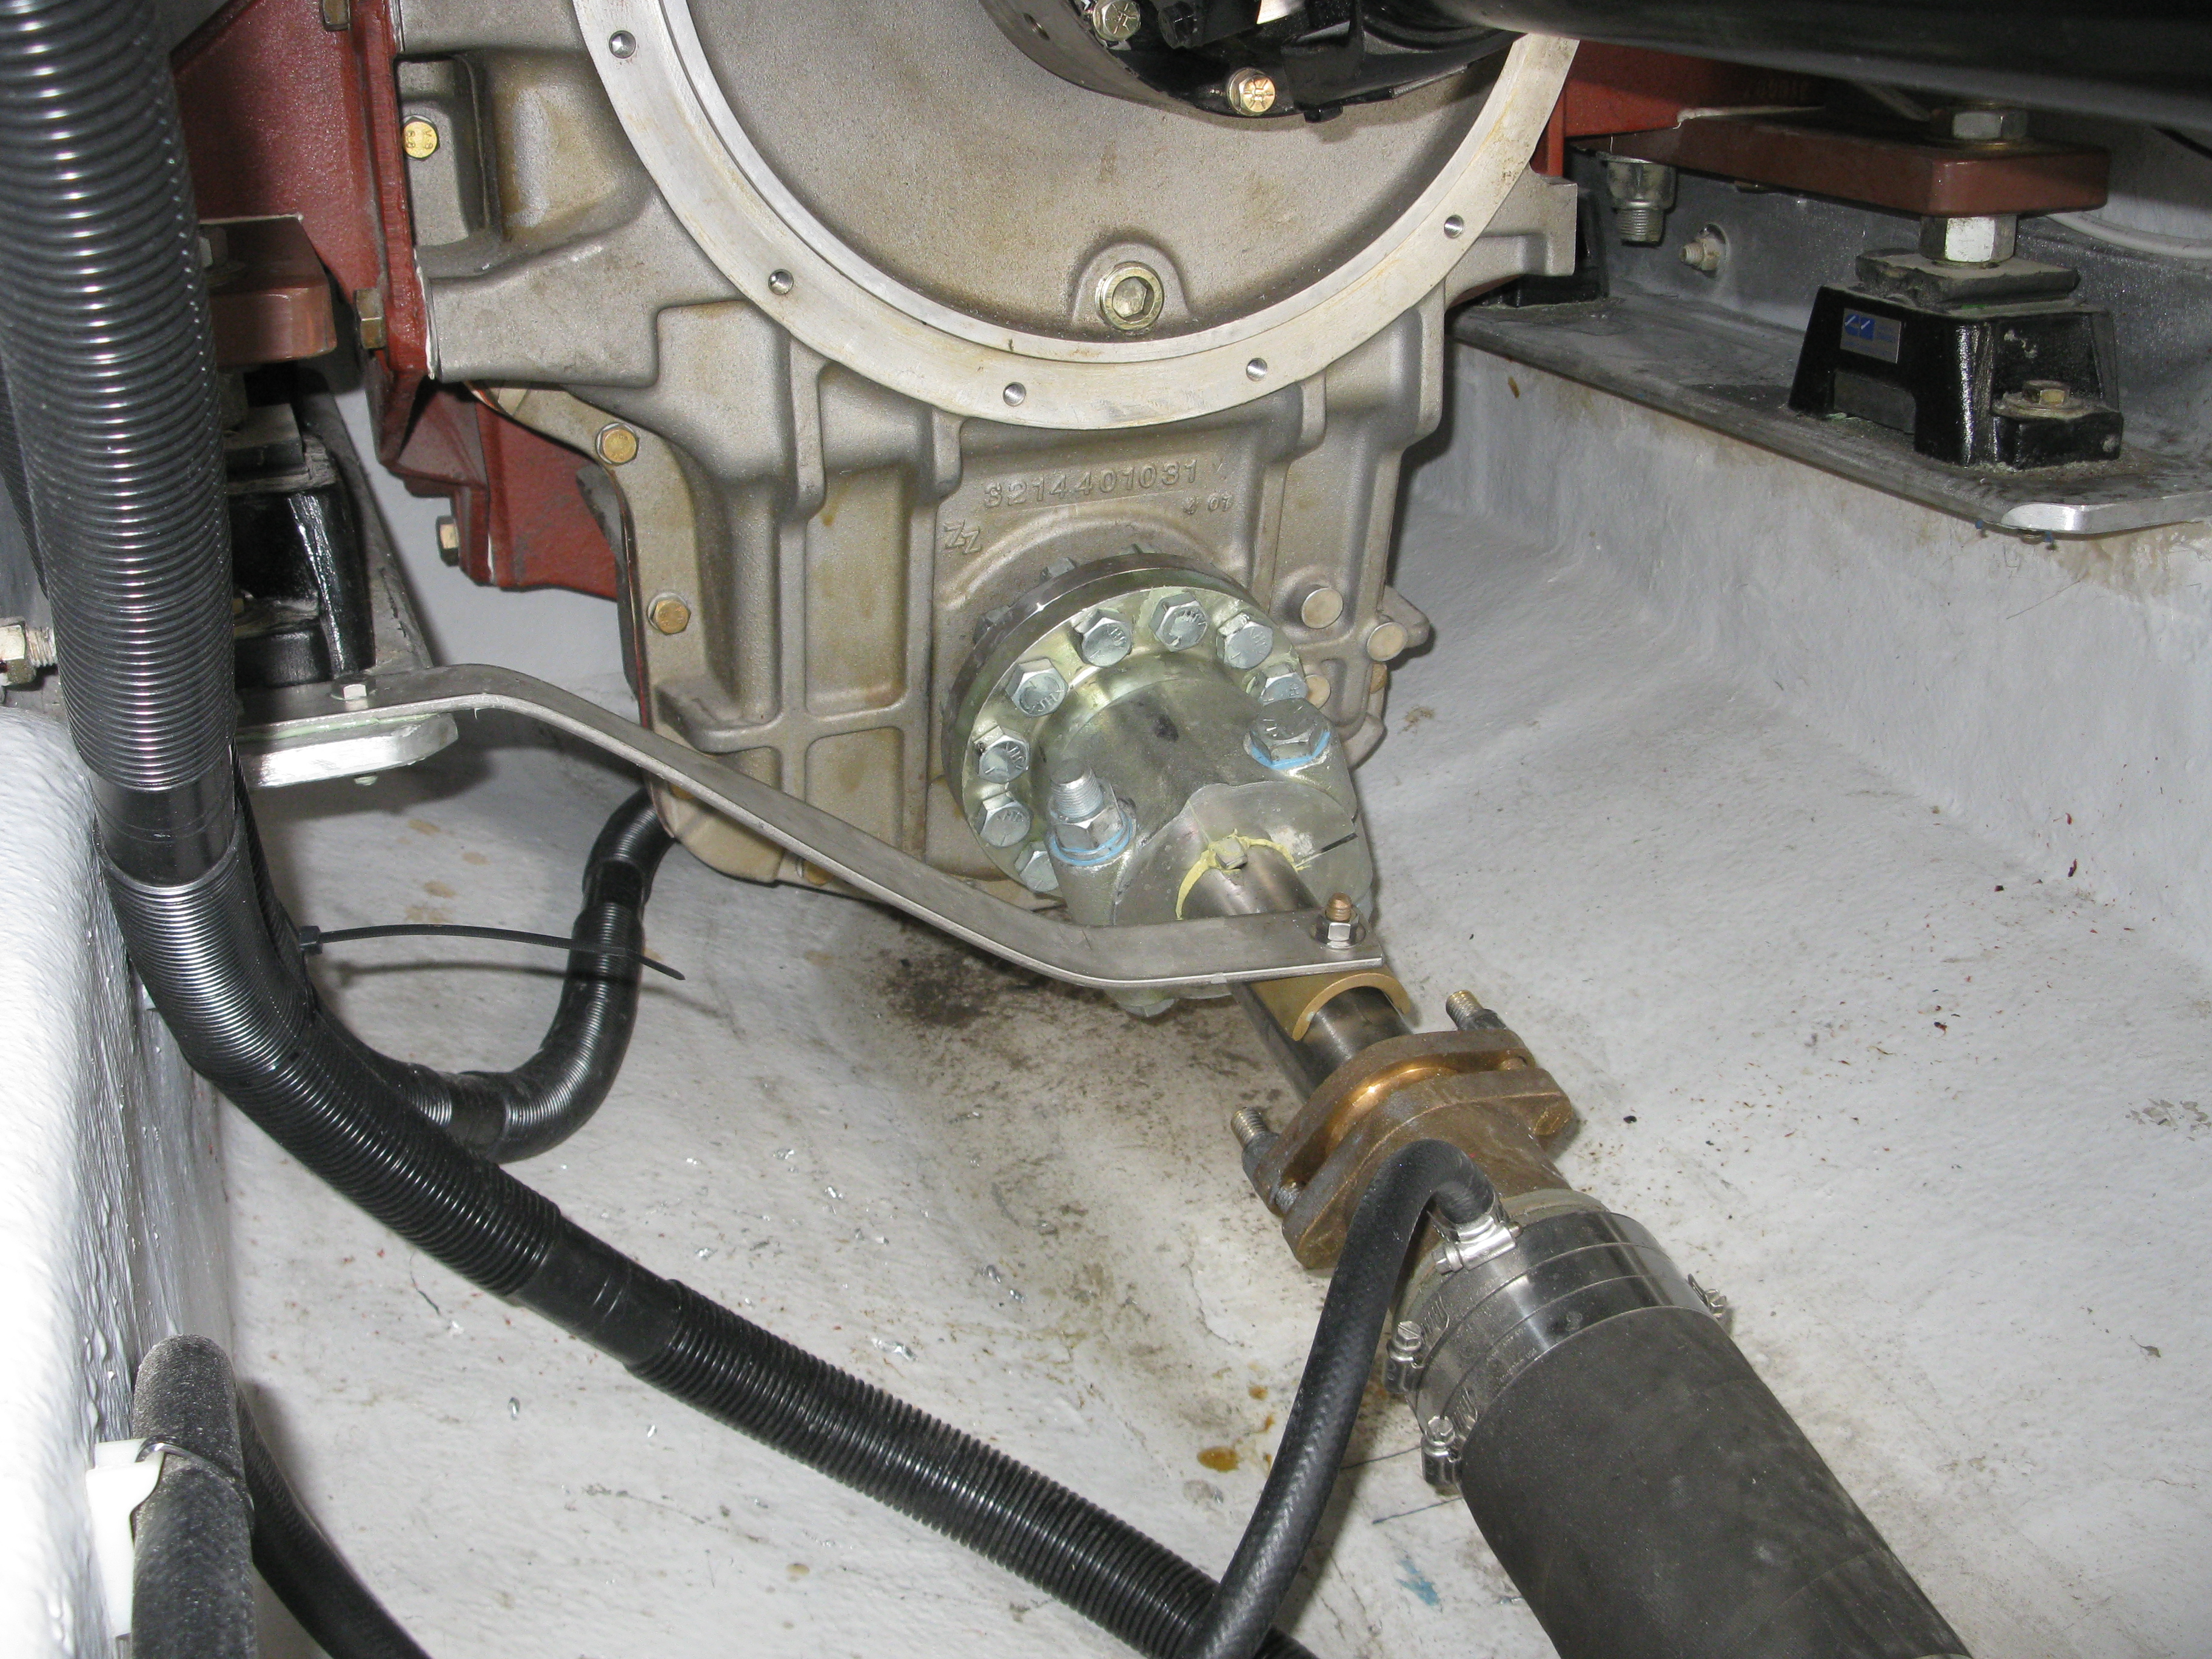
A remote mounted ZF325IV was what we choose for this project. Rated to over 600HP and could easily be coupled to a QSM 11, going “overkill” in an application like this always pays long term dividends. Also, re-engineering and v-drive specifically design to be “close-coupled” always presents a challenge to me but it’s something that keeps my 65 year old mind functioning.
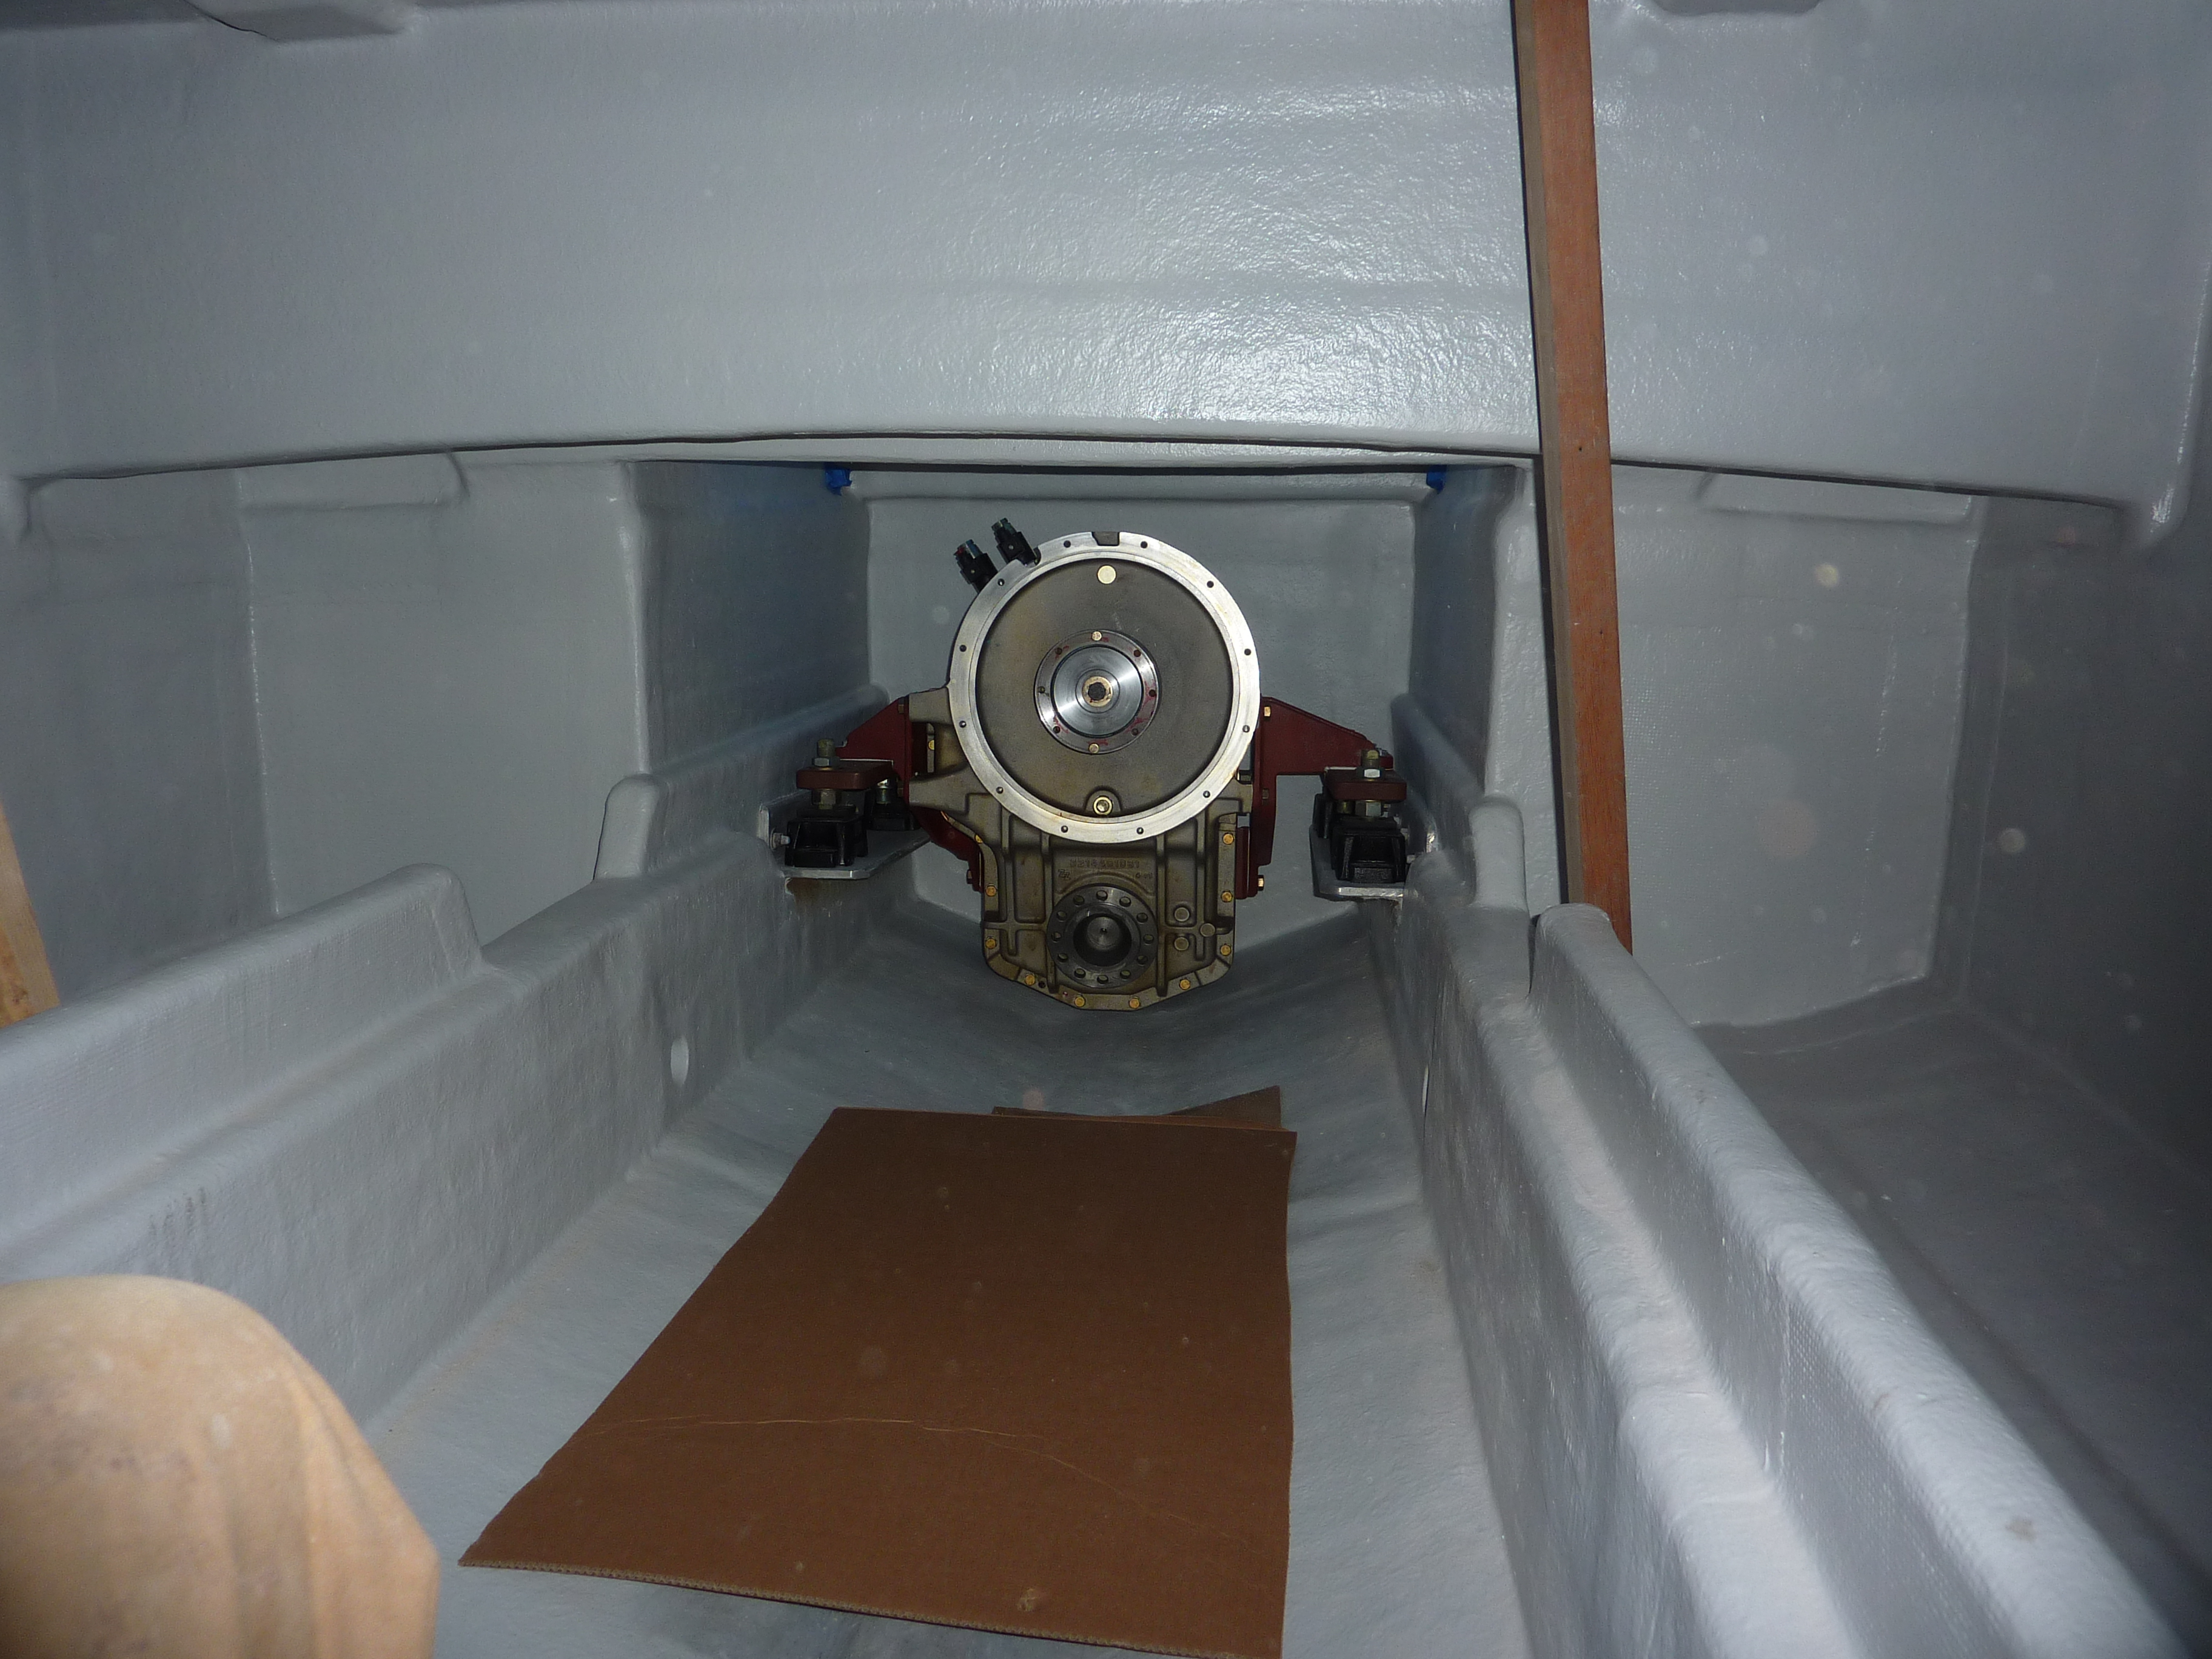
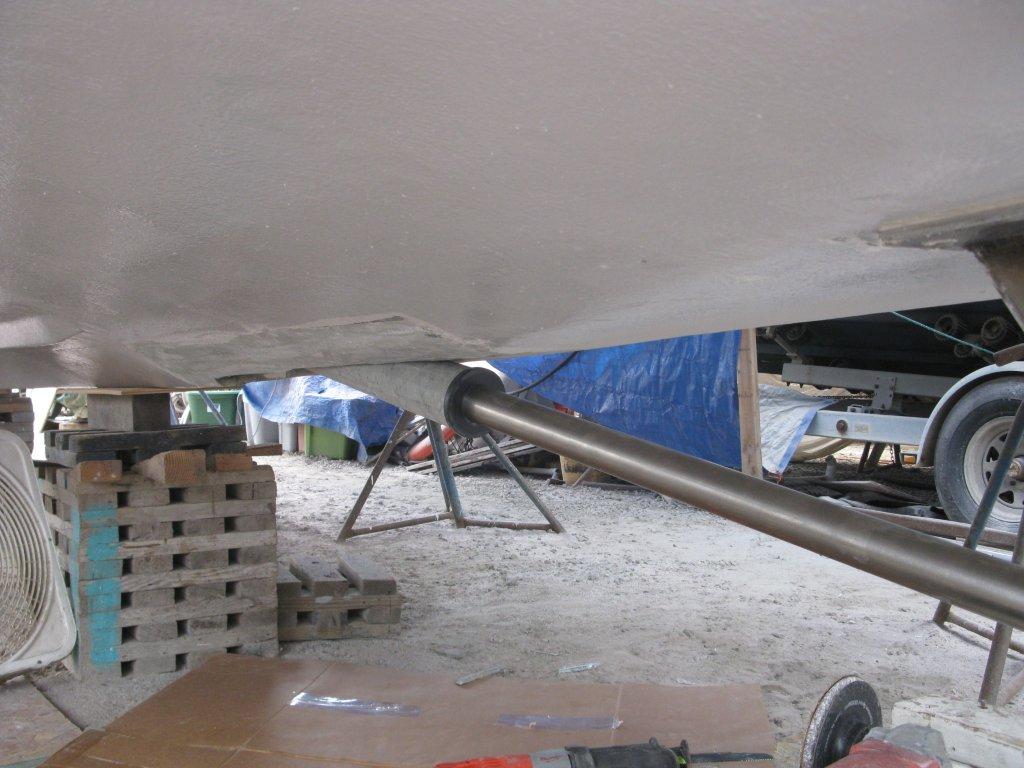
The ZF 325IV sitting on it mounts under the deck approx 12 ft forward of the transom.When doing an install like this, I always tell people you start at both ends ( this is the farthest point forward of the drive train) and then, fill in the center. That “all to important” hole in the bottom of the boat. It takes a lot of planning when you start with nothing to figure this one out.
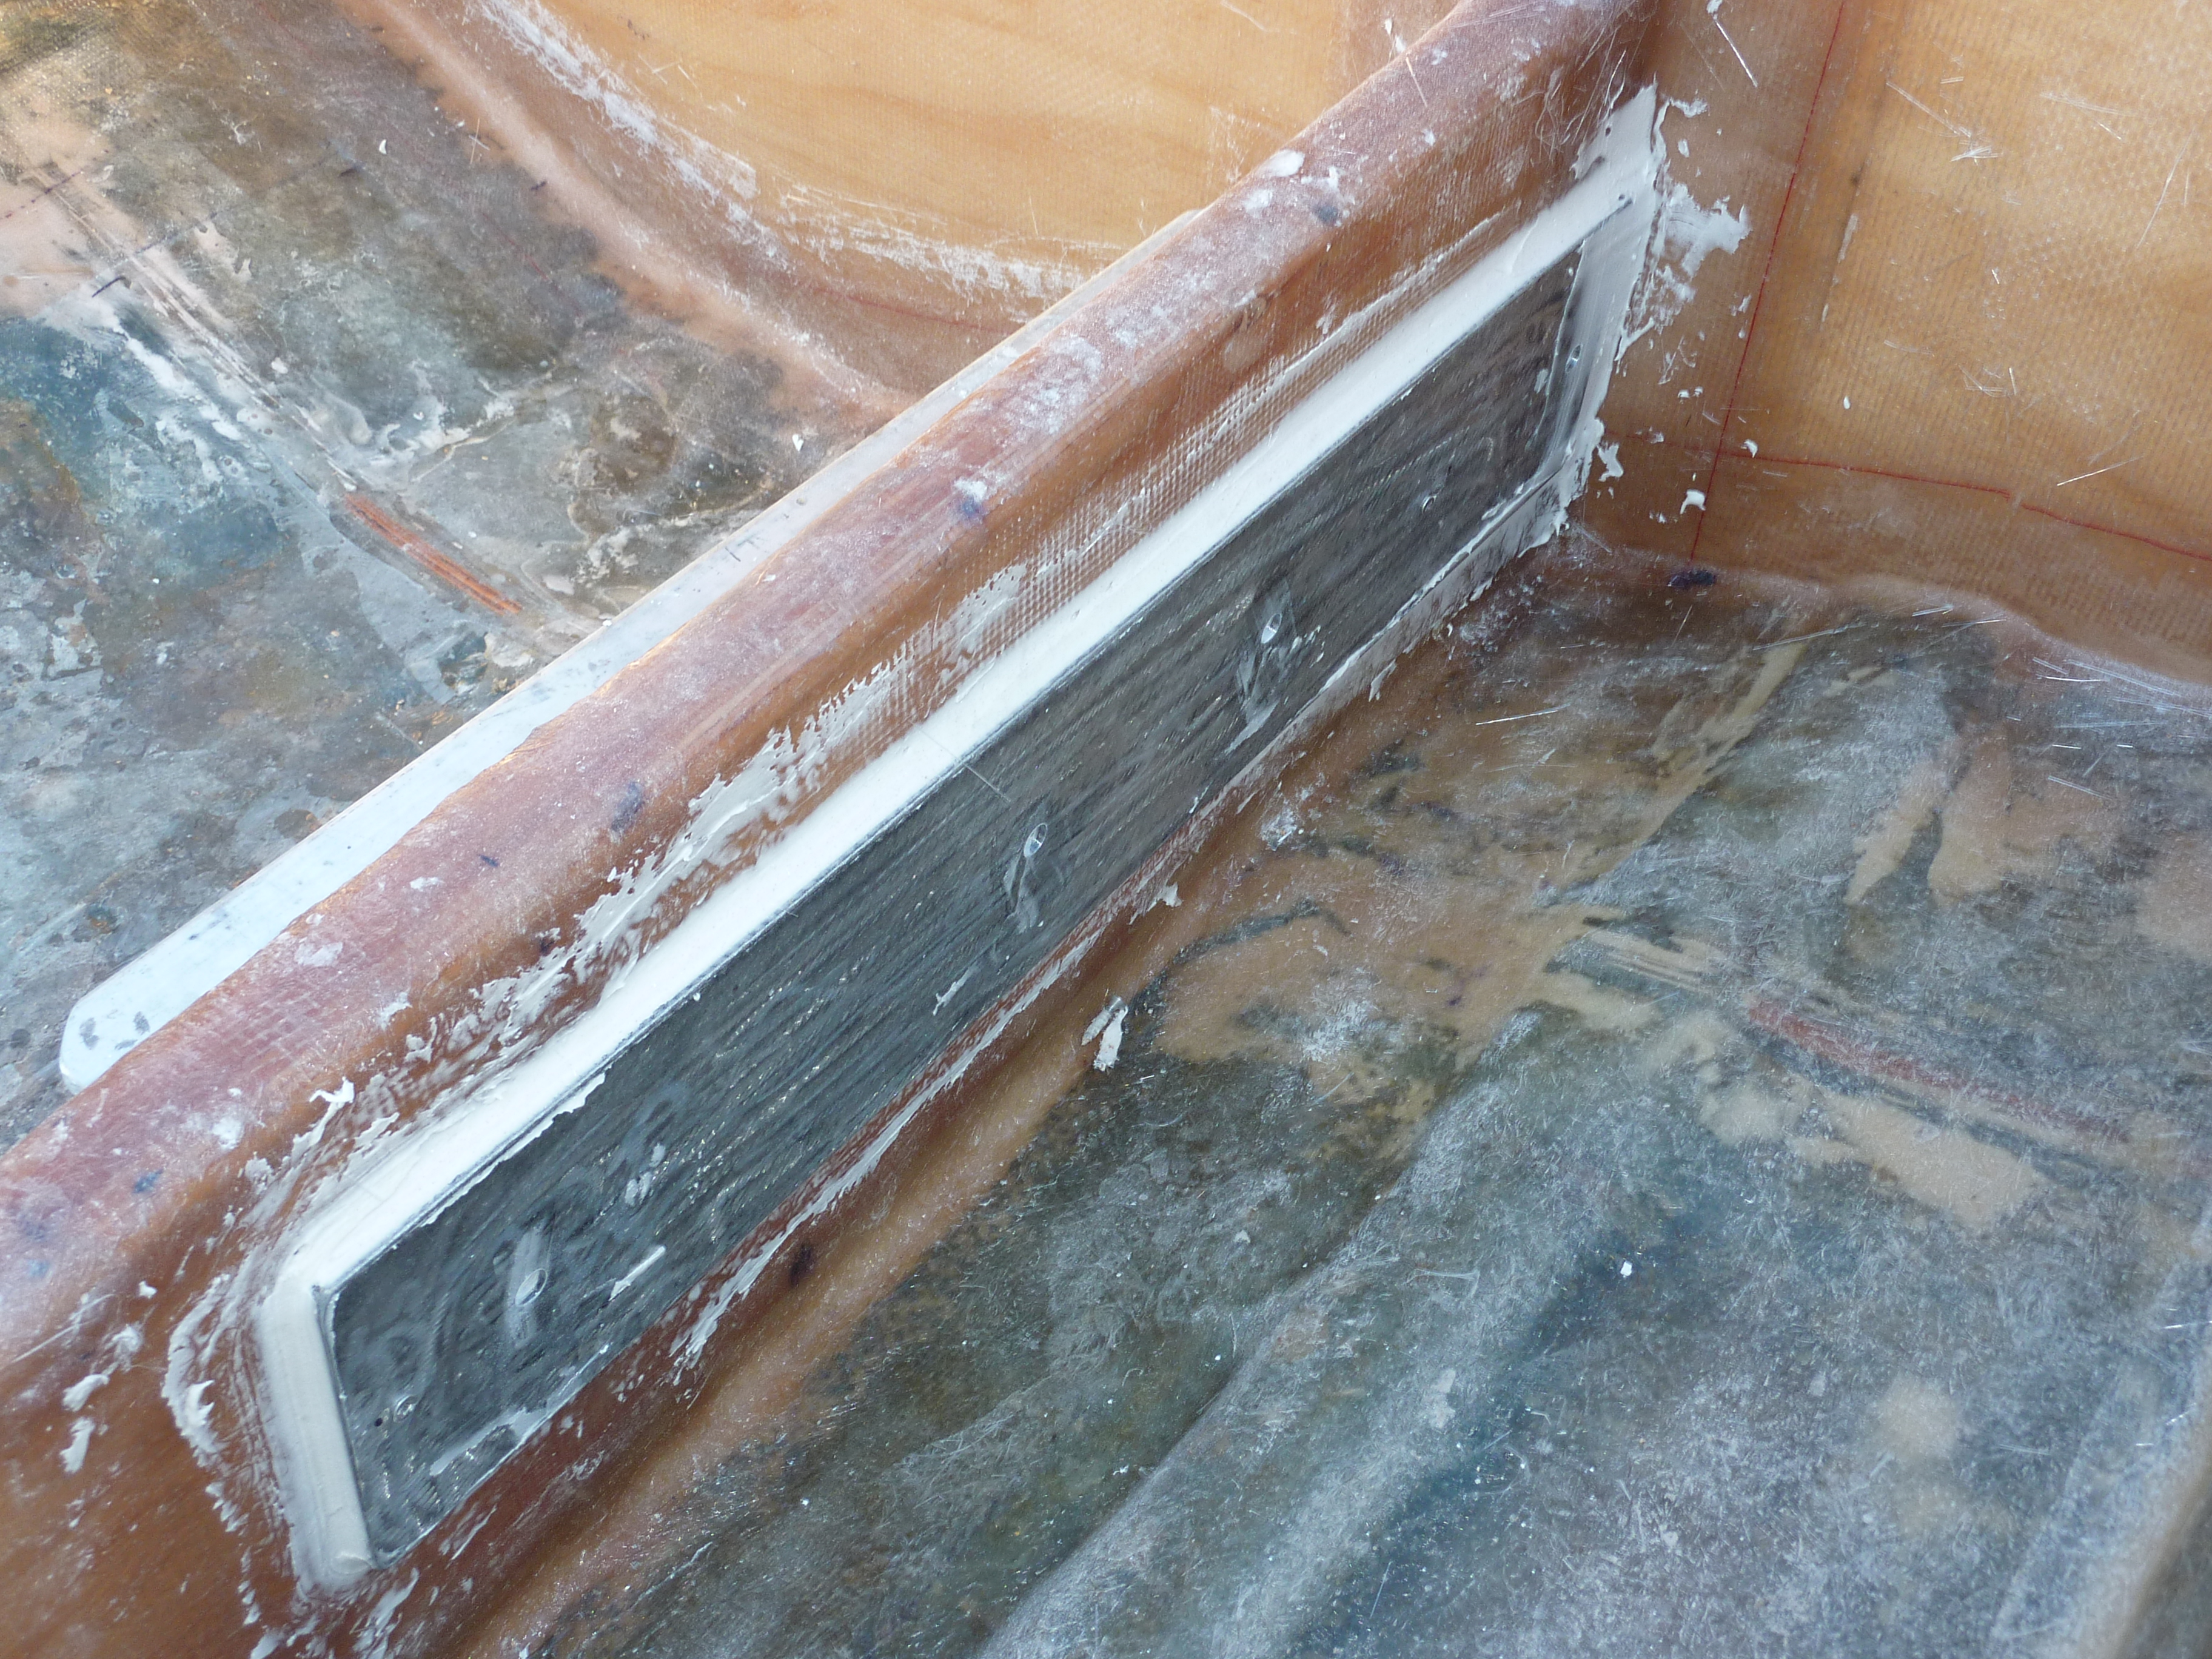
The intergral fiberglass shaft log that will also act as an intermediate strut and is held in place with accurately machined bushings during the glassing process. Using “feeler gauge alignment”, the FRP heavy-walled log tube is glassed in place.
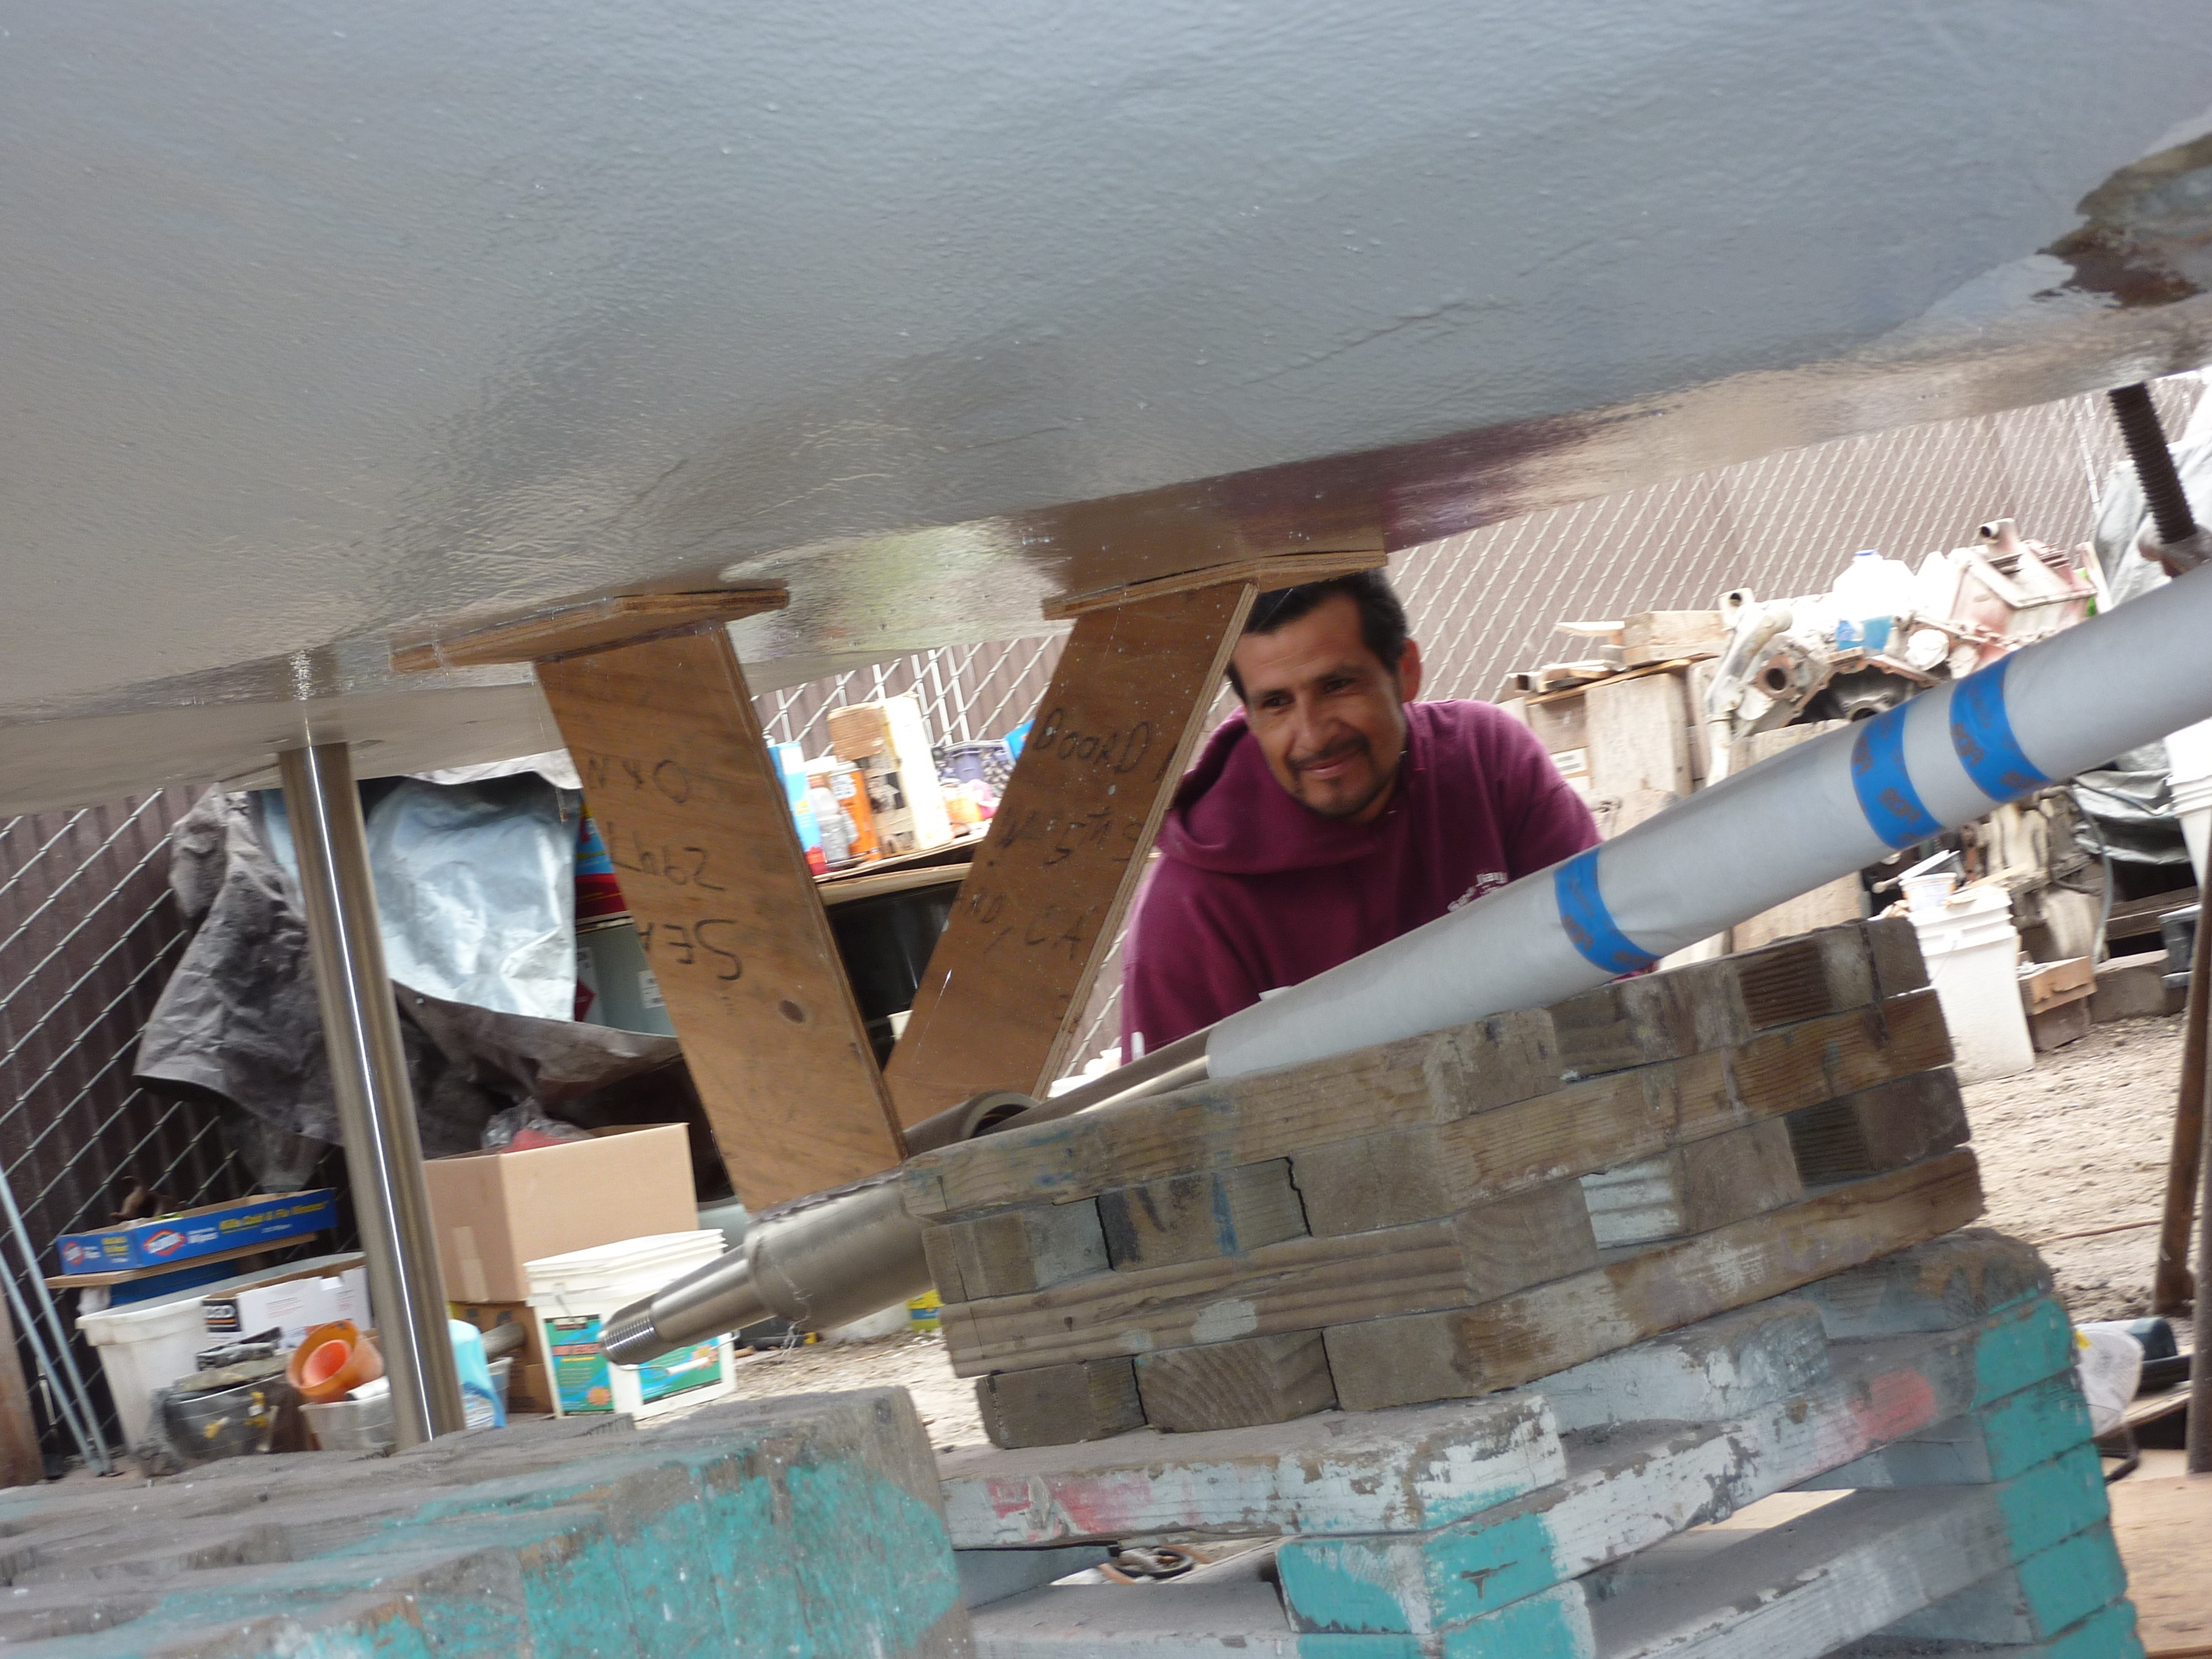
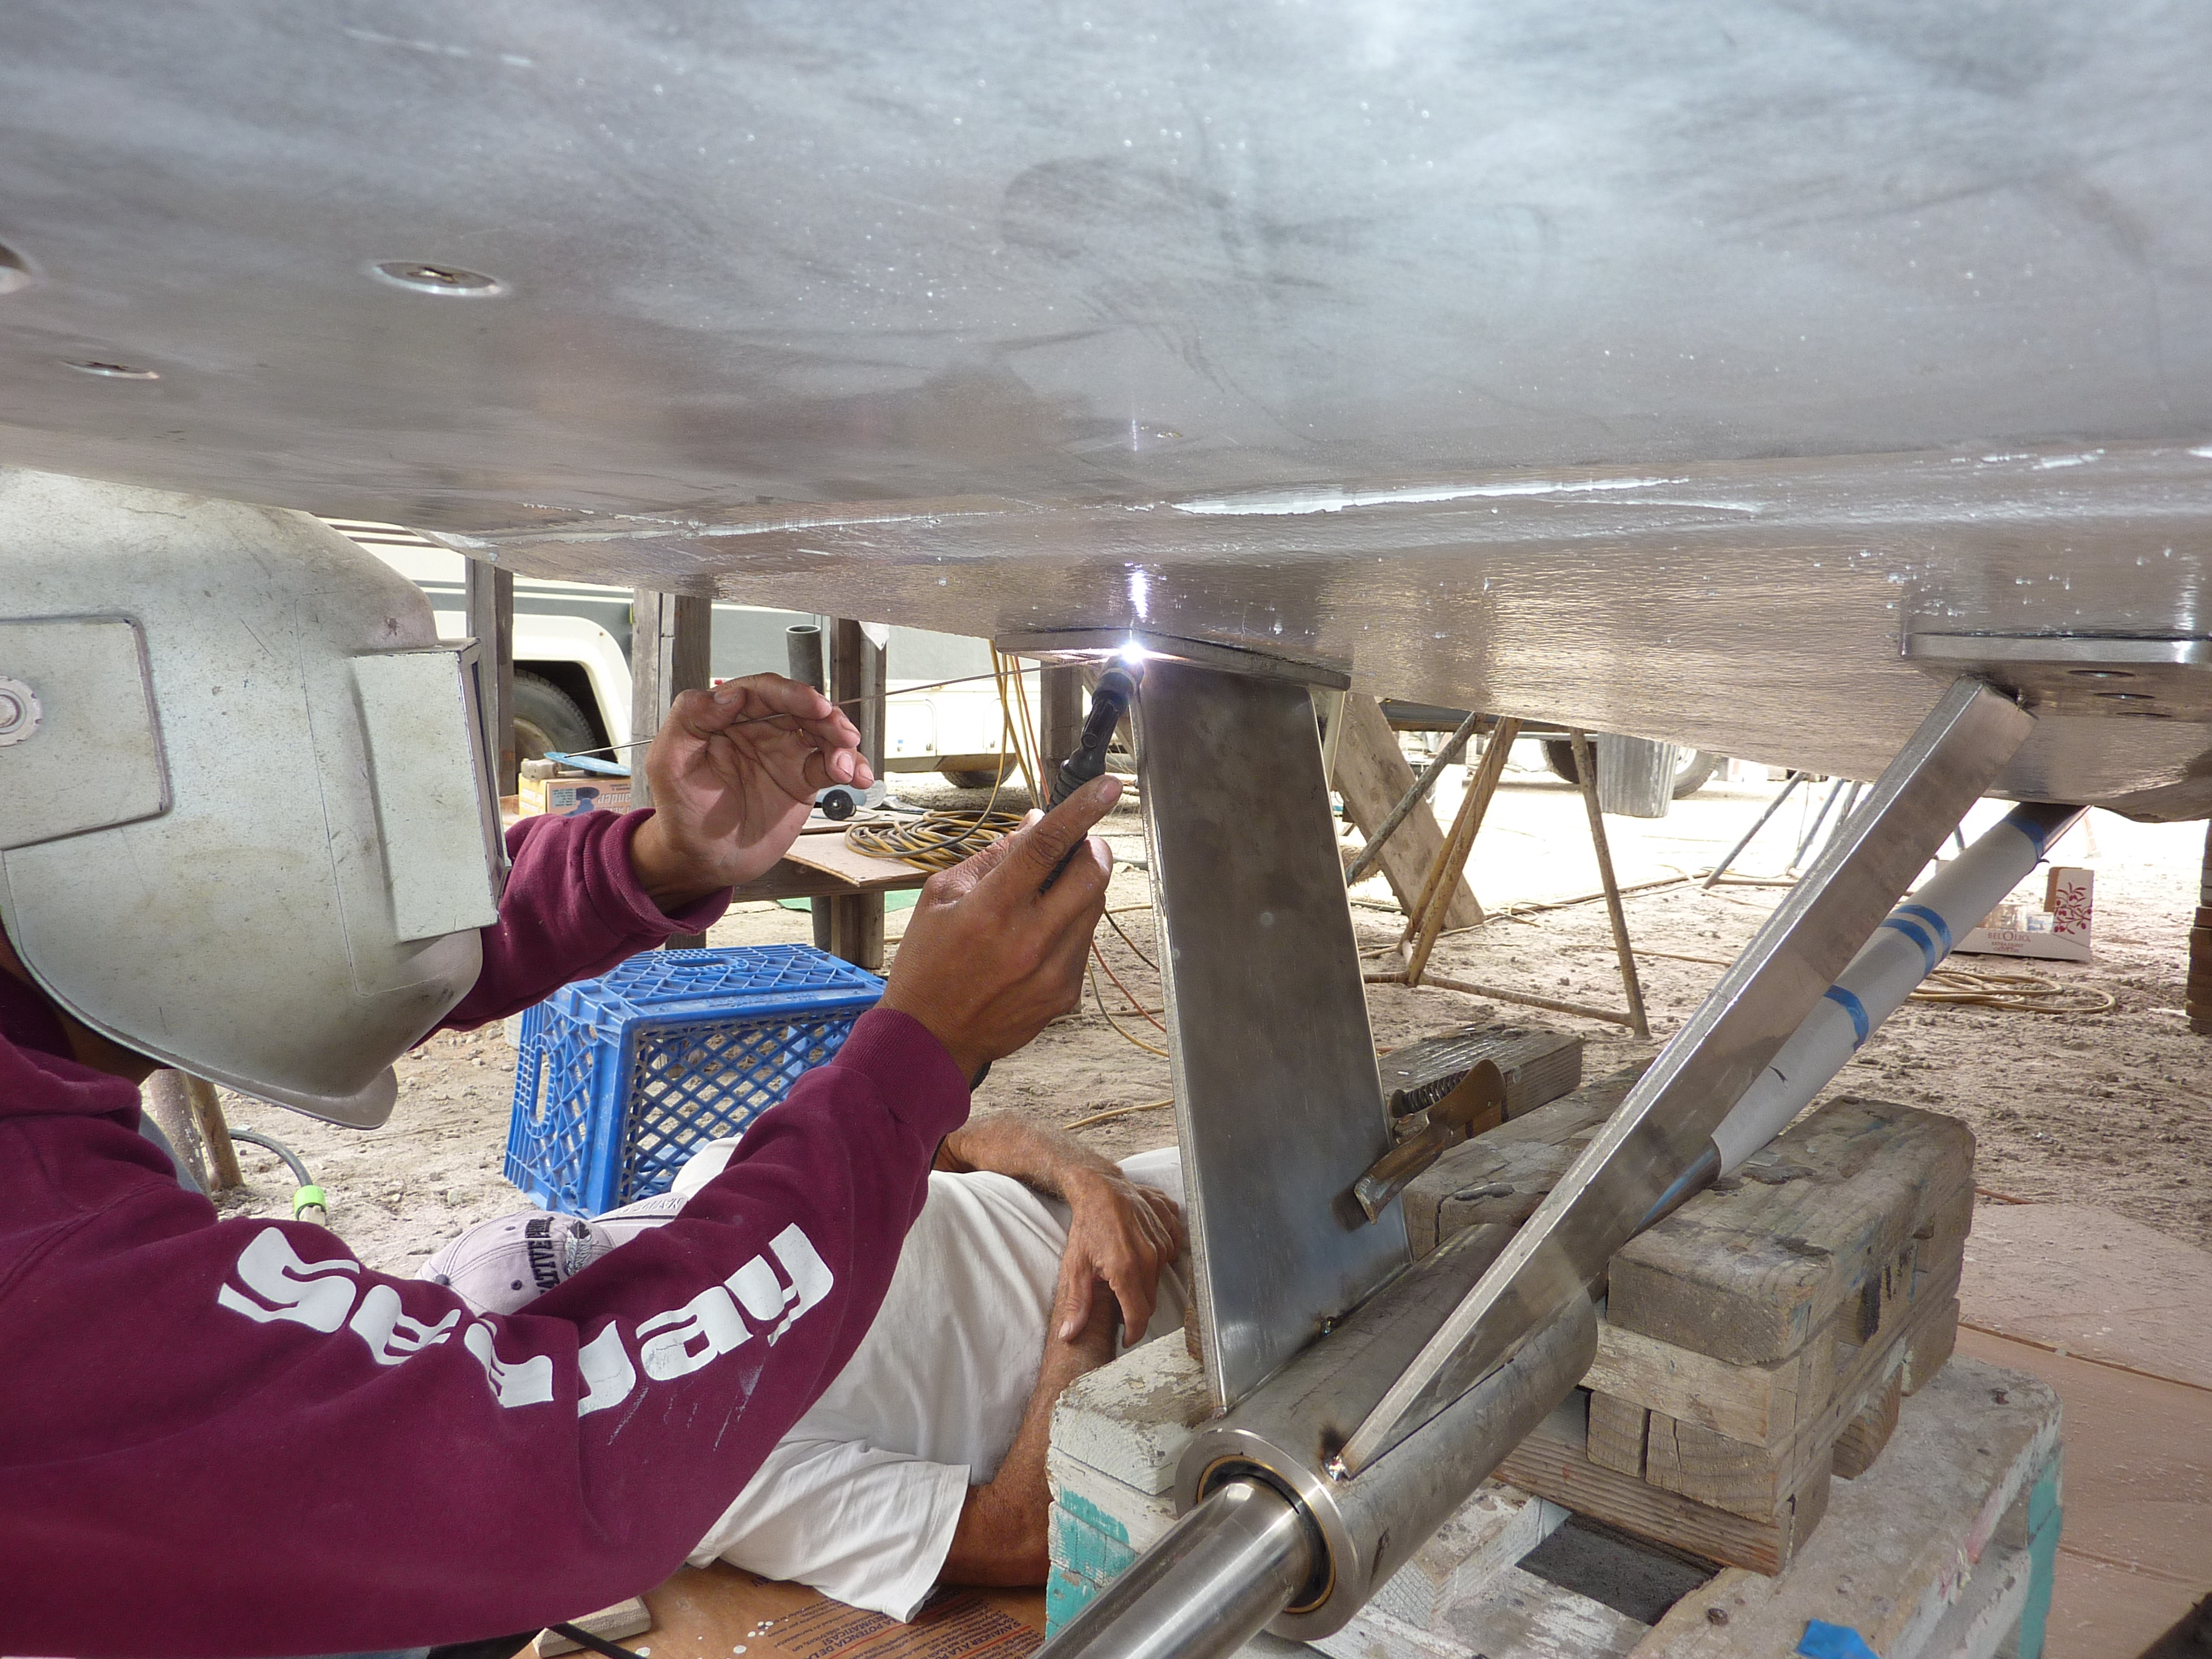
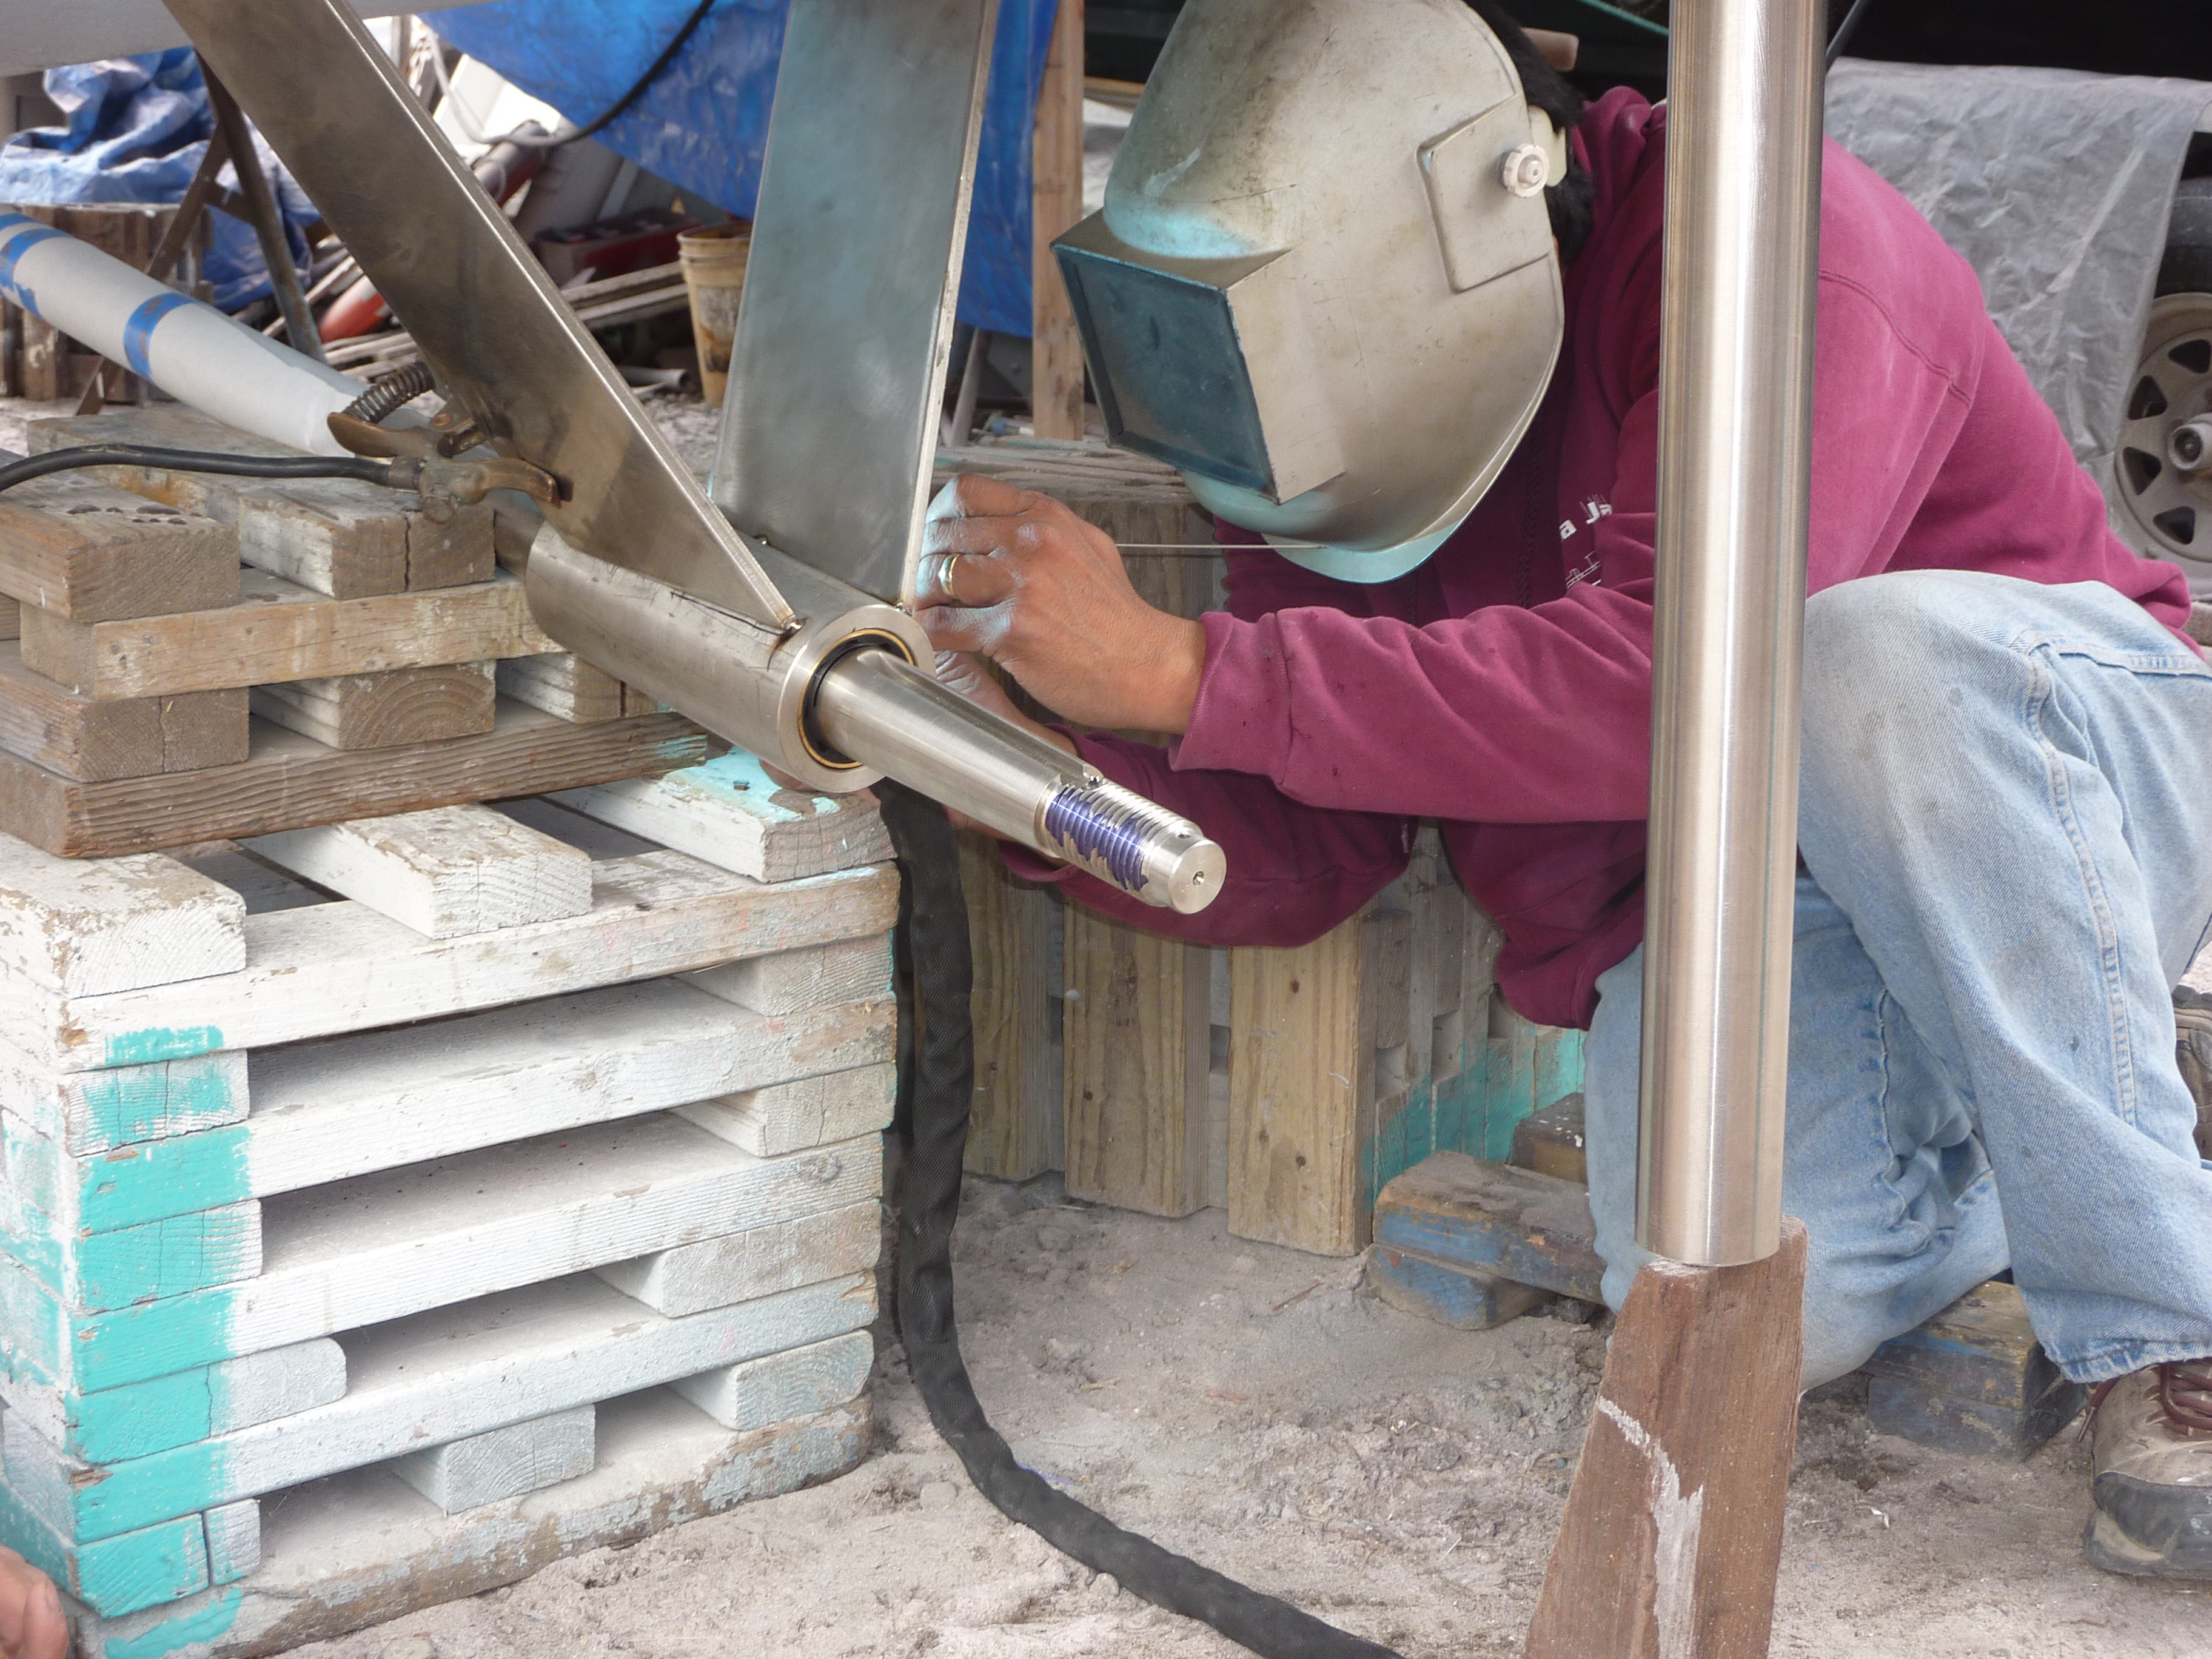
The best boat guy around “Frank Rivera” is carefully looking as his setup before making the strut plates out of 3/8” & 1/2” Stainless Steel.
This is where experience really pays dividends. Frank is at his absolute best here using all he’s learned in the 25+ years we have worked together doing this type of work.If you haven’t figured it out yet, the “OTHER END” is the rudder shaft shown here. Strut is mocked up with templates from wood, the SS pieces are then cut and pre-finished & tacked in place.
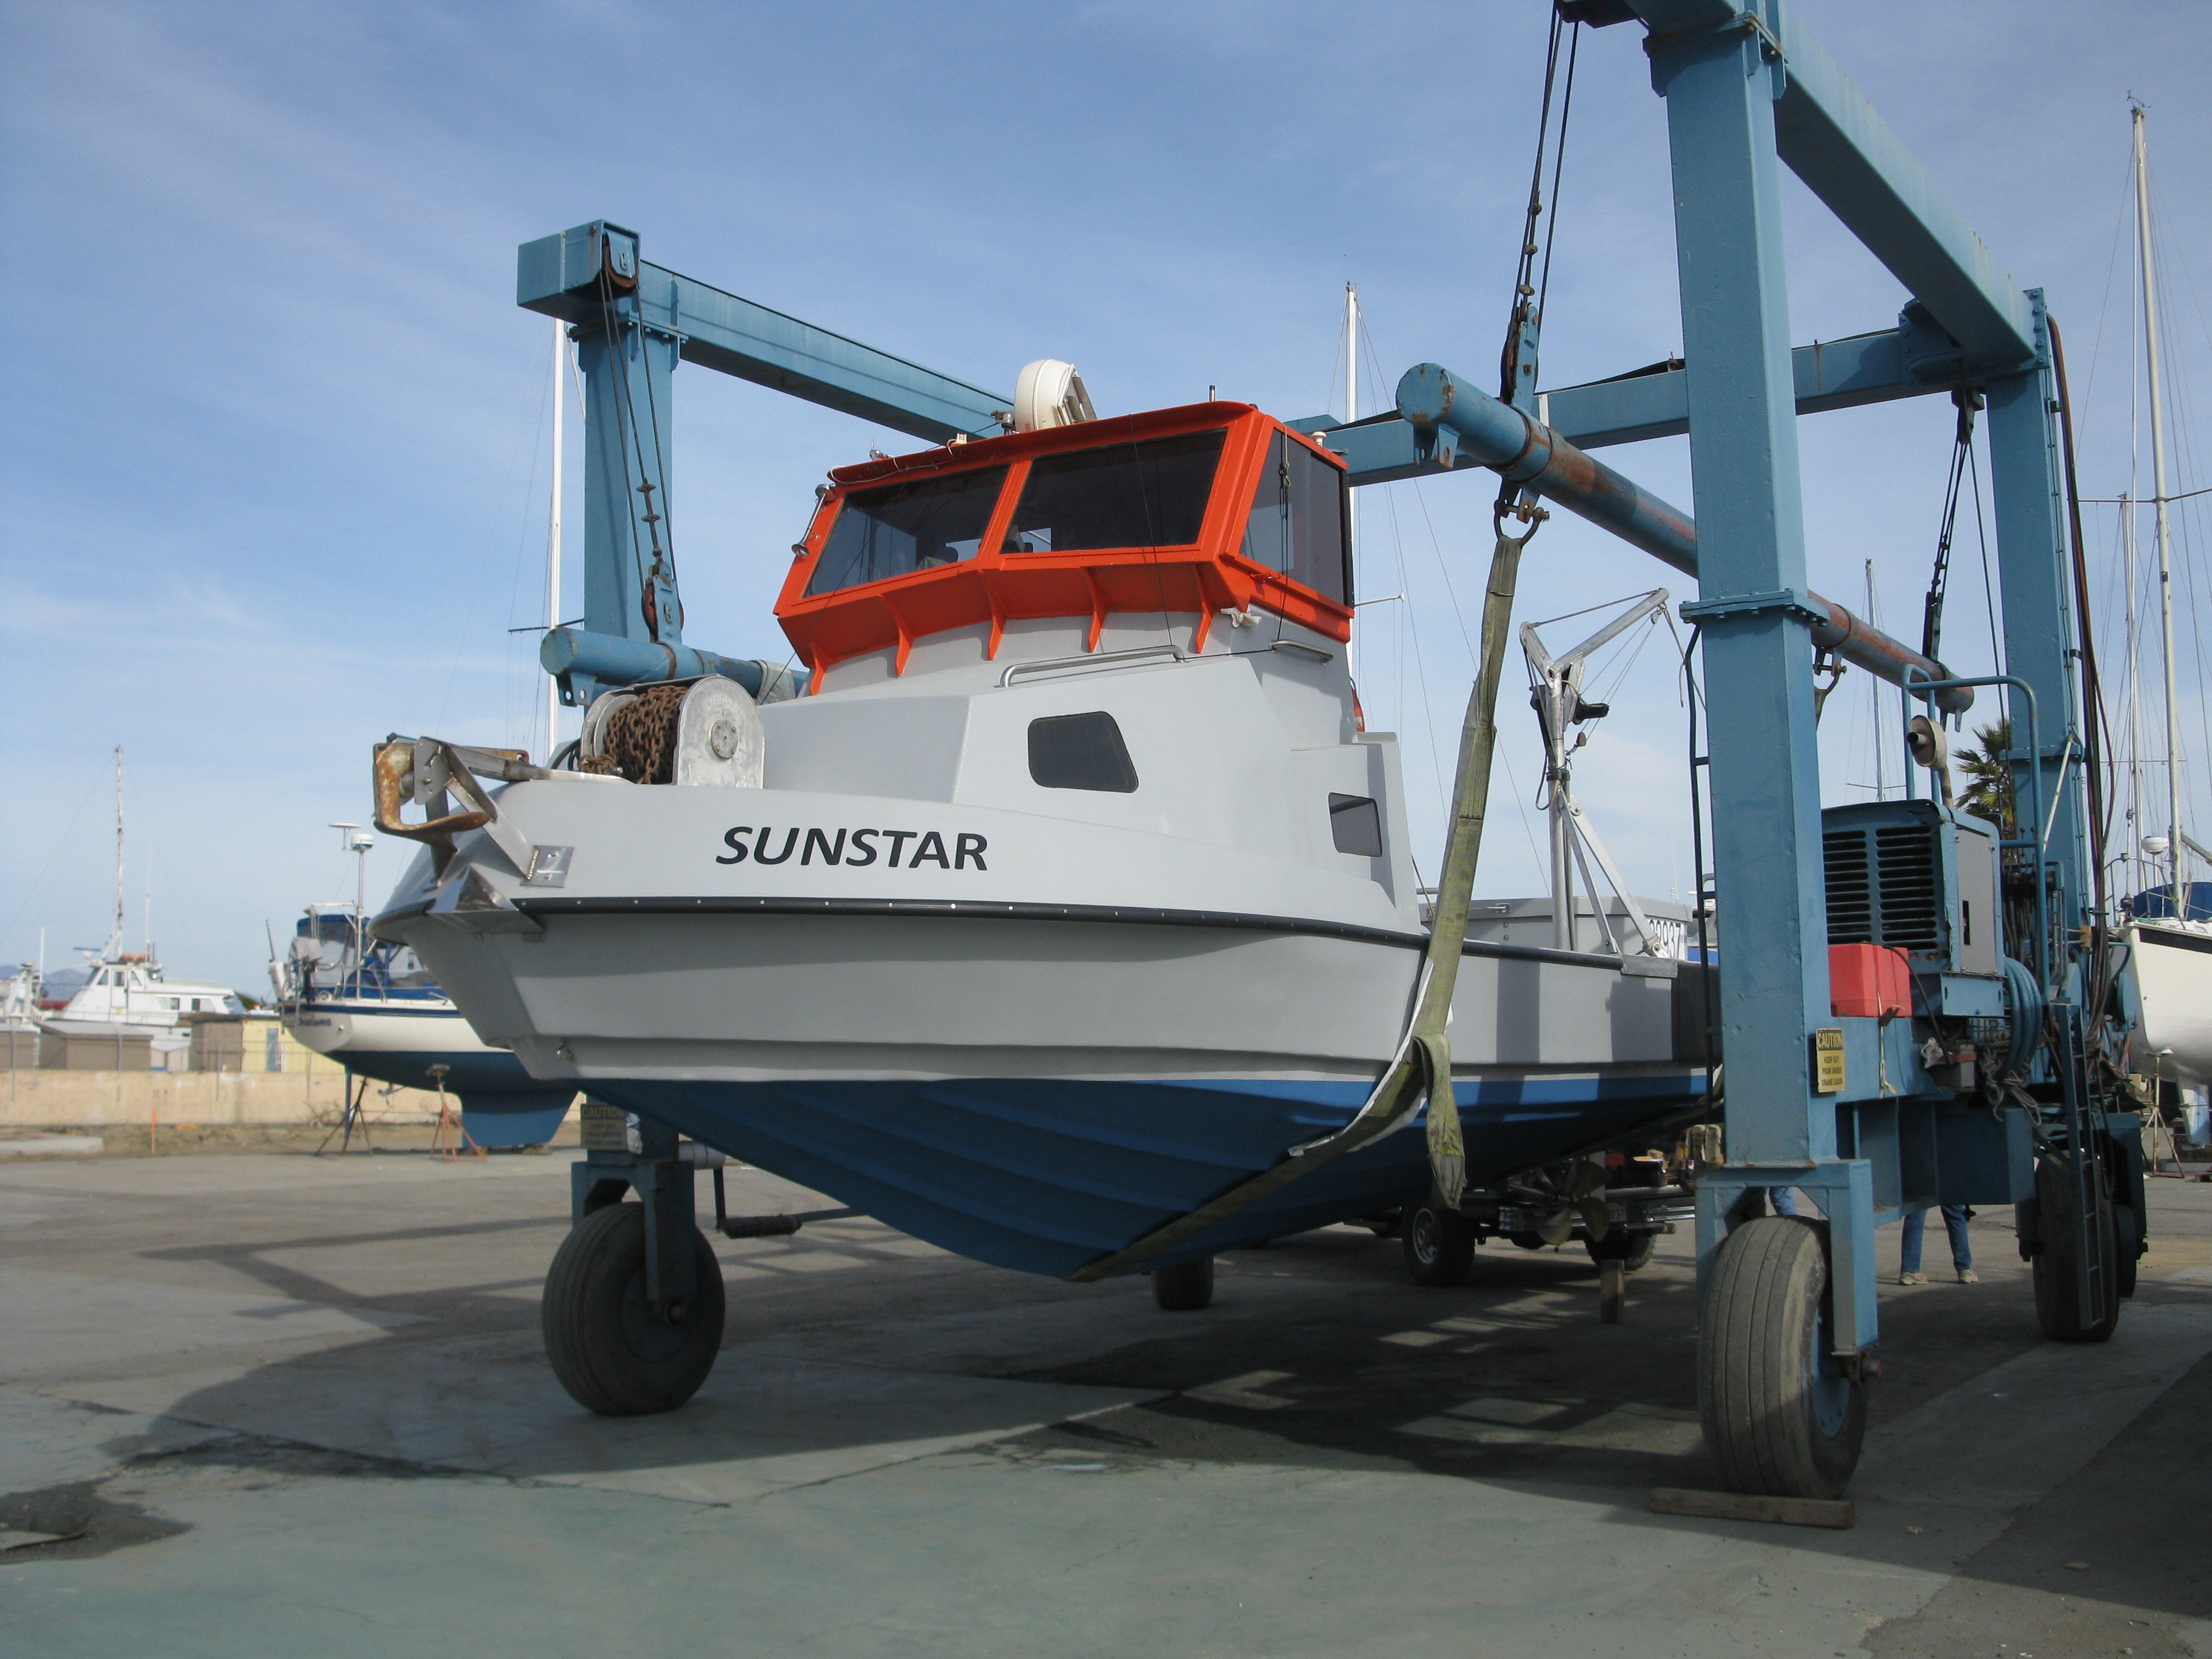
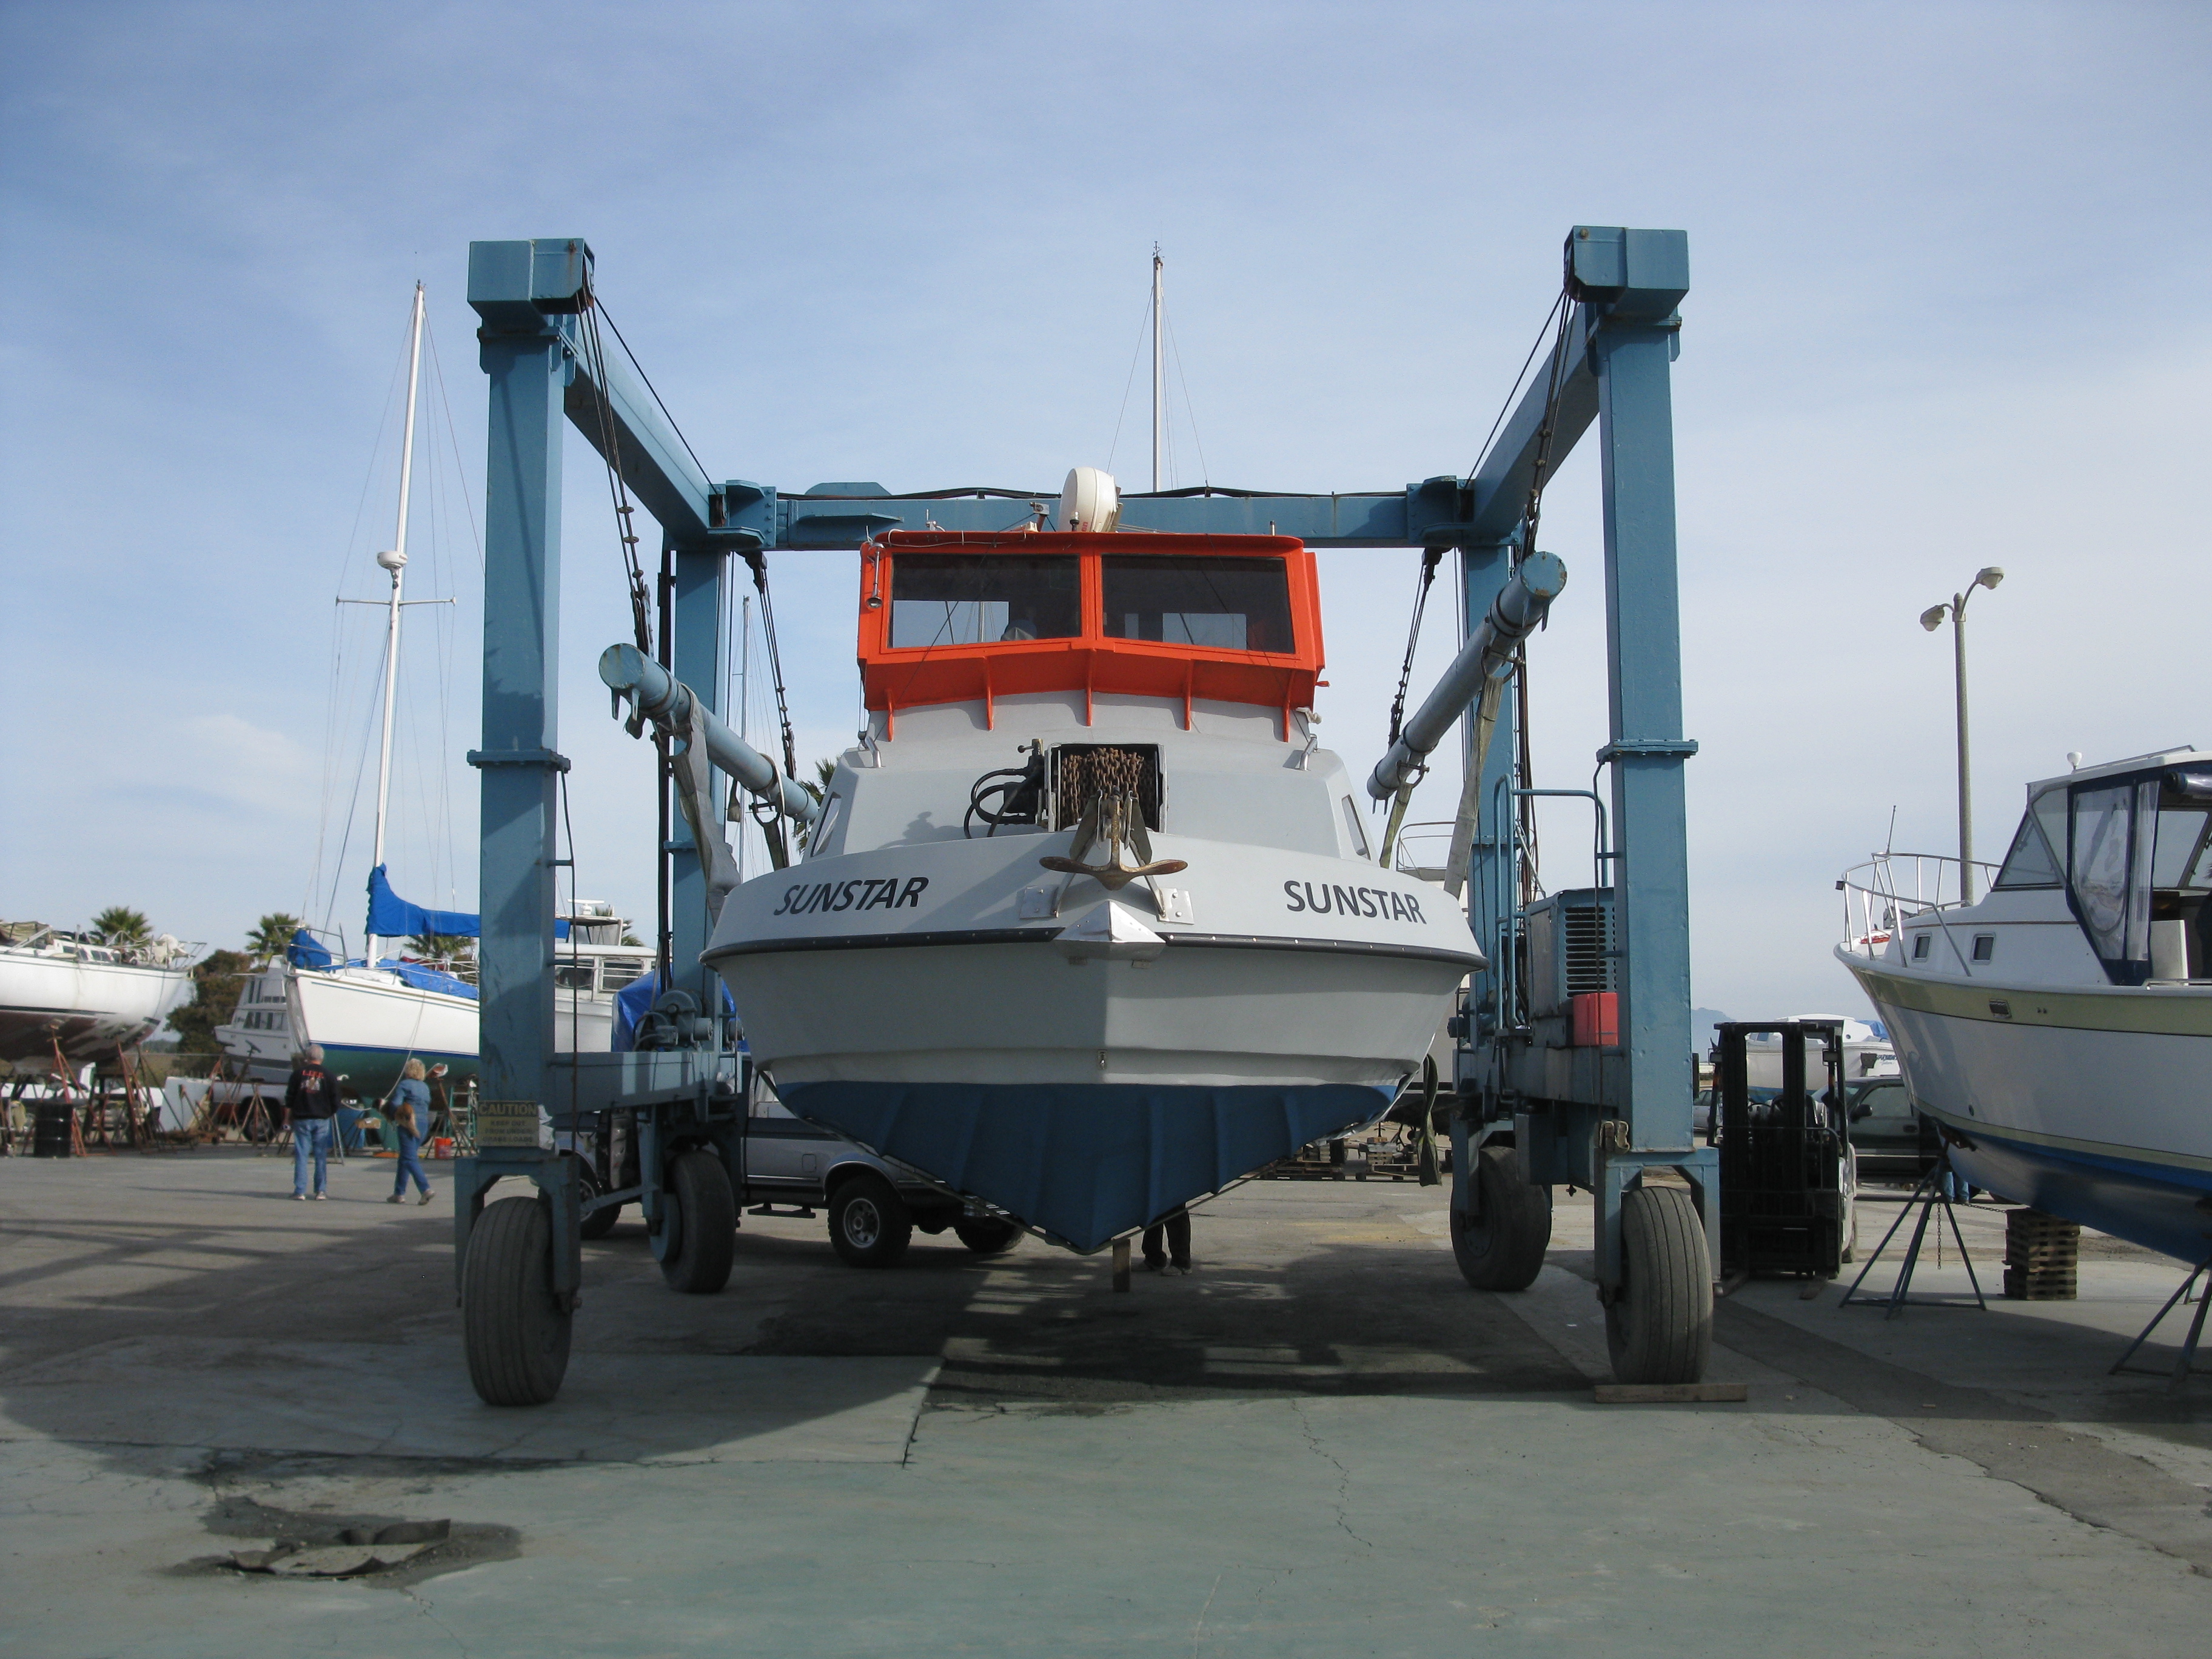
Finished Project
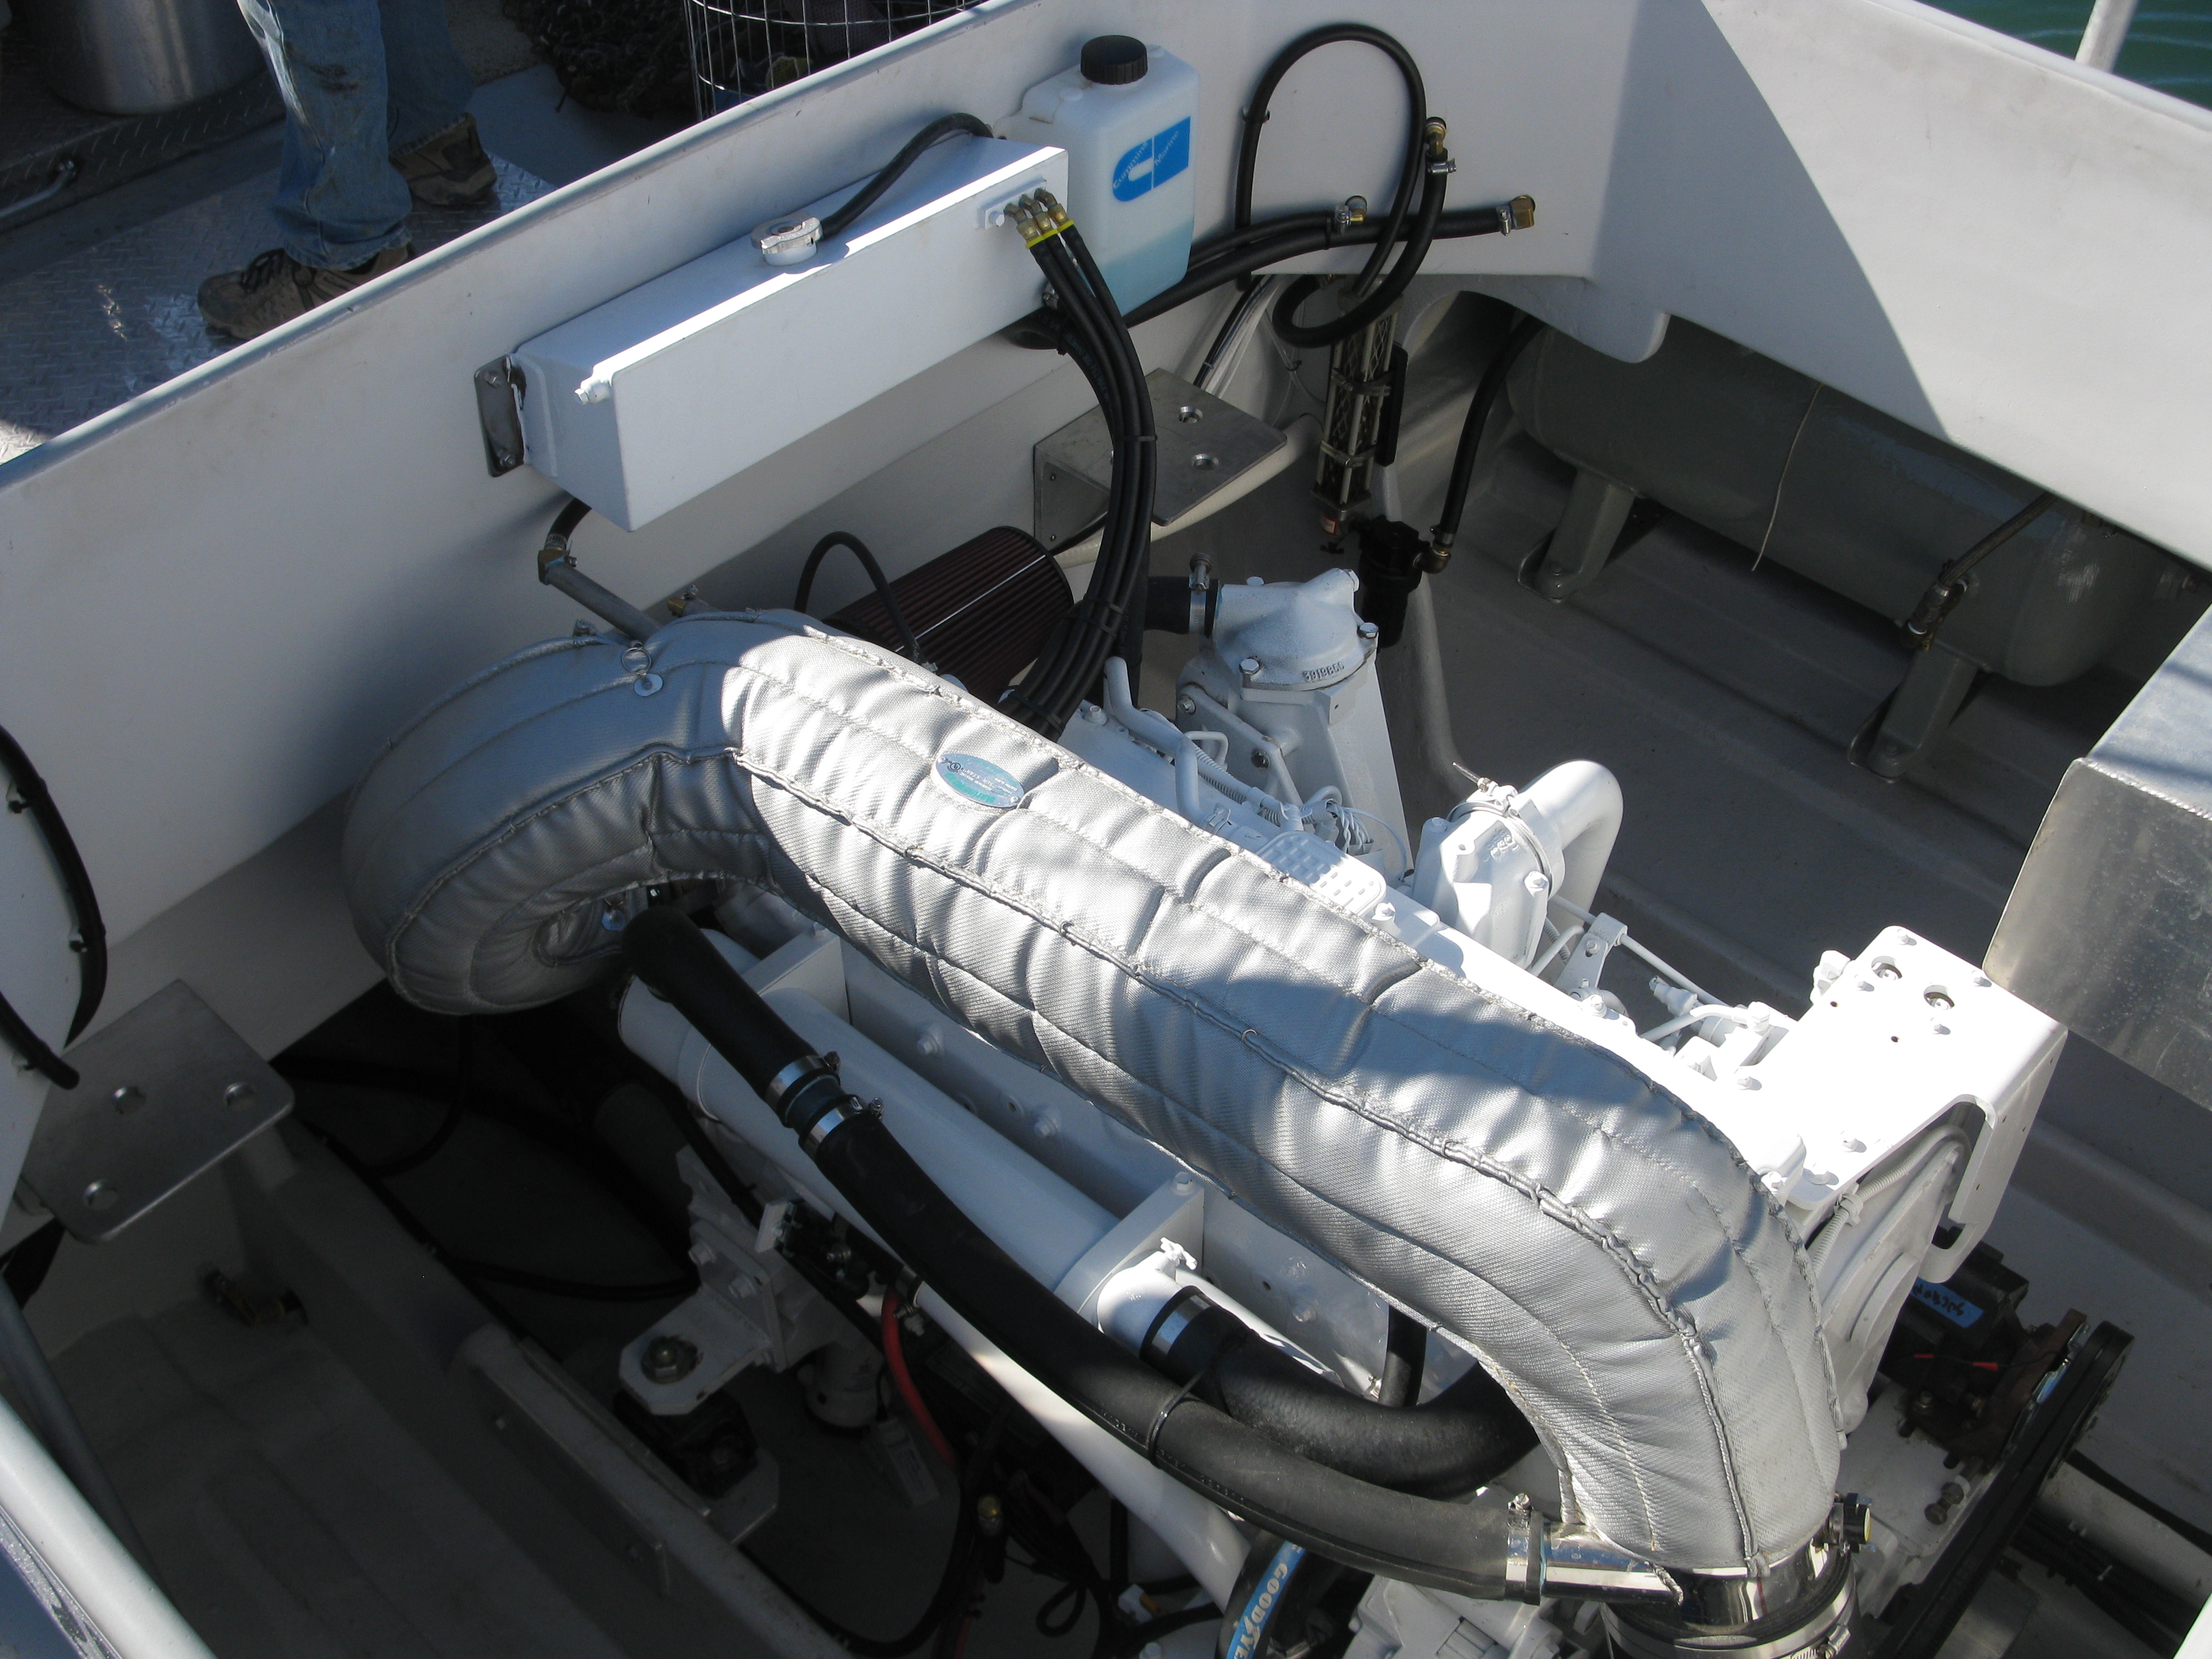
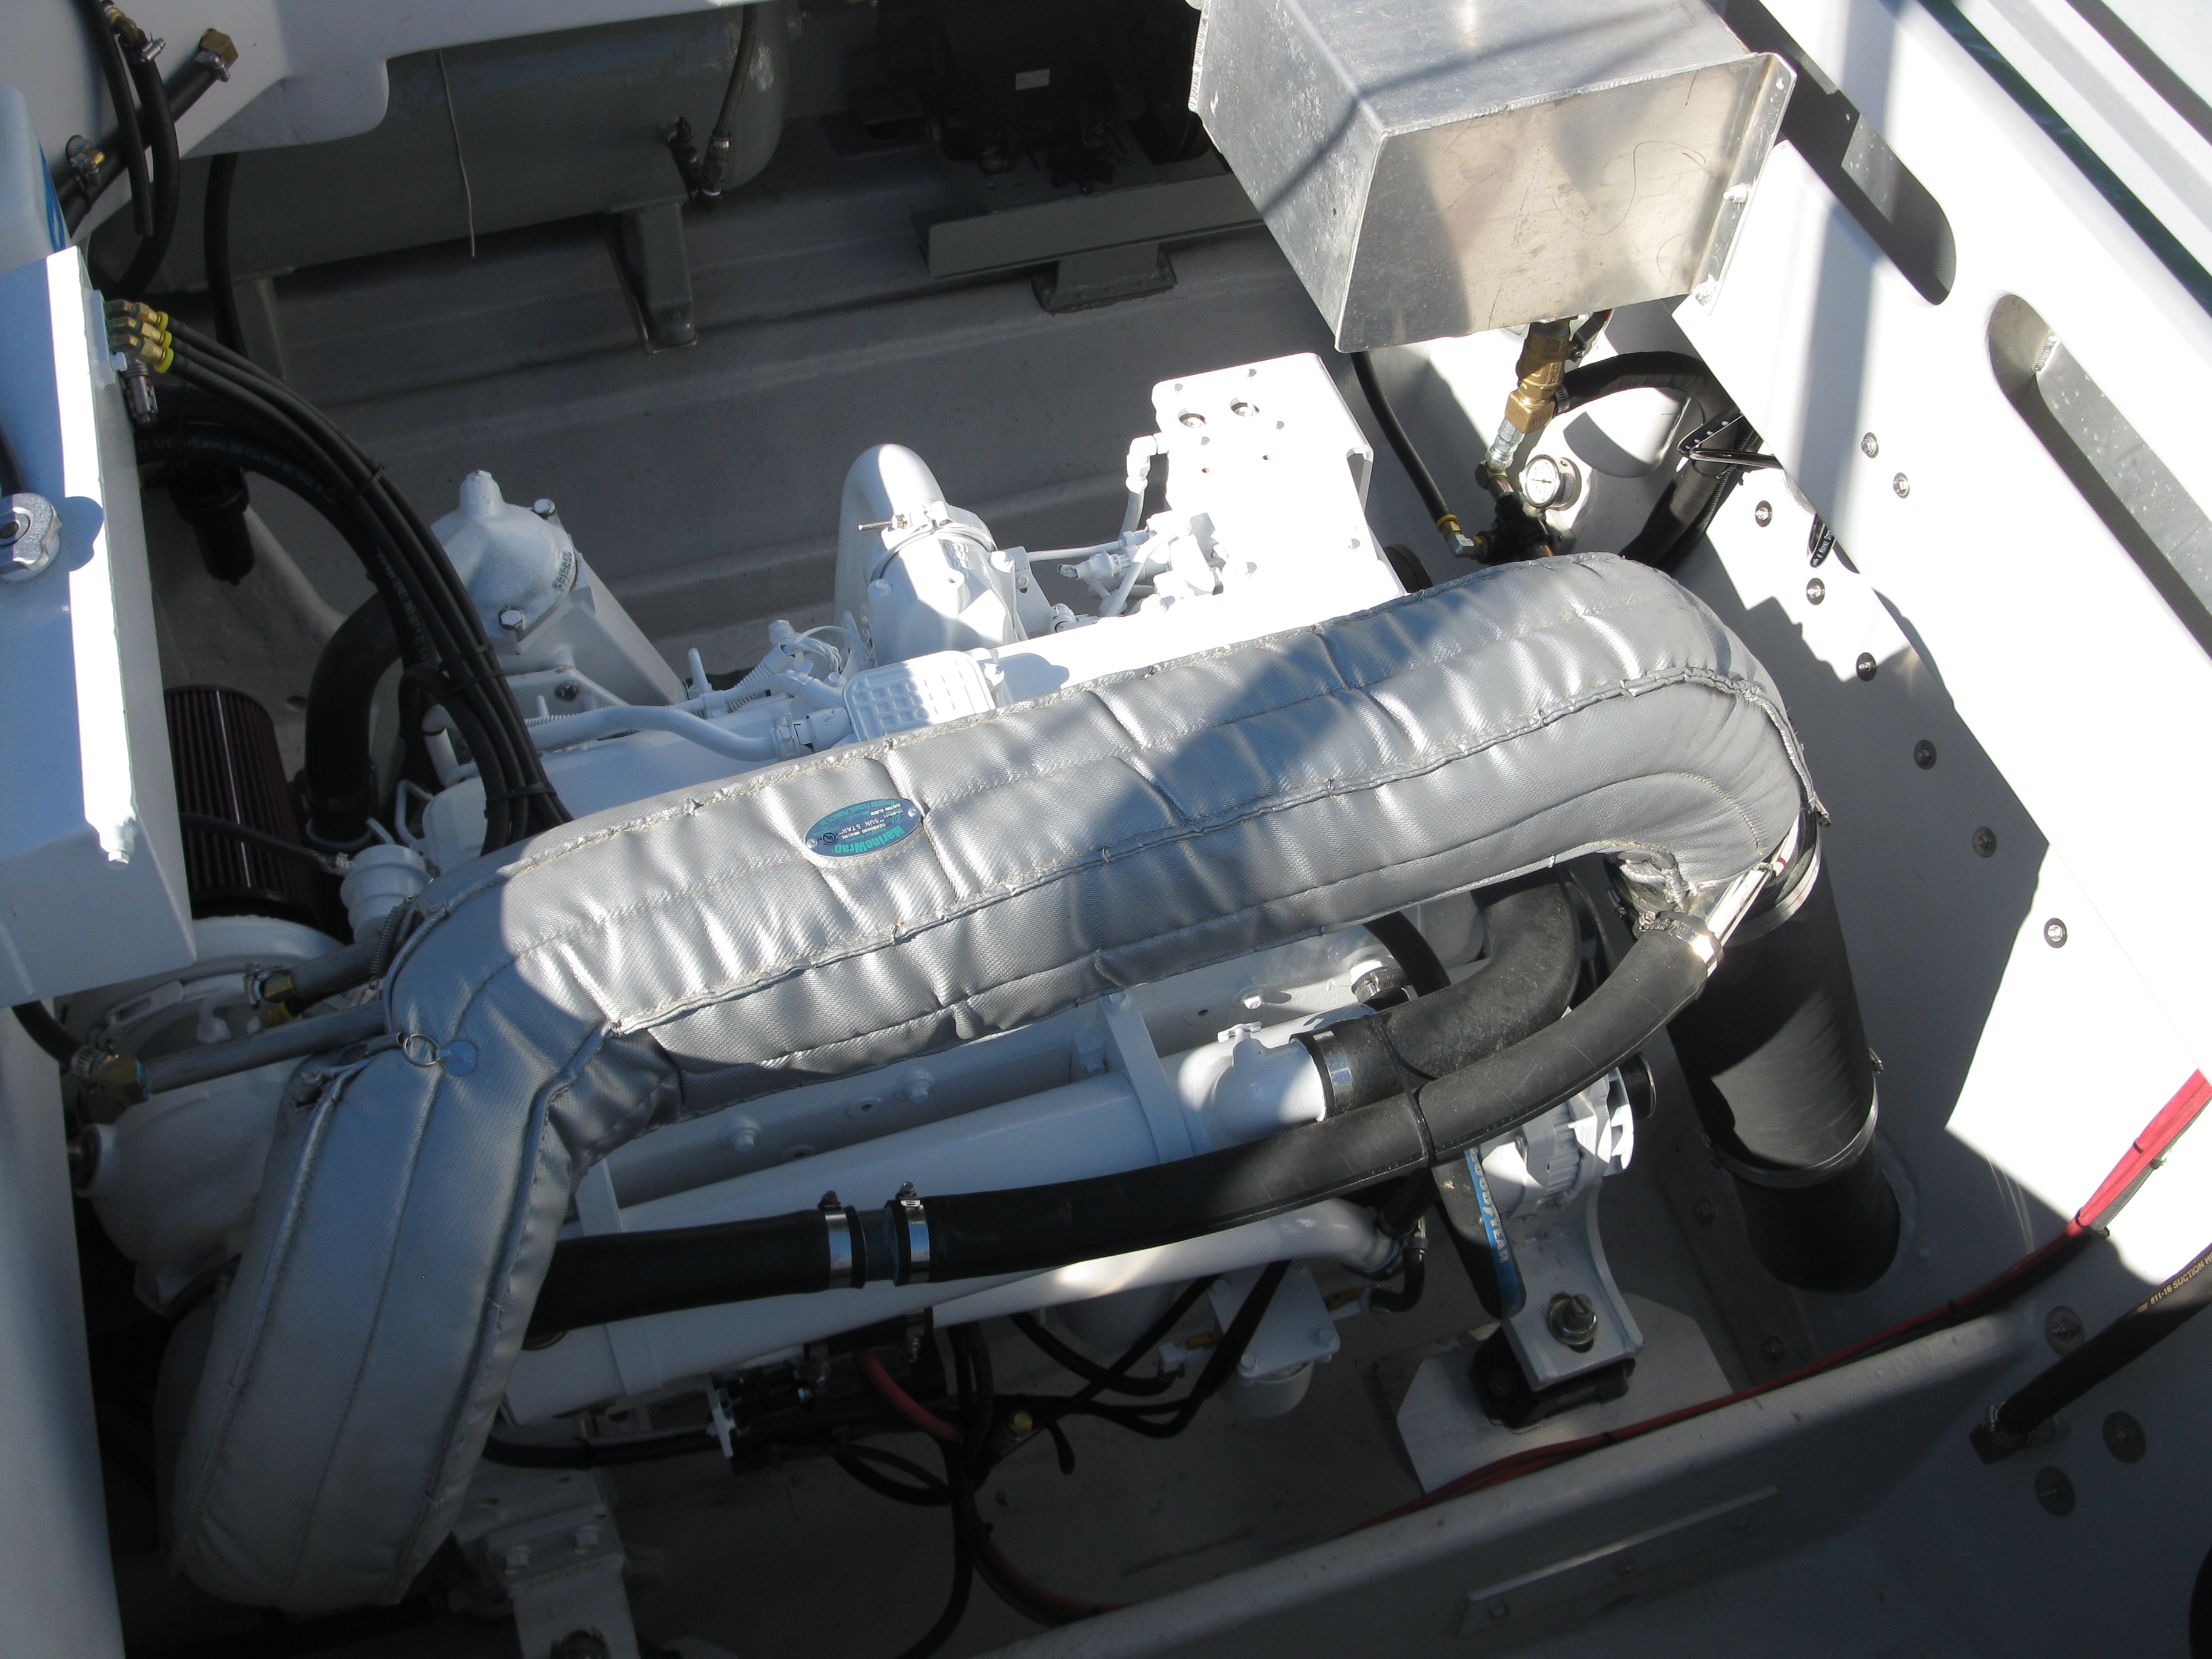
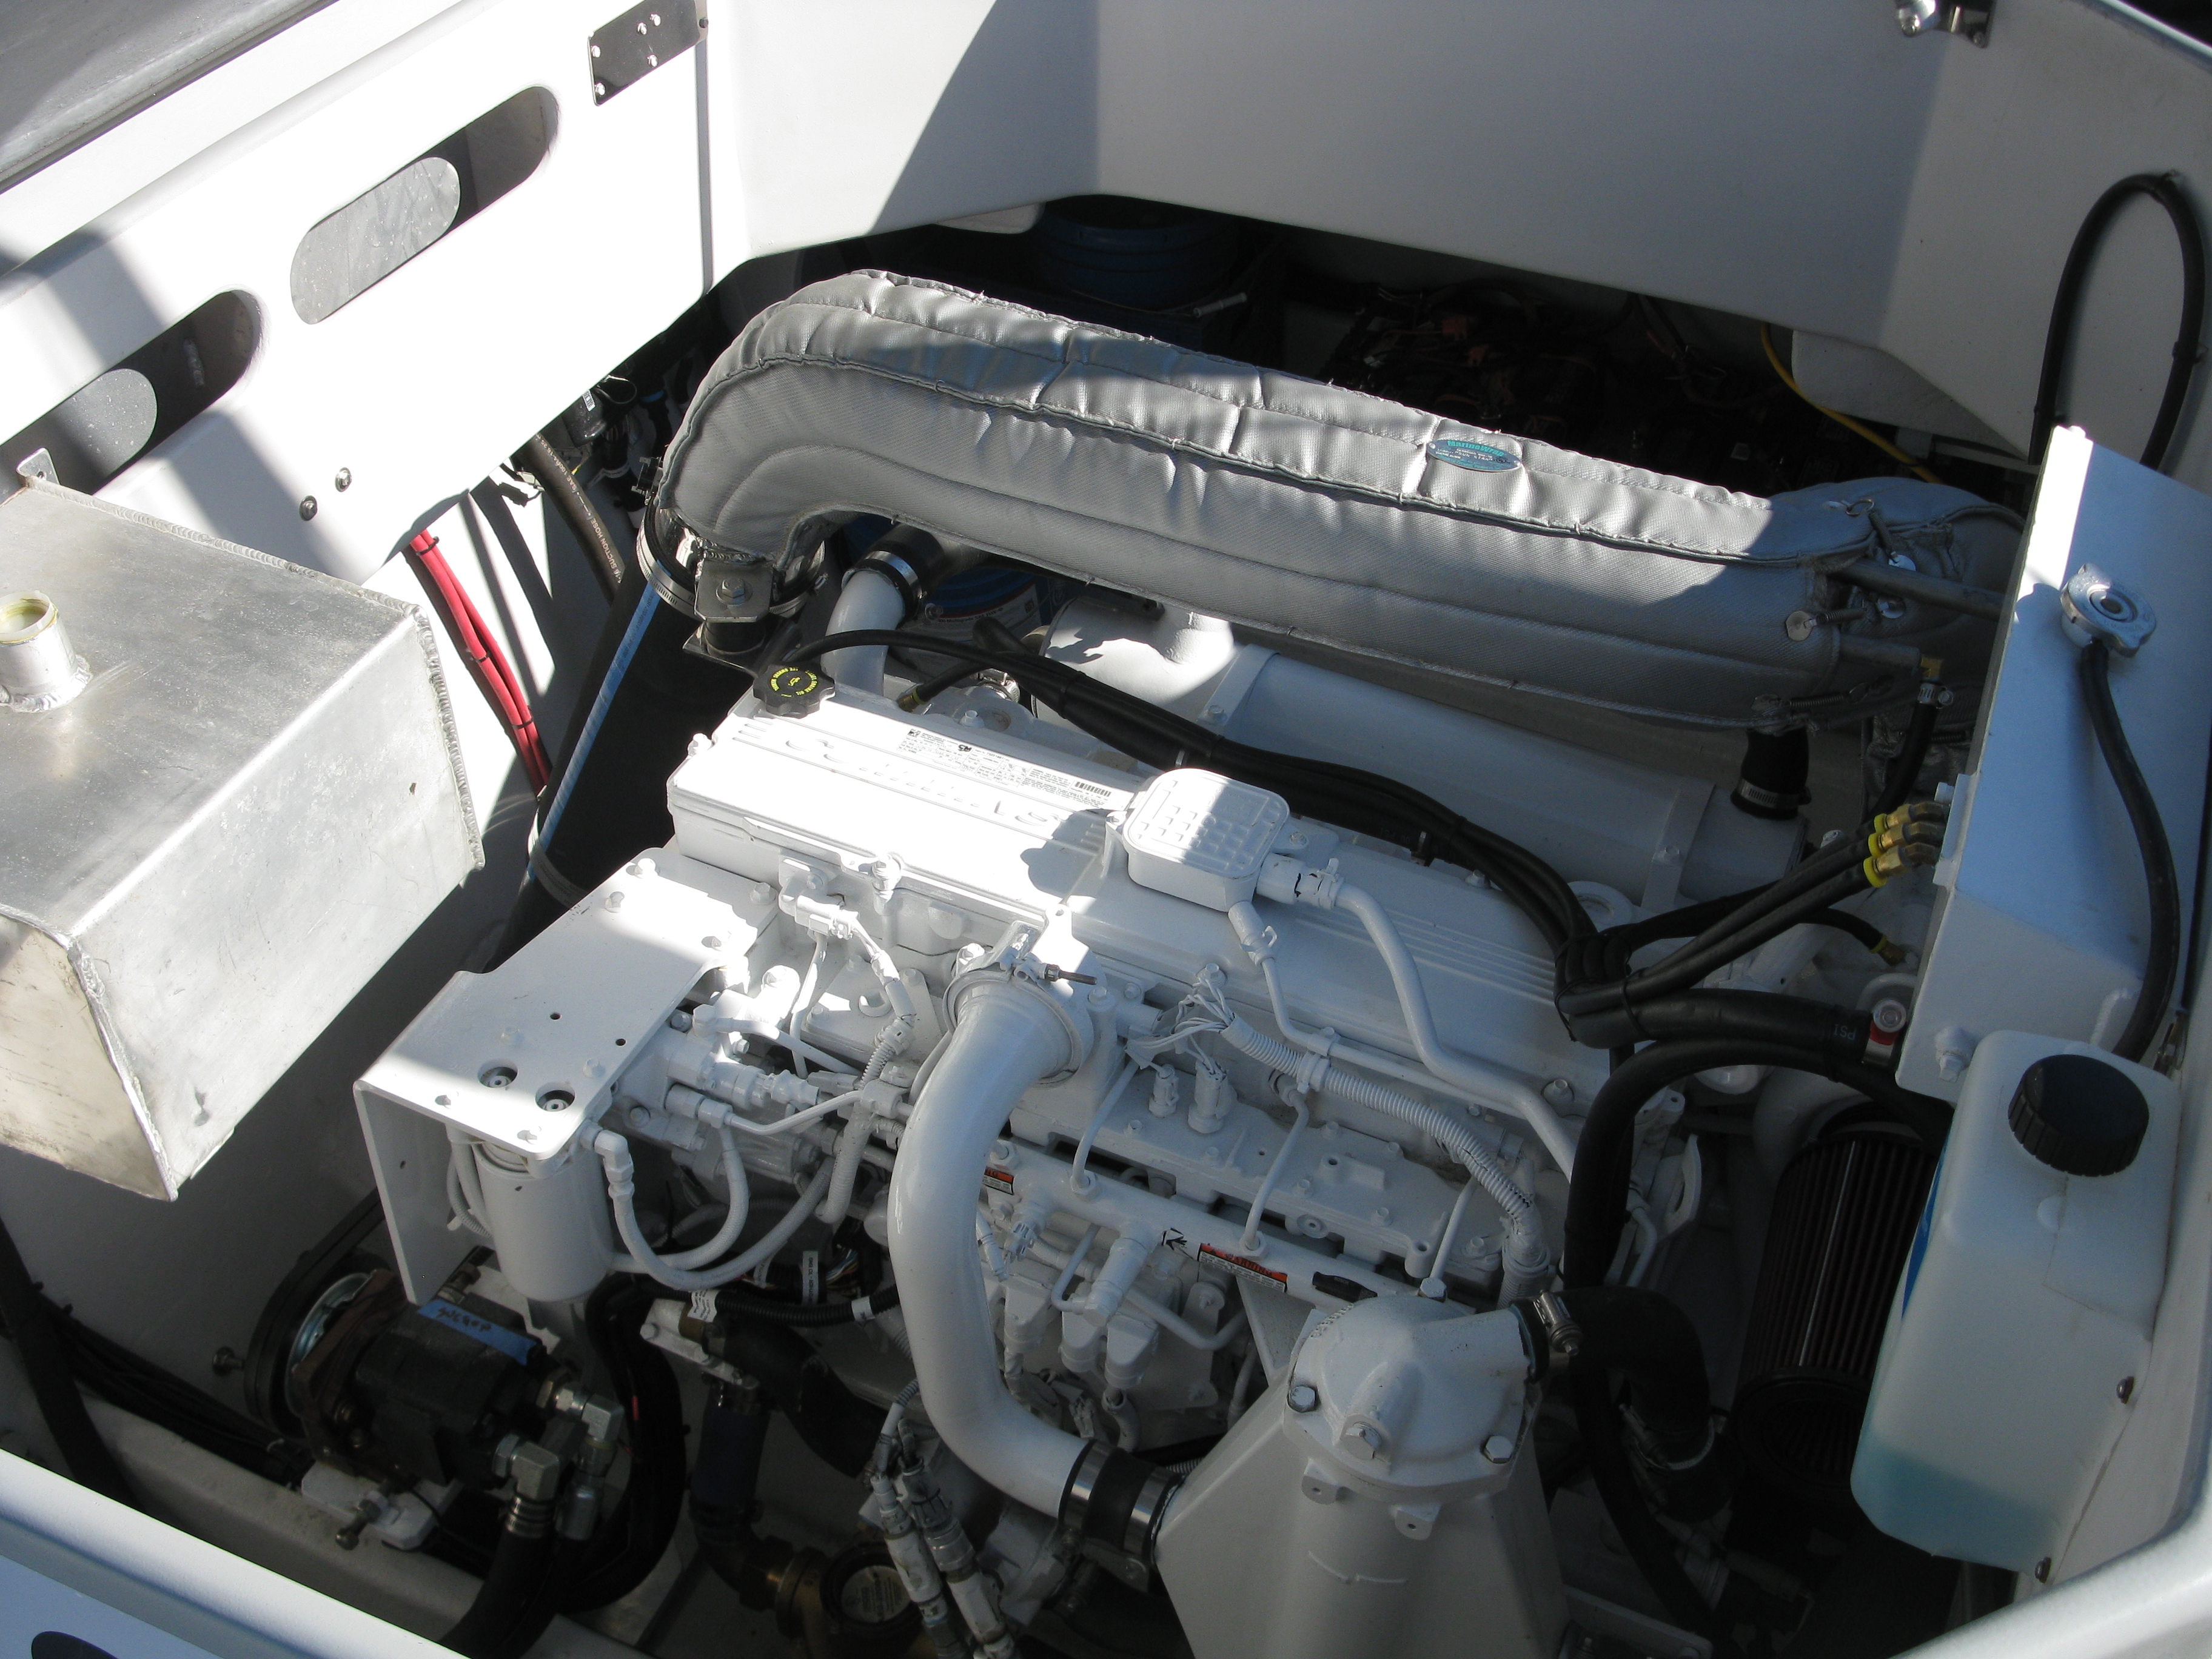
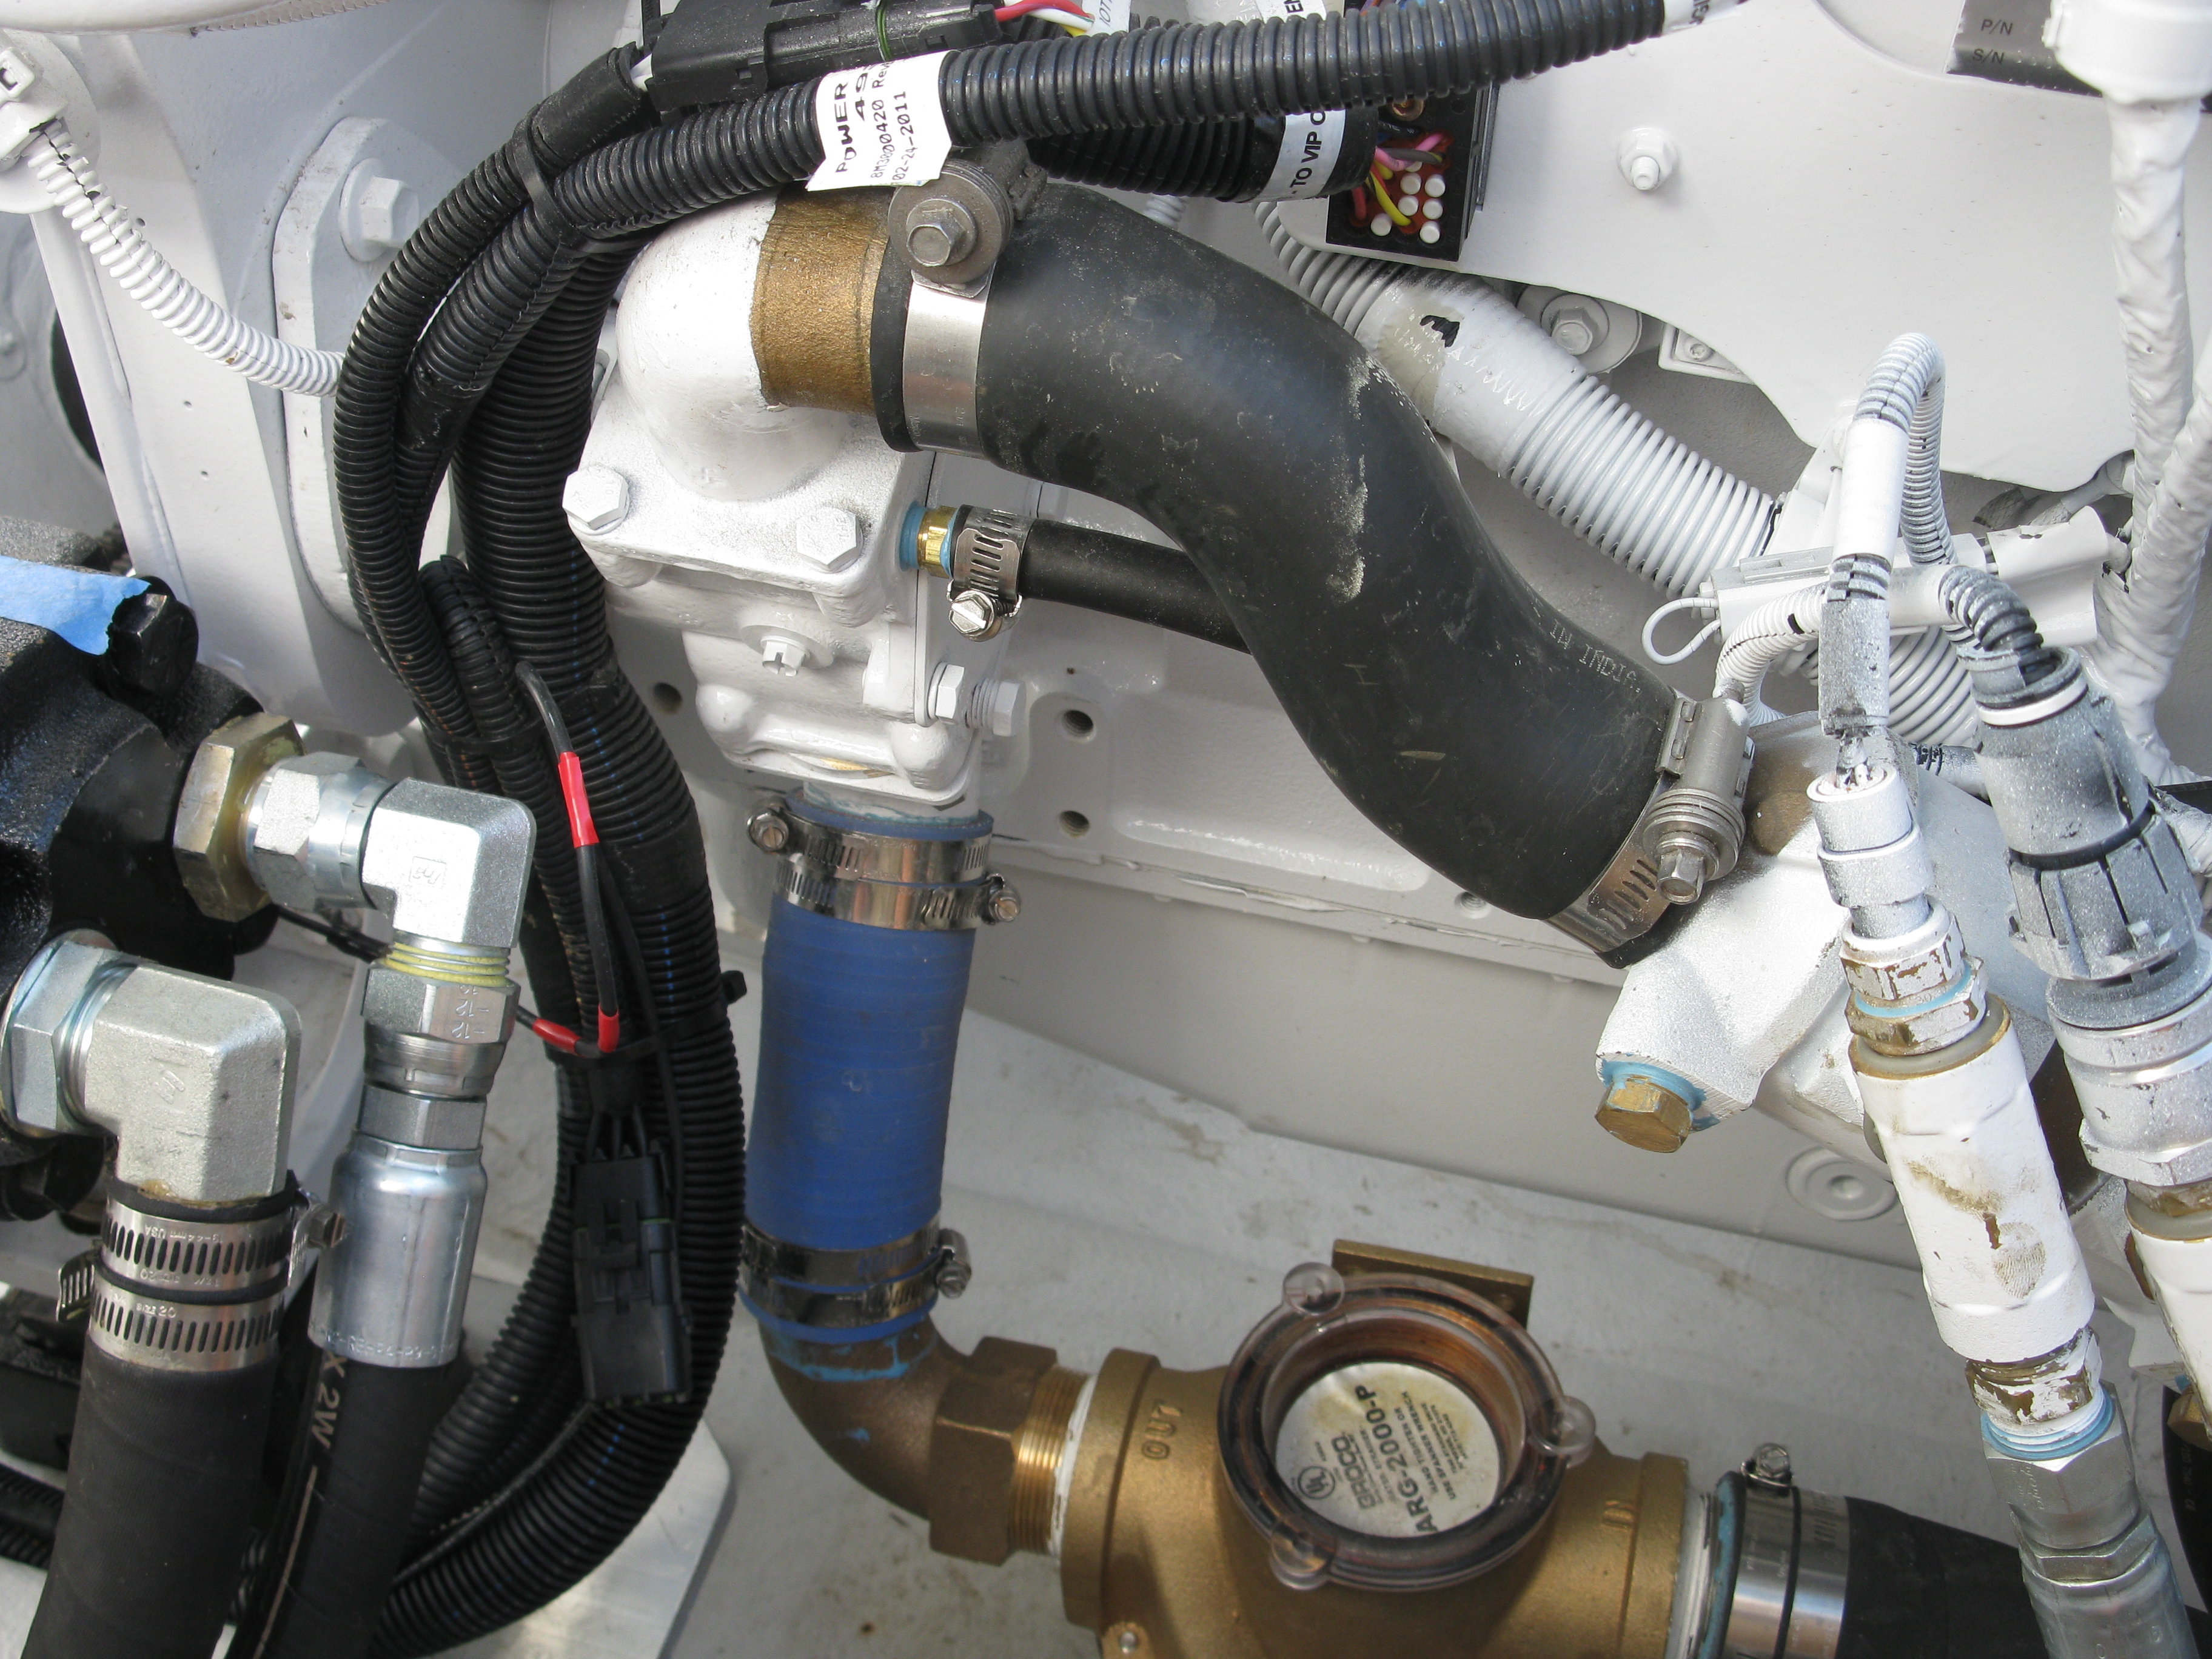
The pictures above show a very simple or basic layout of the Cummins QSL9 engine, exhaust, and support equipment to allow this boat to do what it must. Big engine room with an “up & over” out of the way exhaust that exits under water. Remote coolant x-tank, hydraulic reservoir, 30 gallon air tank tucked under the port rear deck. All easily accessible so you won’t end up with bloody knuckles when doing simple maintenance.
Turbo with redundant coolant alarm switch.
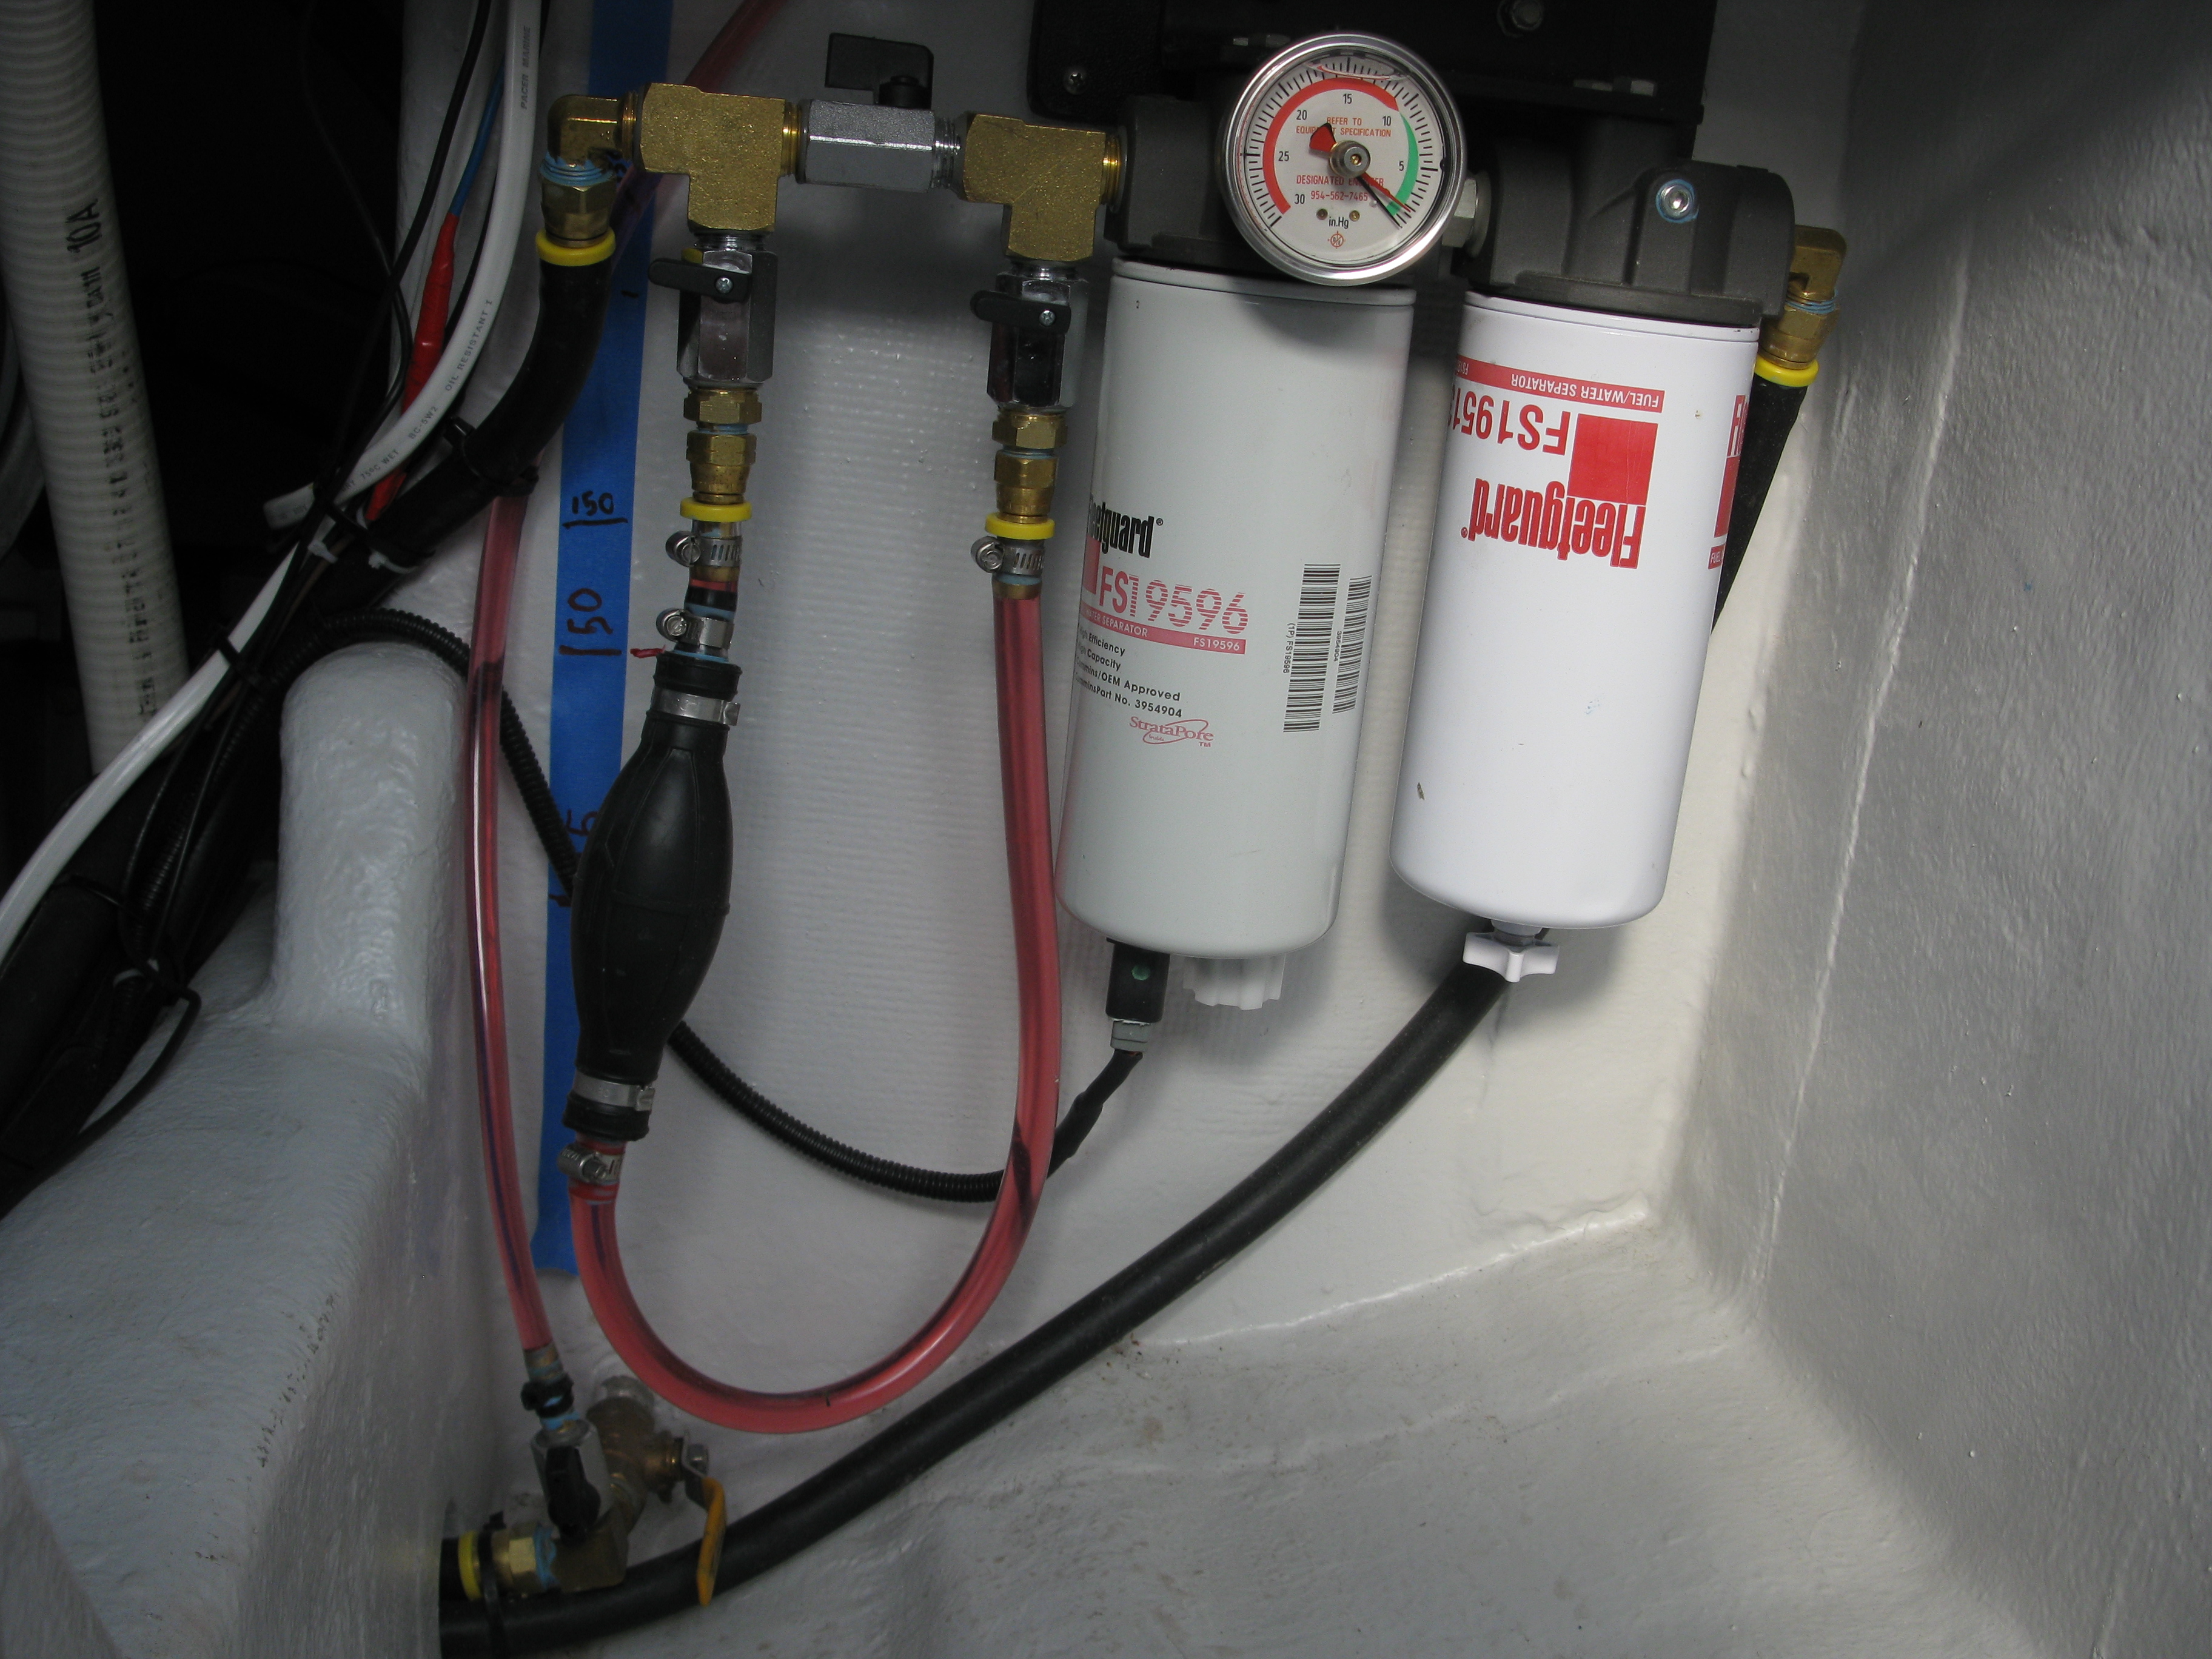
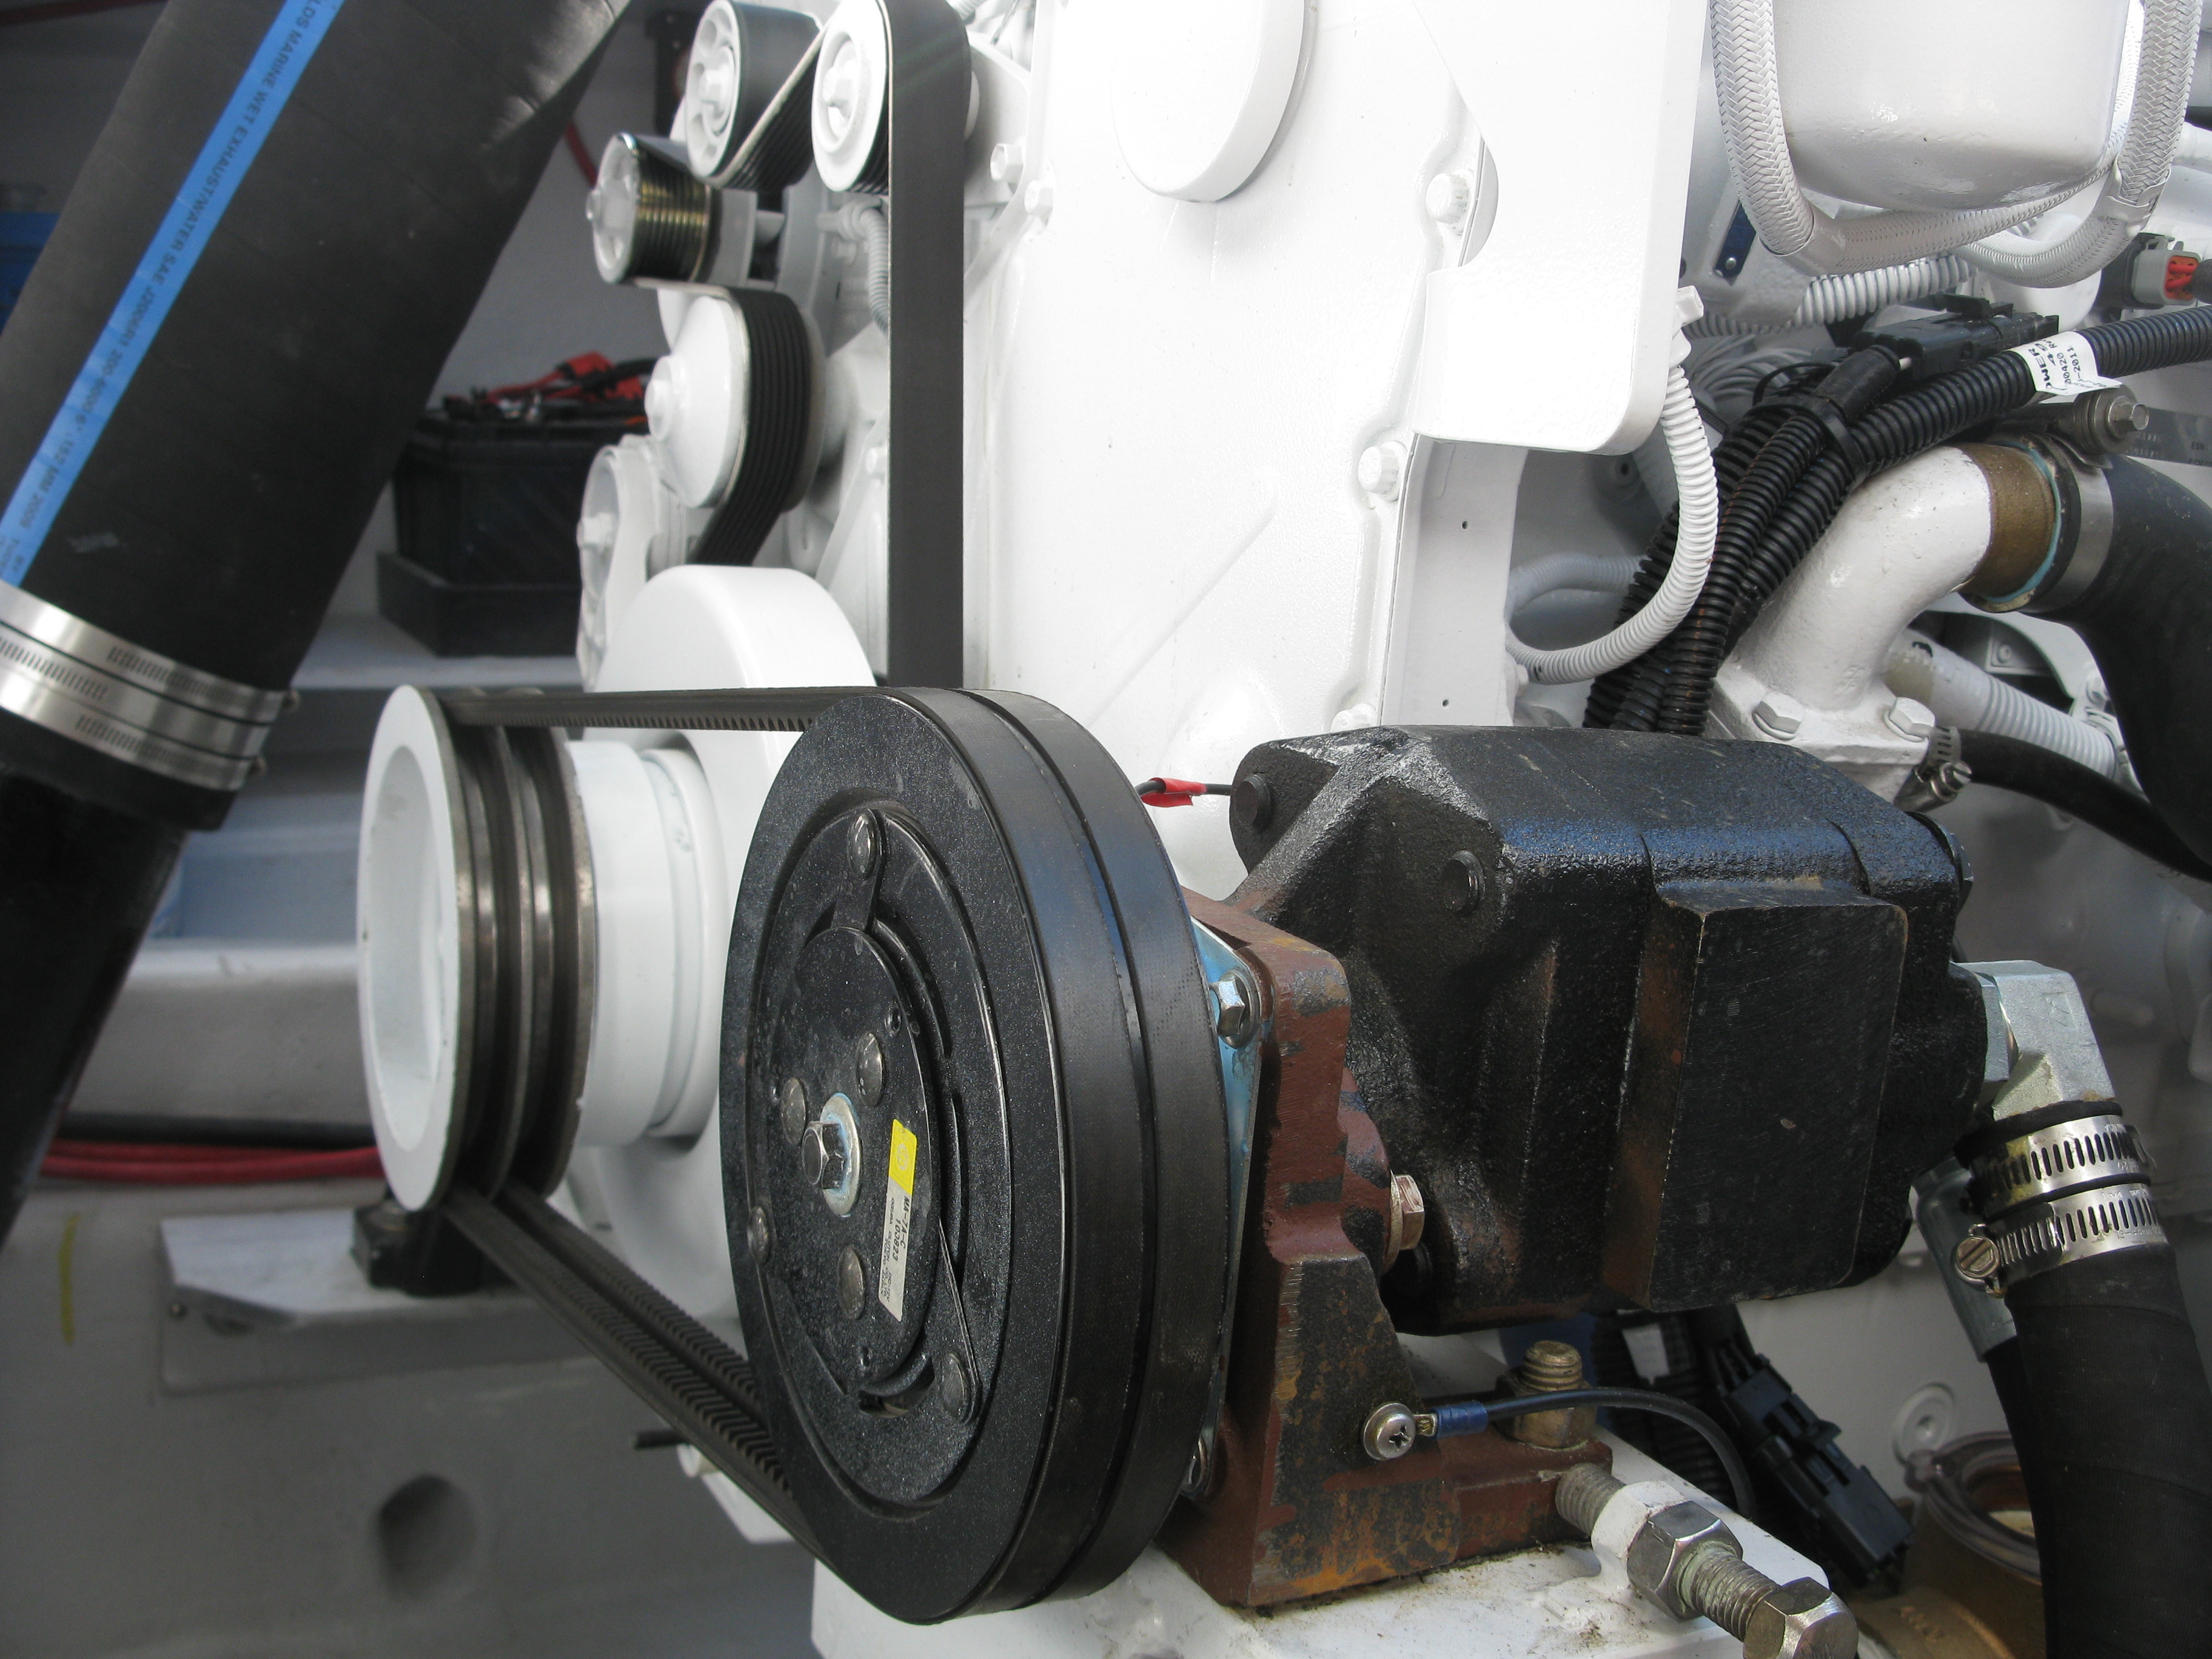
But what else? Our proven SMX Multi-Stage Fueltration System.
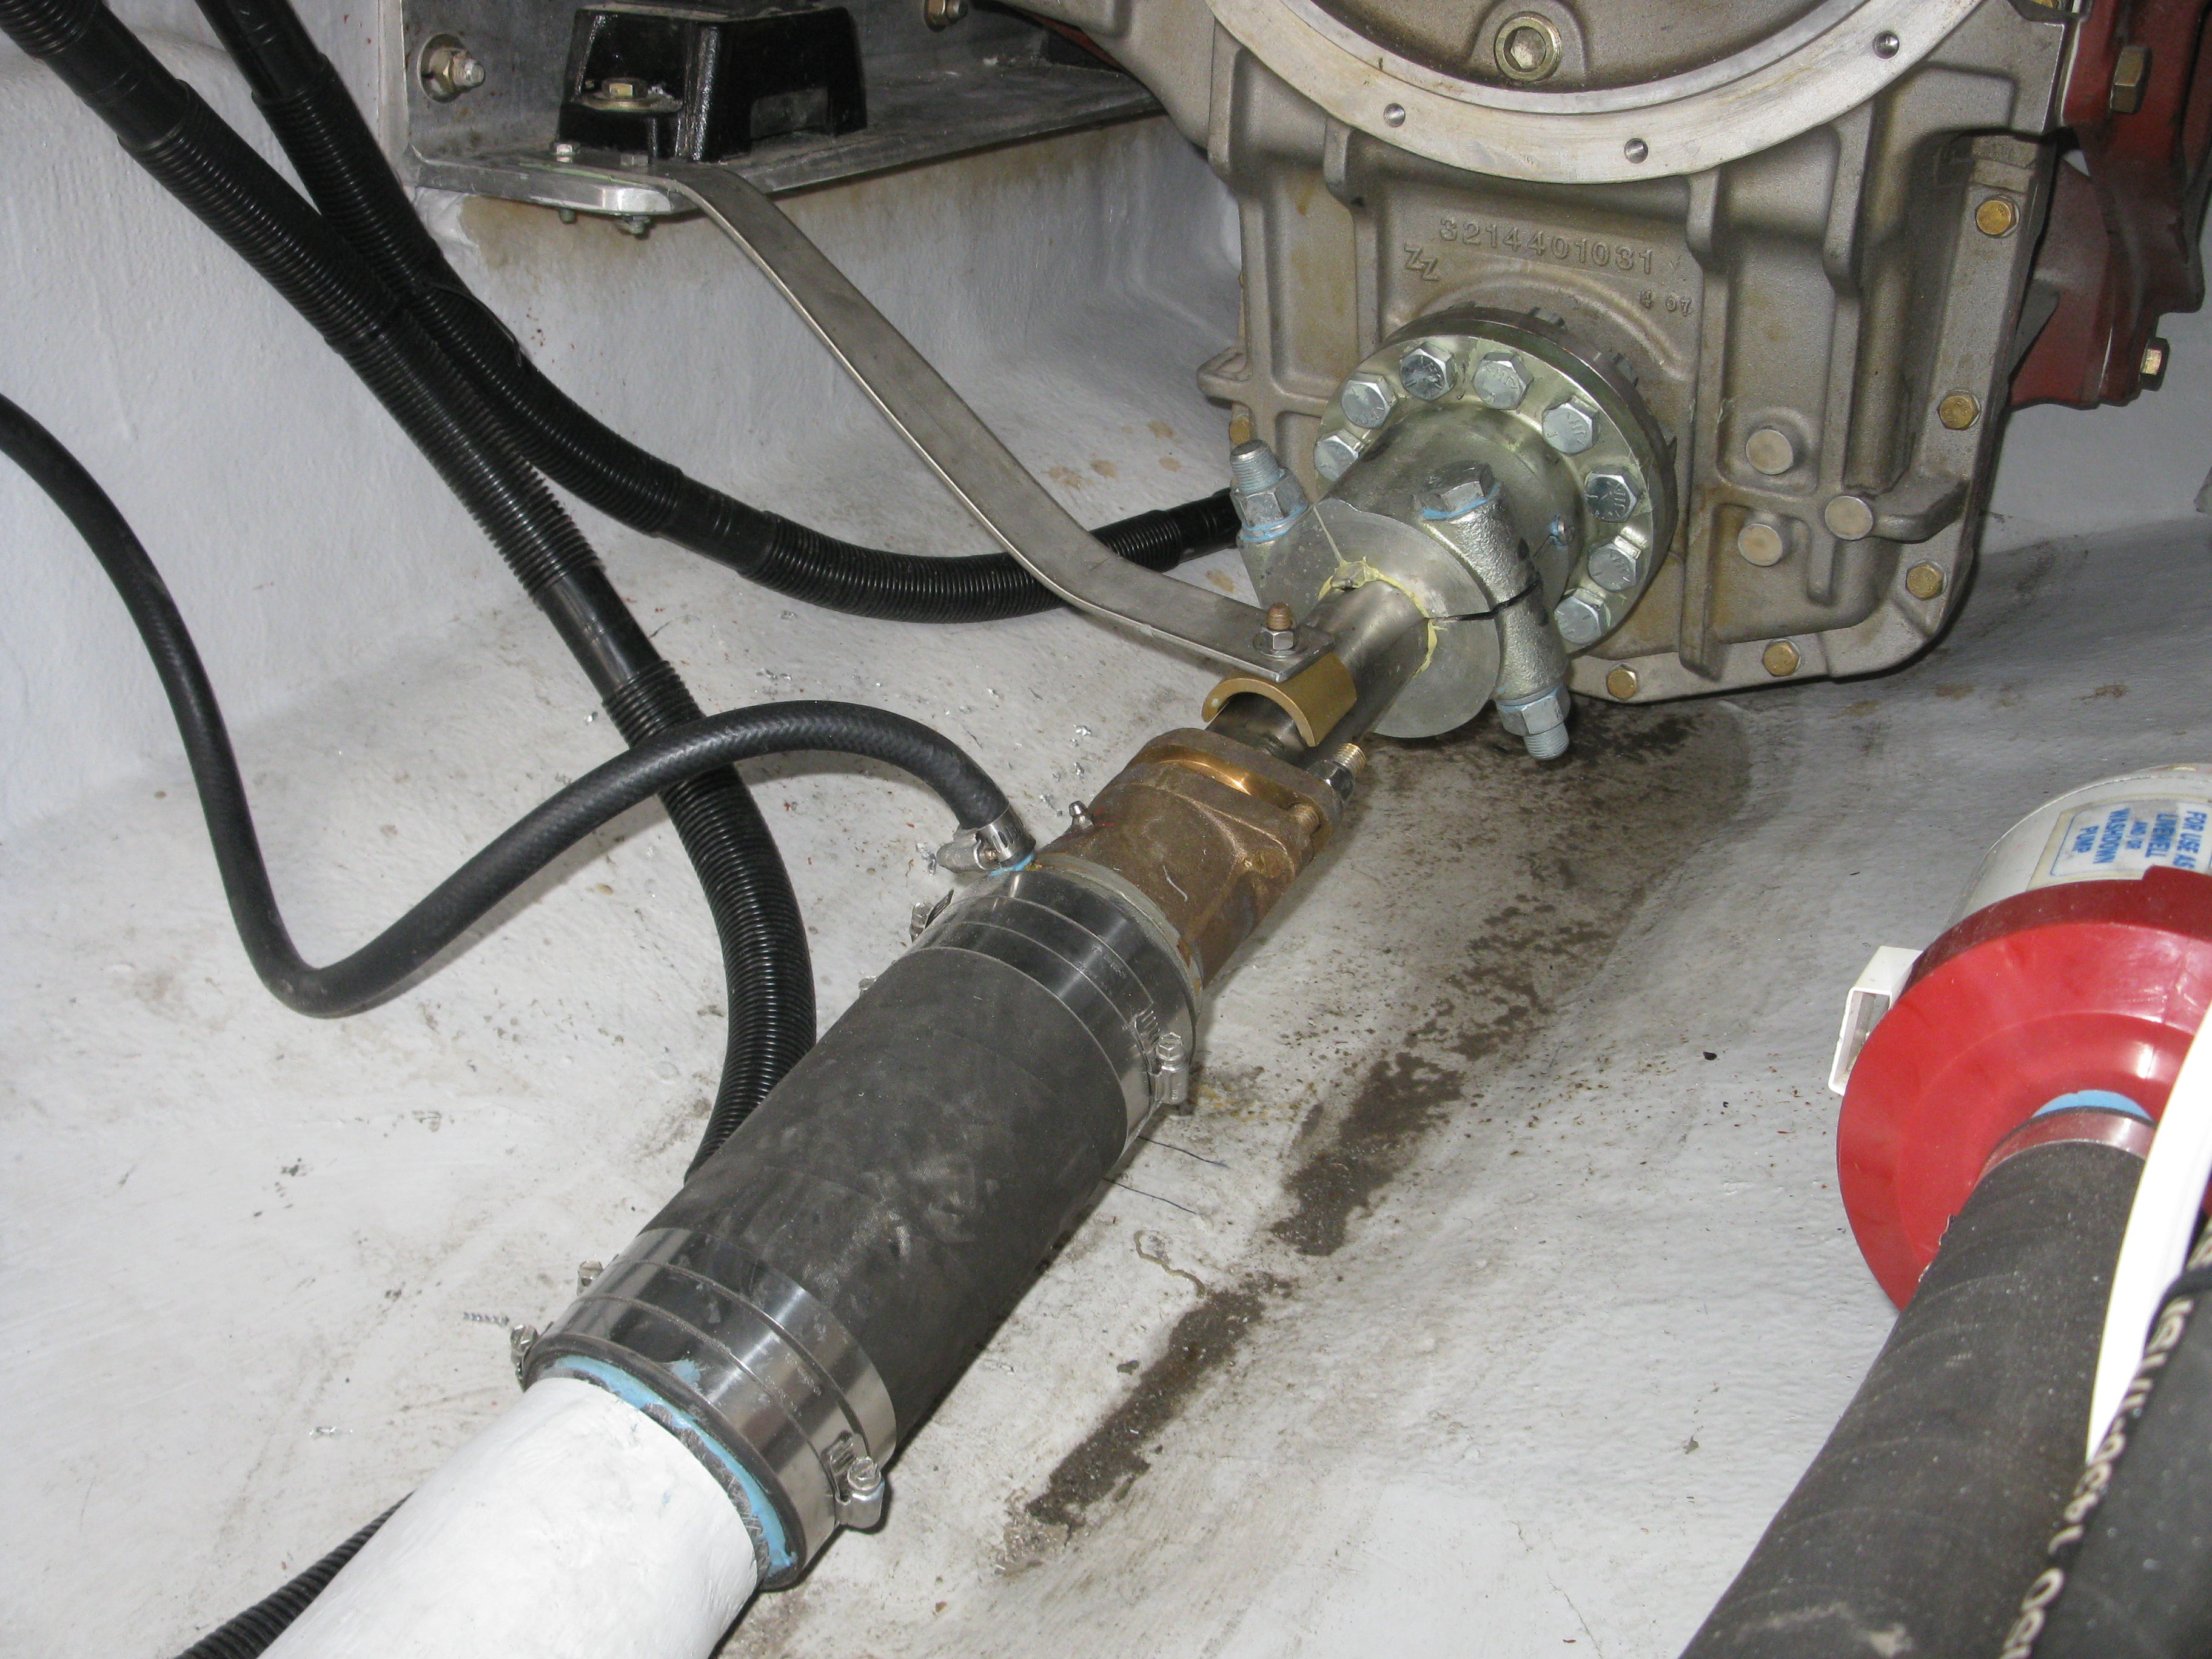
Remote mounted ZF325IV just after a very hard sea trial. A little water from the packing gland with some oil/grease “smudges” floating in the bilge.
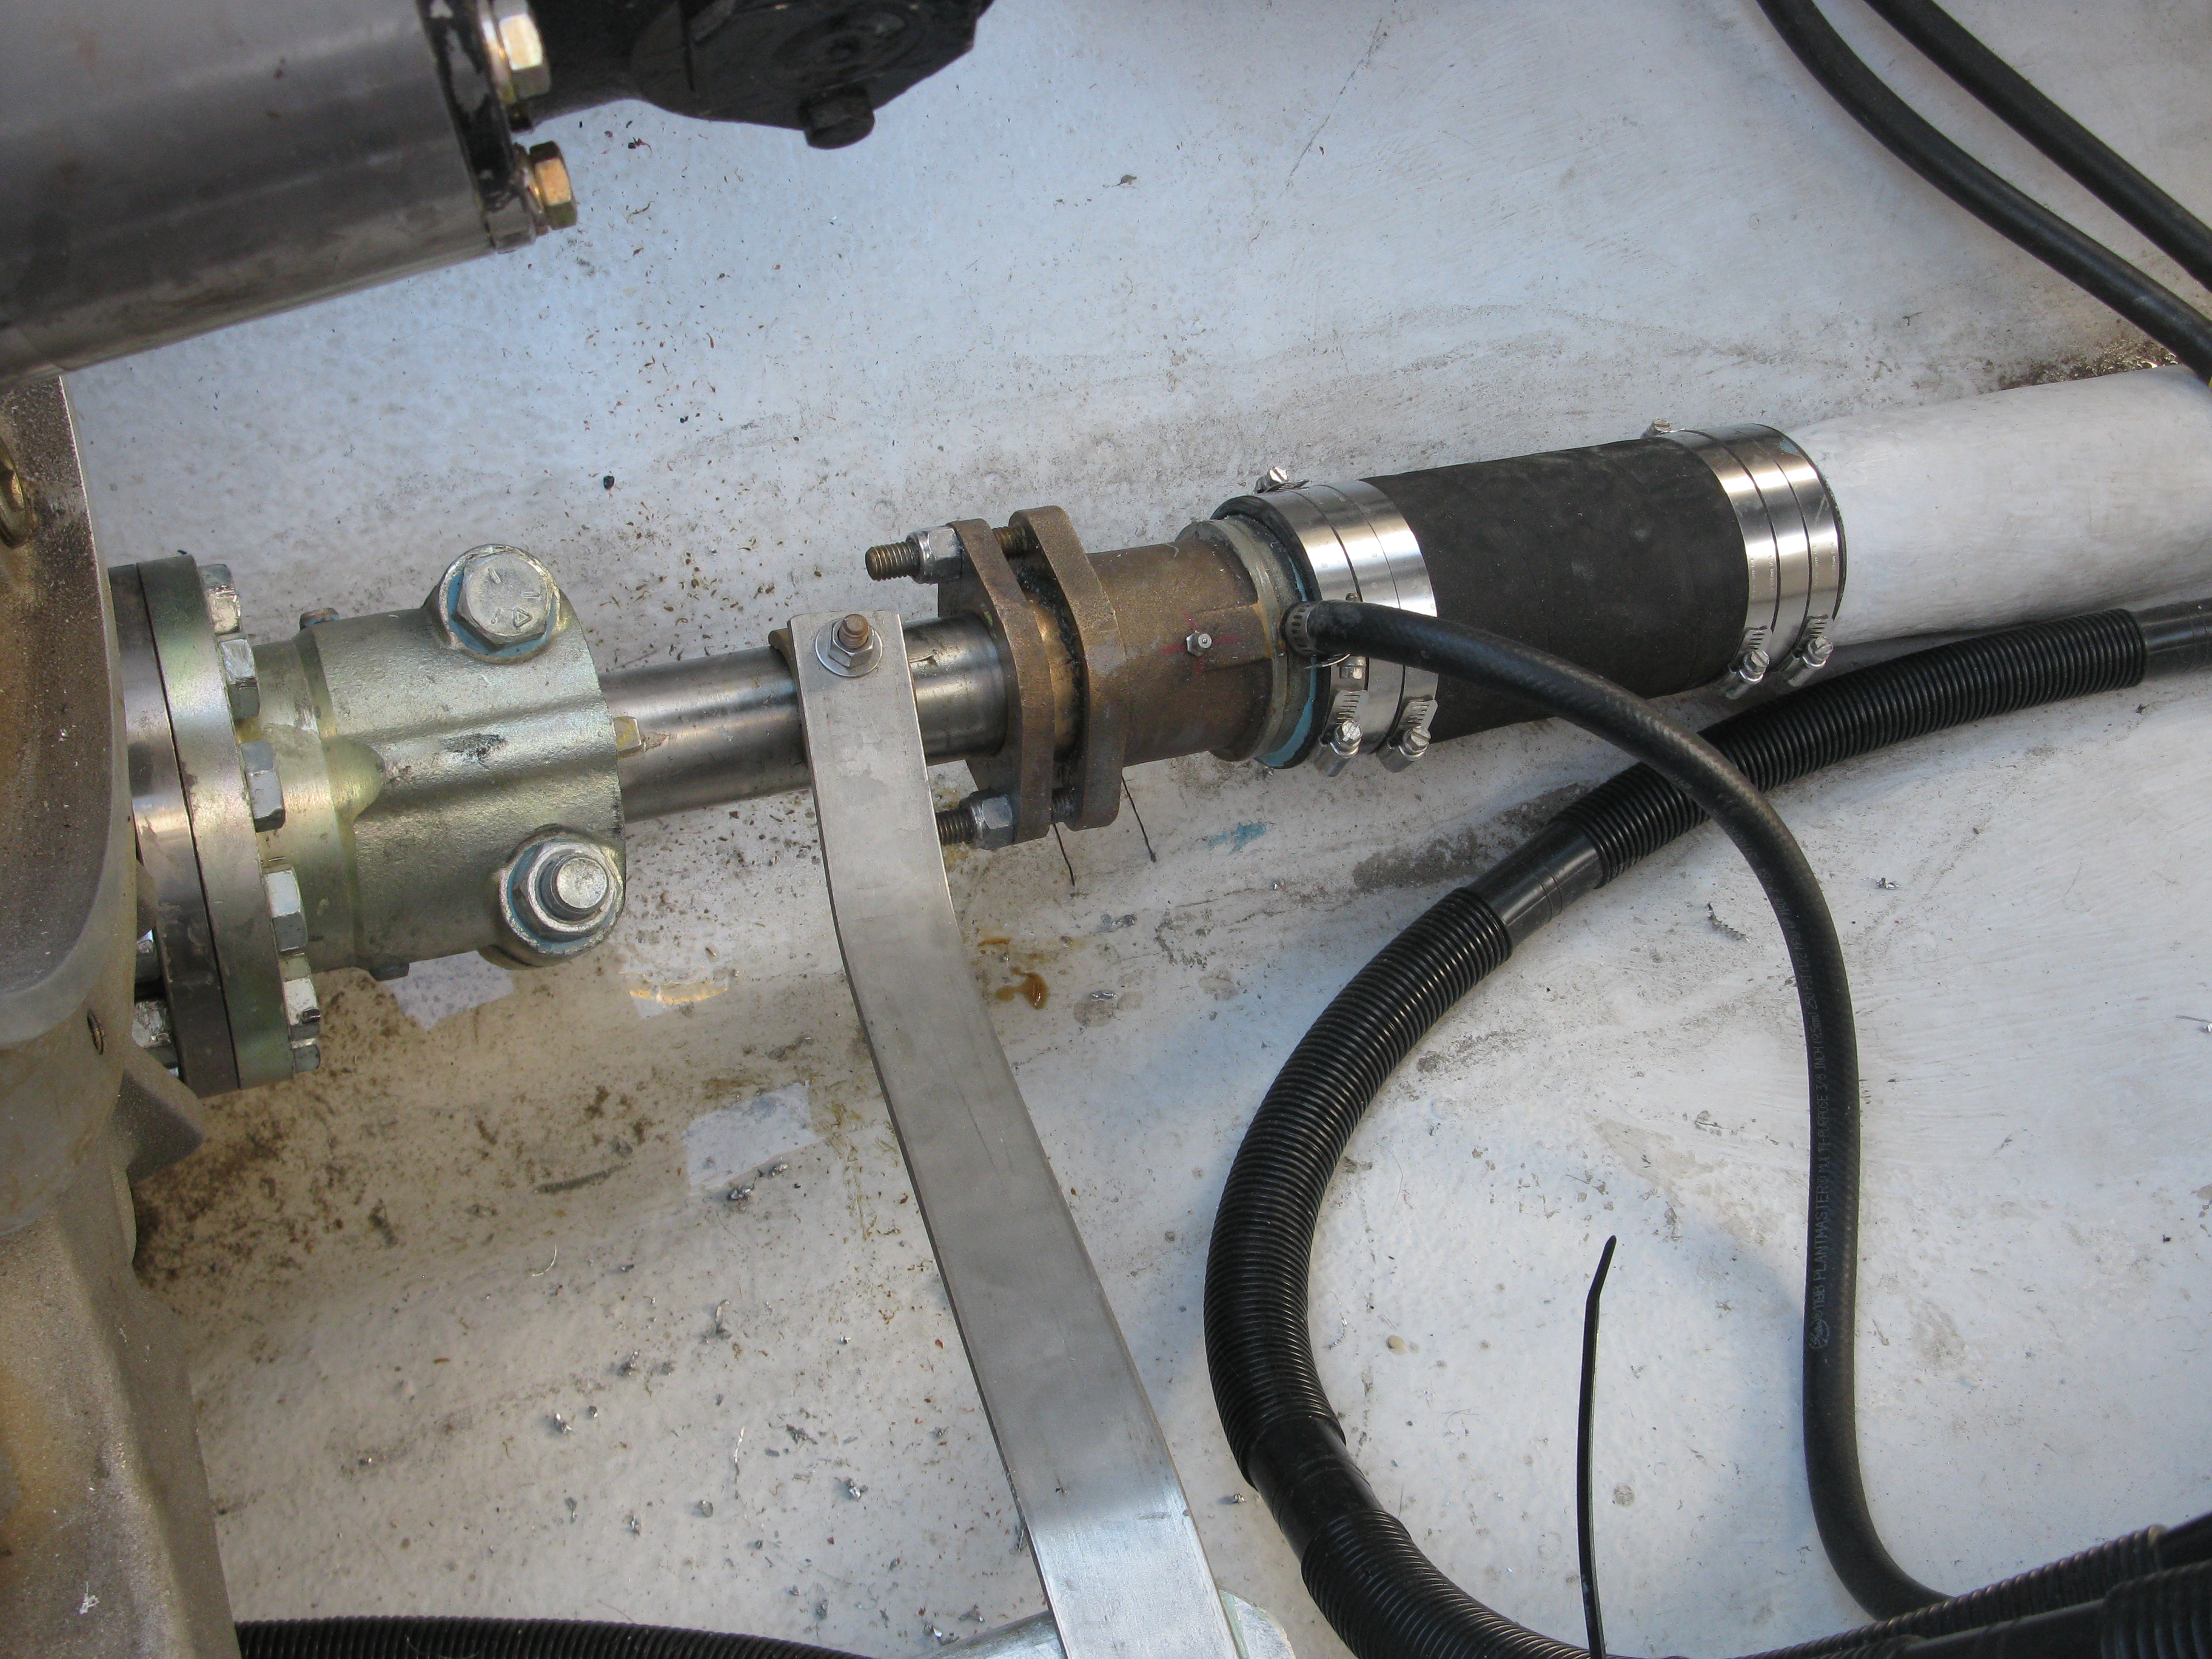
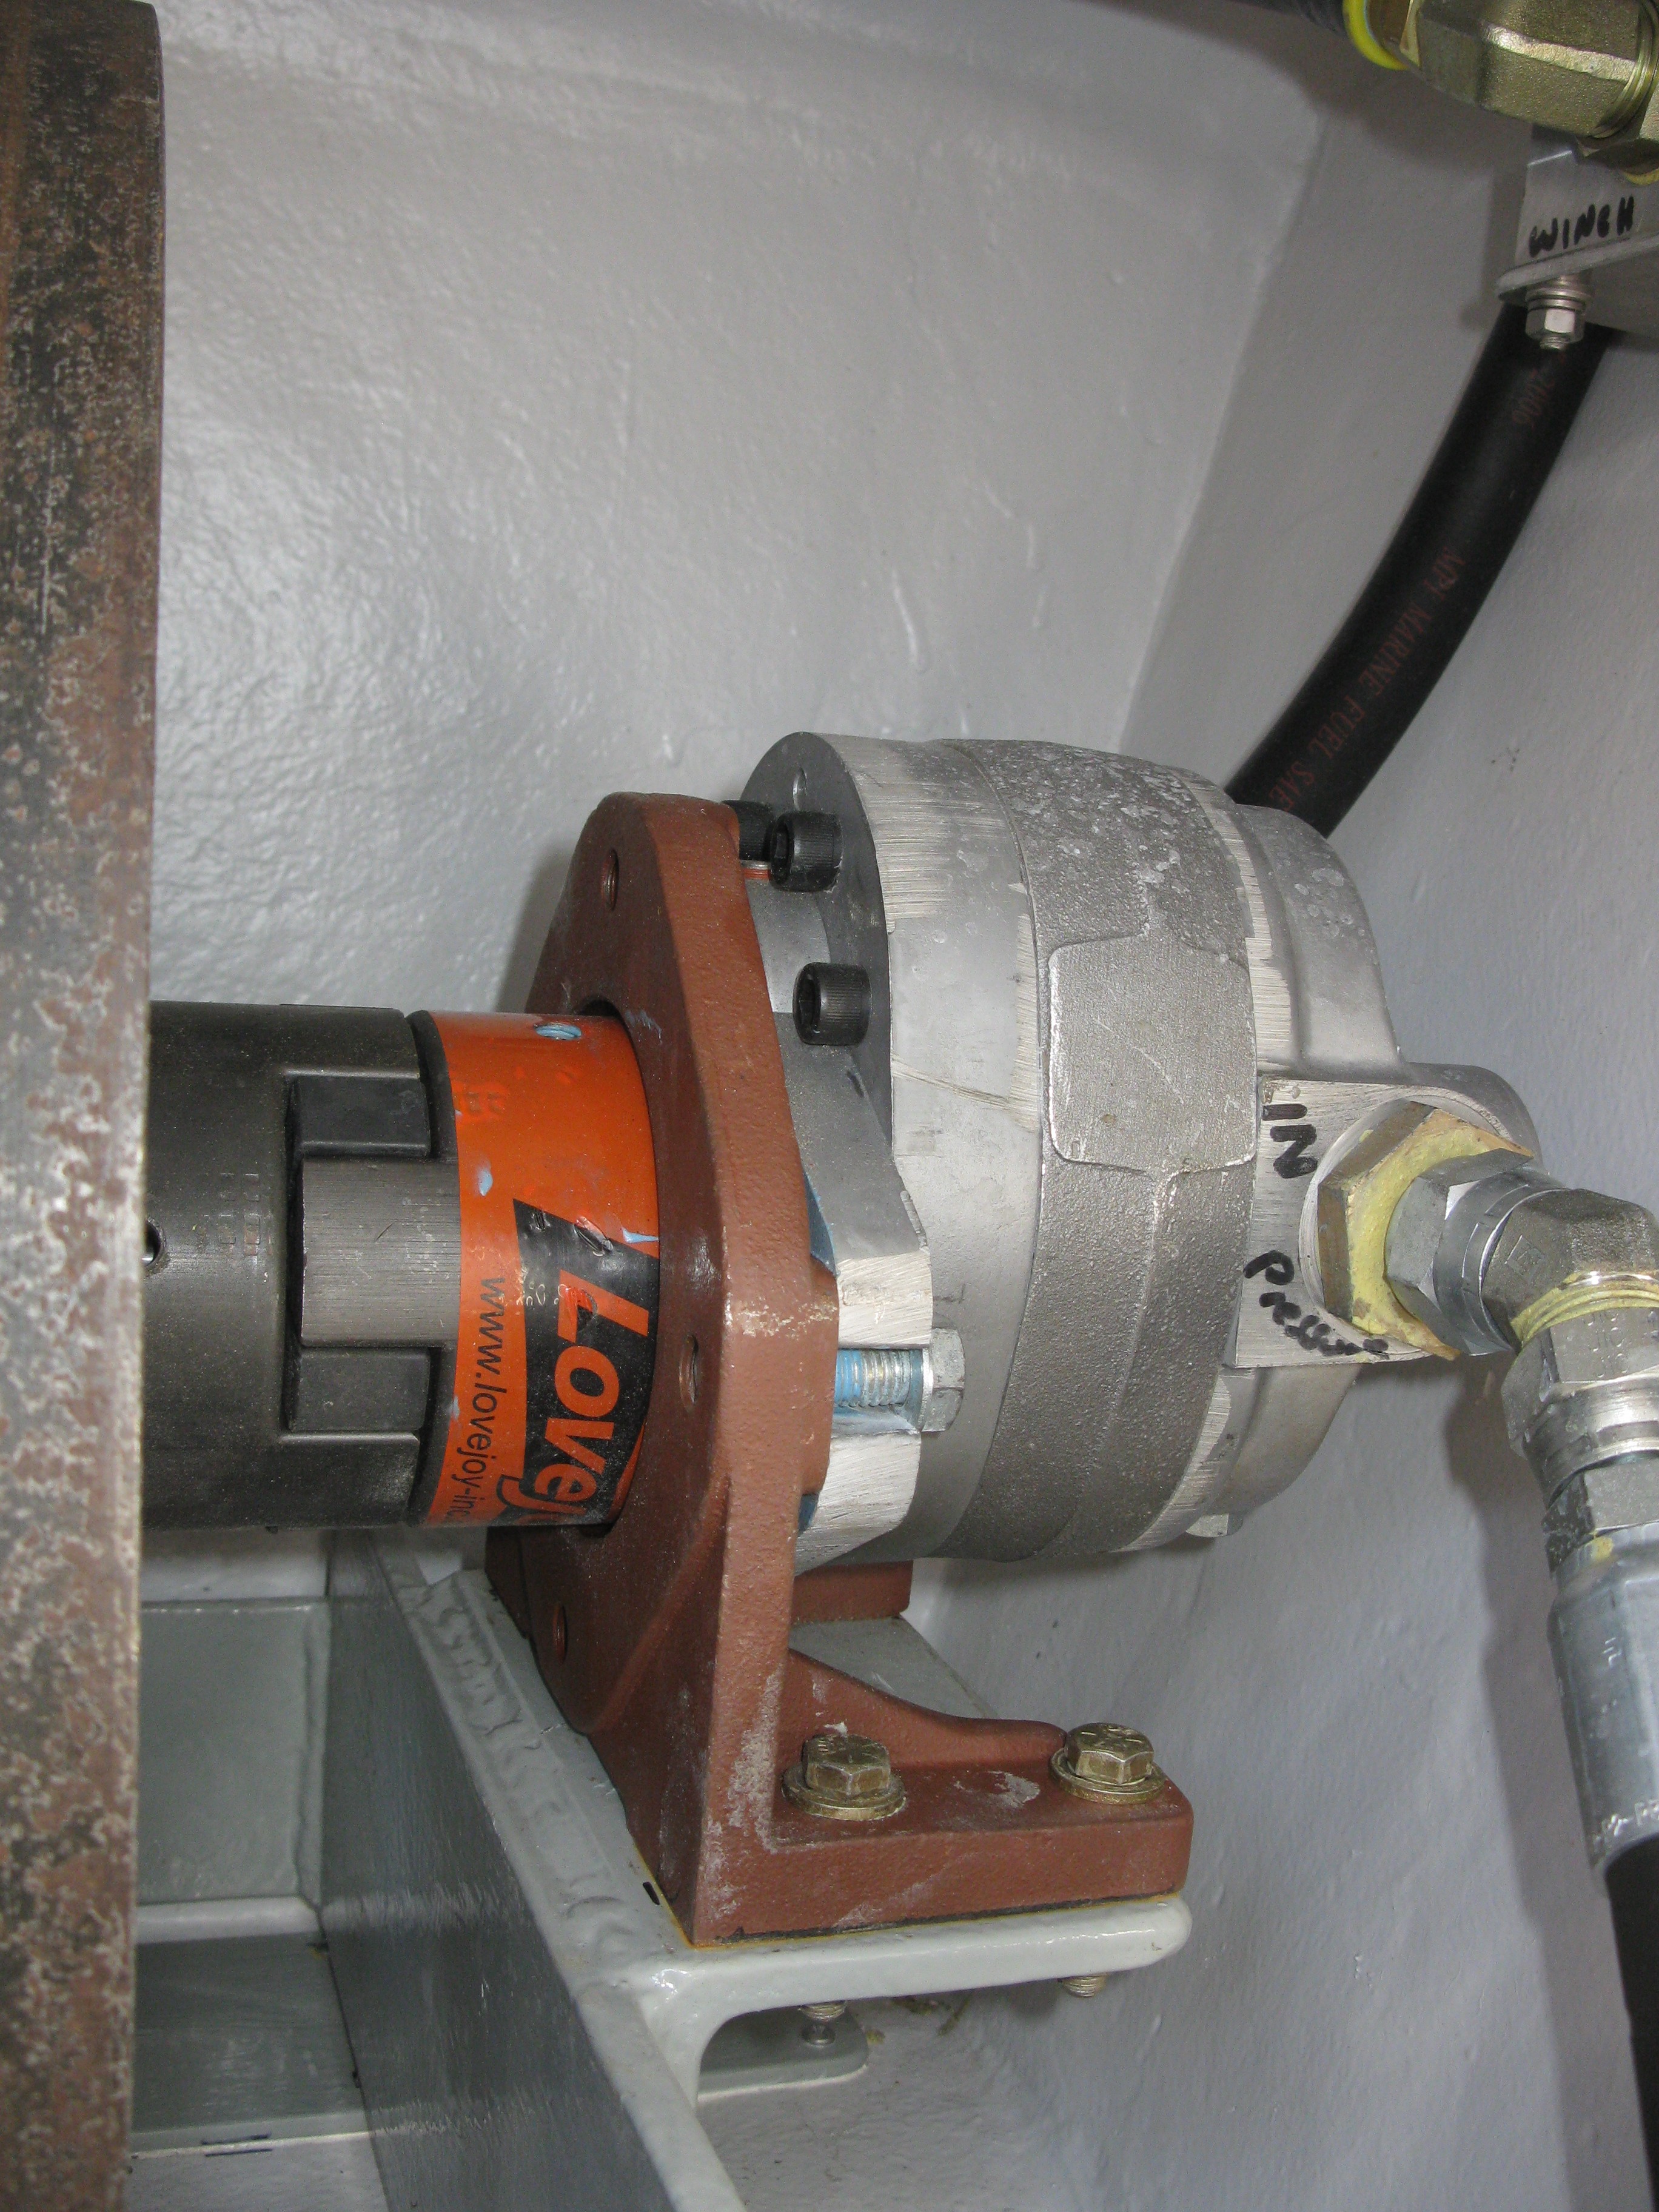
Top view of the ZF325IV and cardan shaft – BTW, that’s a Spicer 1610 with a very custom adapter designed and machined by us.
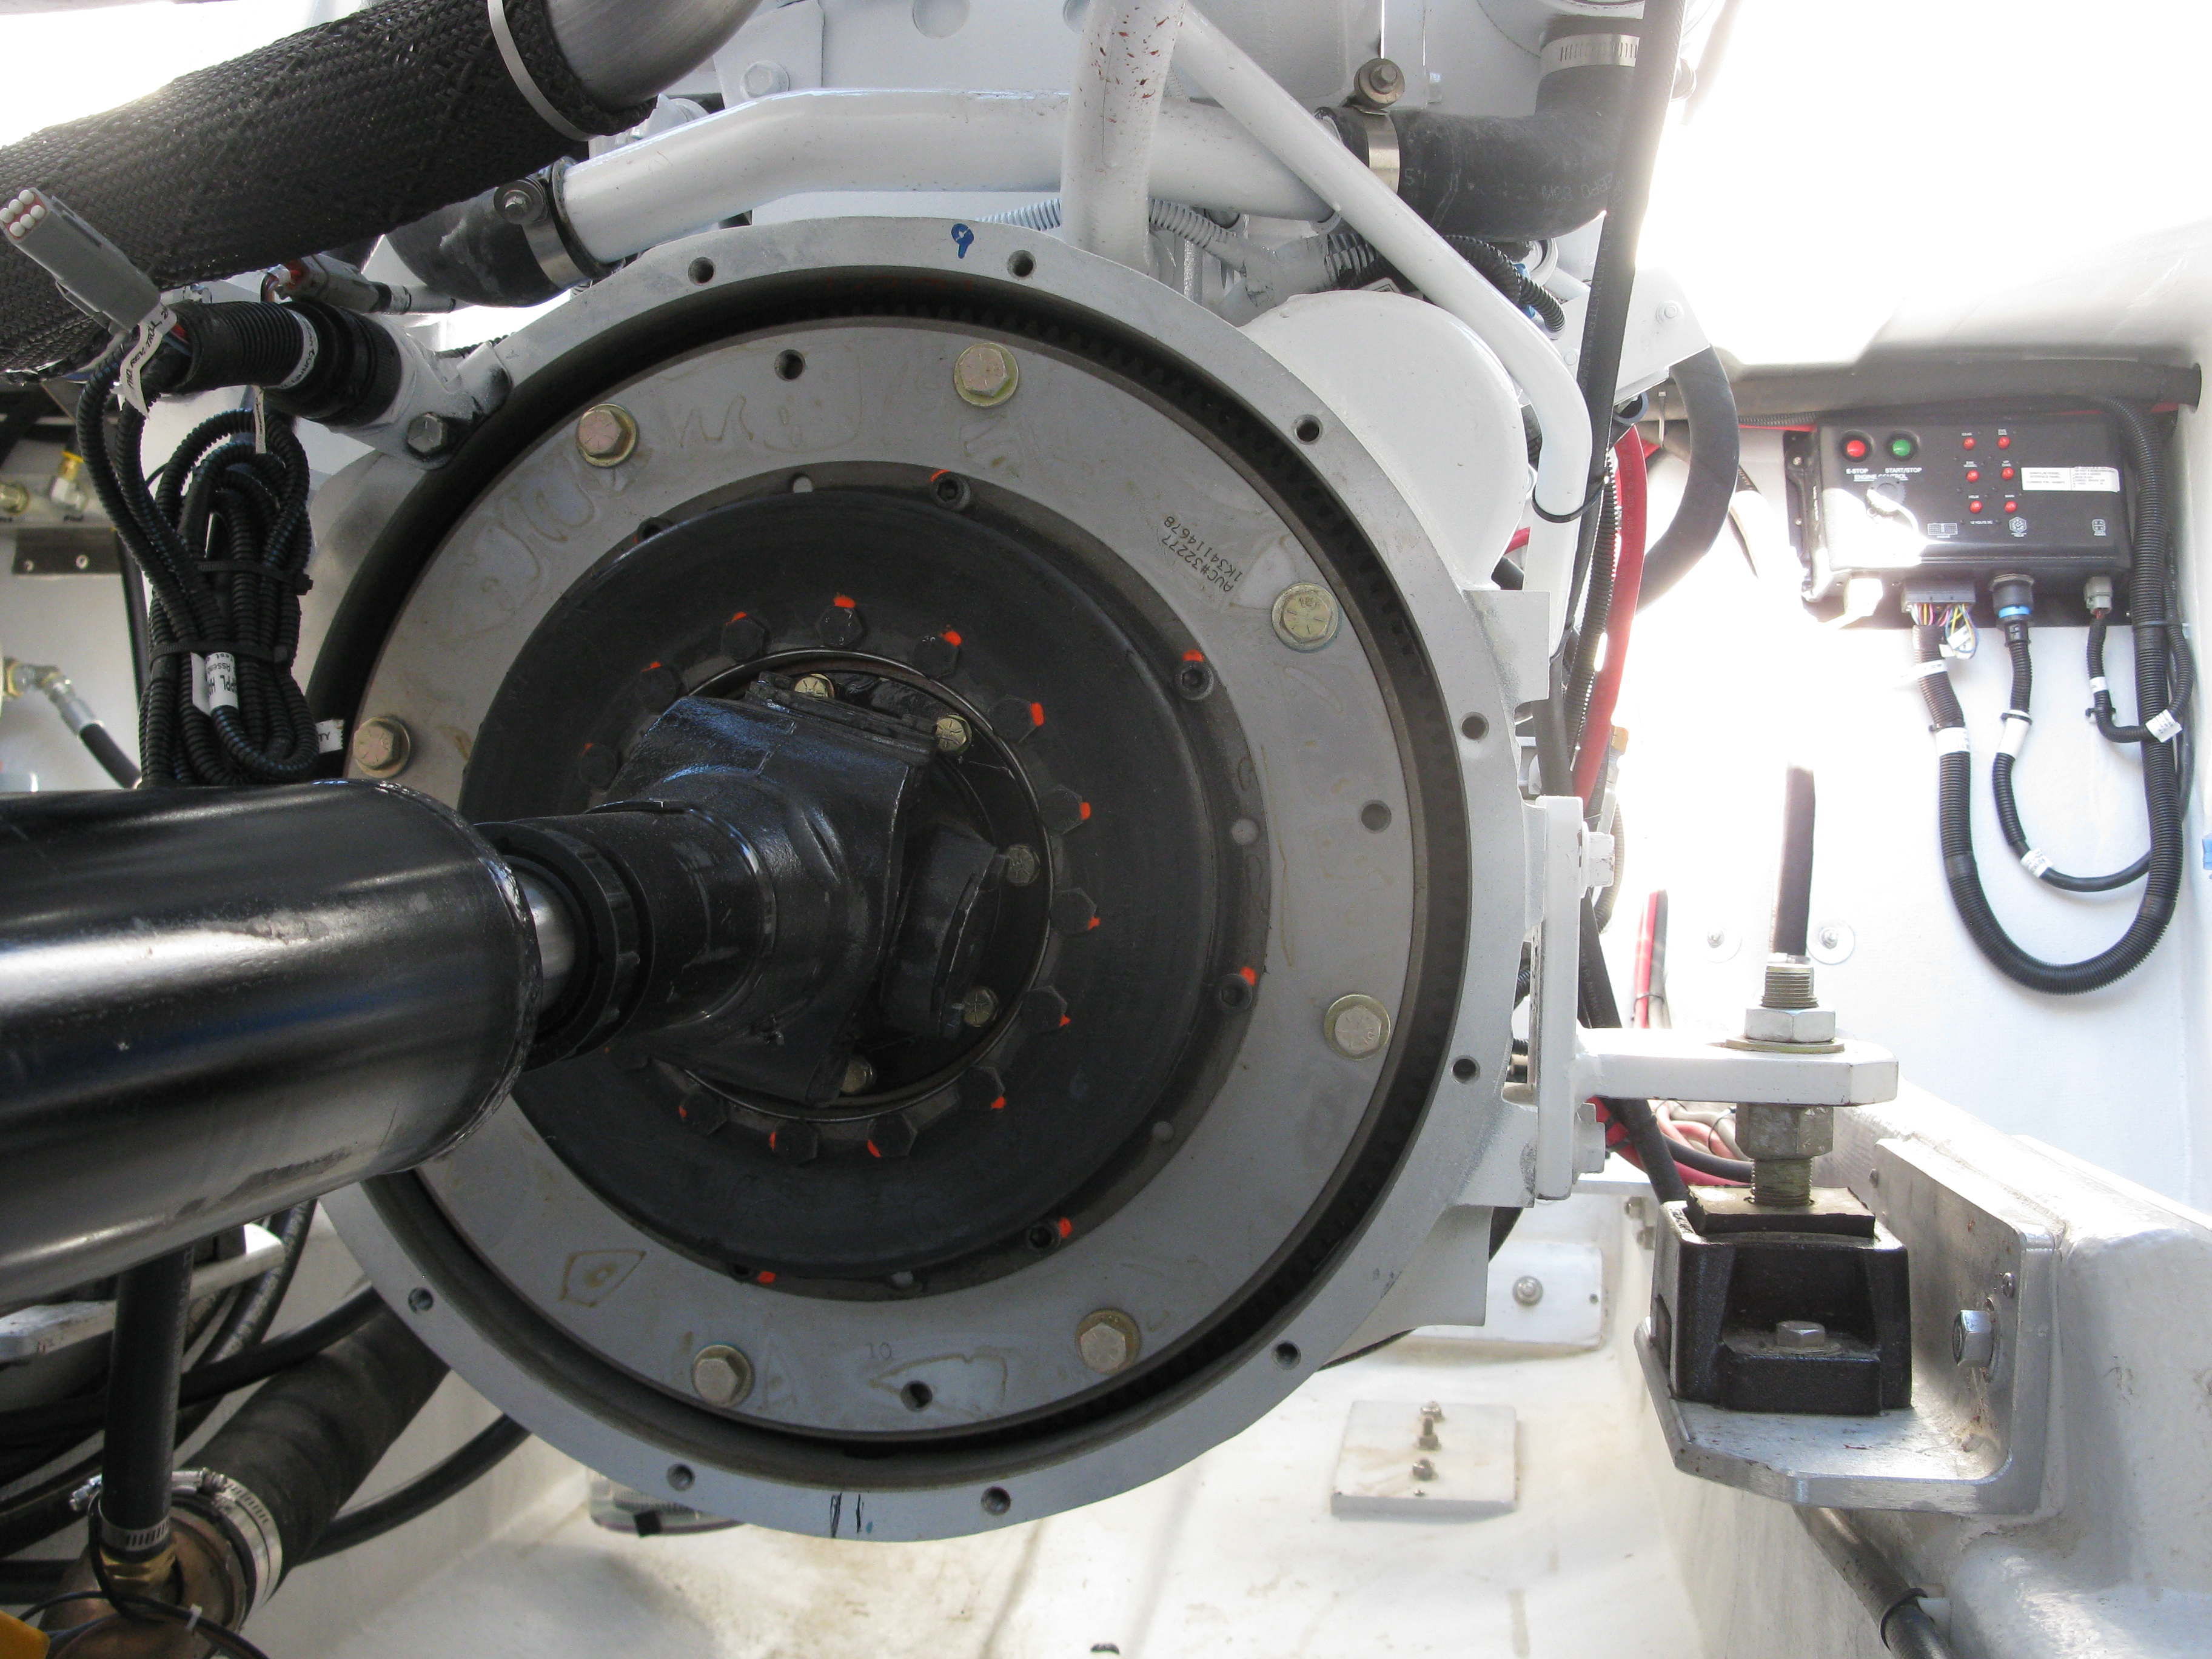
Vulkan SAE 14” Cardan shaft coupling. A tad expensive at about $2700, but you can’t get by without one. Leave it to the Germans to come up with a BMW priced 60 lb disc made of some rubber and steel!
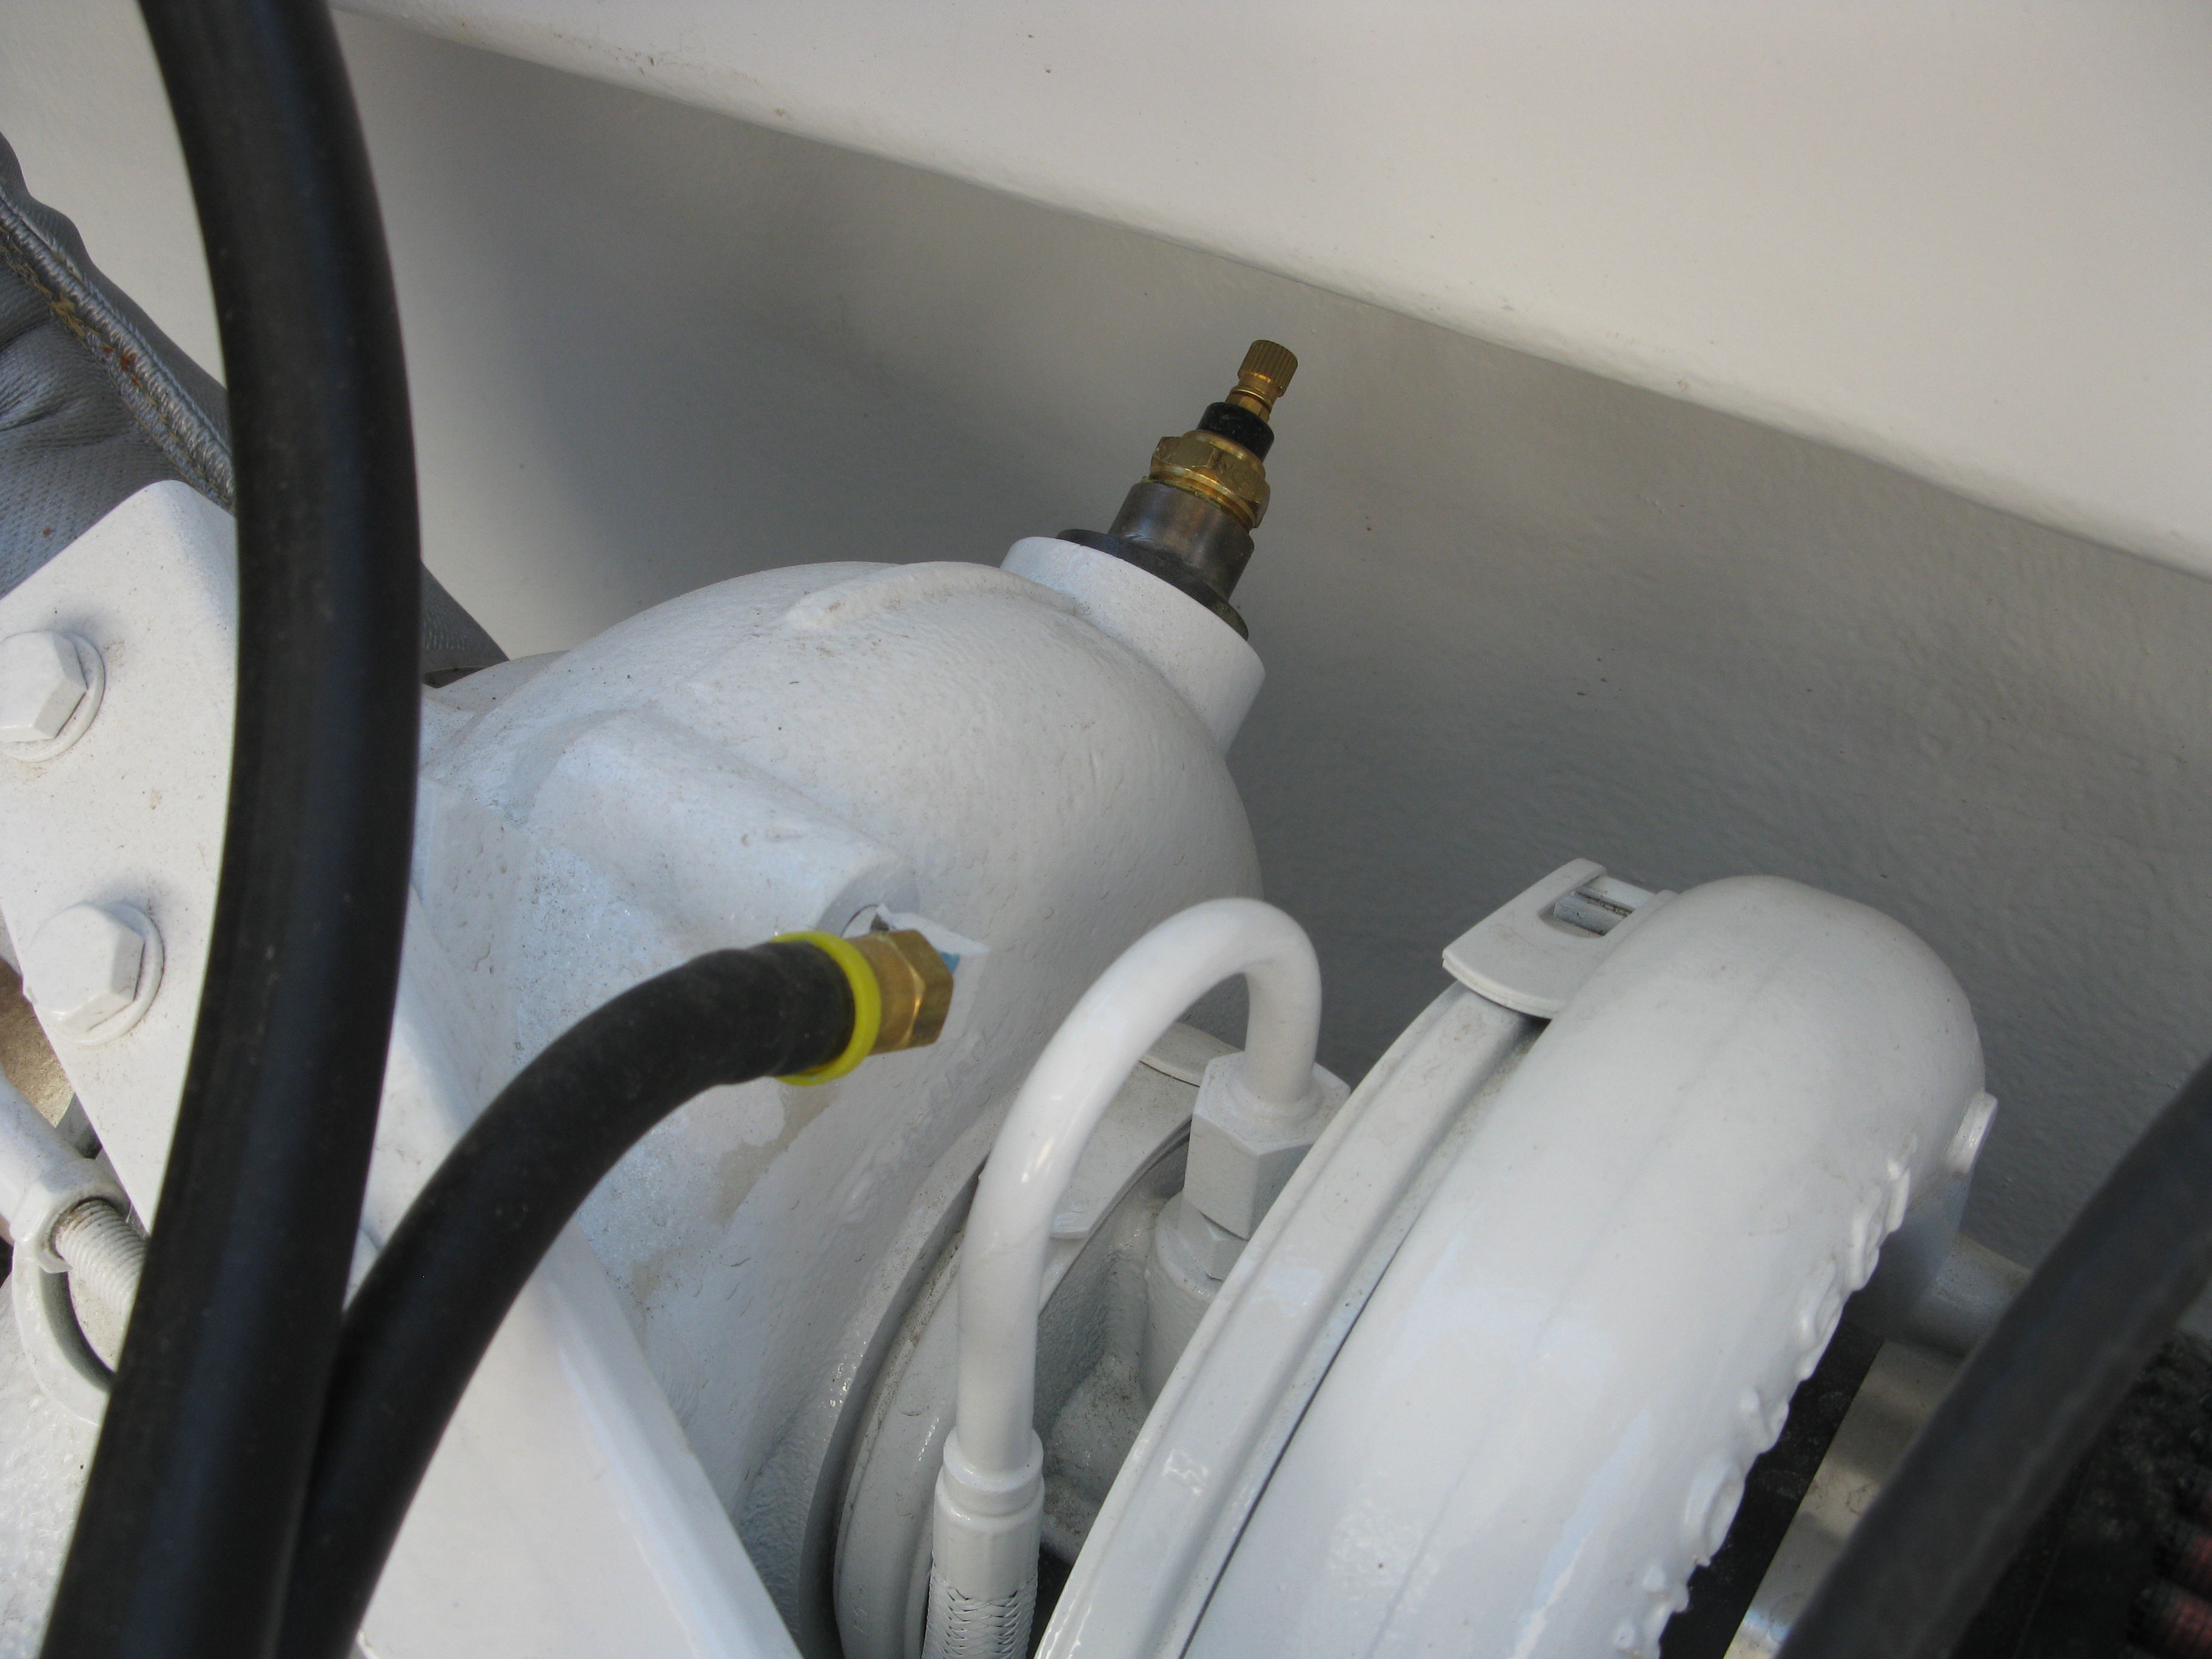
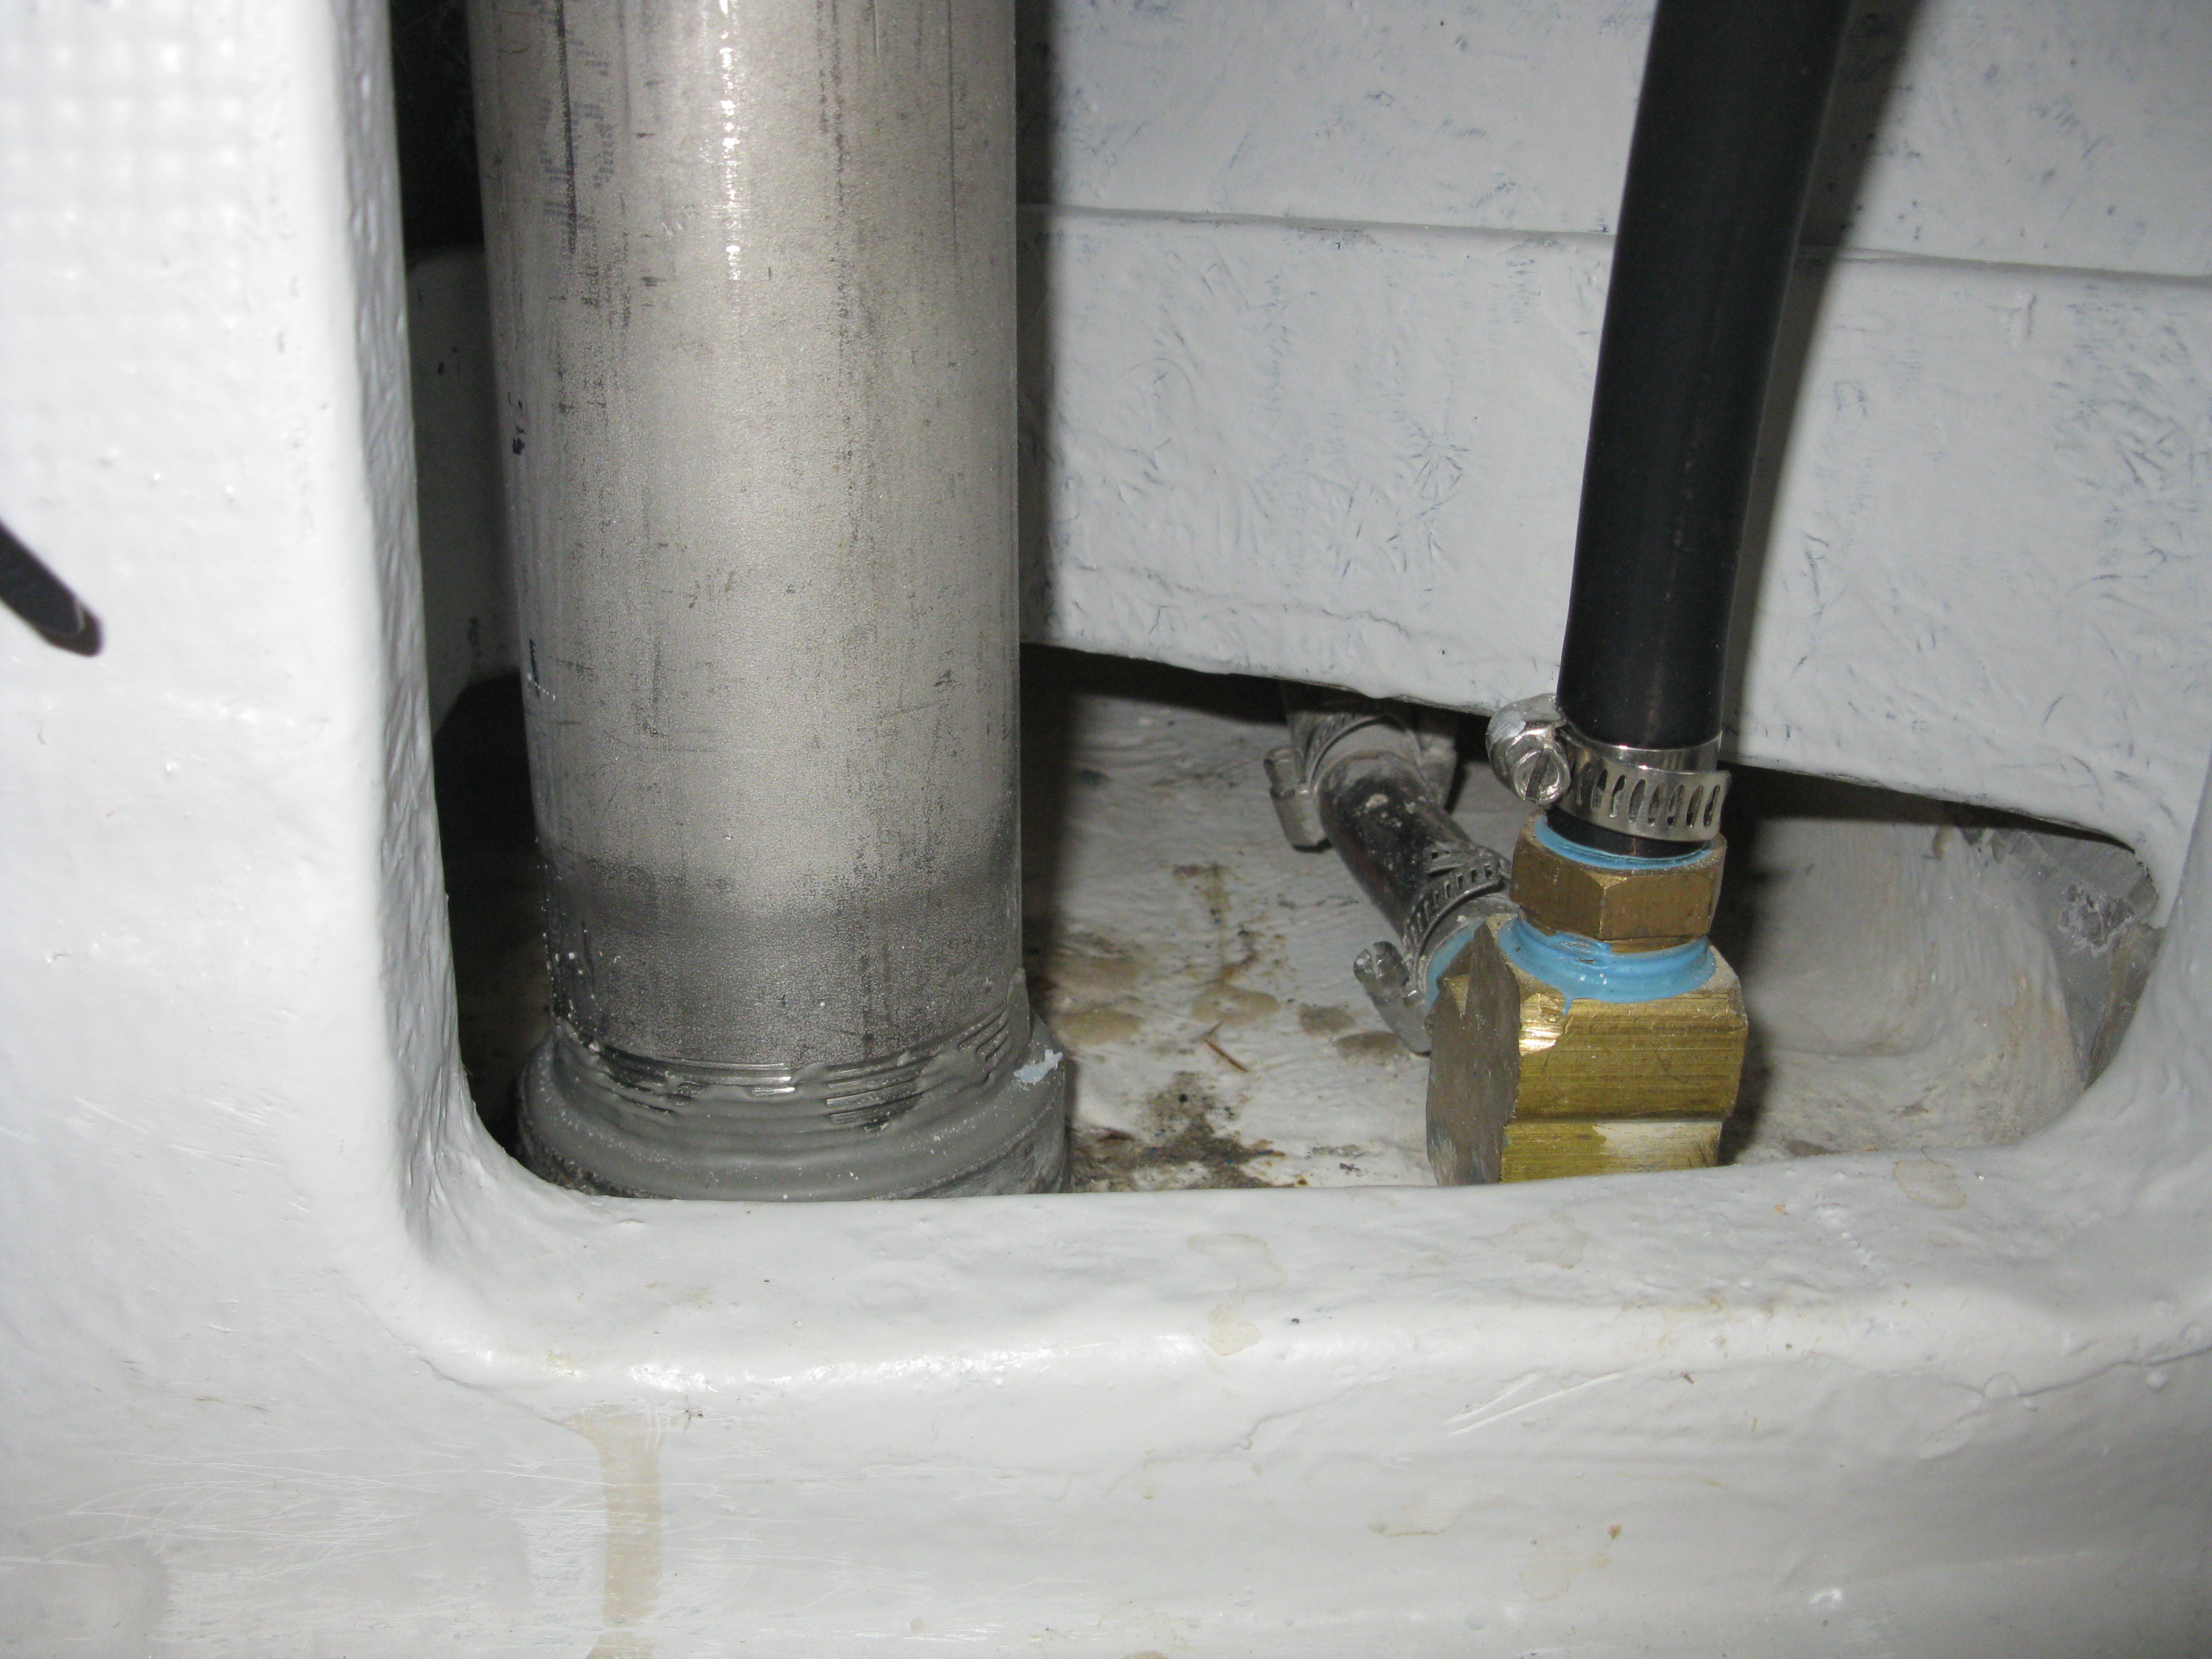
Shaft wiper and water feed to log / center shaft bearing. I used 2” AQ19 shafting.
Shaft seal is re- machined by us from a Buck Algonquin casting/part. We install a grease fitting that lubes it in the center of the pure Teflon packing we use, assemble them on the lathe and run them in at 1800 rpm. We use as long of a soft multi-plied marine exhaust type hose as practical, to allow the packing to more easily “follow the shaft”. Plus, we never use “T” bolt clamps – that is another story that goes against the grain with most, but something that I believe in for multiple reasons based on 30+ yrs of dealing with shaft seals & logs of all types. When sea trial day comes, putting together a packing like this is just one less thing I have to deal with.
Factory Sherwood 1730 Pump – It will never make it through warranty, but that’s warrantee $$ in my pocket. I’ll give it one year, maybe 1200 hours at best.
Commercial Shearing Hydraulic pump – 12 GPM at 800 engine RPM – set to about 2200 PSI and is used to drive his 5 HP drive compressor and anchor winch.
His “dive-air compressor” hydraulically run driven at about 700 shaft RPM putting out 120-150 PSI and about 20 CFM.
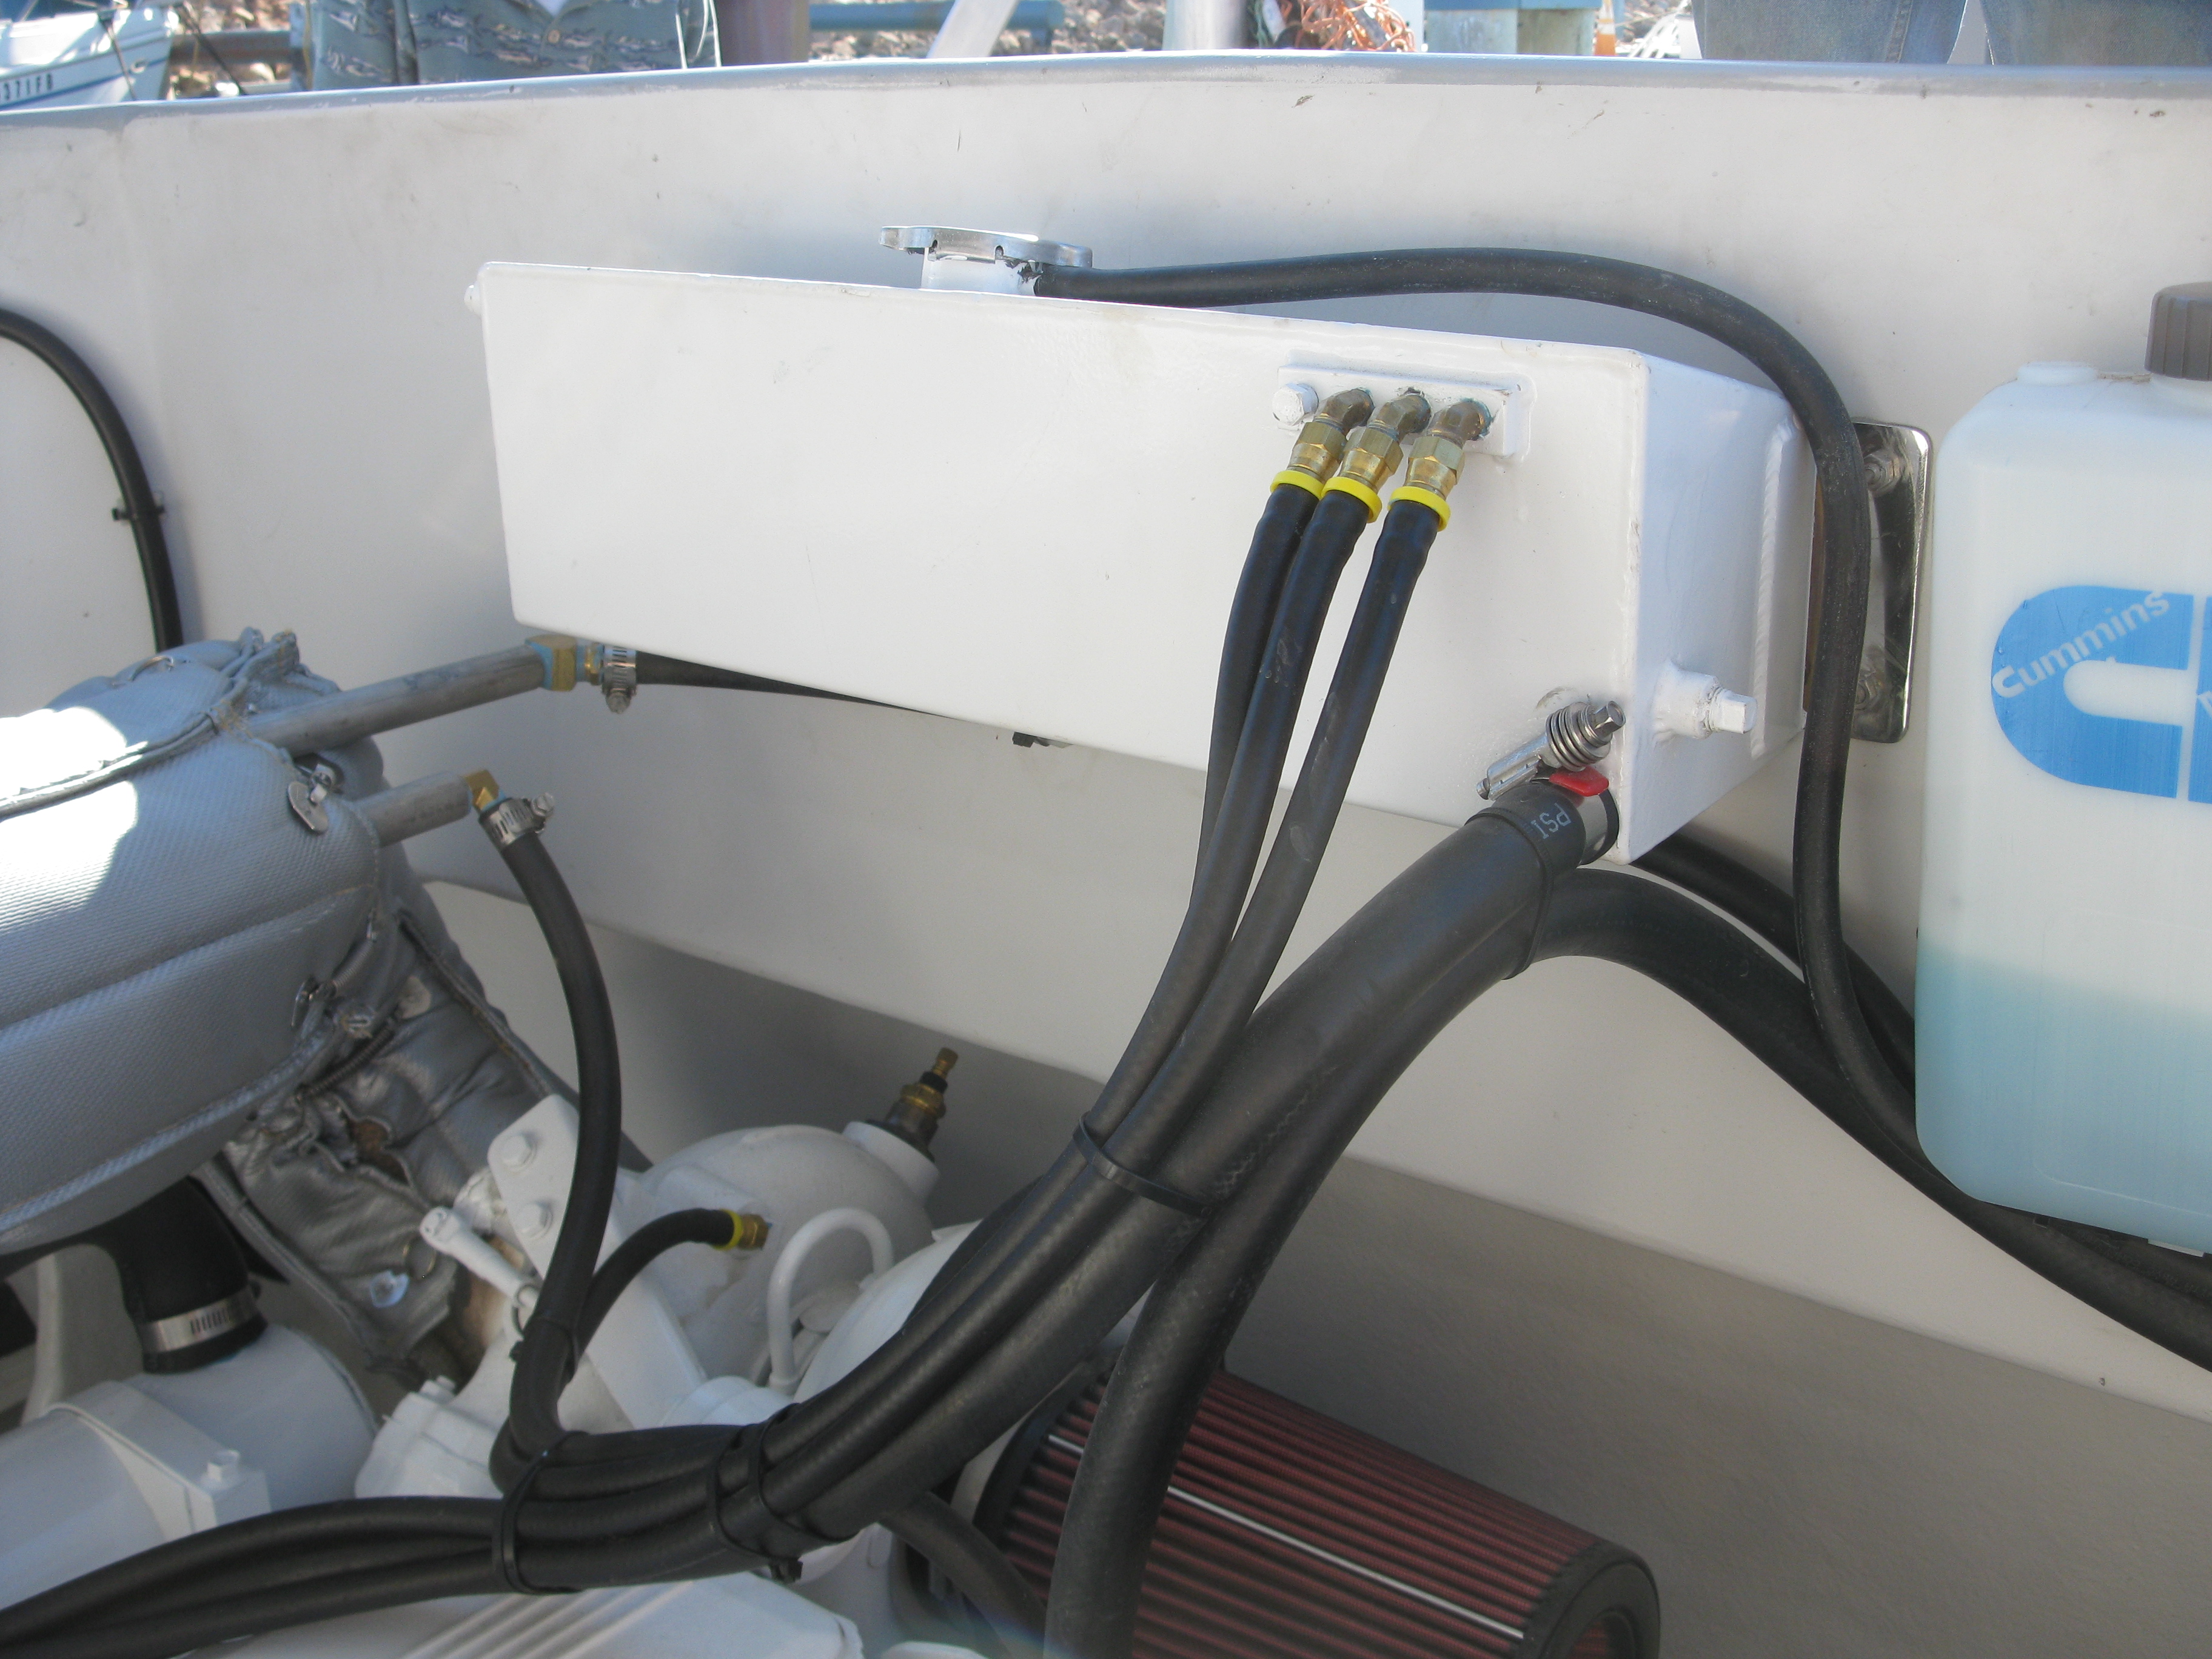
Remote engine coolant expansion tank. Very easy access/service and is about 15” above the engine.
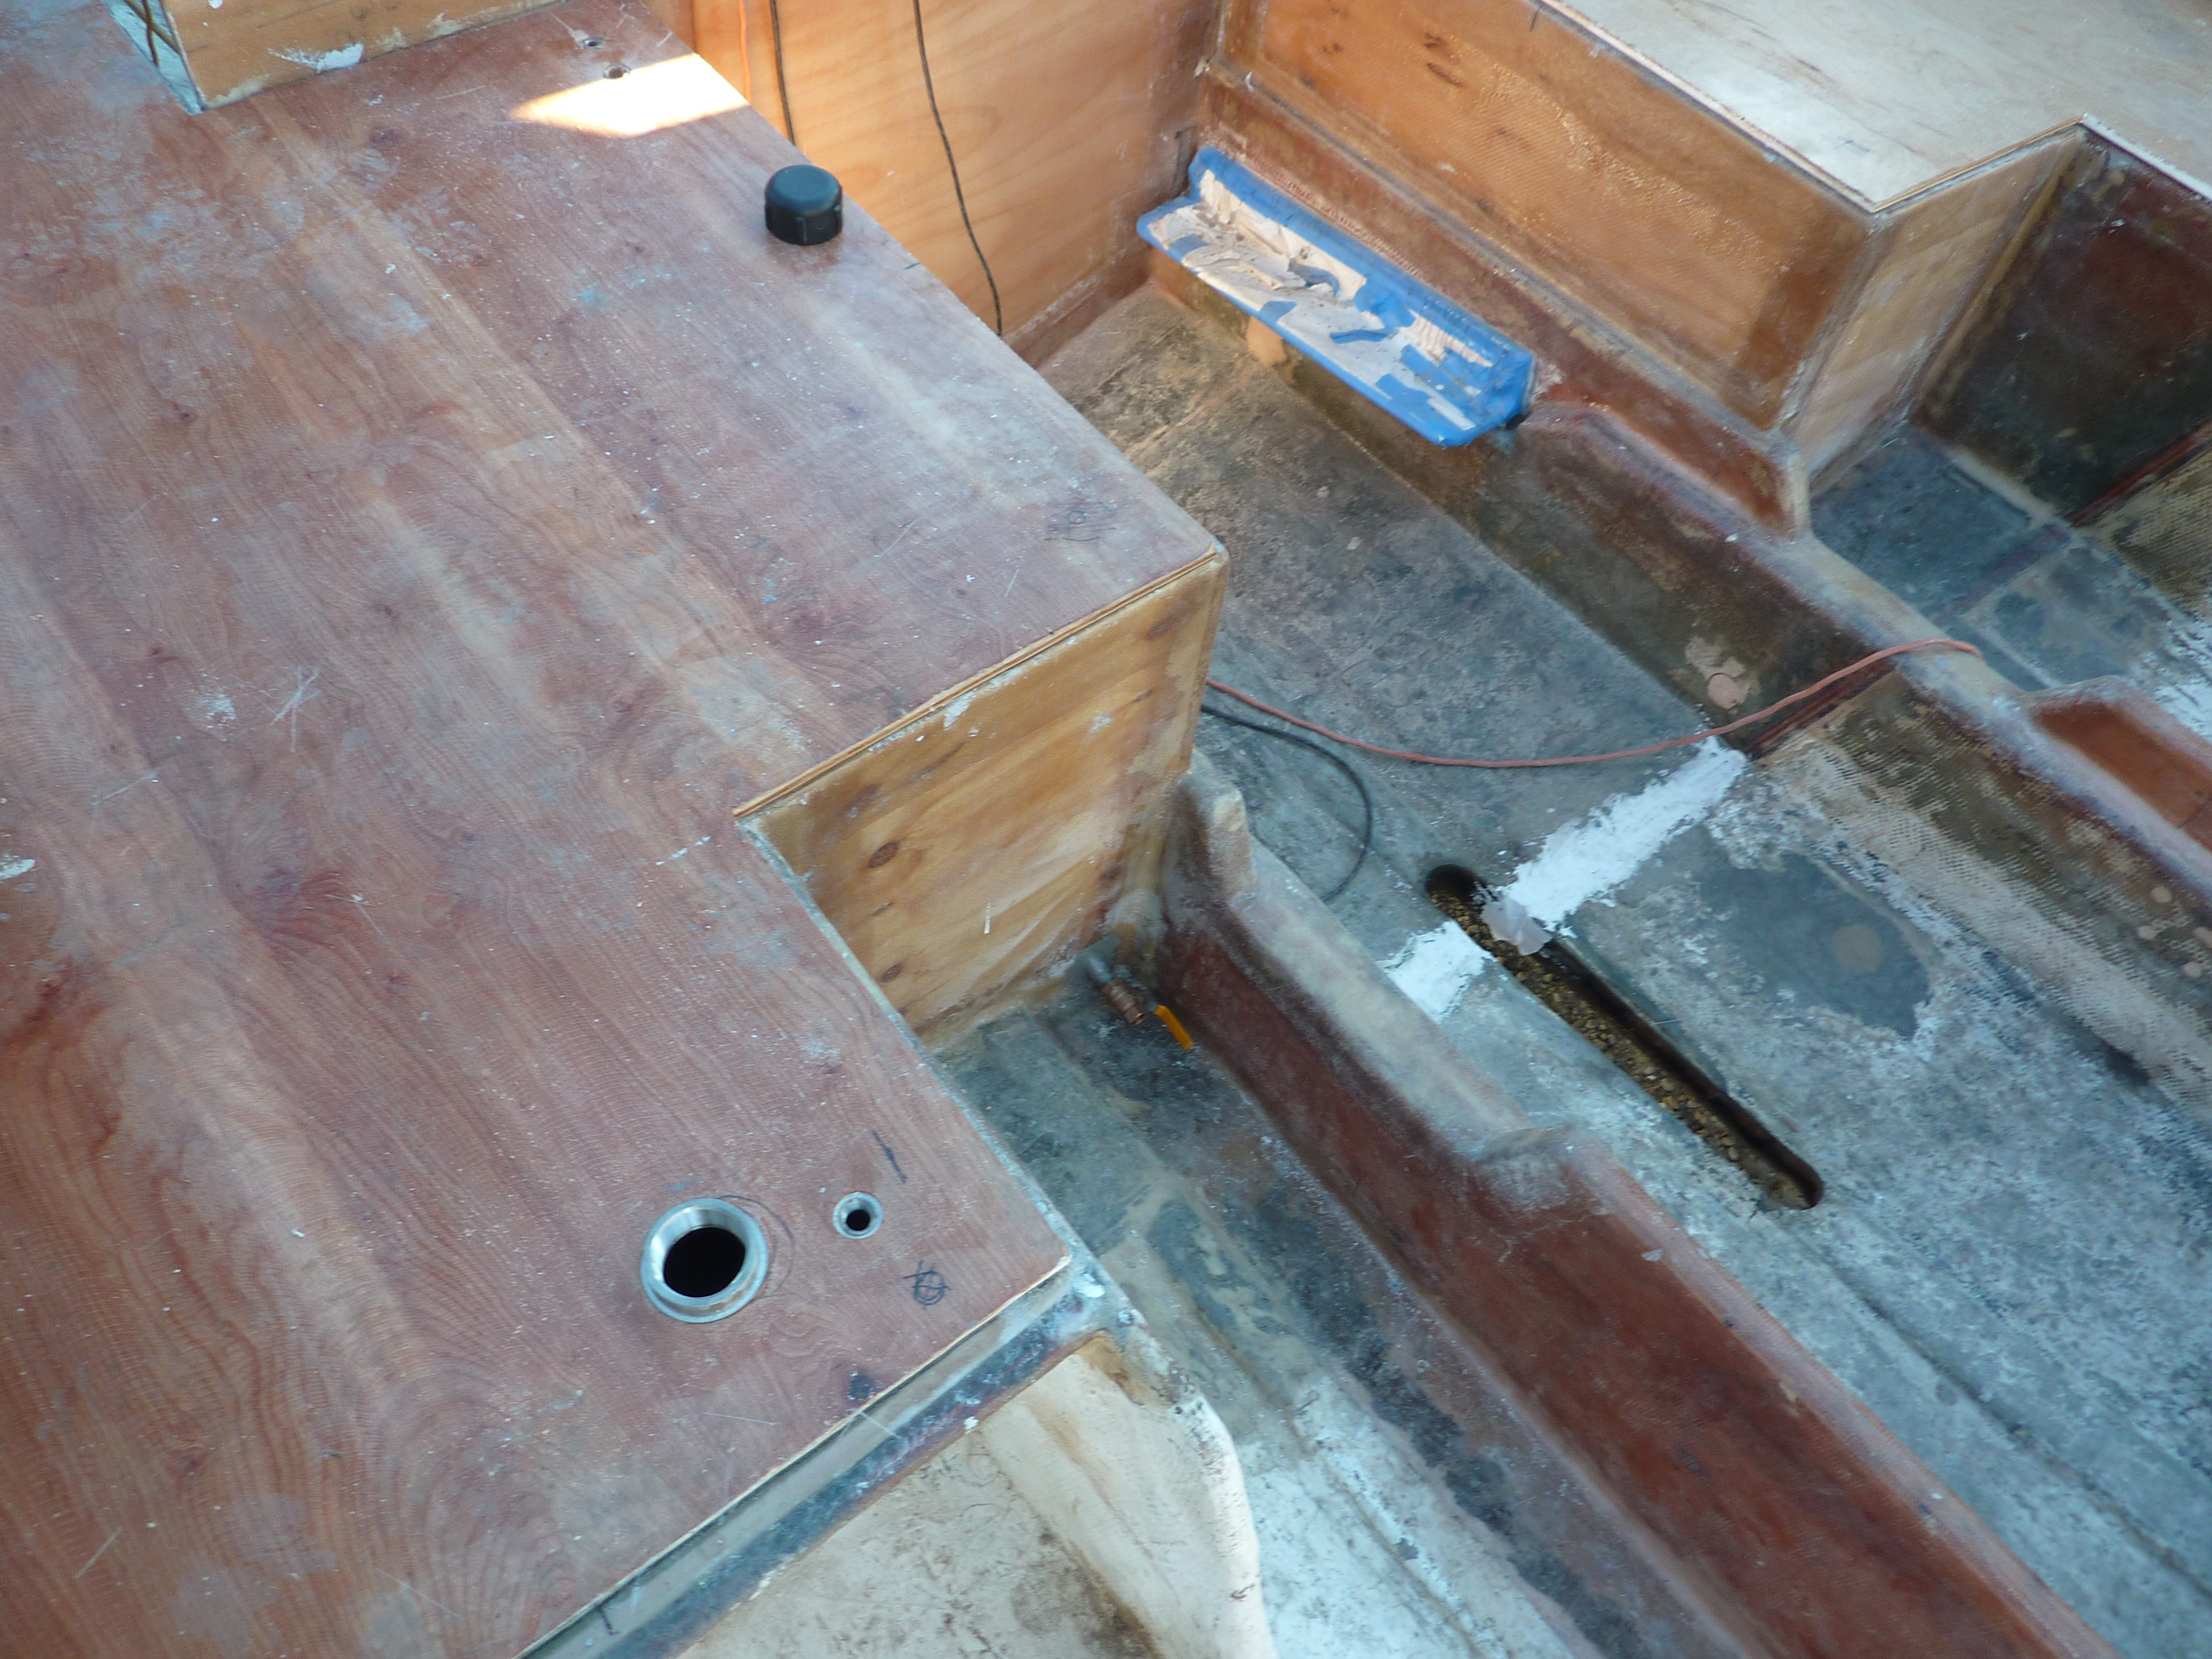
Top of fuel tank access to return fuel, vent line and 2”+ ID fuel fill.
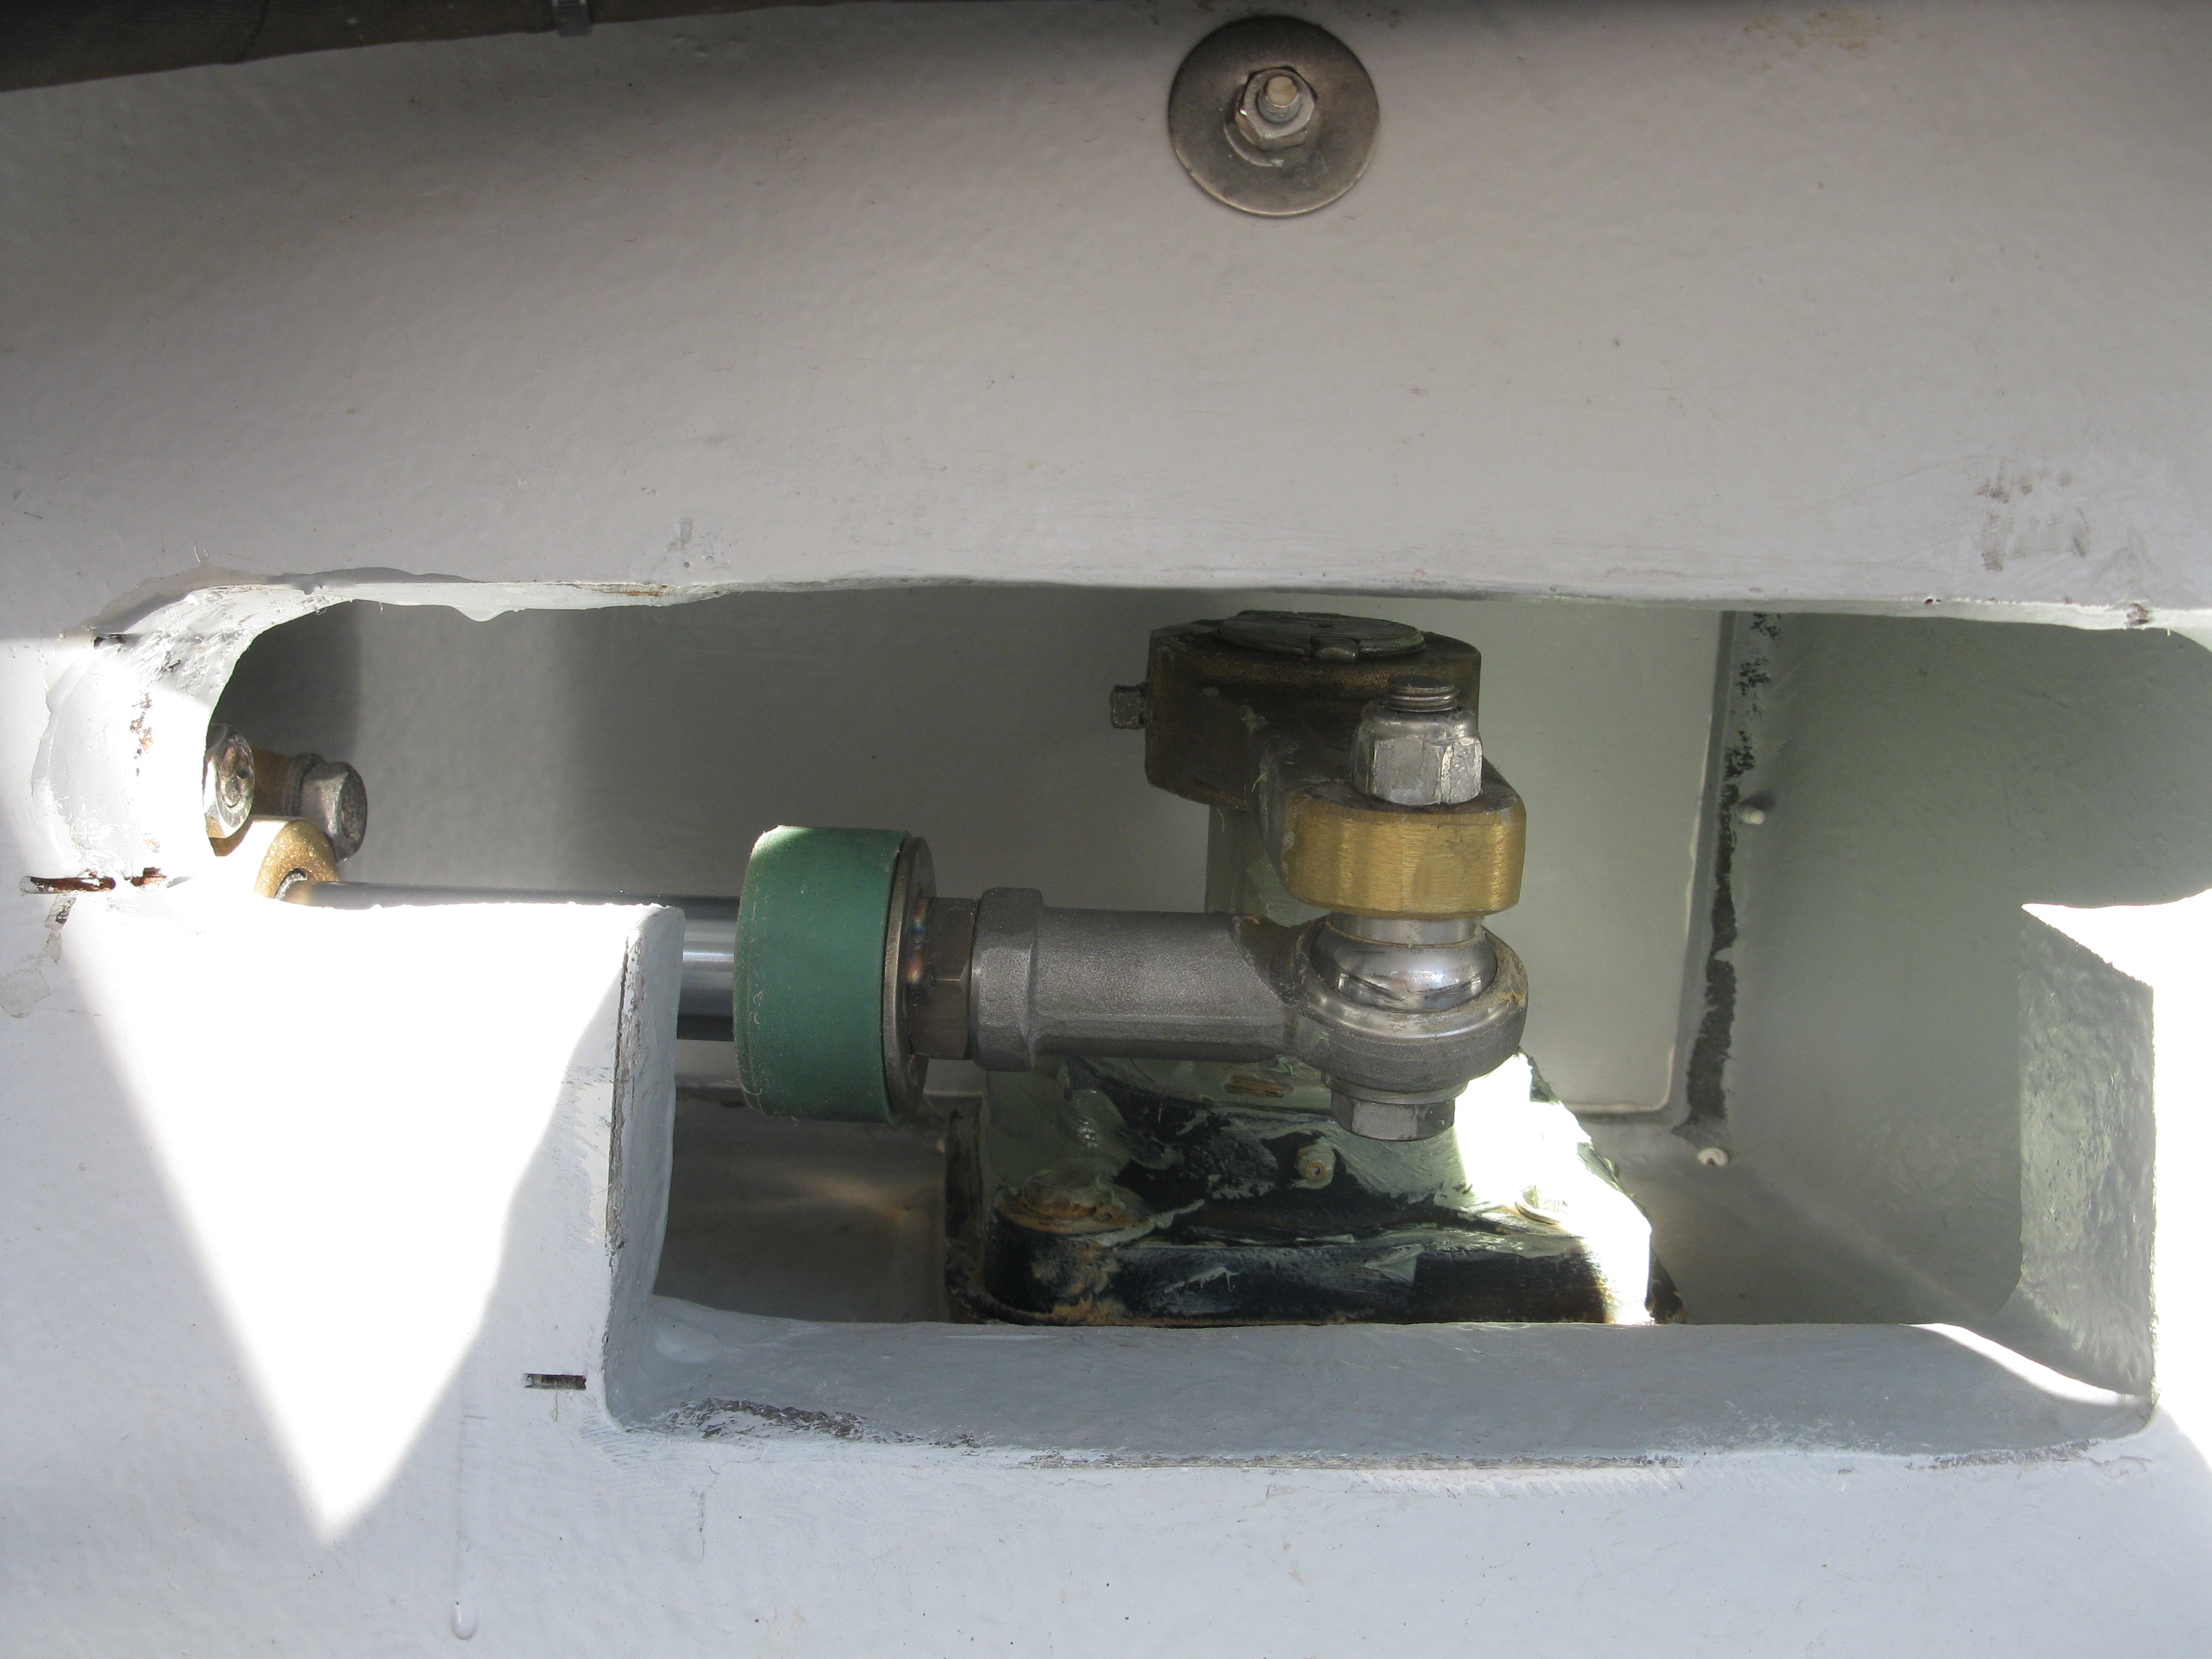
Hydraulic steering ram connection to rudder tiller arm.
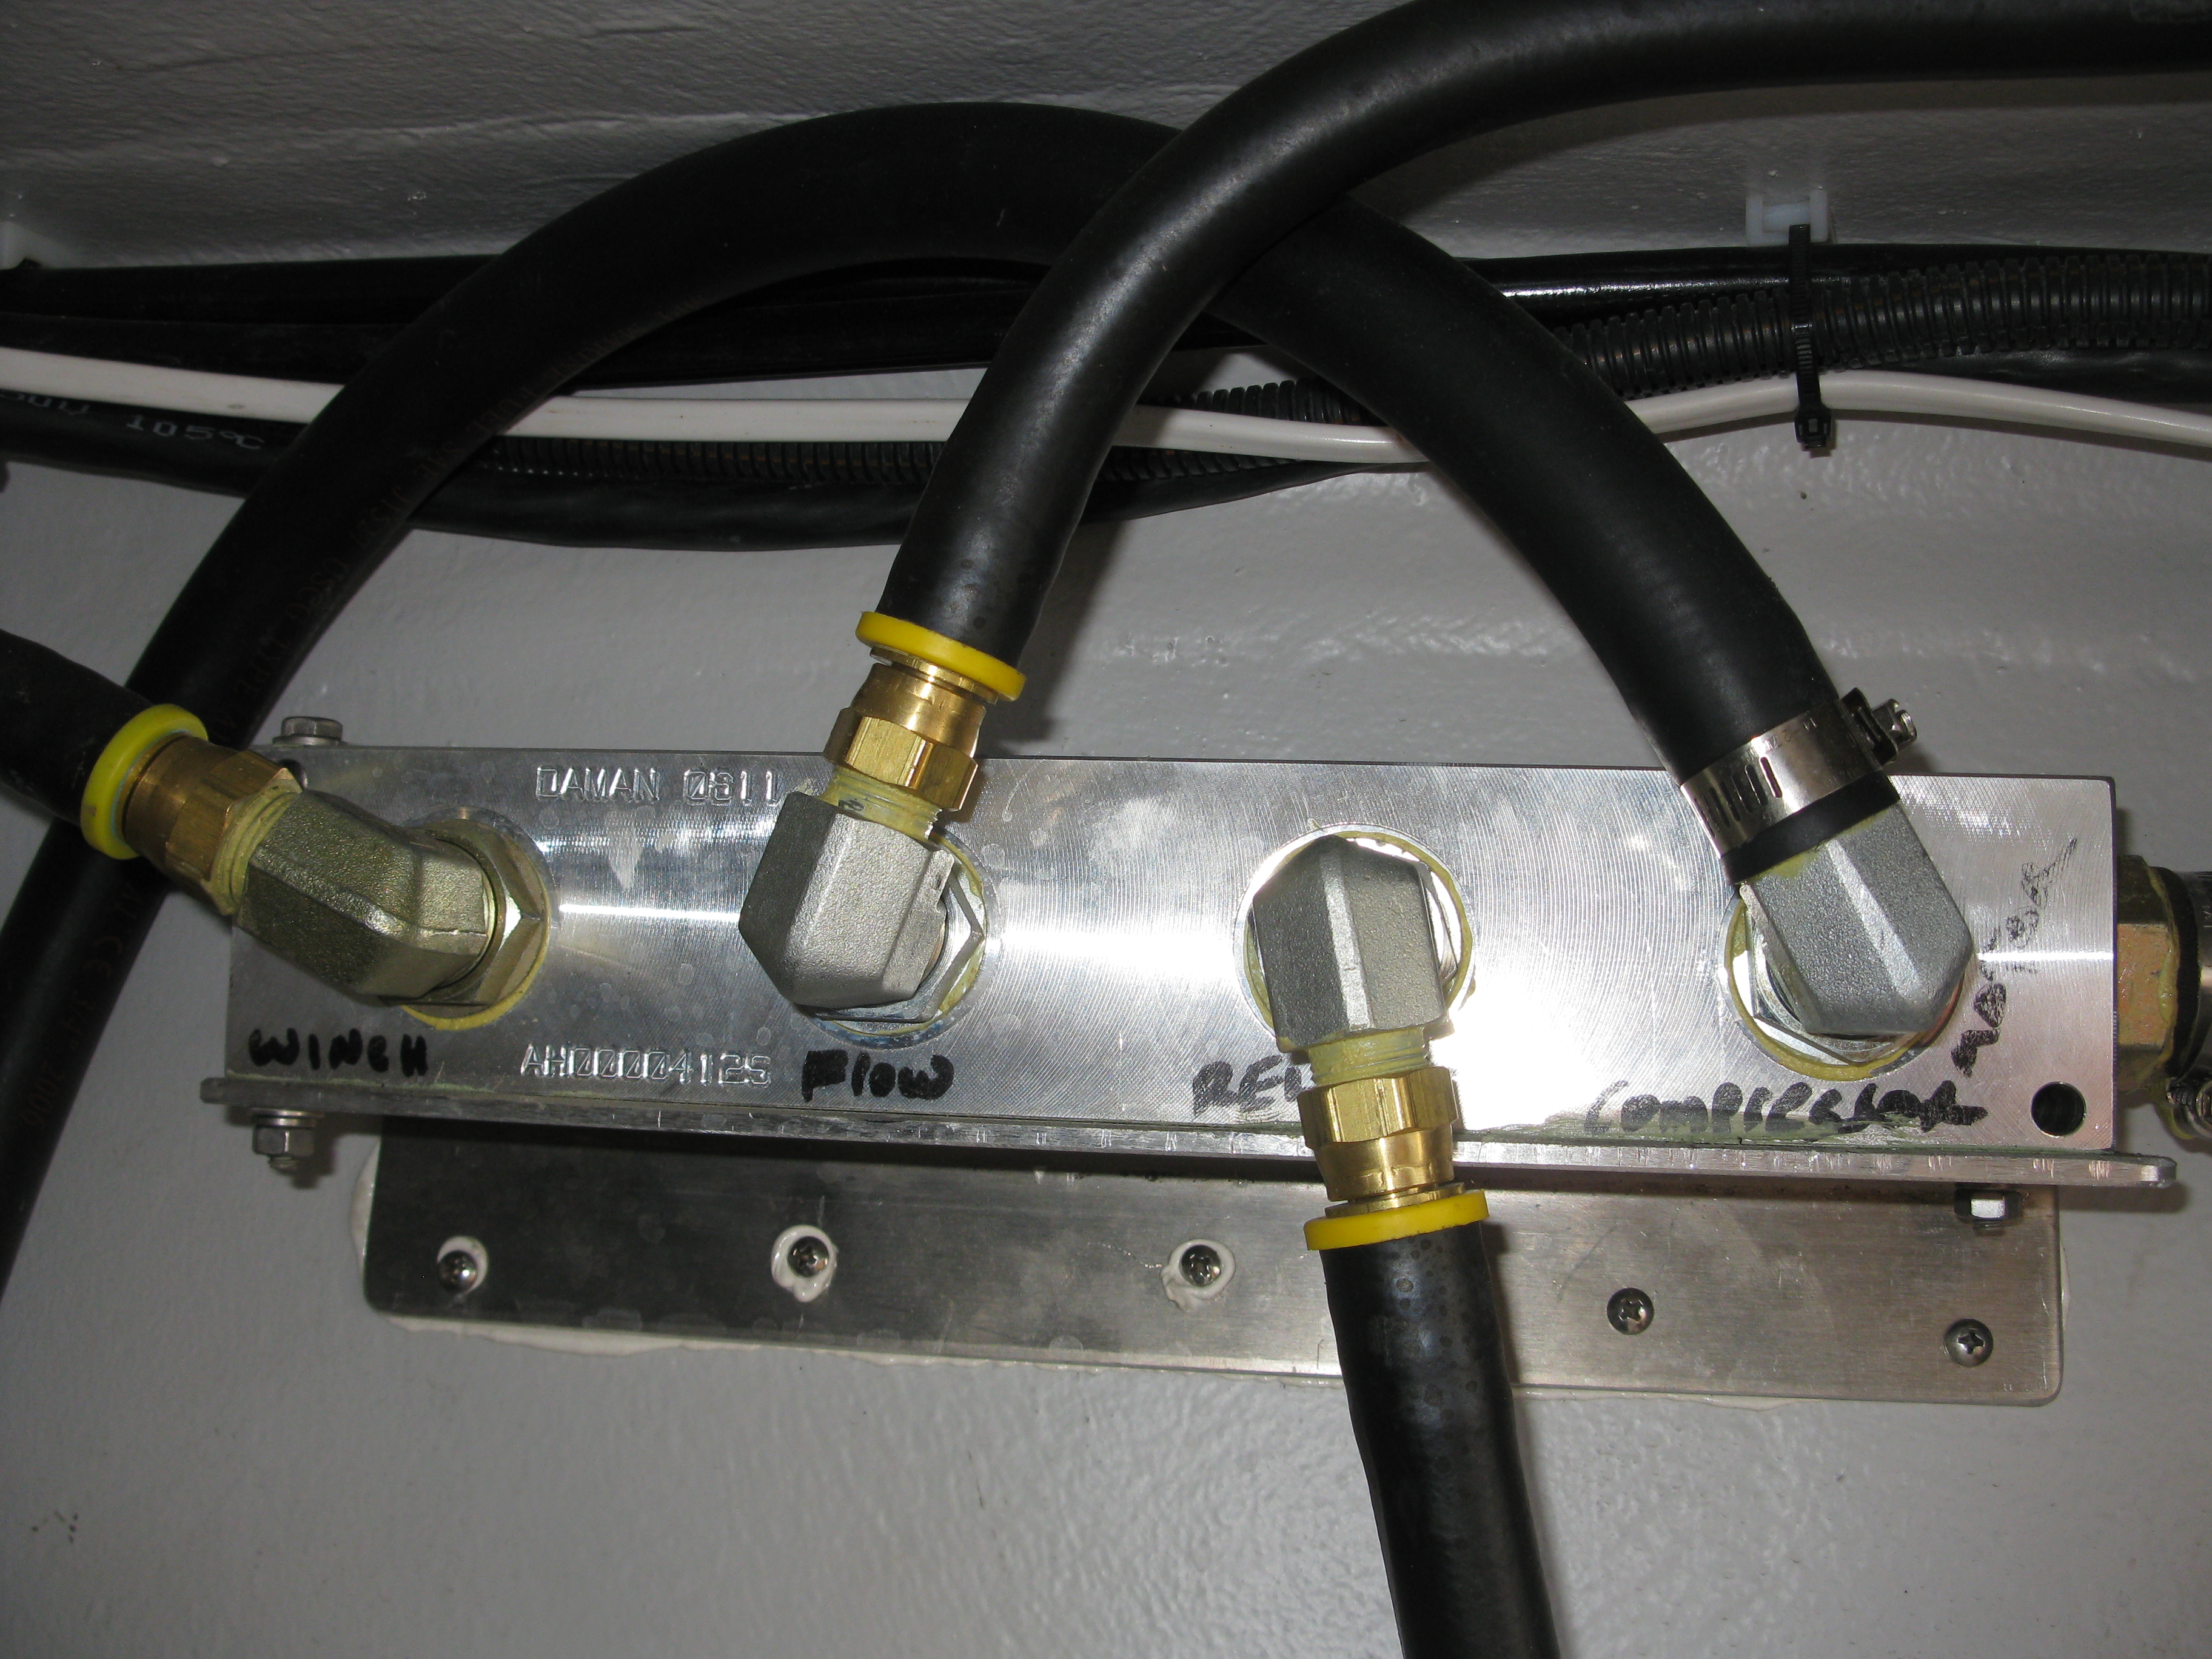
Hydraulic manifold – Where all the low pressure return lines “come together”.
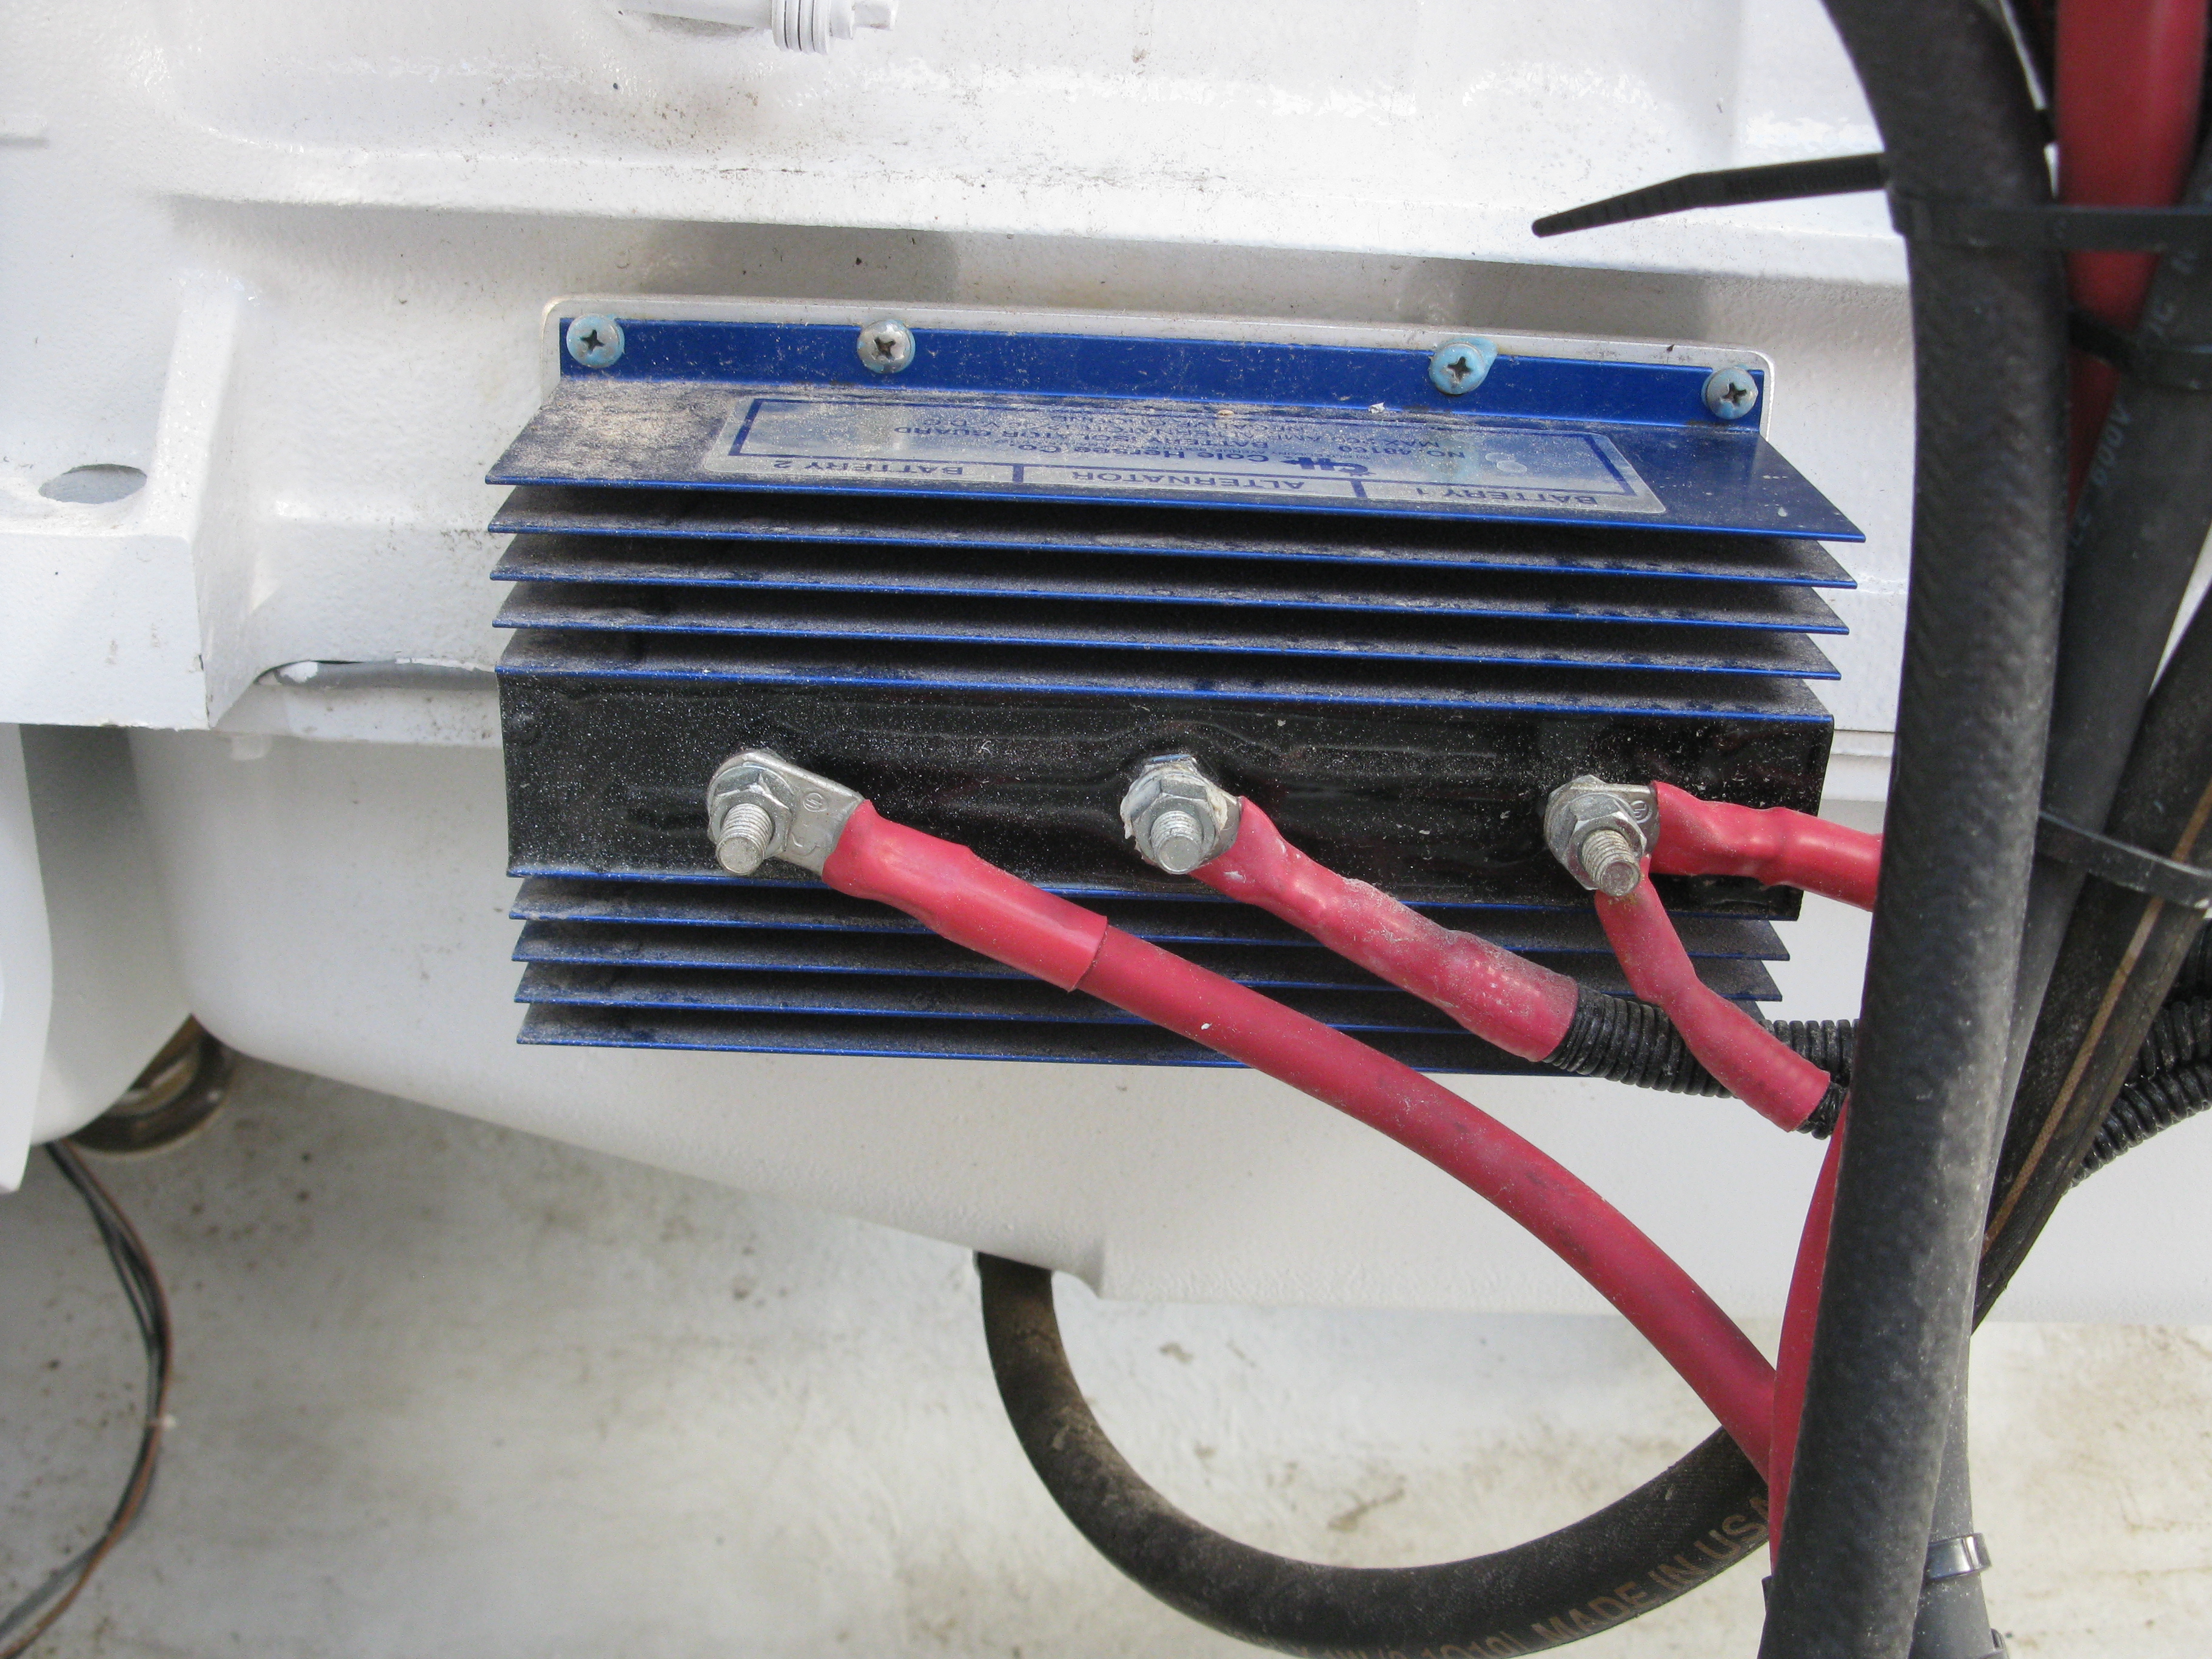
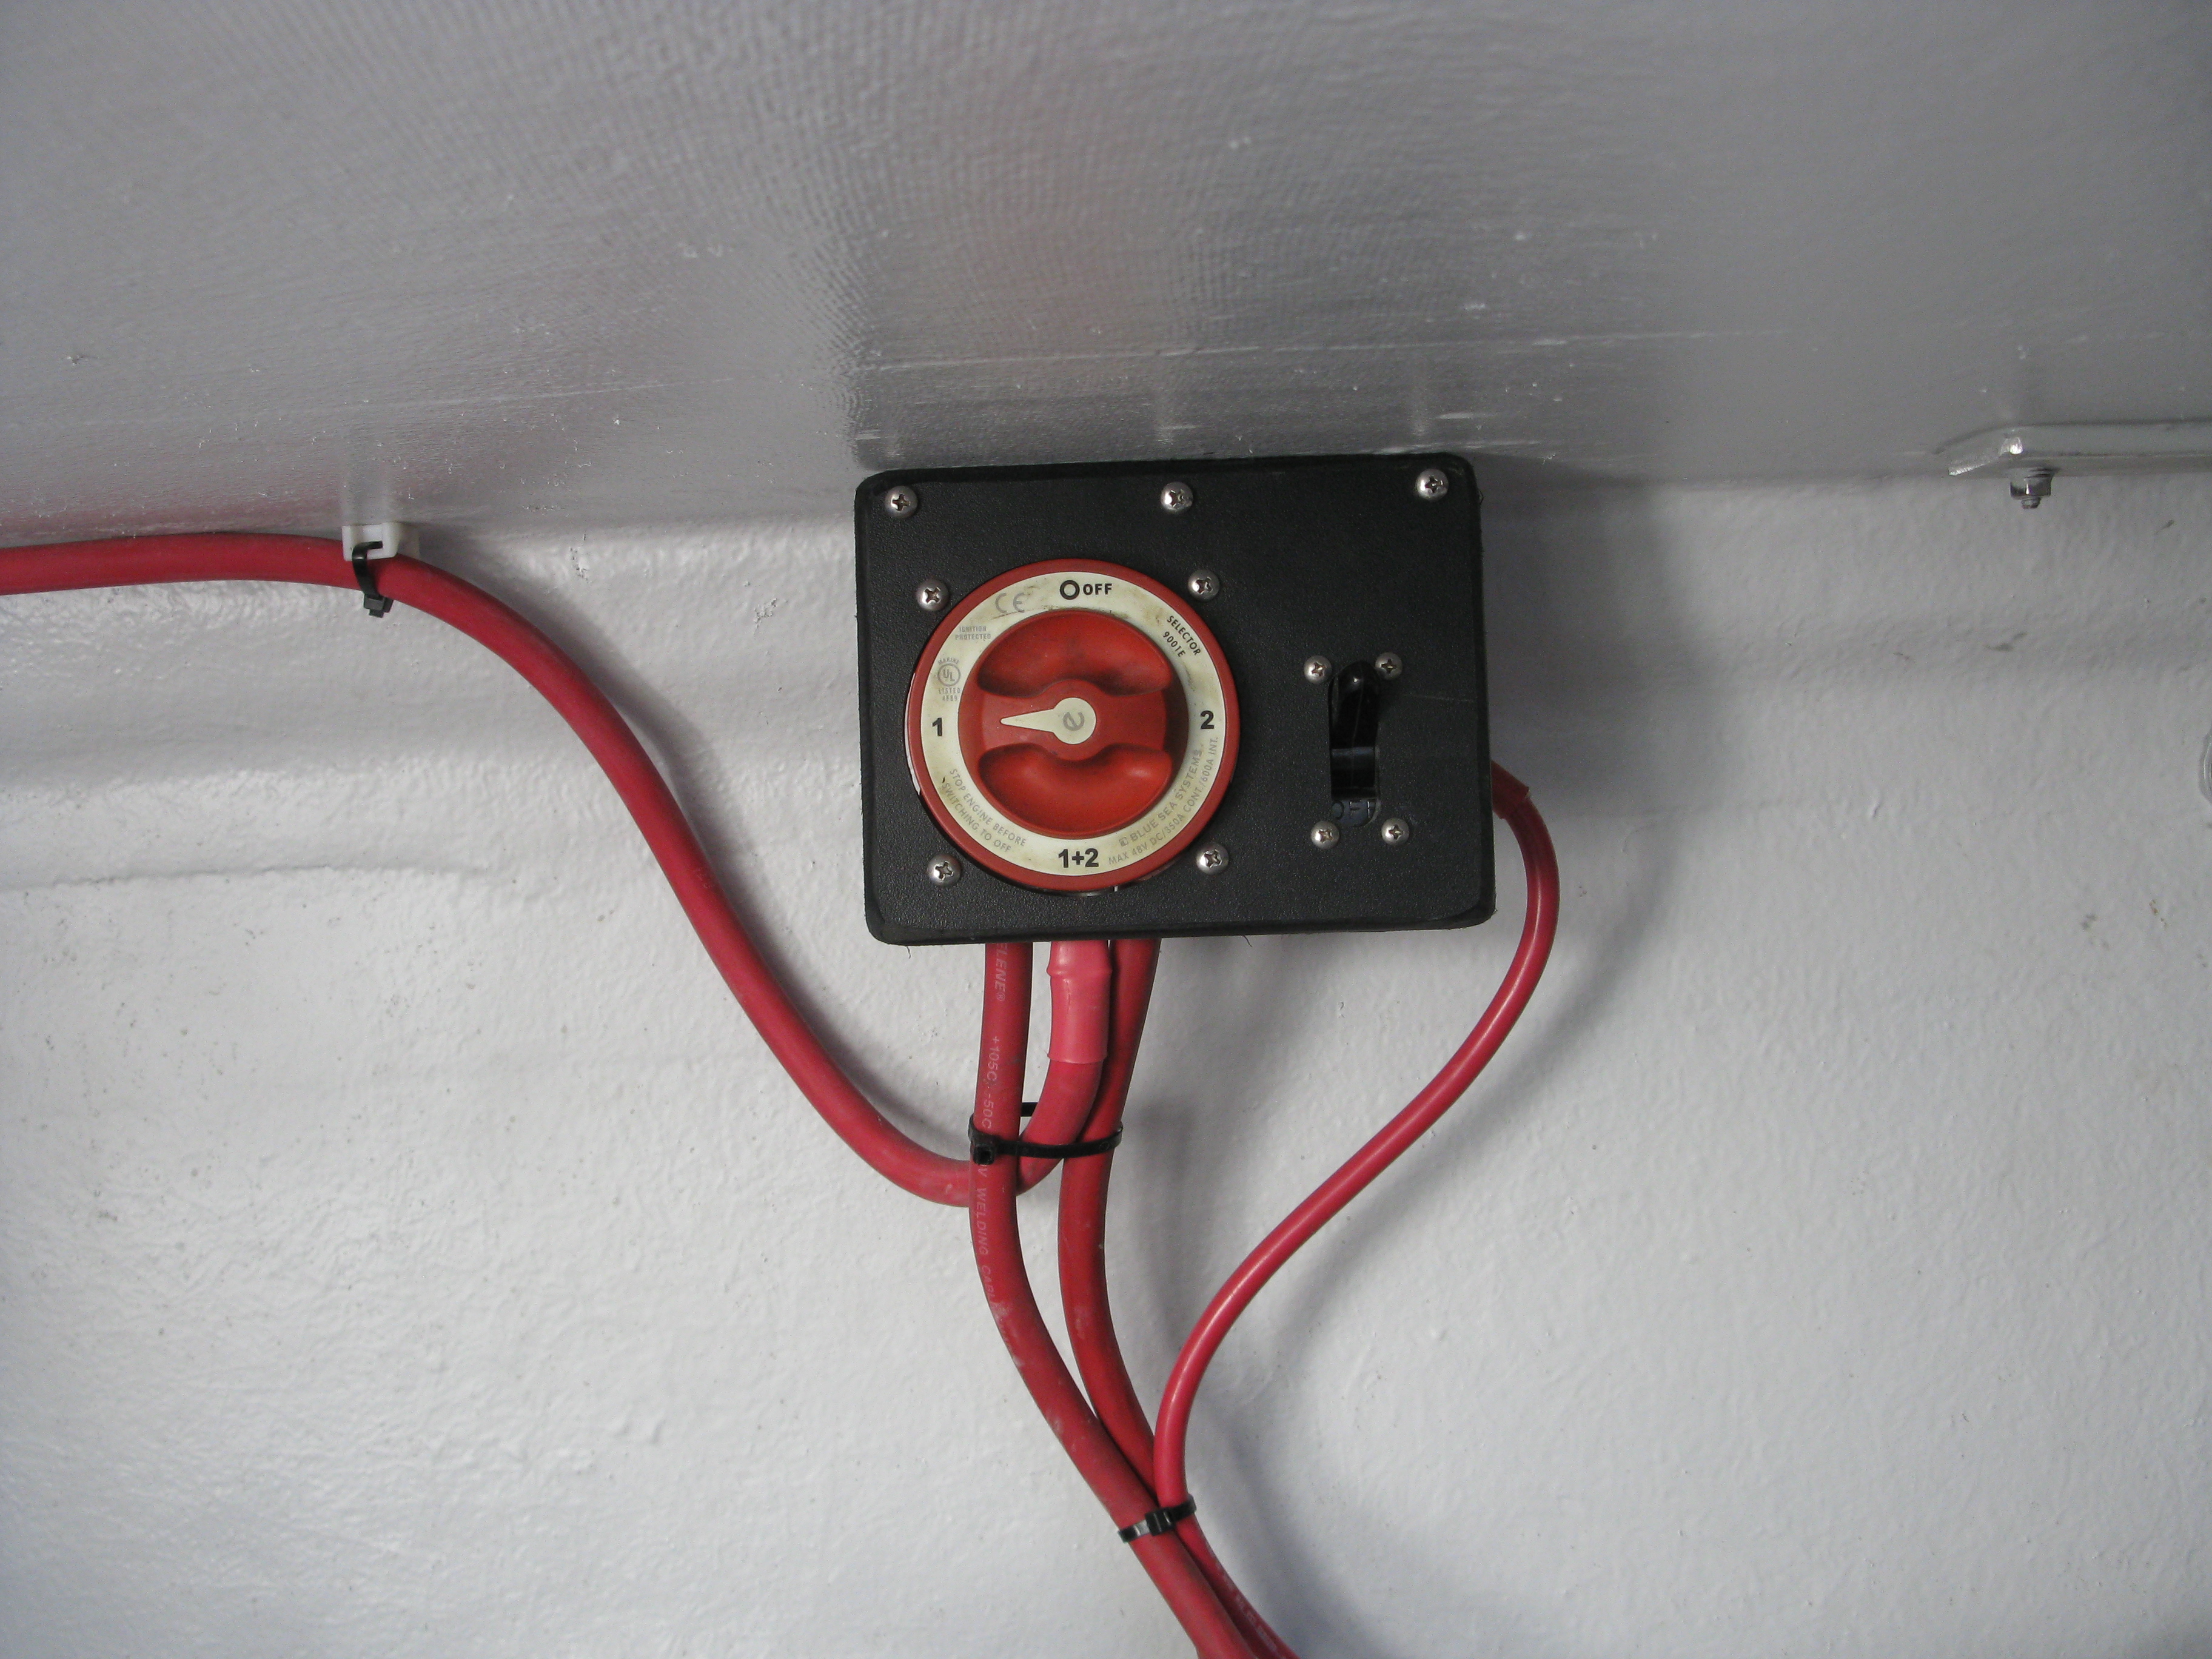
My favorite way to control/split and isolate alternator output. A quality, oversized diode isolator is brainless as to operation, and is exactly what a typical commercial fisherman needs.
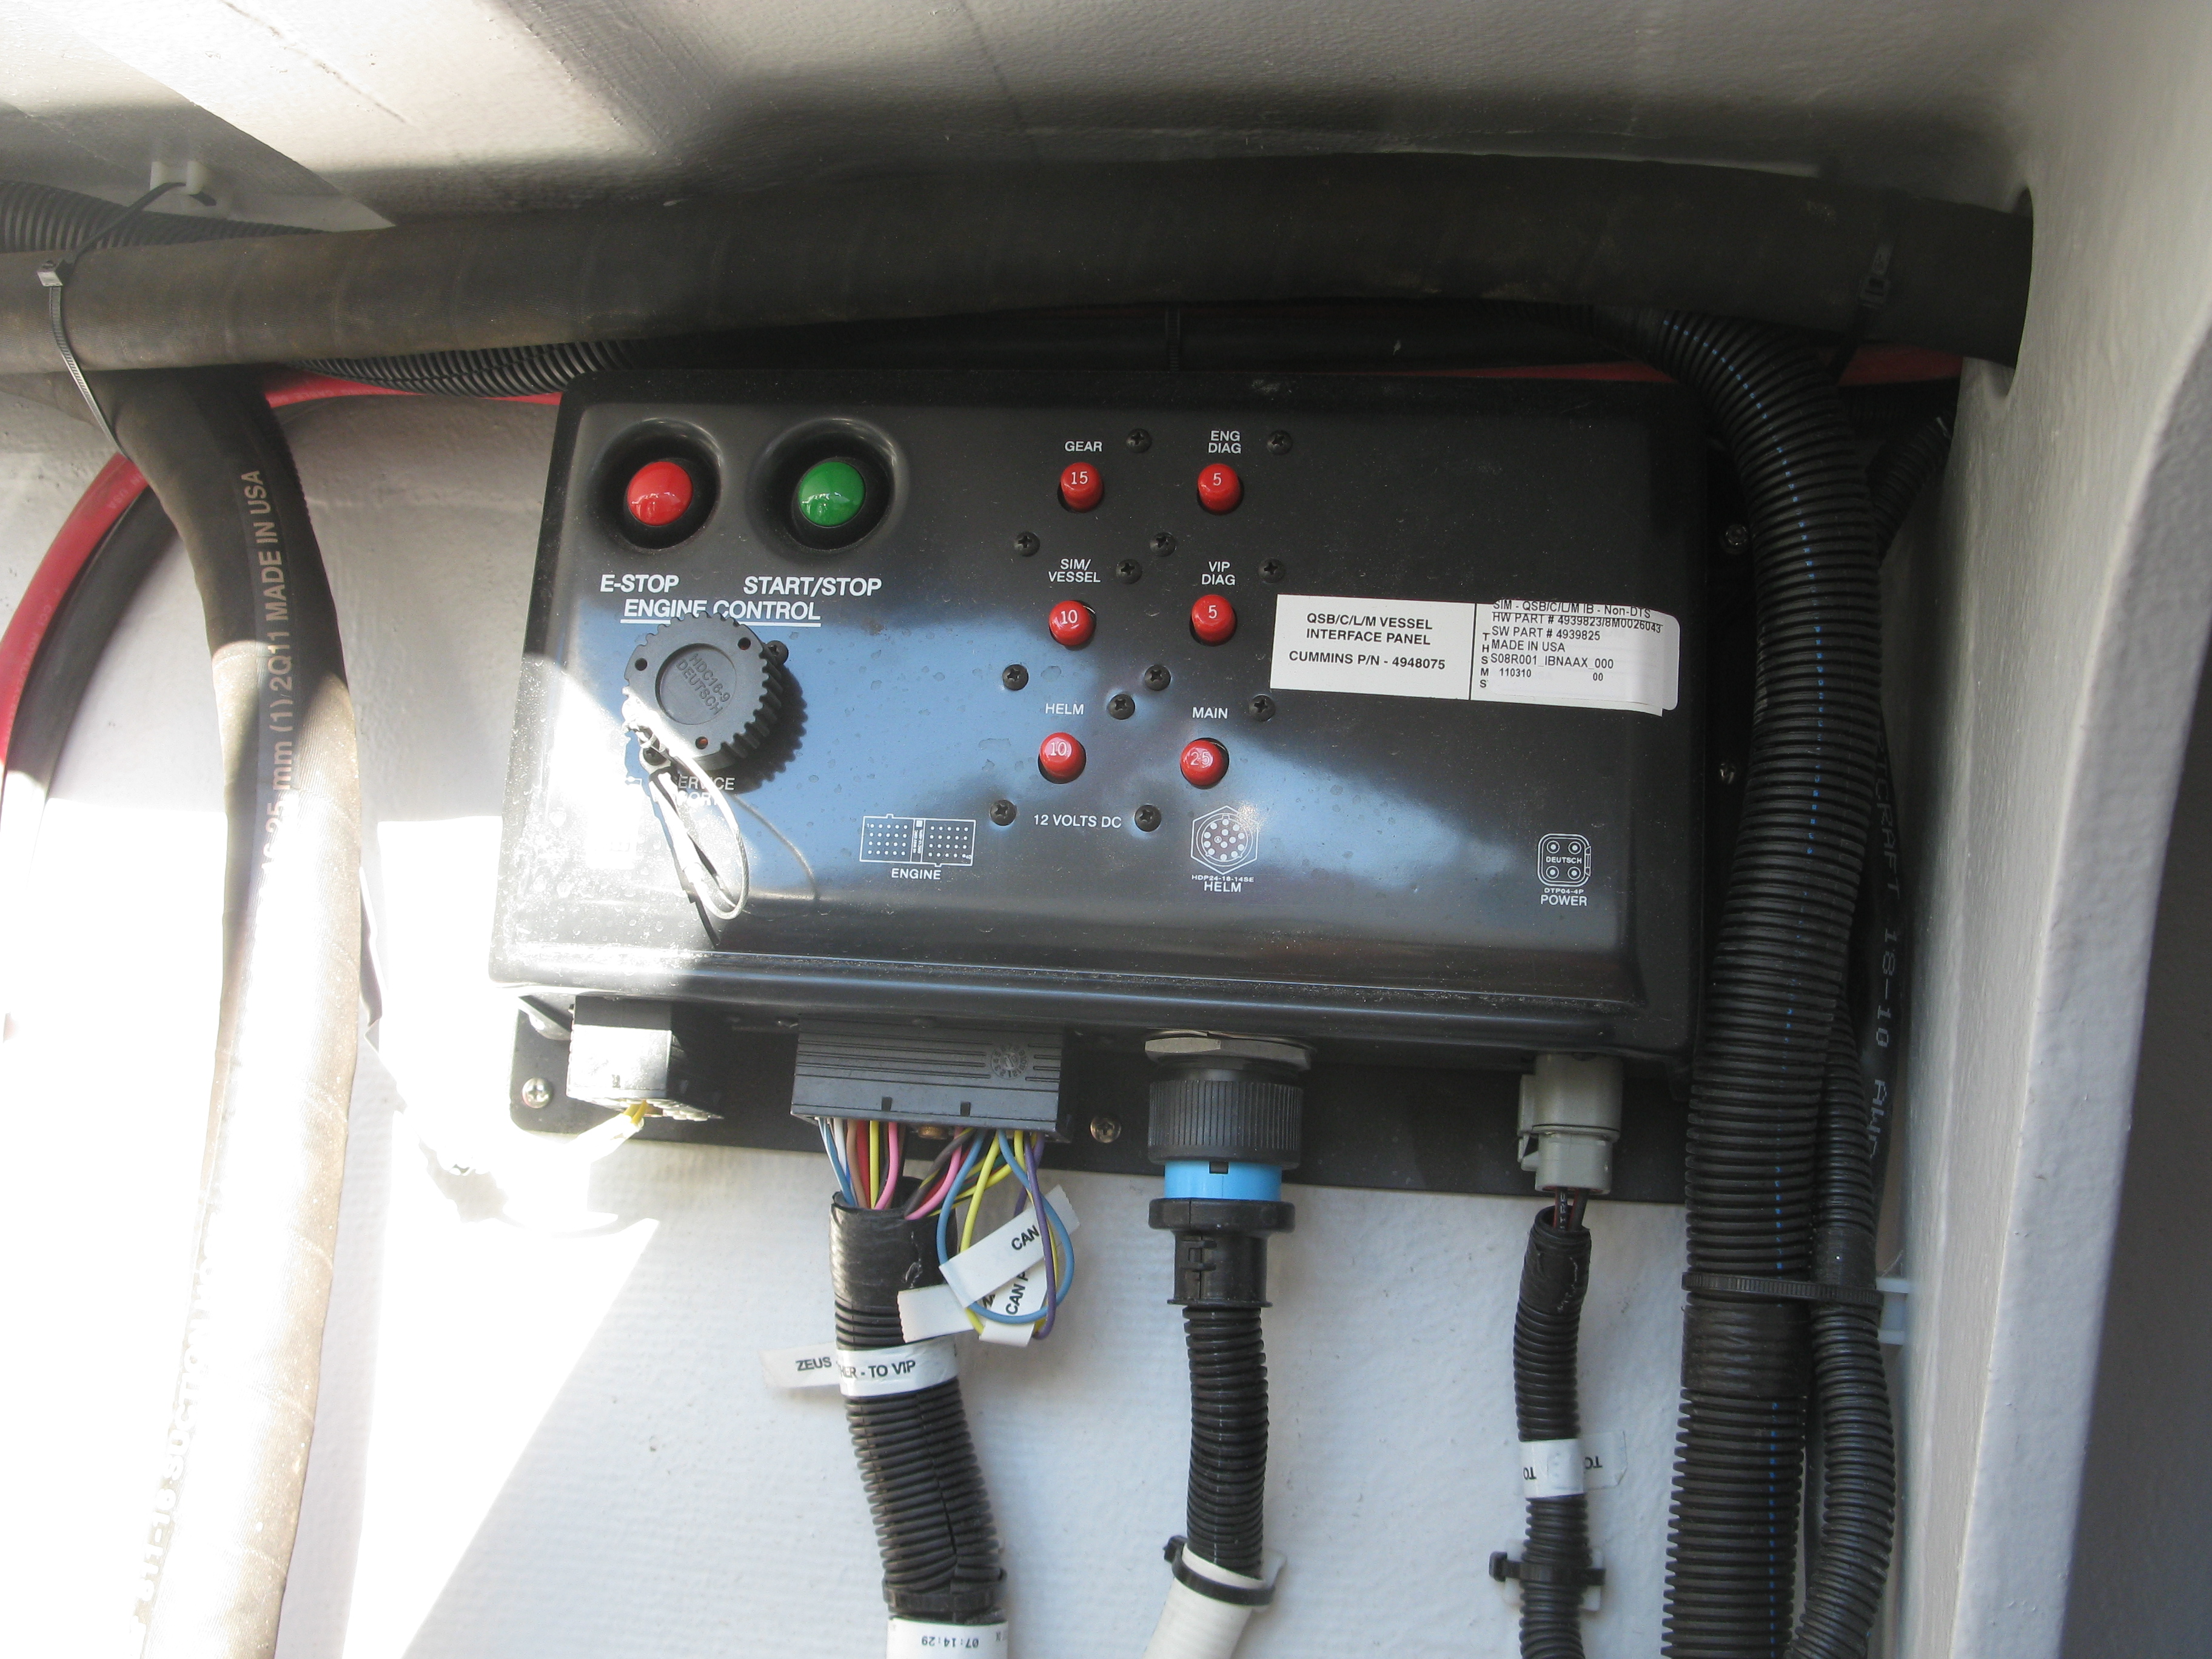
Cummins early style VIP box used with Smartcraft 2.0 engines.
Typical battery switch but wired so he can’t forget. The black switch is a 90 AMP slow blow on/off switch breaker that controls all house power going forward.
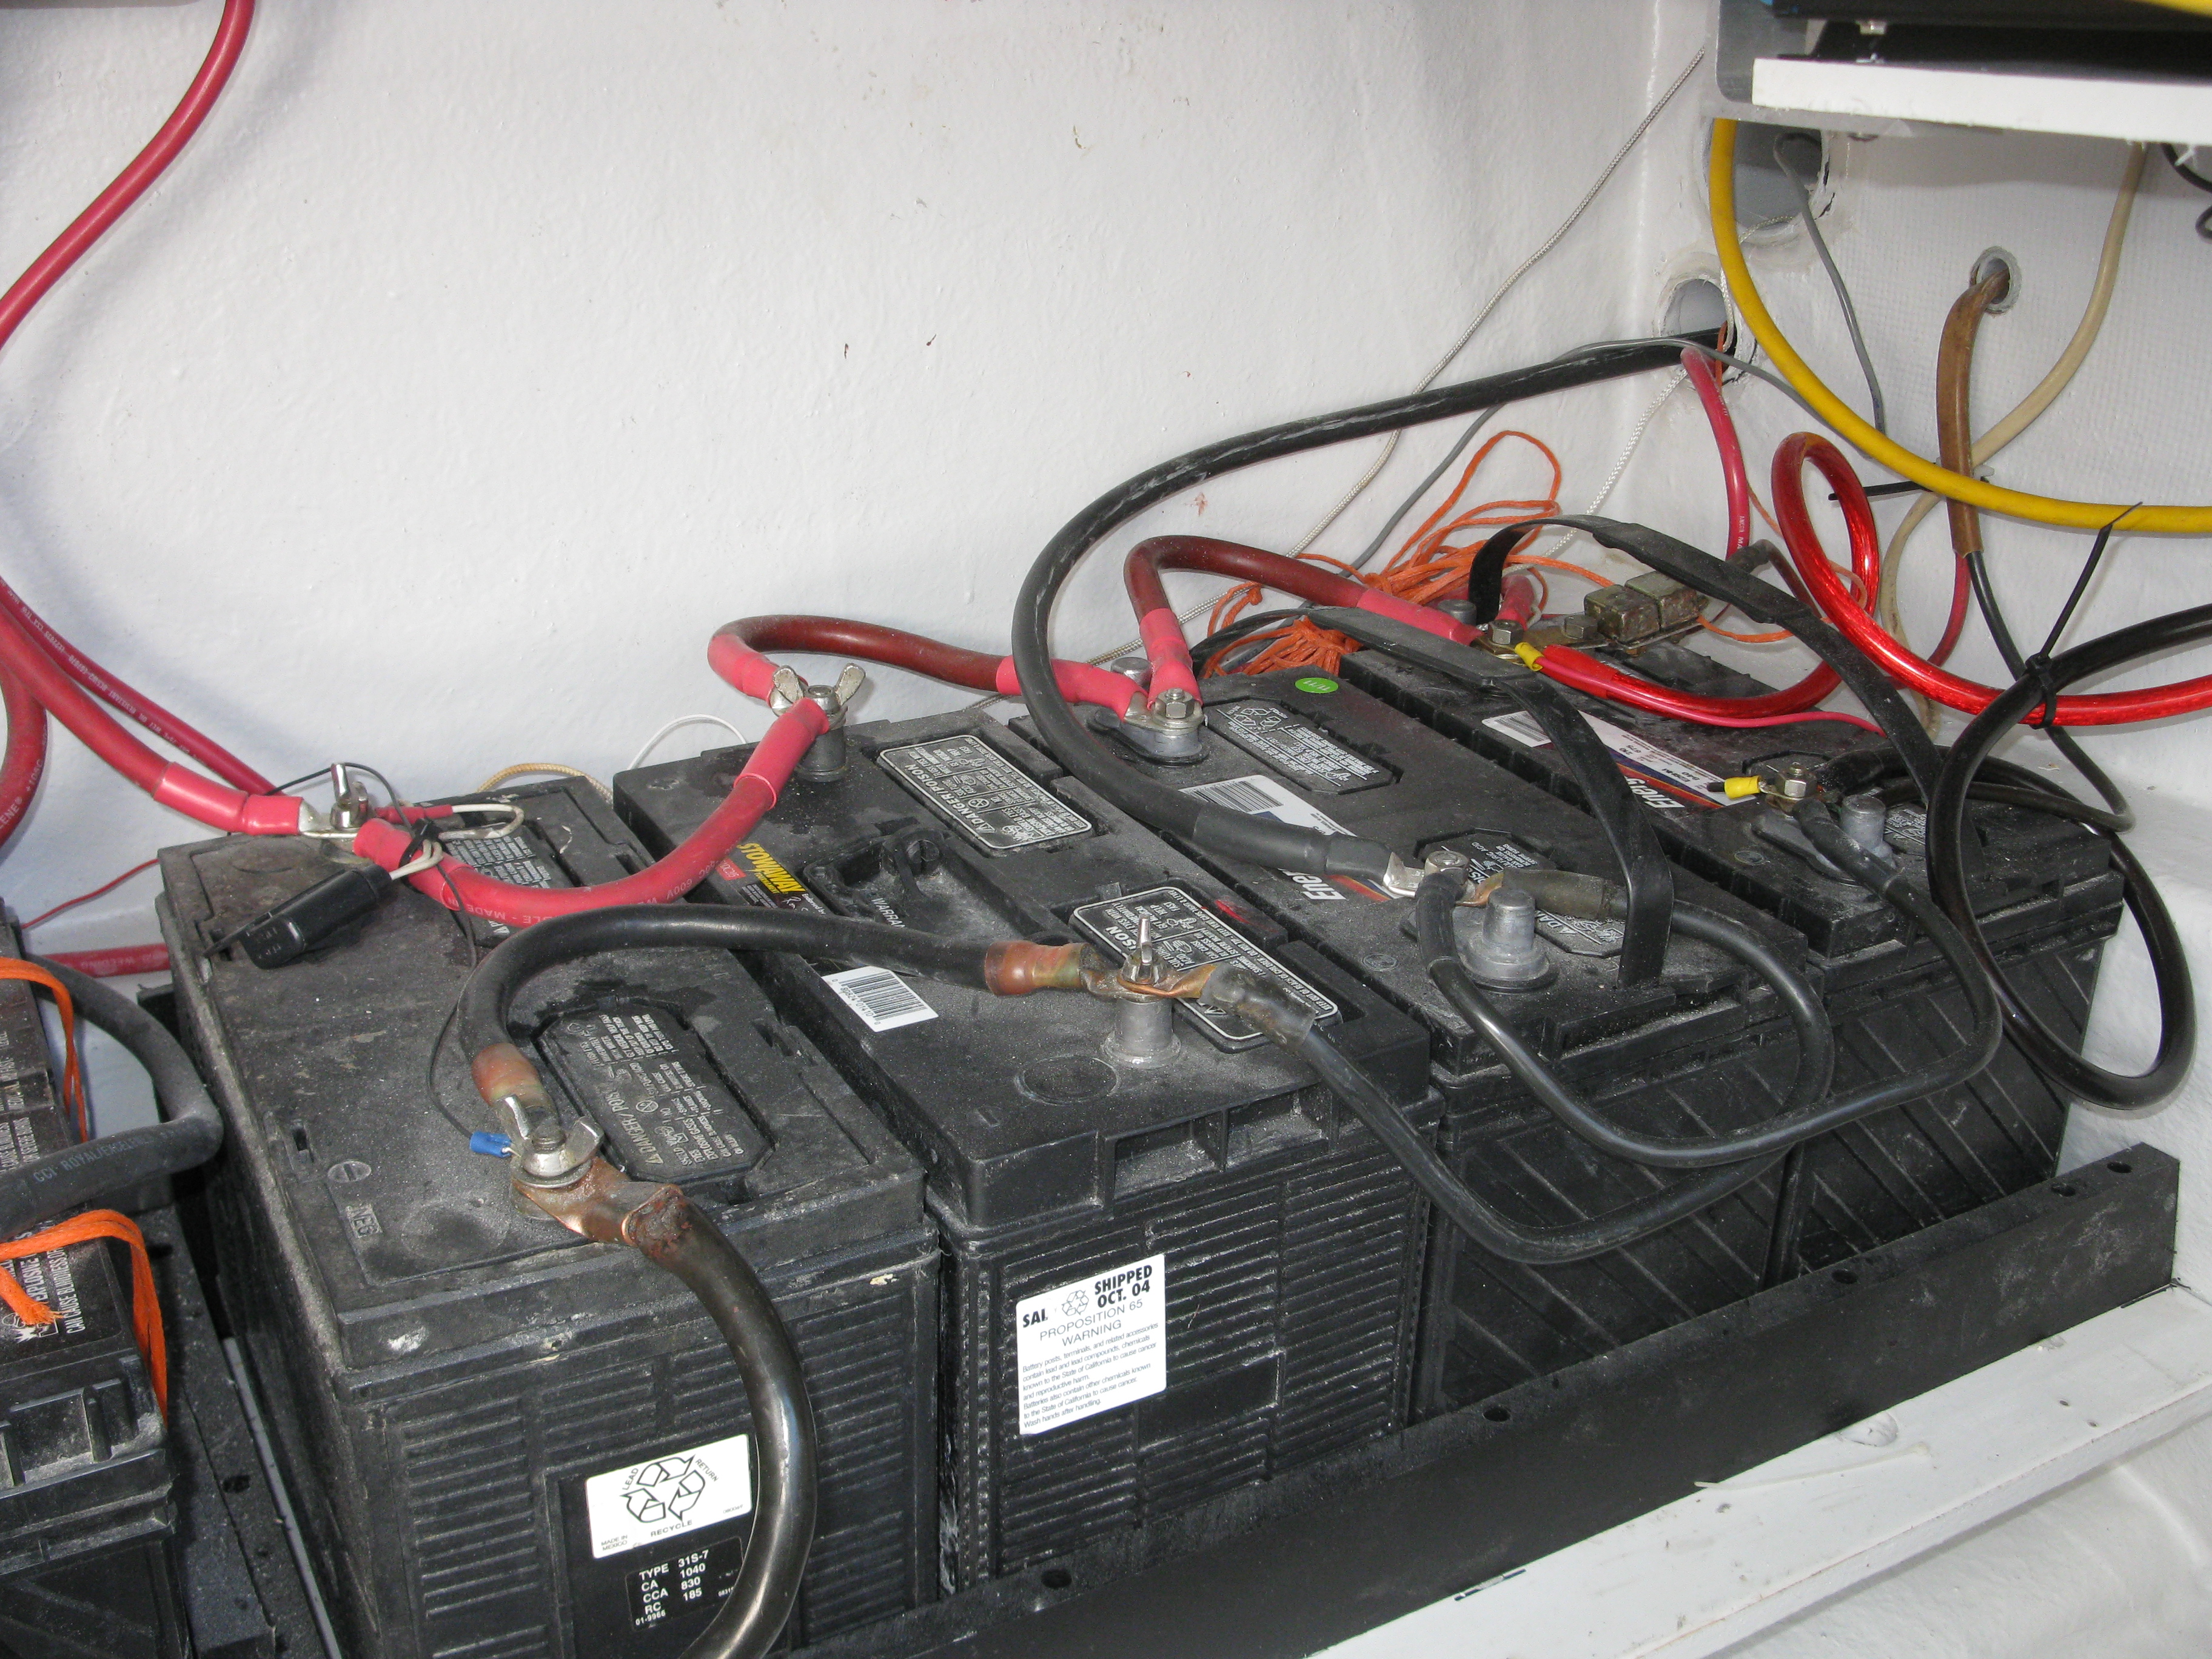
2 x Group 27 pairs – Two for the engine and two for the house. Both isolated except for the grounds and are charged automatically threw a diode isolator. The wiring is a little messy, but this was the owner’s work…
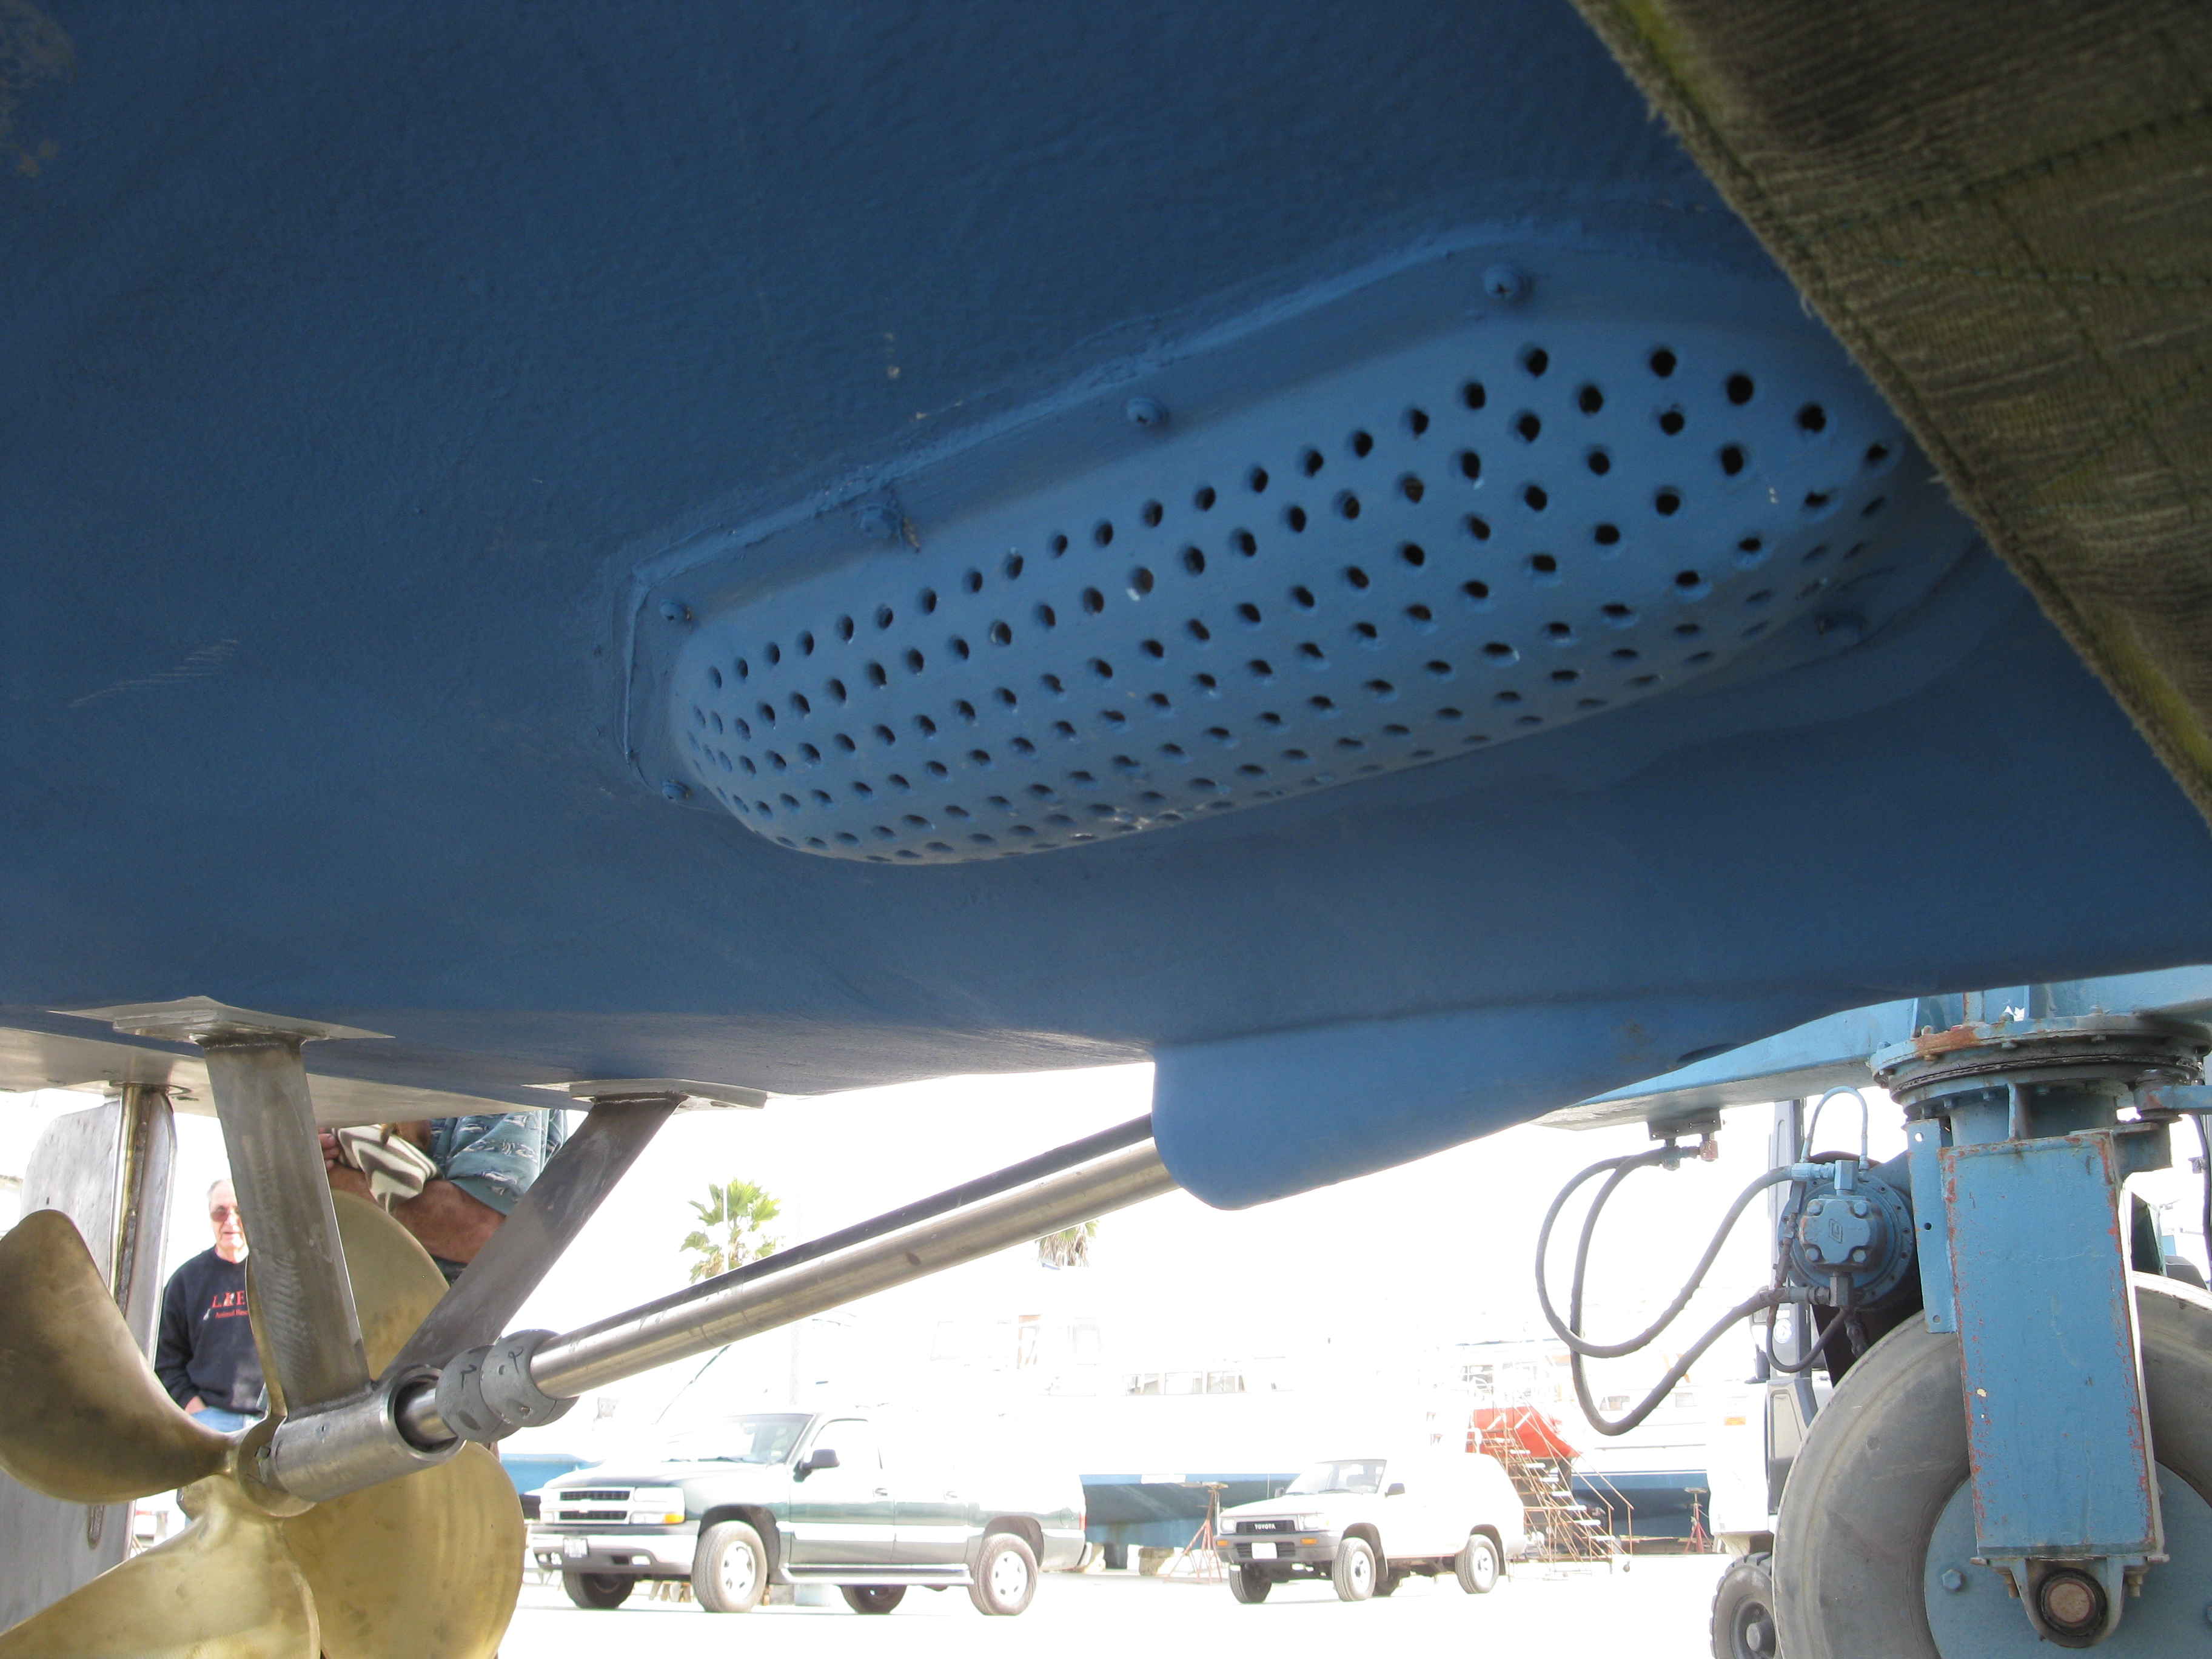
Large “squid screen” has multiple thru hulls under it. This guy sits in very heavy kelp for hours on end and the main engine never shuts down as he “mainlines” his dive compressor.
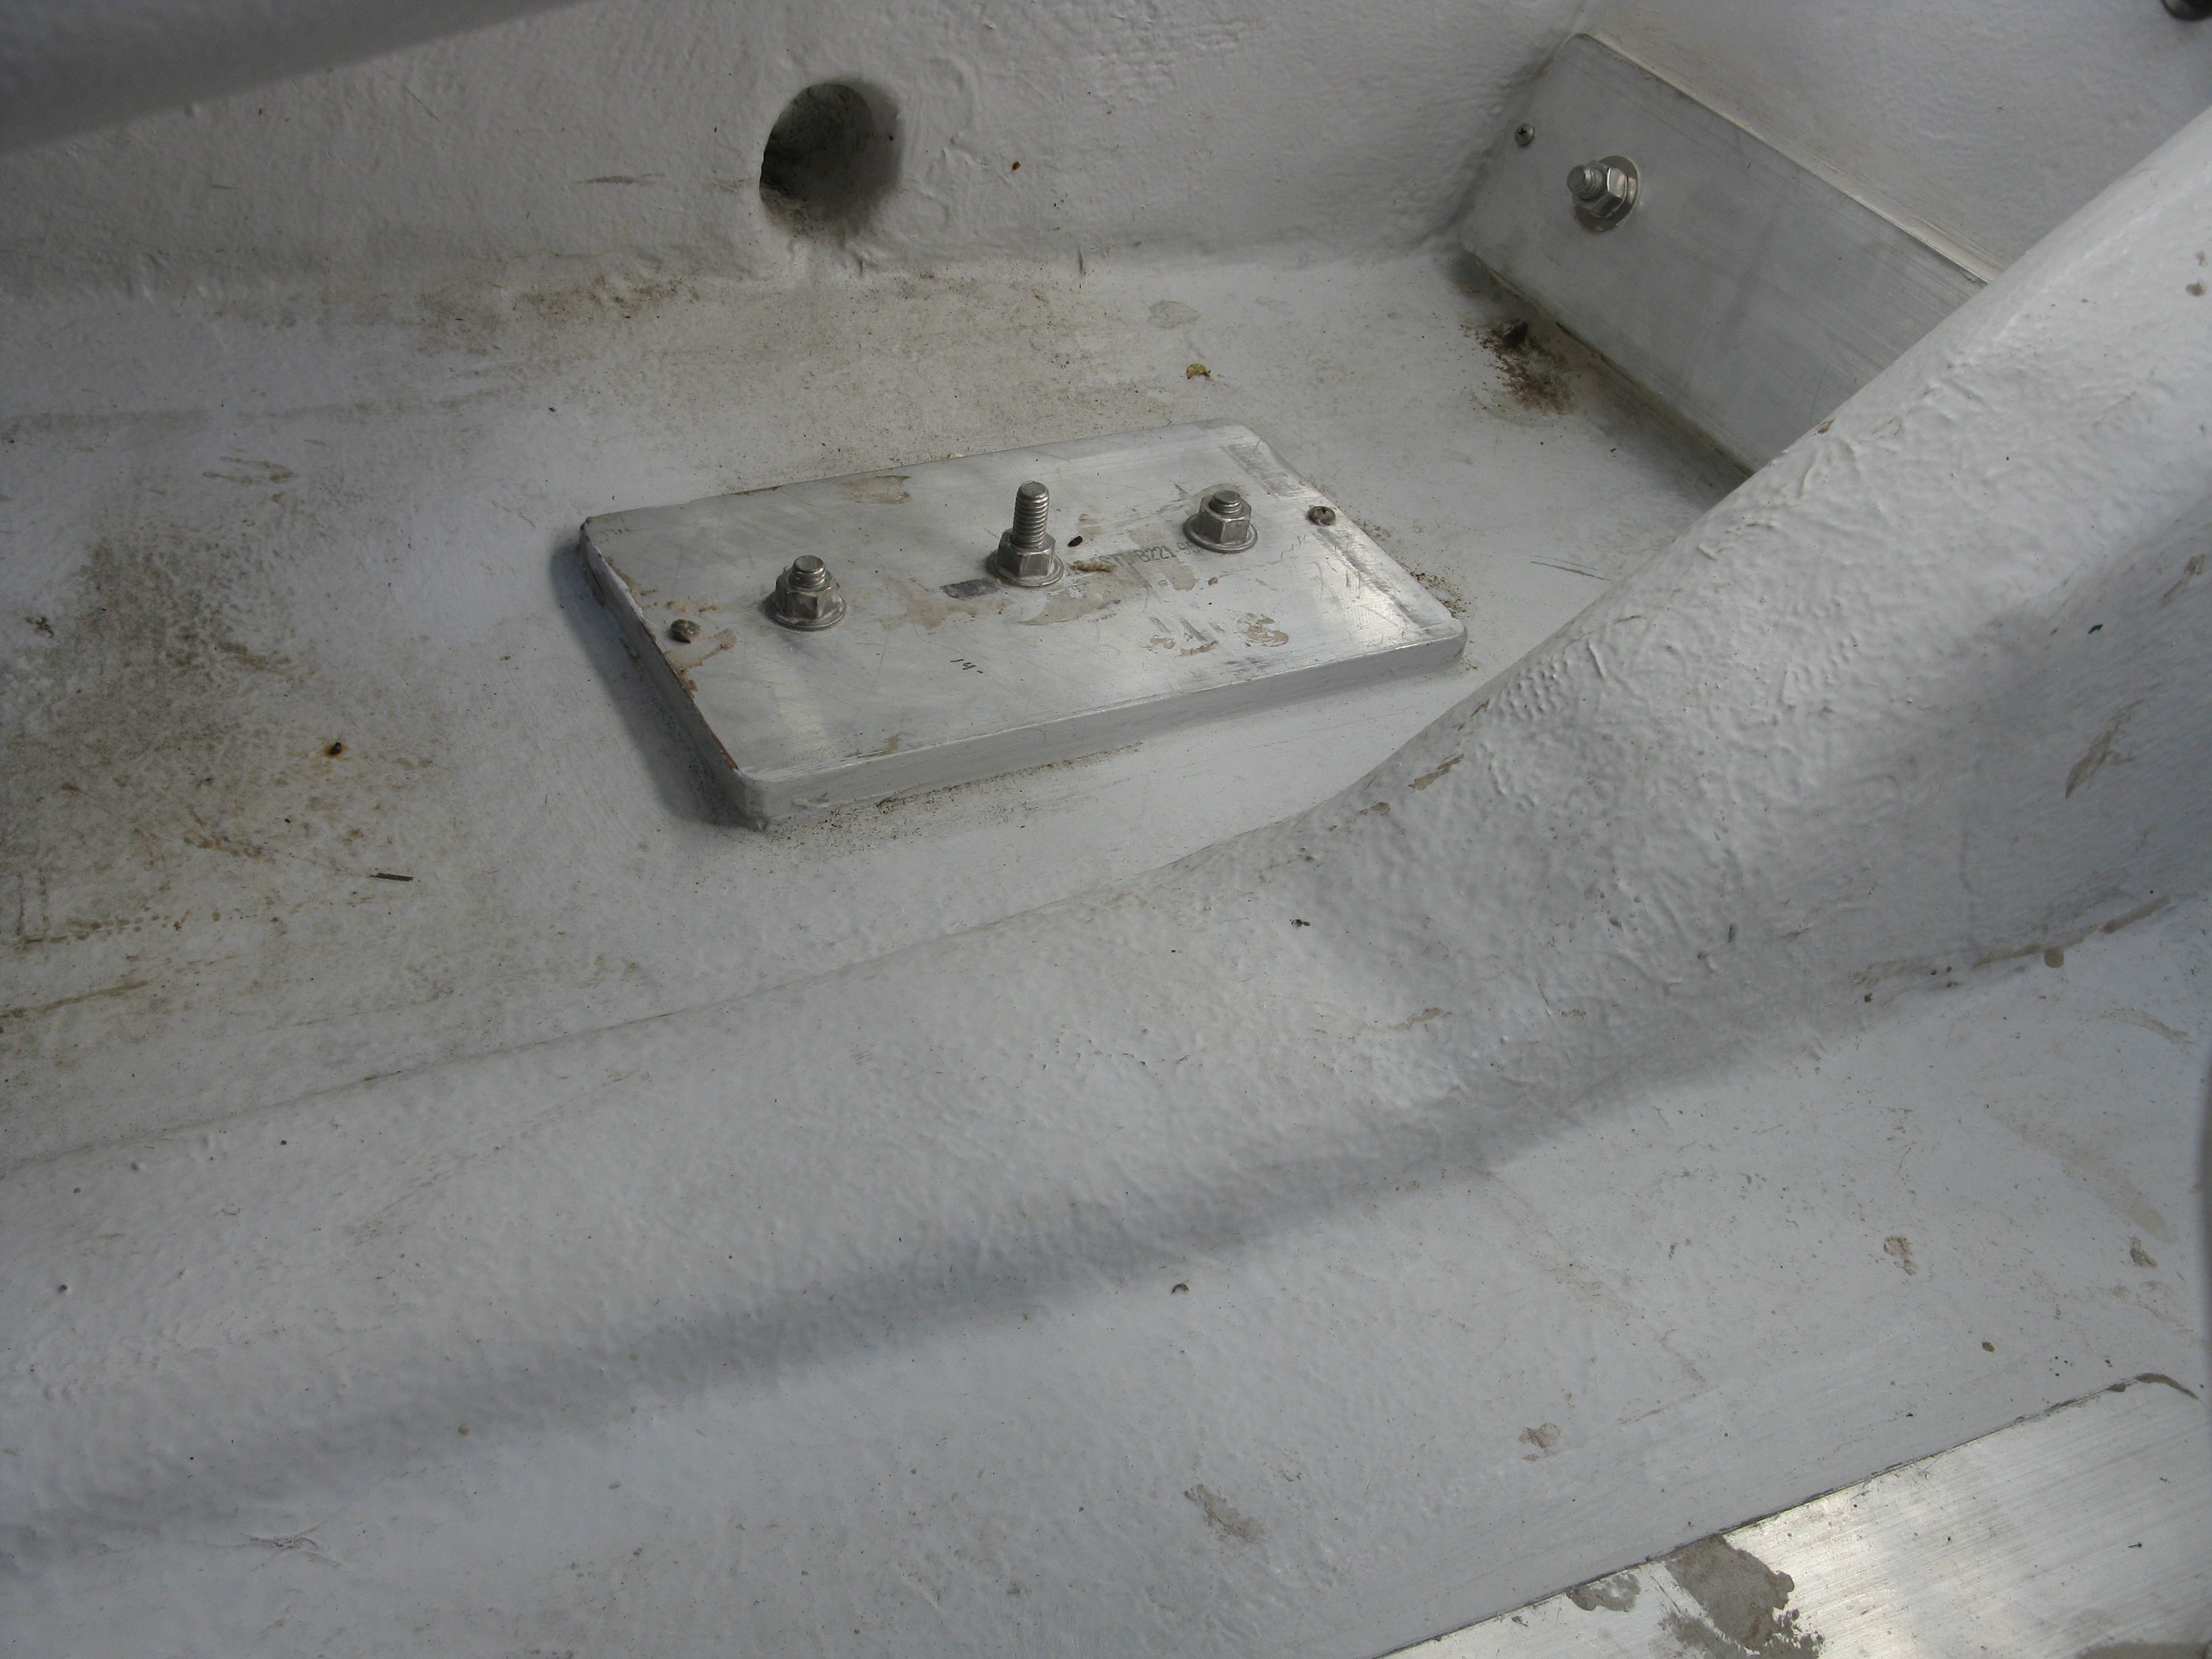
One of two heavy strut backing plates.
Outside rudder and box that holds the hydraulic steering gear. Good access from the inside and when push comes to shove 10-15 yrs from now, the outside box should come off pretty easily.
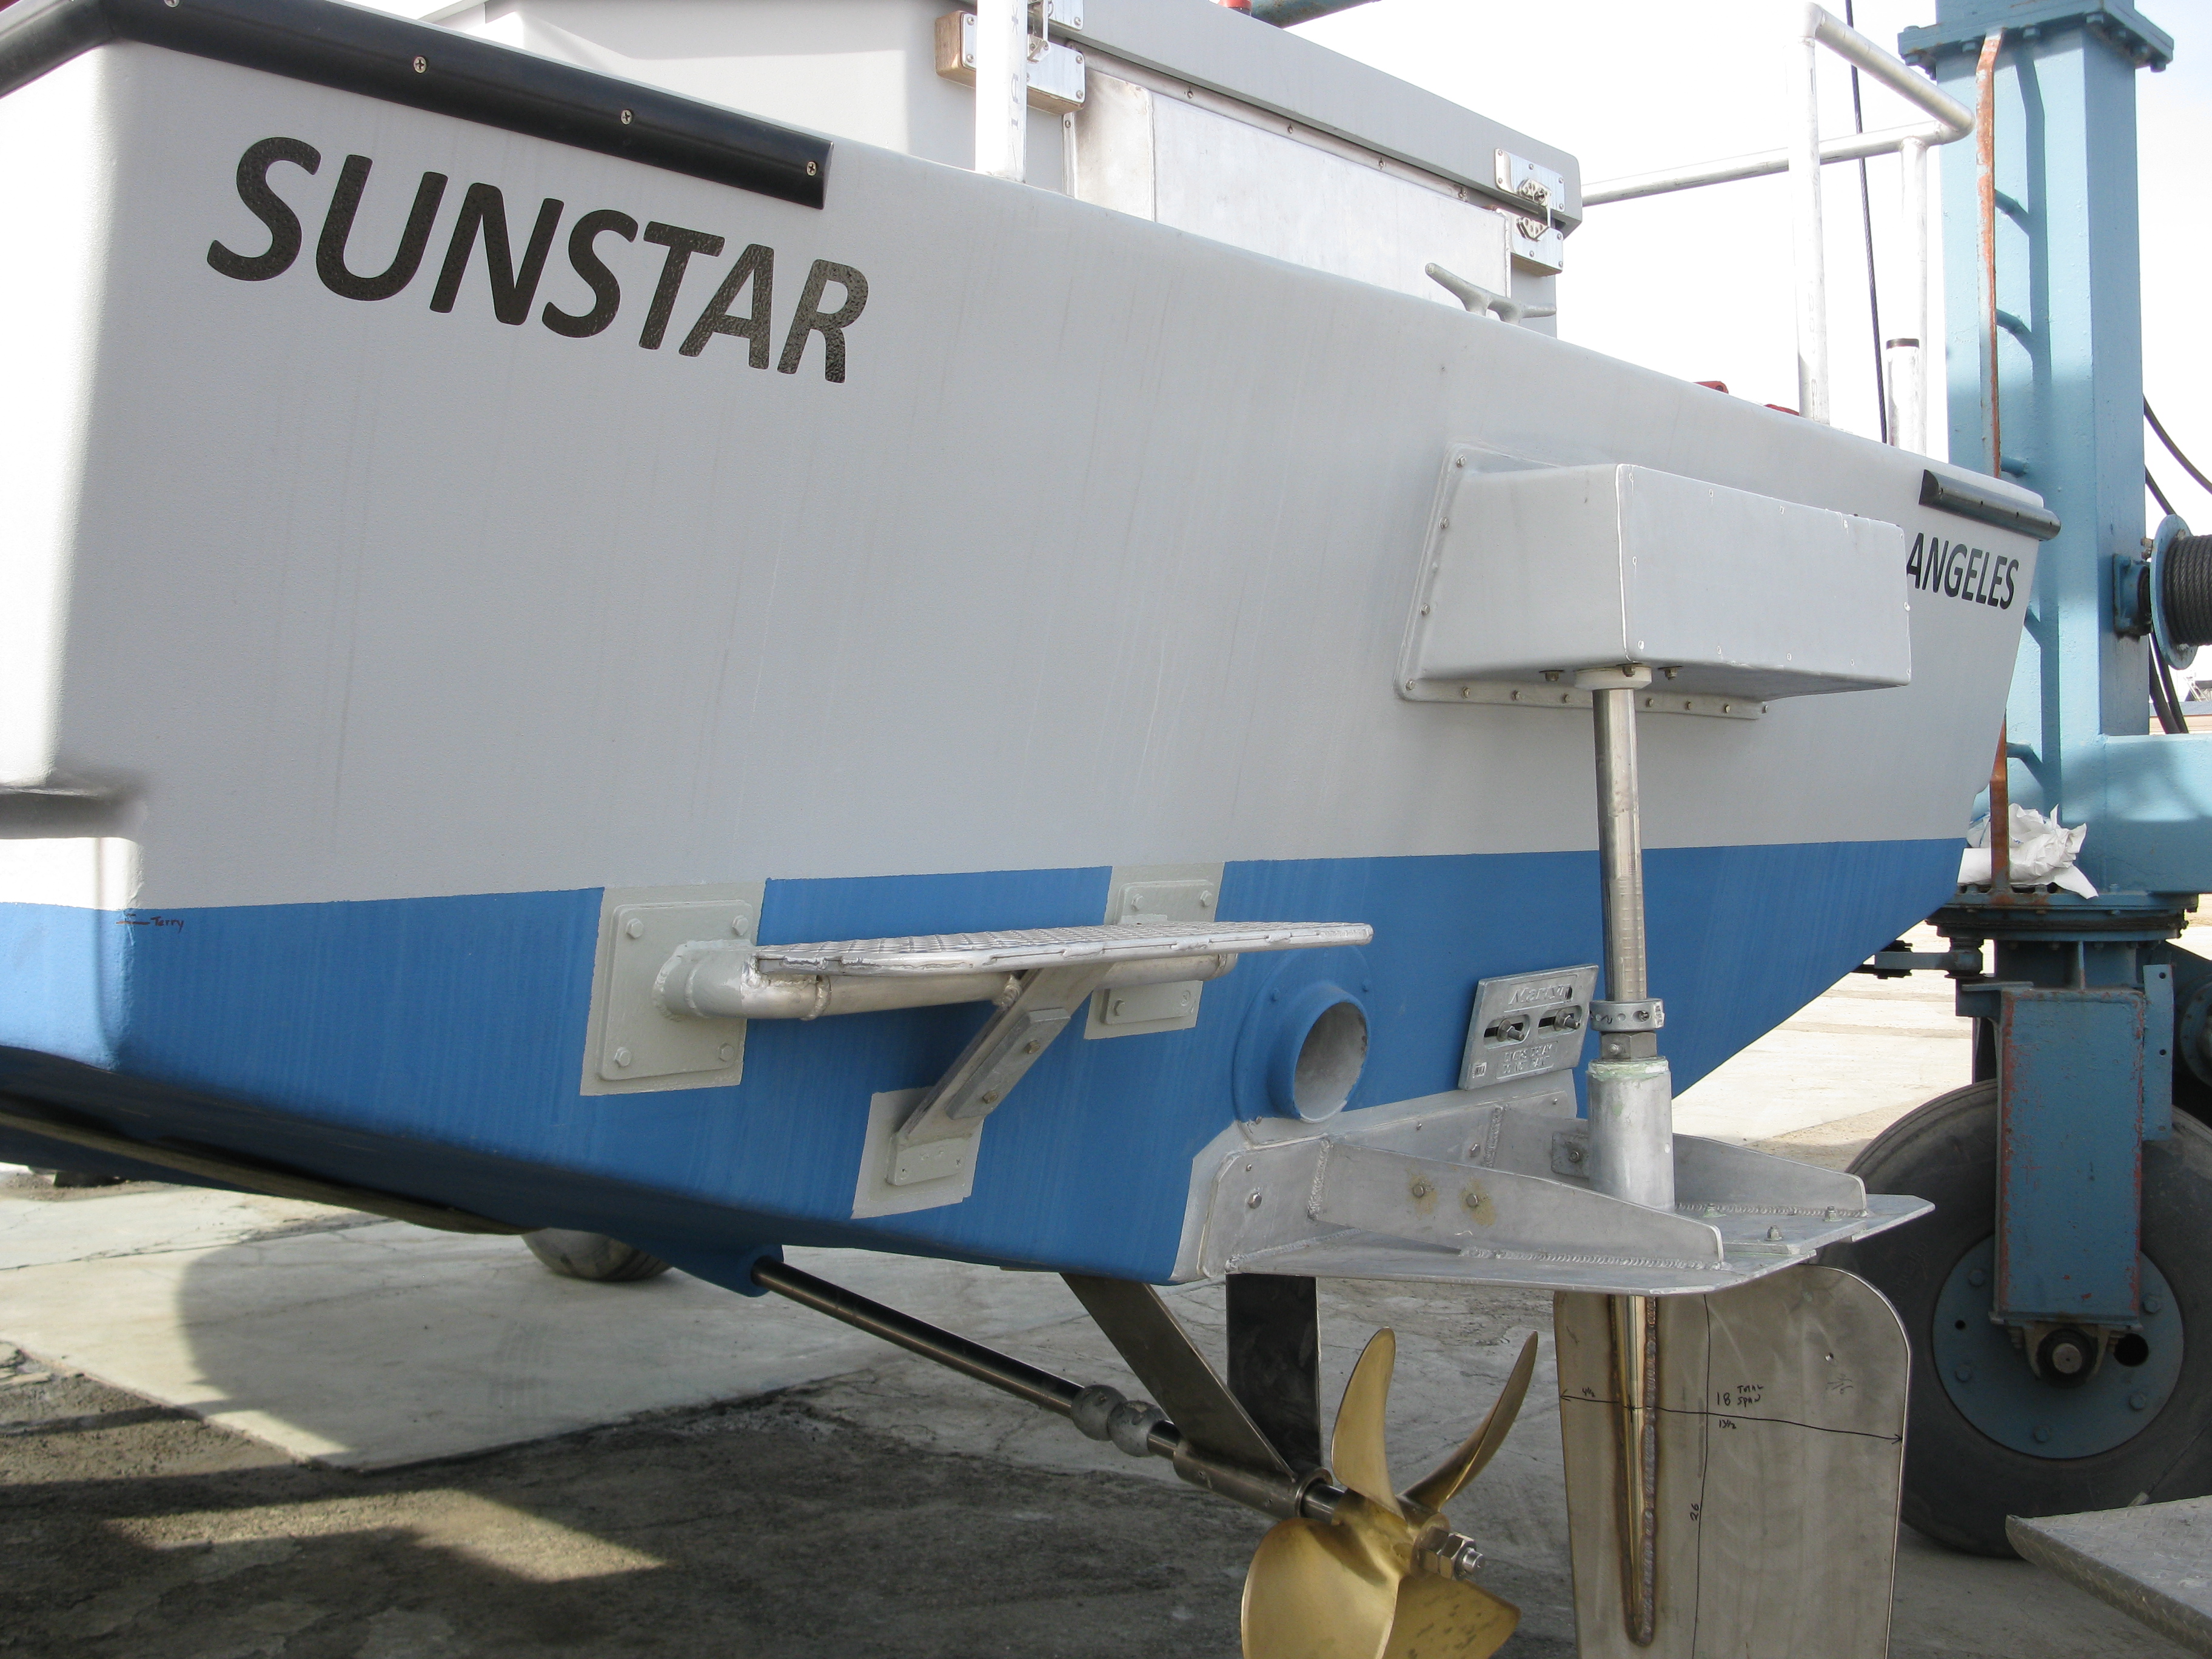
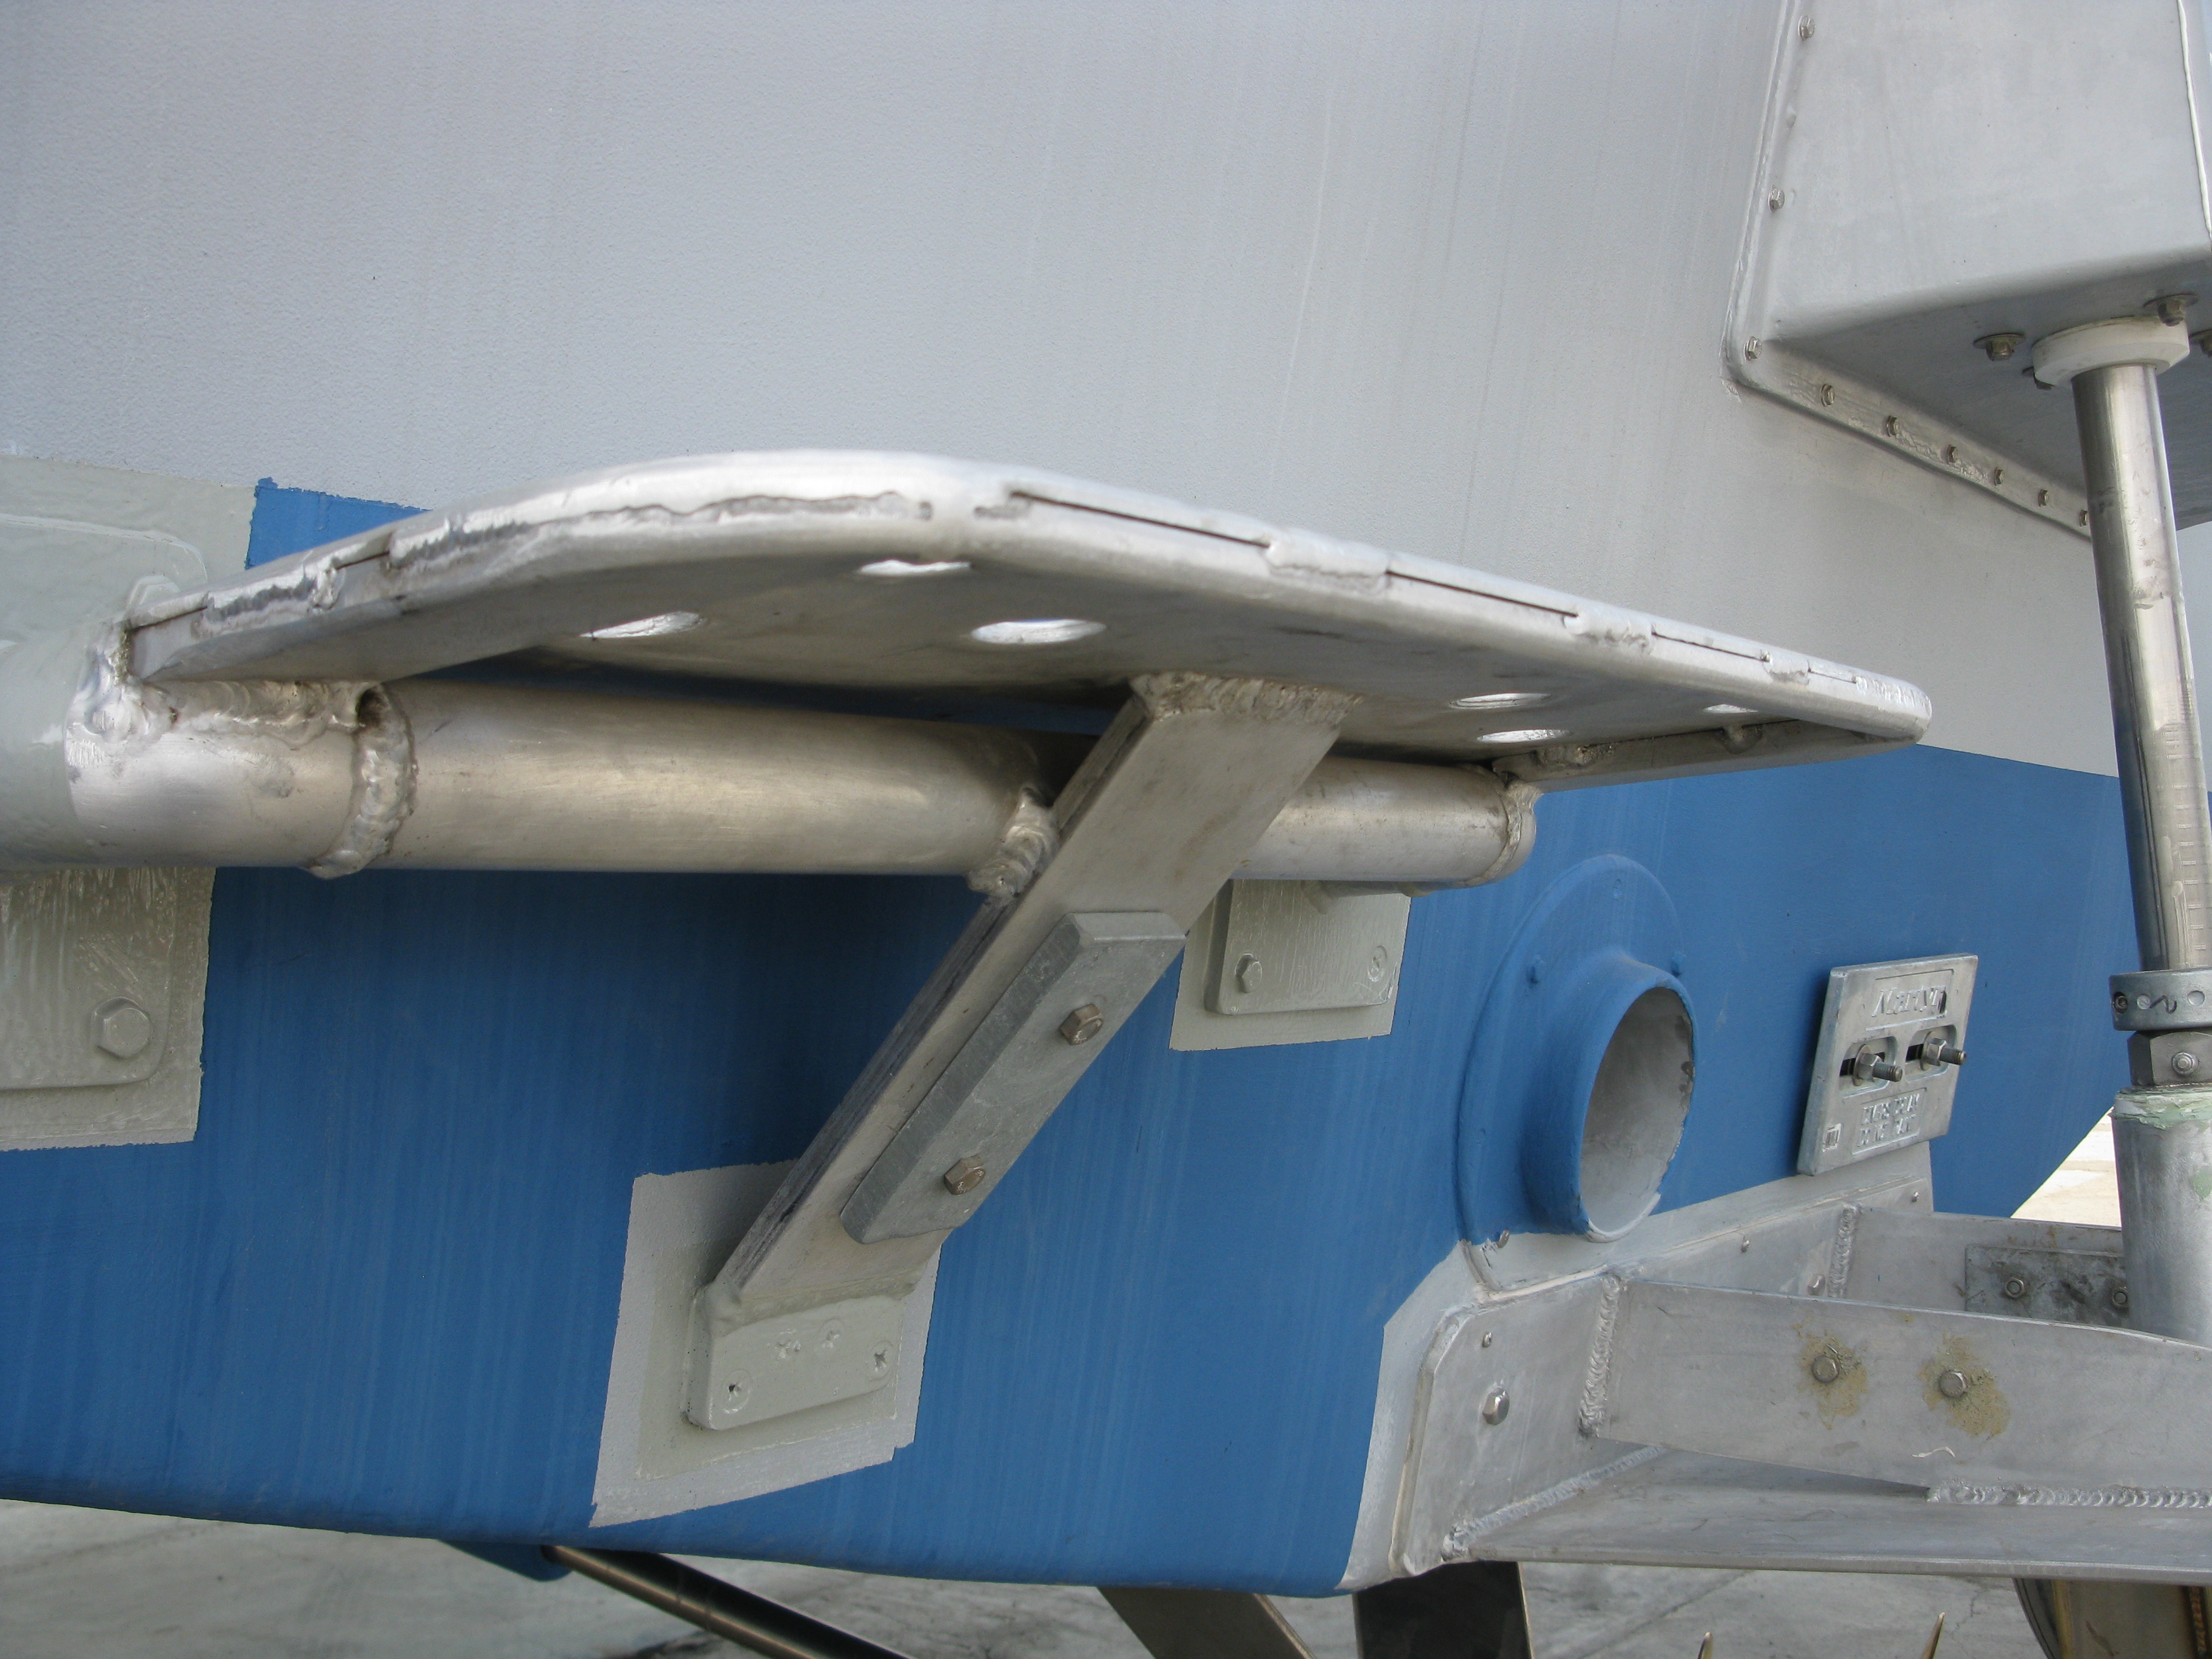
Combo swim step and hydraulic oil cooler. All of the return hydraulic oil goes goes thru the heavy 2” pipe that doubles as the main step support. Think of it as a hydraulic oil “Keel Cooler”.
Aluminum lower rudder plate, large SS plate rudder with a 2” AQ19 shaft, 4 blade ZF 26” prop.
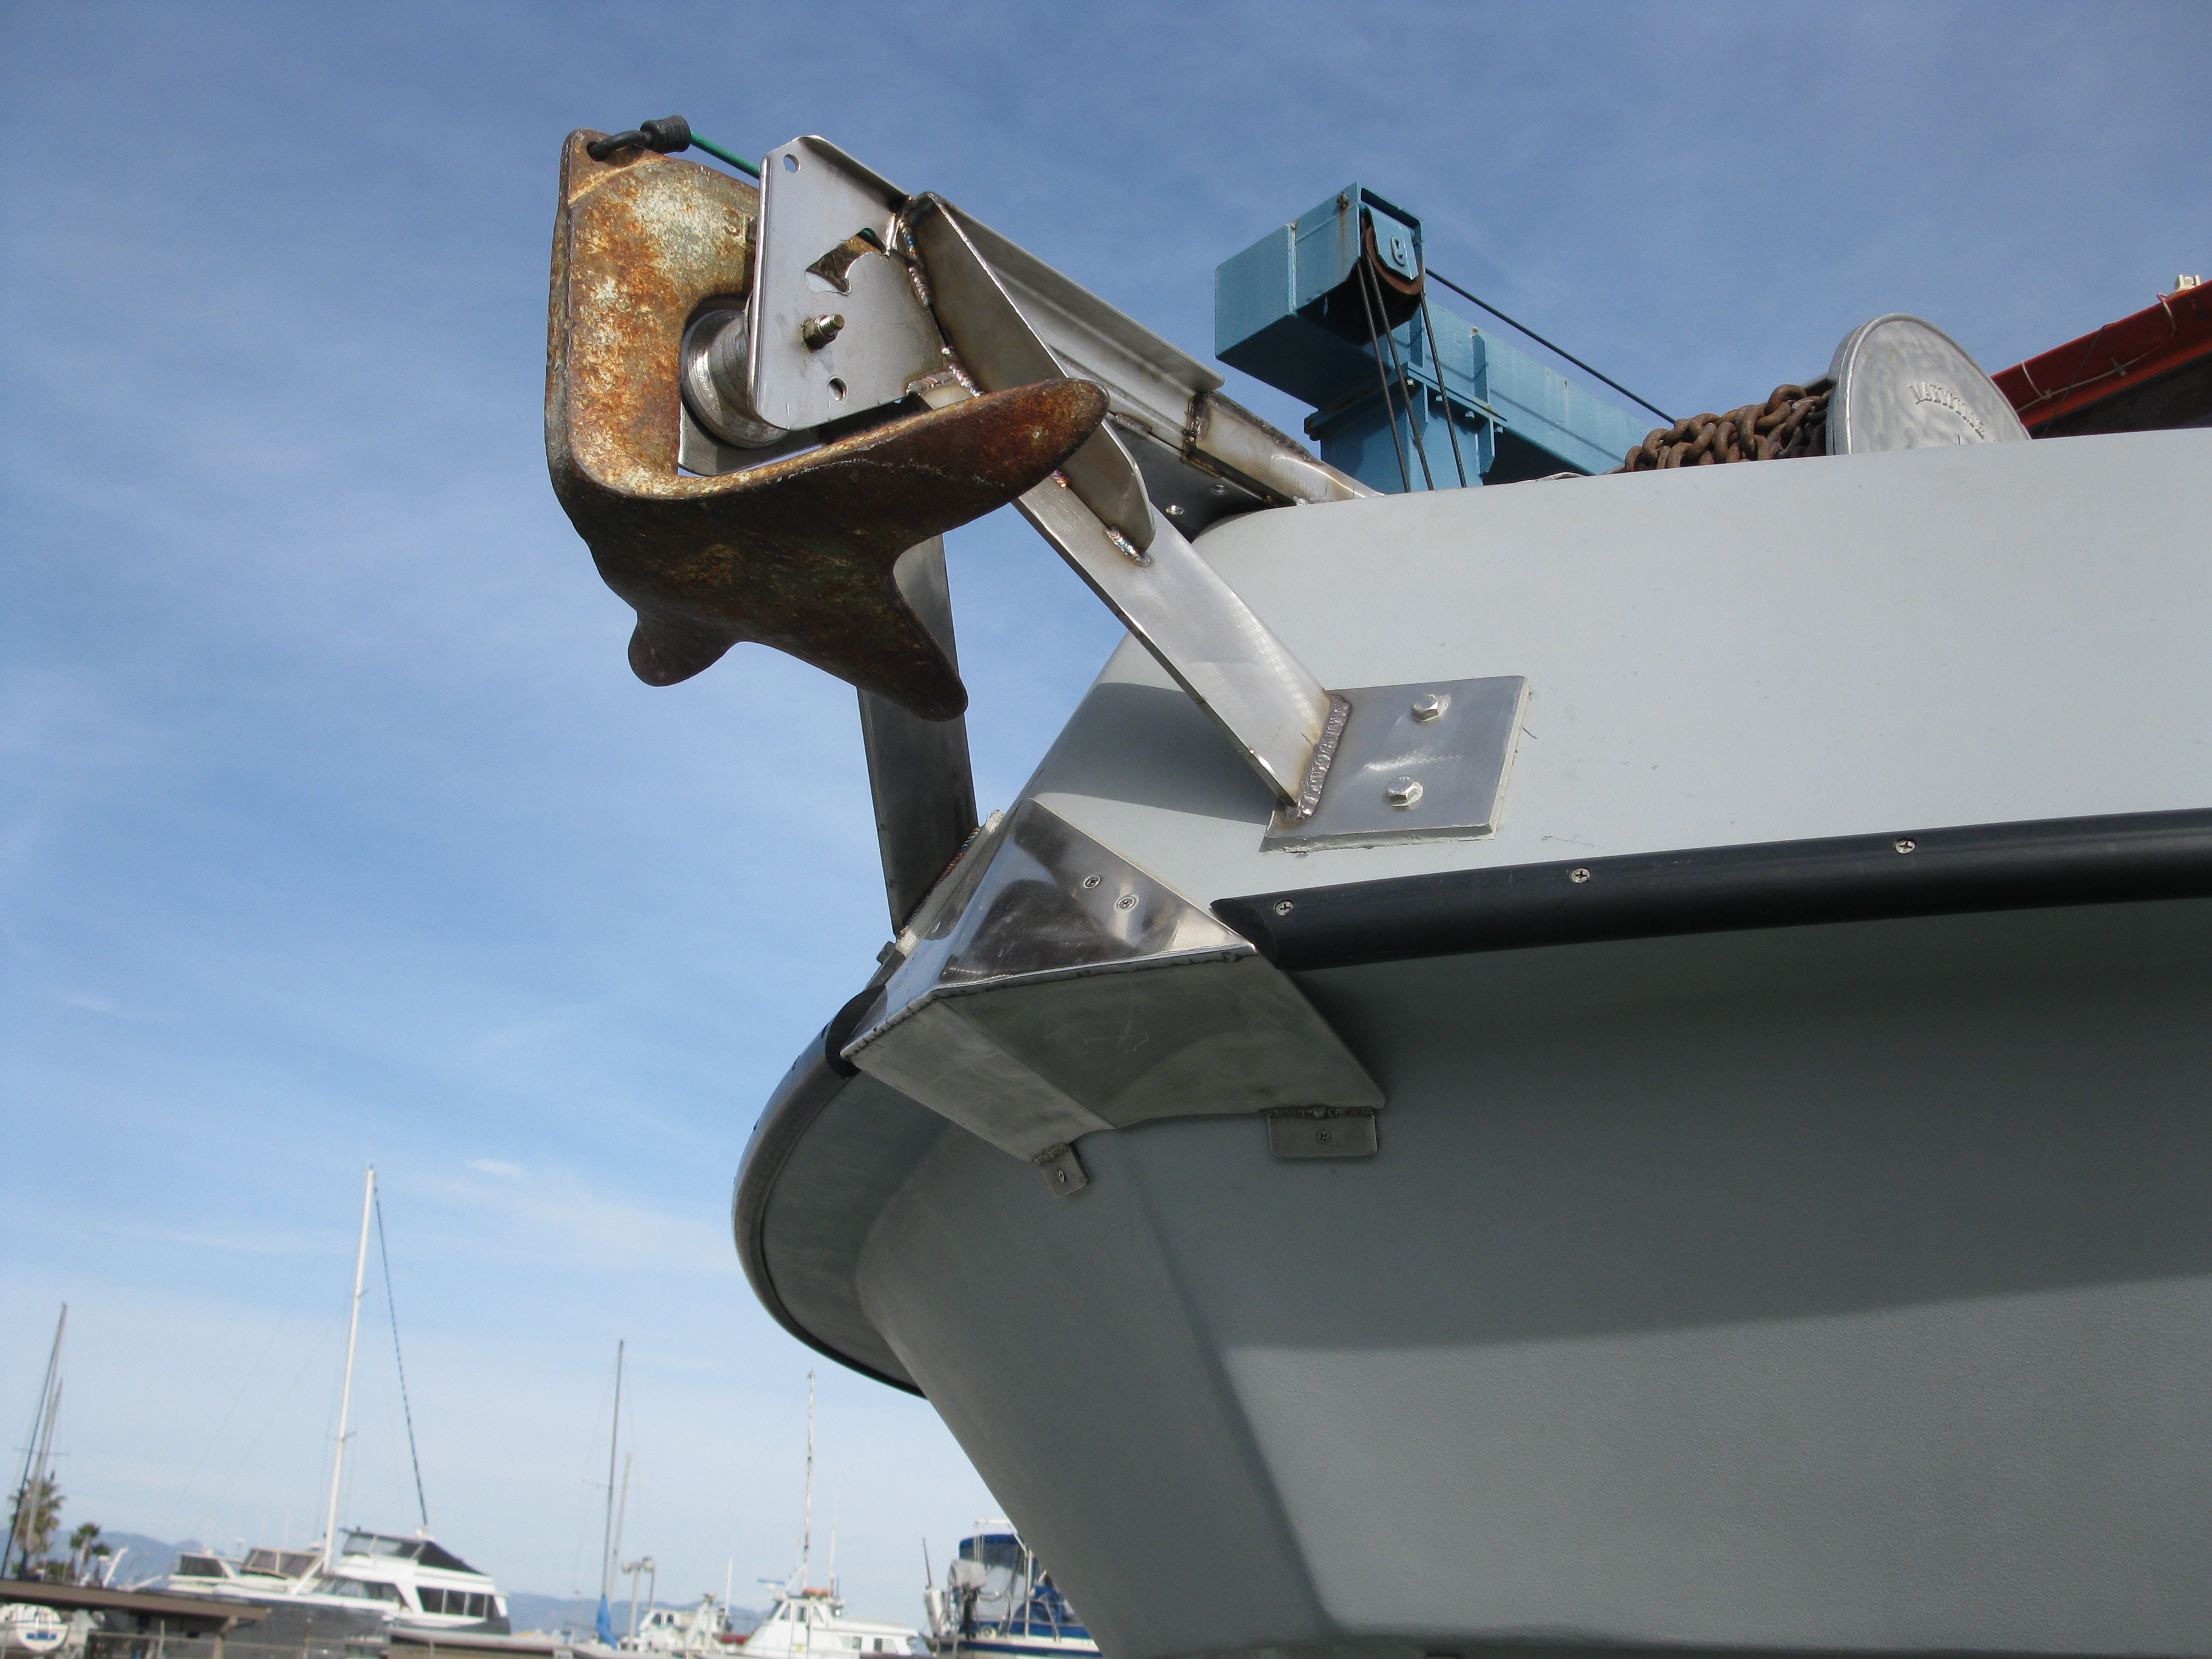
Very custom bow roller modifications needed to clear to “new bow”. We added in a 1/4” SS “bash plate” just in case.
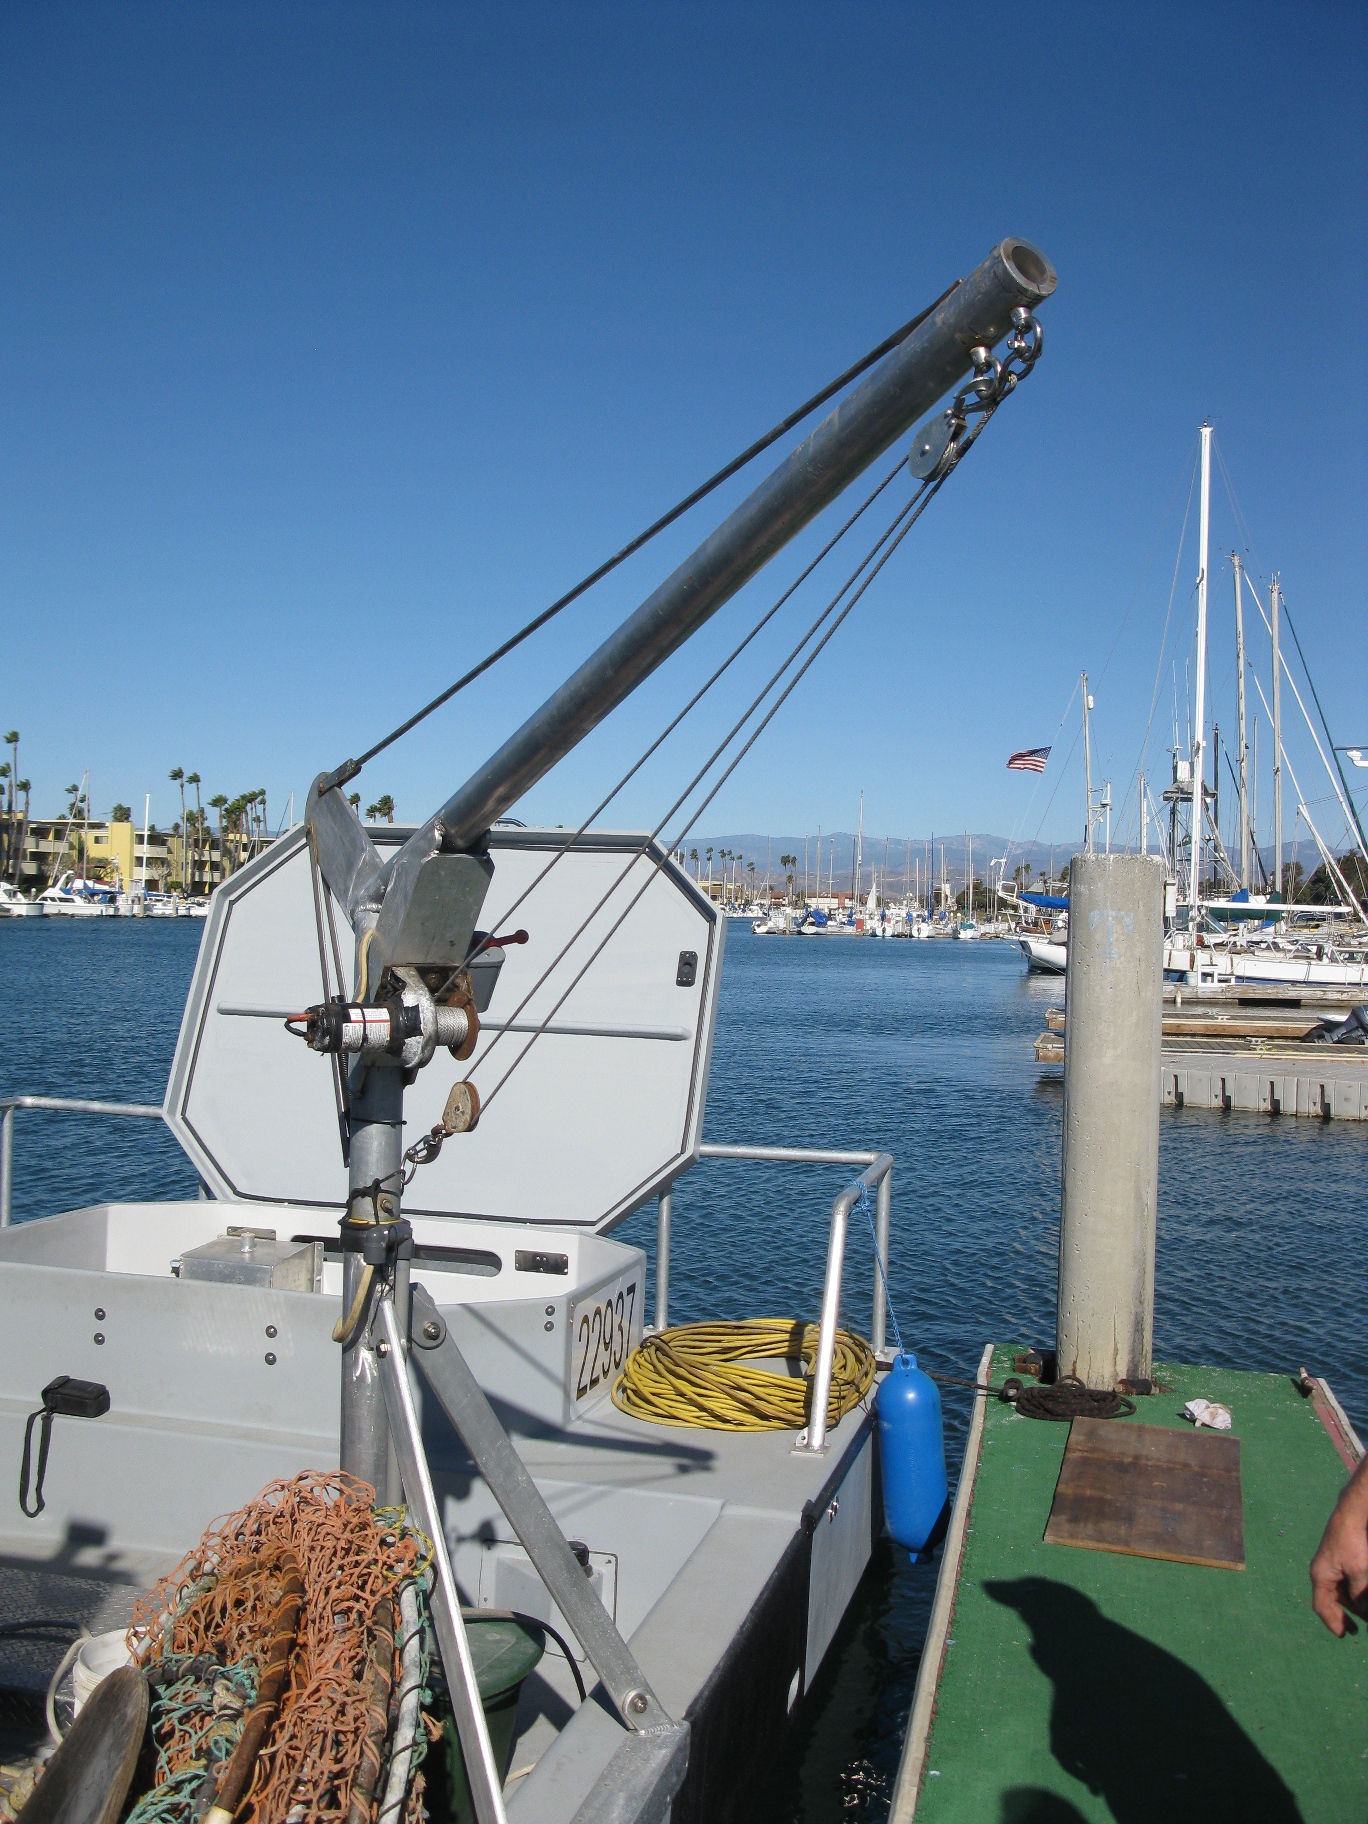
We built him a custom davit from 3.5” and 4.5” OD heavy walled 6061 aluminum. Used solid bar up the center and 3/4” x 3” legs to the cap rail. A pre-tensioned stainless steel bar at the top. We tested it with 500 Lbs and then jumped up and down on it while swinging it around. Worked really good. It was a fun project for me.
Sea Trial Day
Performance has been way better than they hoped for. The vessel cruises “light” (about 23,000 lbs) at close to 12K’s getting about 1.5 Mpg. When Sunstar is heavy (about 28,000-30,000+ lbs) with a load of Sea Cucumbers or Sea Urchins, 6 K’s was norm burning about 7 gph per hour between the 2 old Cats. With the QSL9 and one big prop, she comes home loaded to the max at 9 Kts burning under 8 GPH. Not that this means anything, but when we seatrialed Sunstar with a full tanks and a lot on misc stuff, she hit 18K’s with the engine against the governor at 2160 RPM / 90% load. As of this writing, Sunstar has accumulated about 1000 hours and has not had one glitch. Terry and his long term partner, Gary, finally have a boat that is tougher than they are and now just watch the weather instead of spending time working on the boat.
The OLD
The NEW
Now you ask, why the orange top?
It’s the Sun Star’s trade mark that goes back over 30 years. Terry wants to be sure that his buddies know who it is him, when they see the boat traveling about 2.5 times faster that it used to!
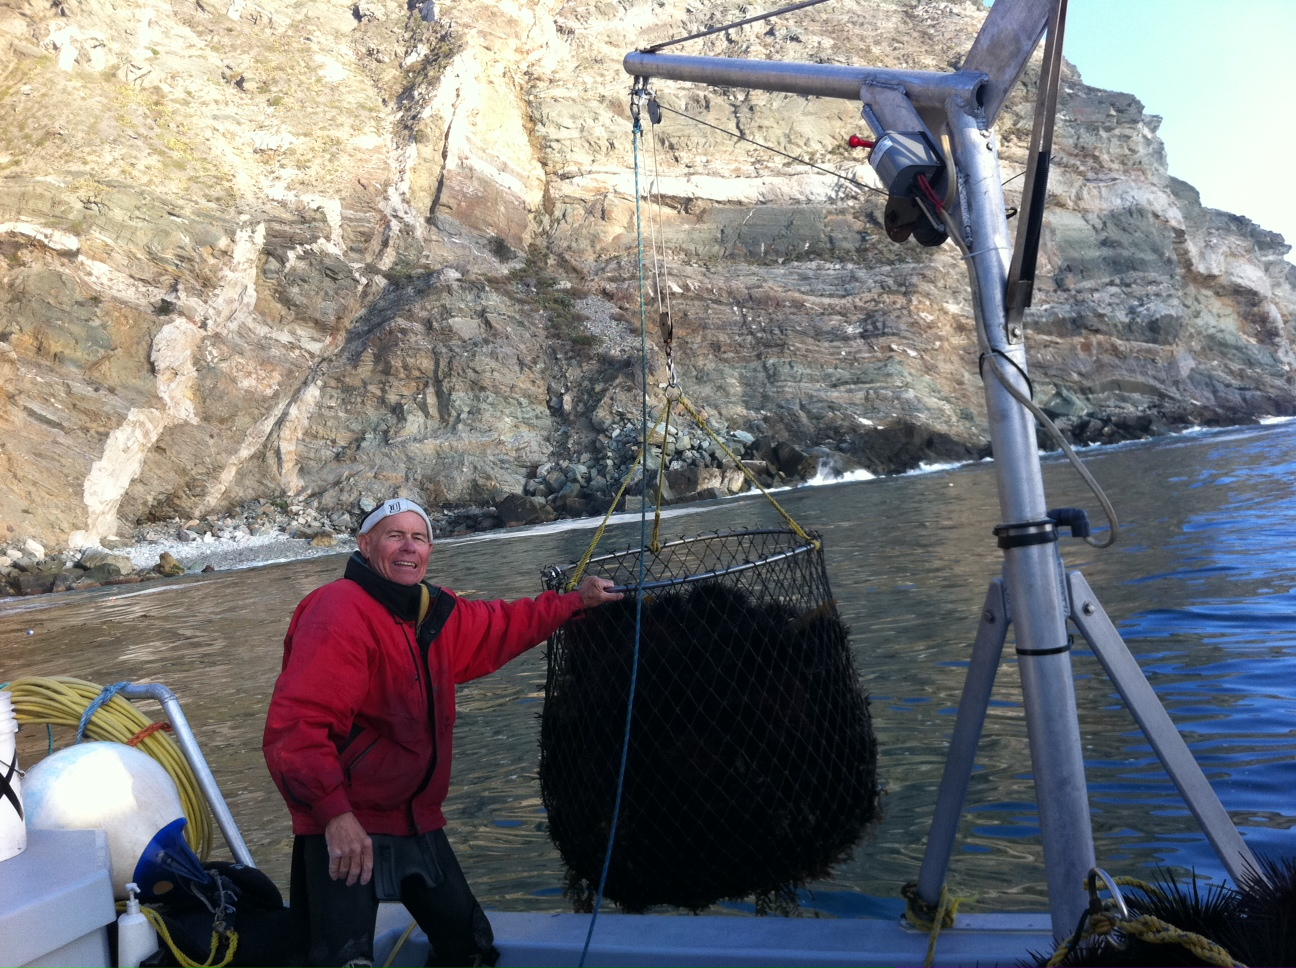
This is what all this was for – Big bags of Sea Urchins hand picked in 40-100 ft of water.
The Project Heroes
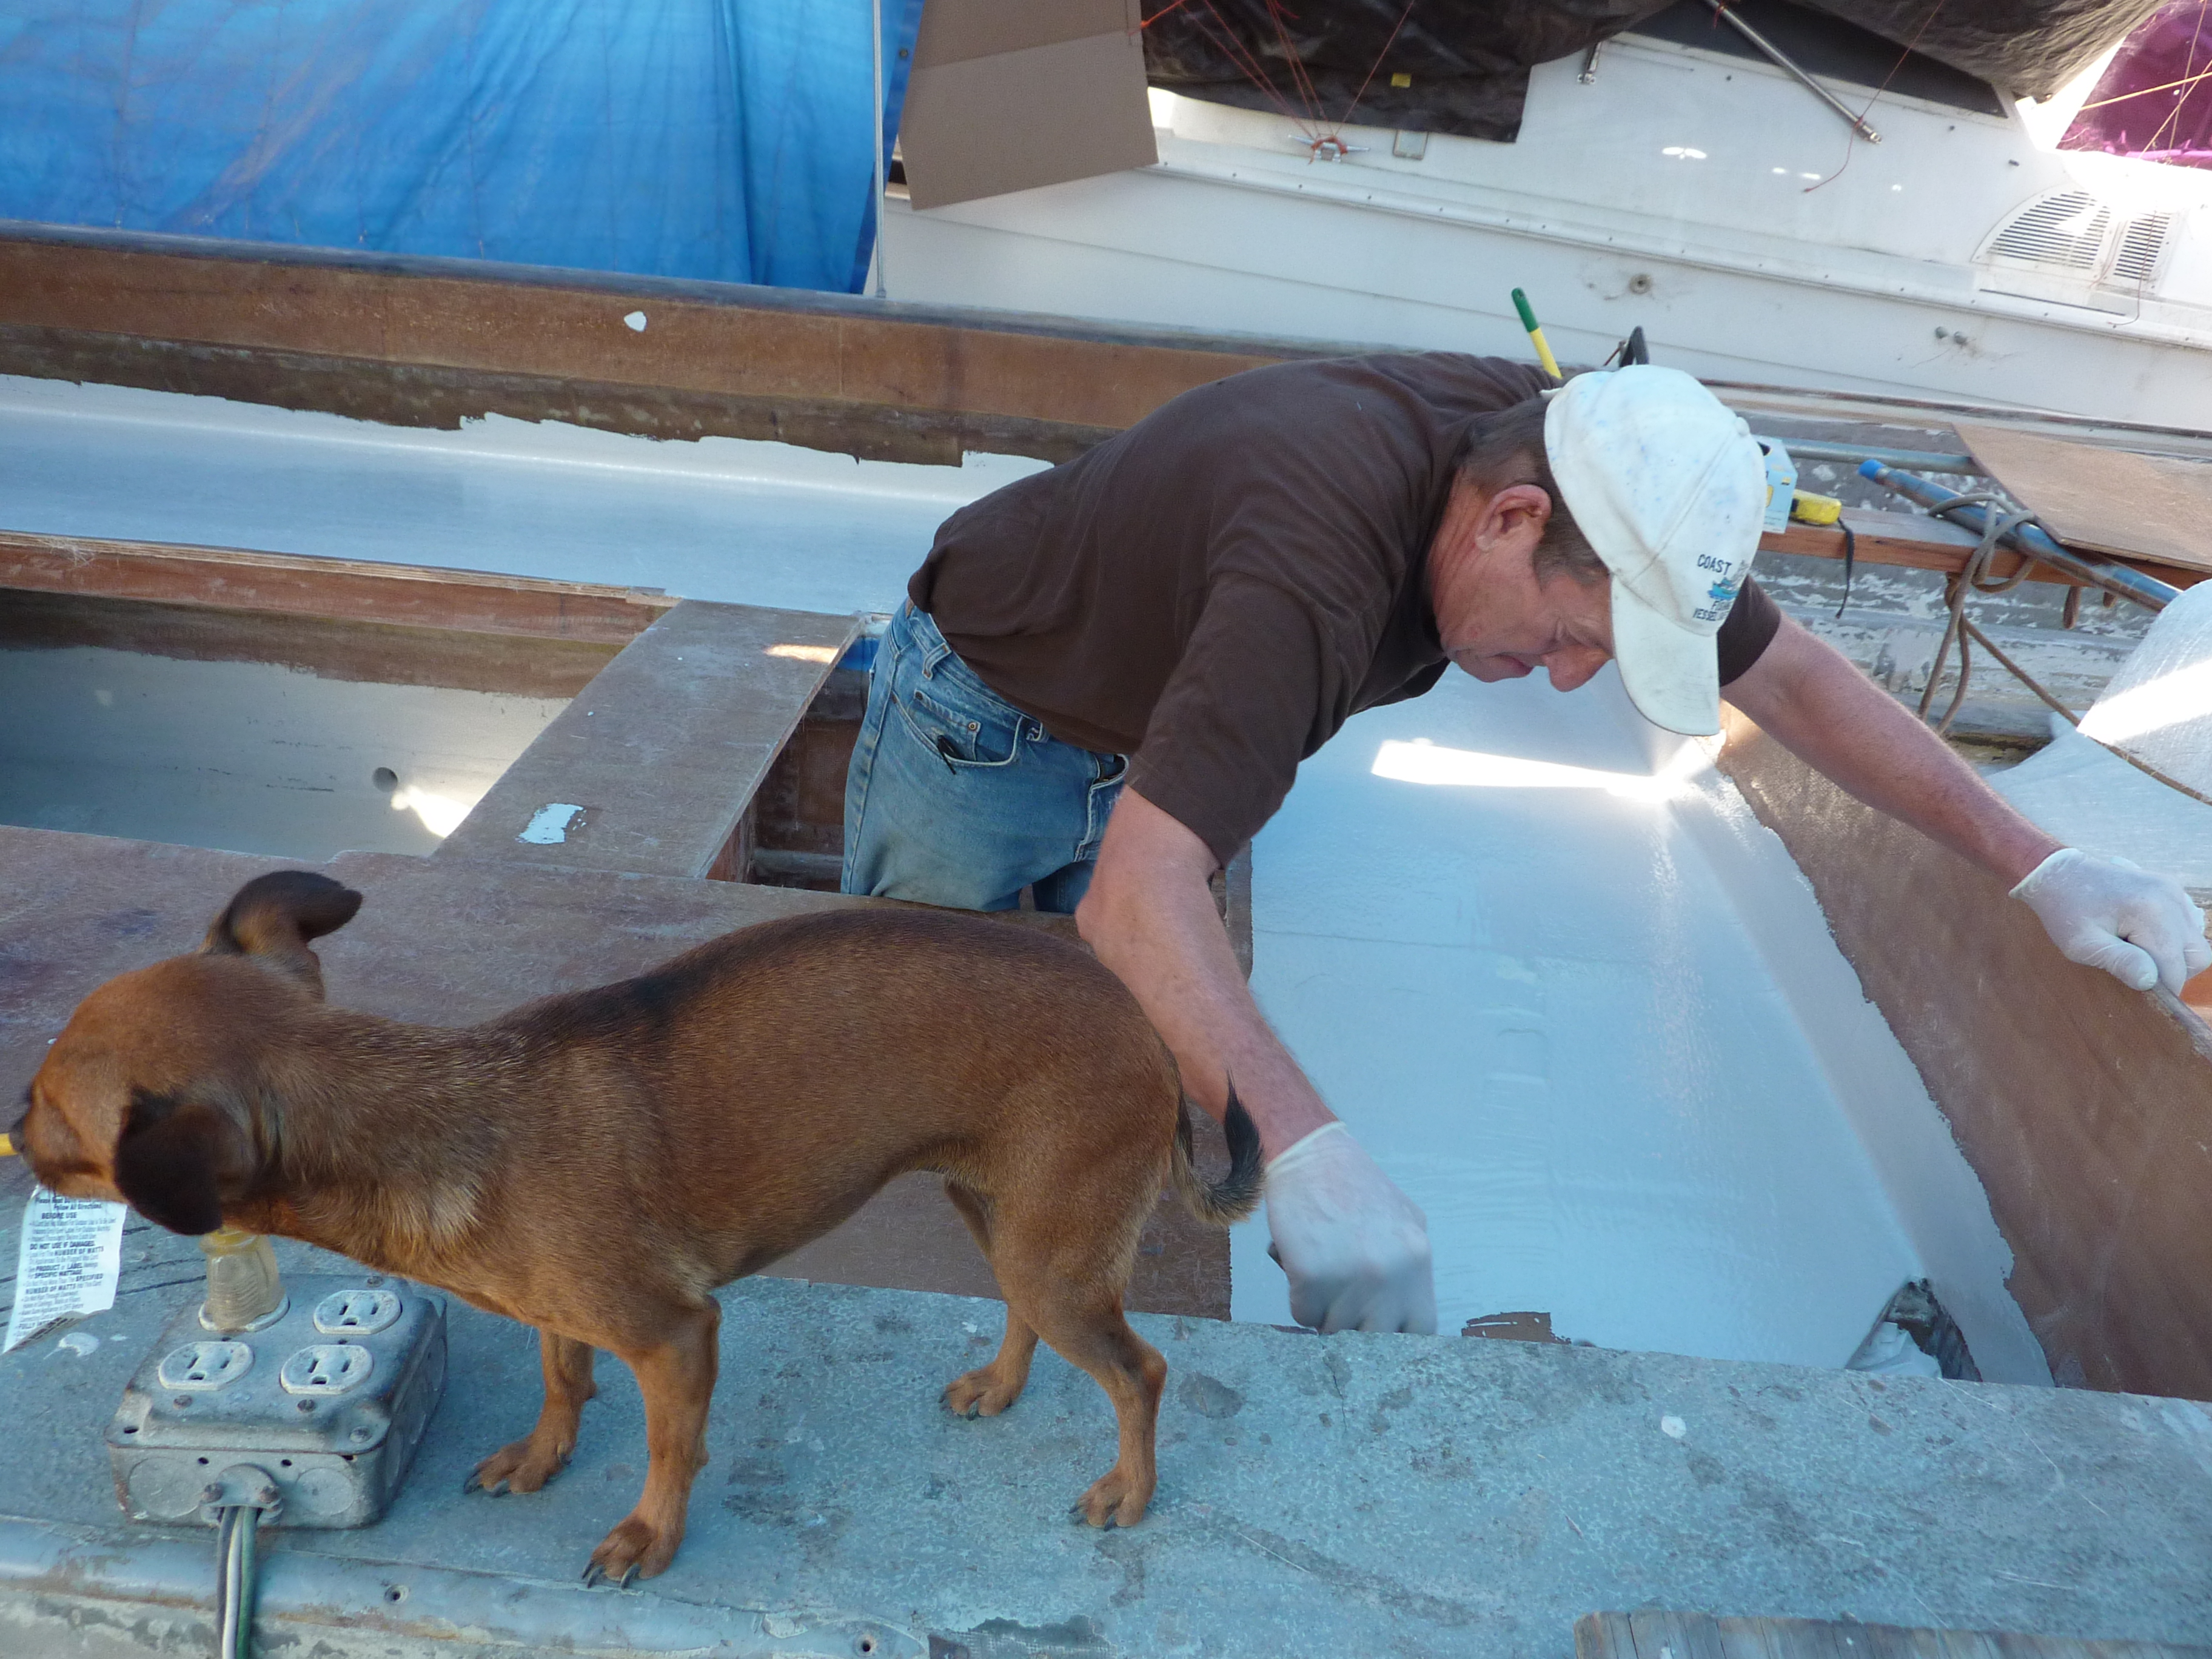
“Gary” is the owners diving partner (over 25 yrs) – He’s a World Class free diver and holds many records. Even at 69 yrs old, there is no way “average Joe Diver” could keep up this guy. He blew me away with his energy during the 8 month project, especially considering he’s never done anything like this before. He still dives over 150 days a year, which he says is a little short of what he used to do. One tough guy!
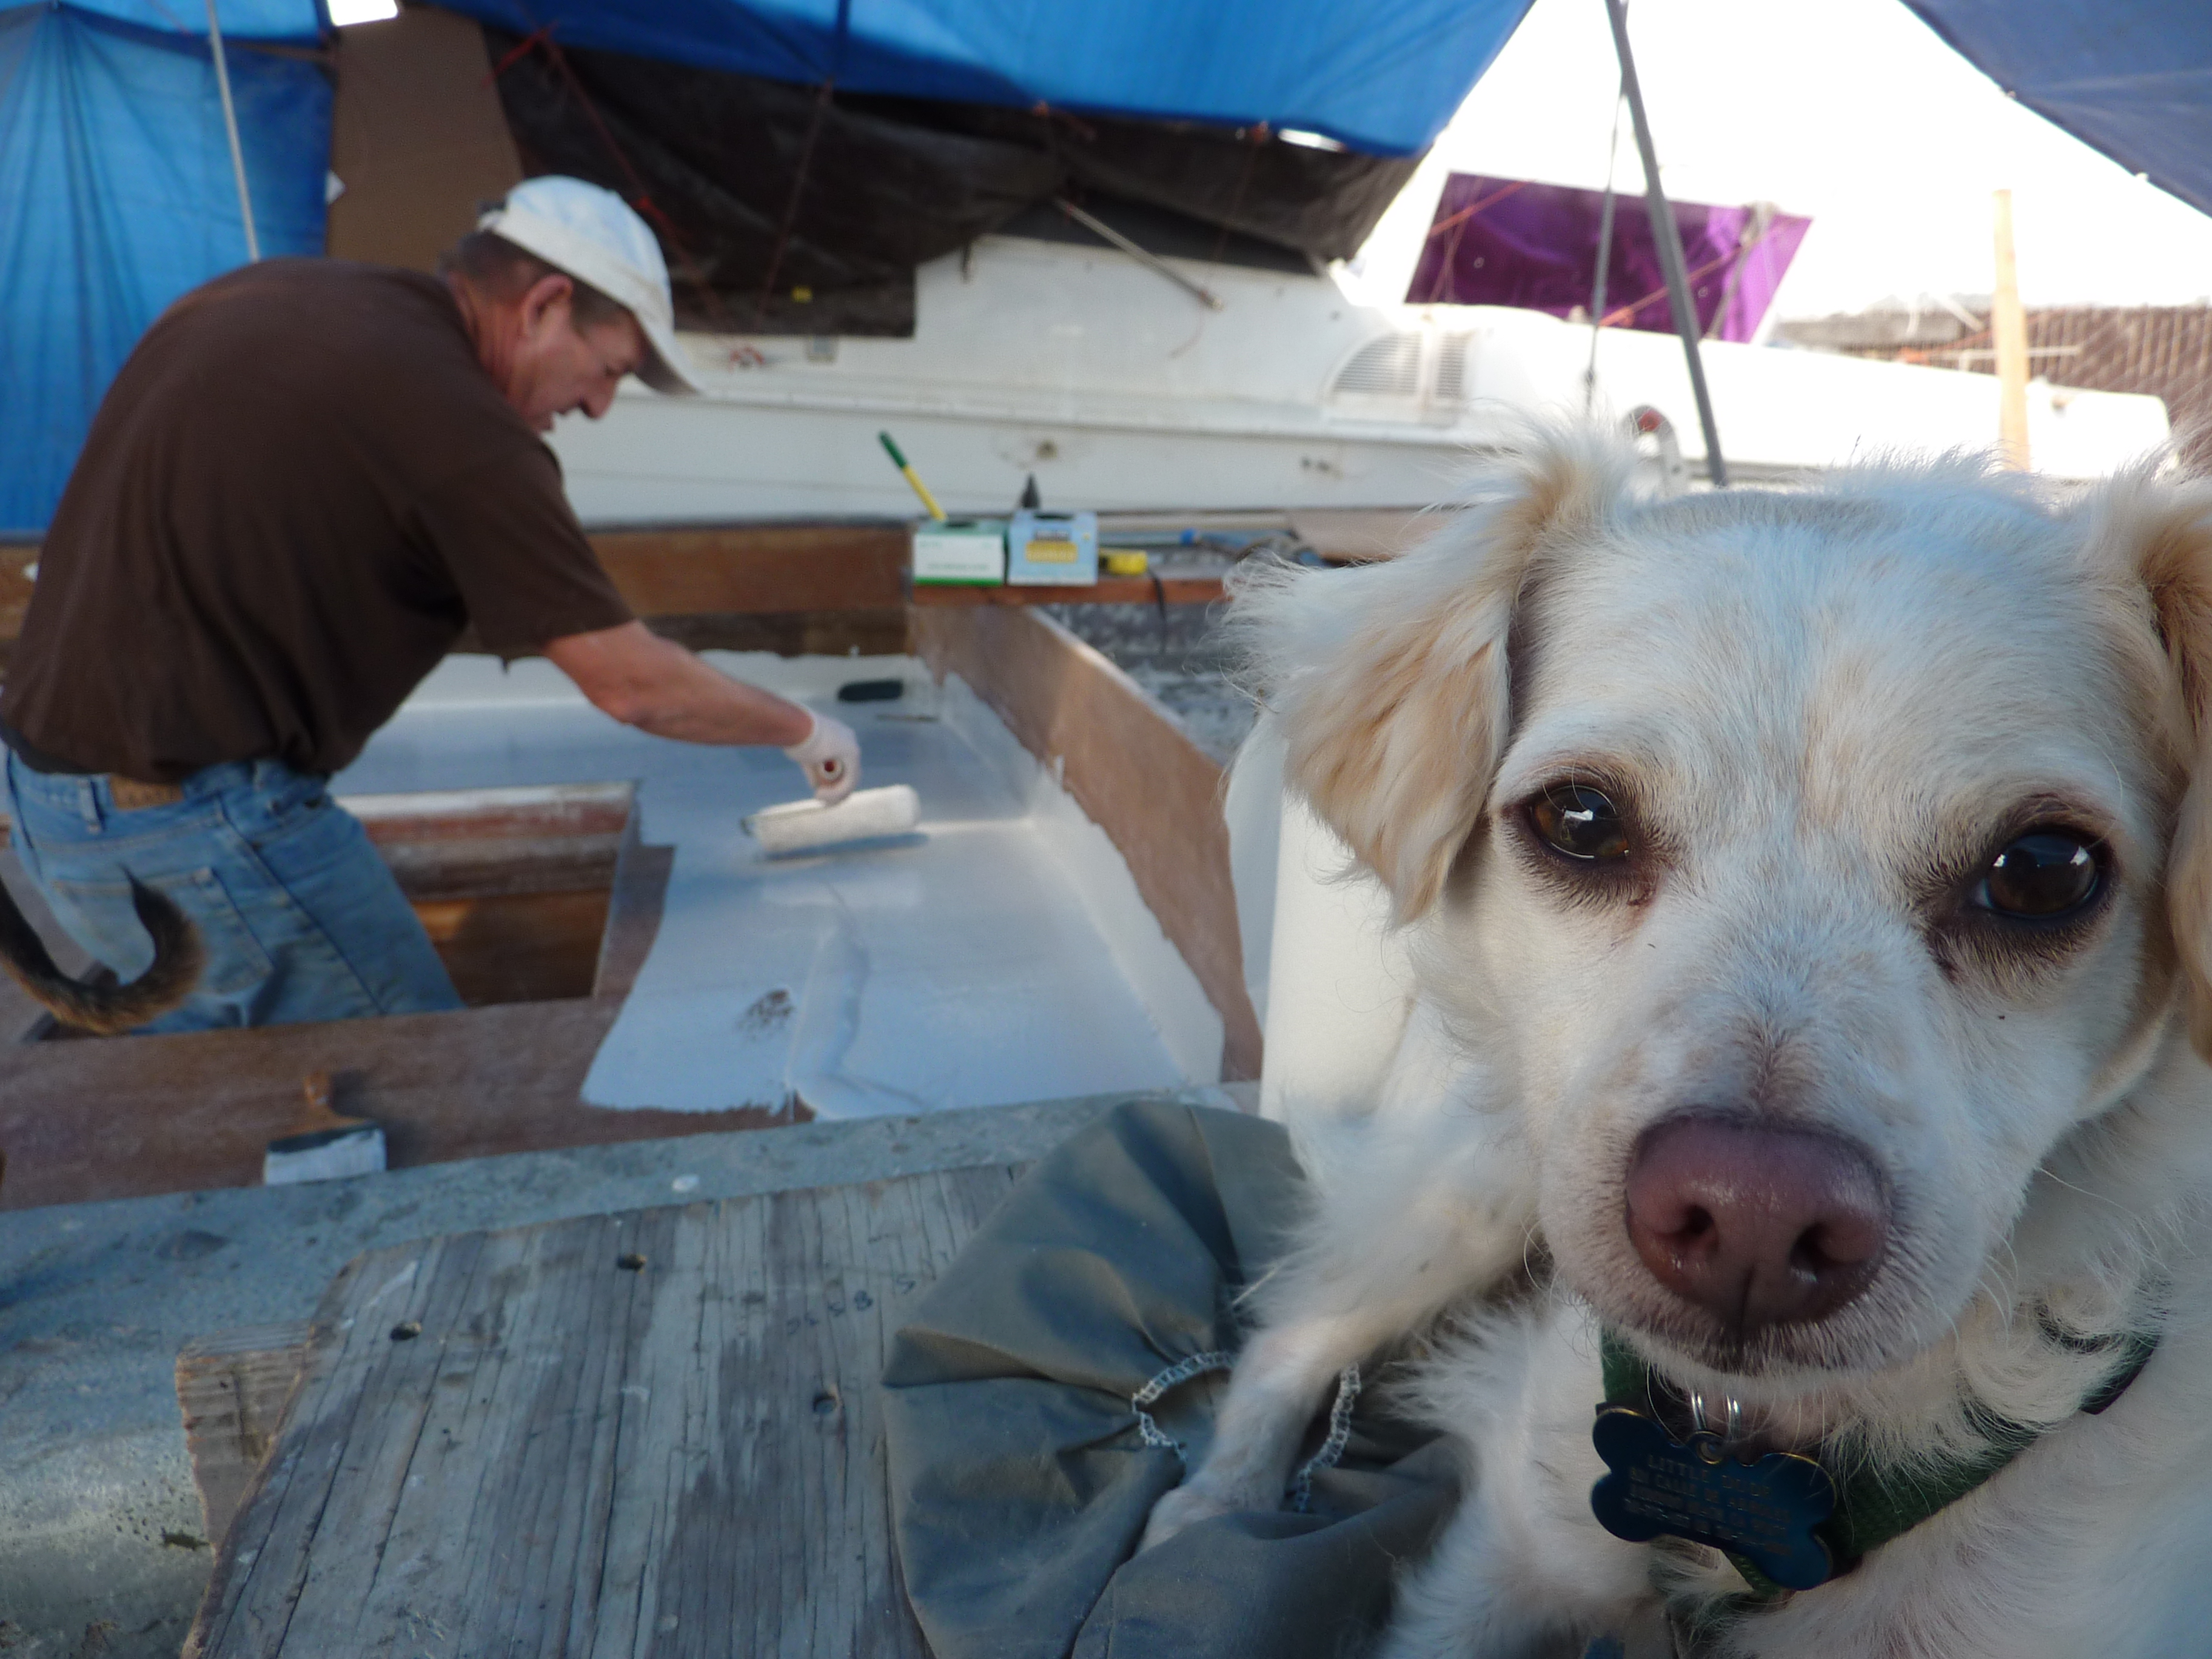
What can I say? Gary’s baby, and she was full time security keeping the yard and wharf rats in check.
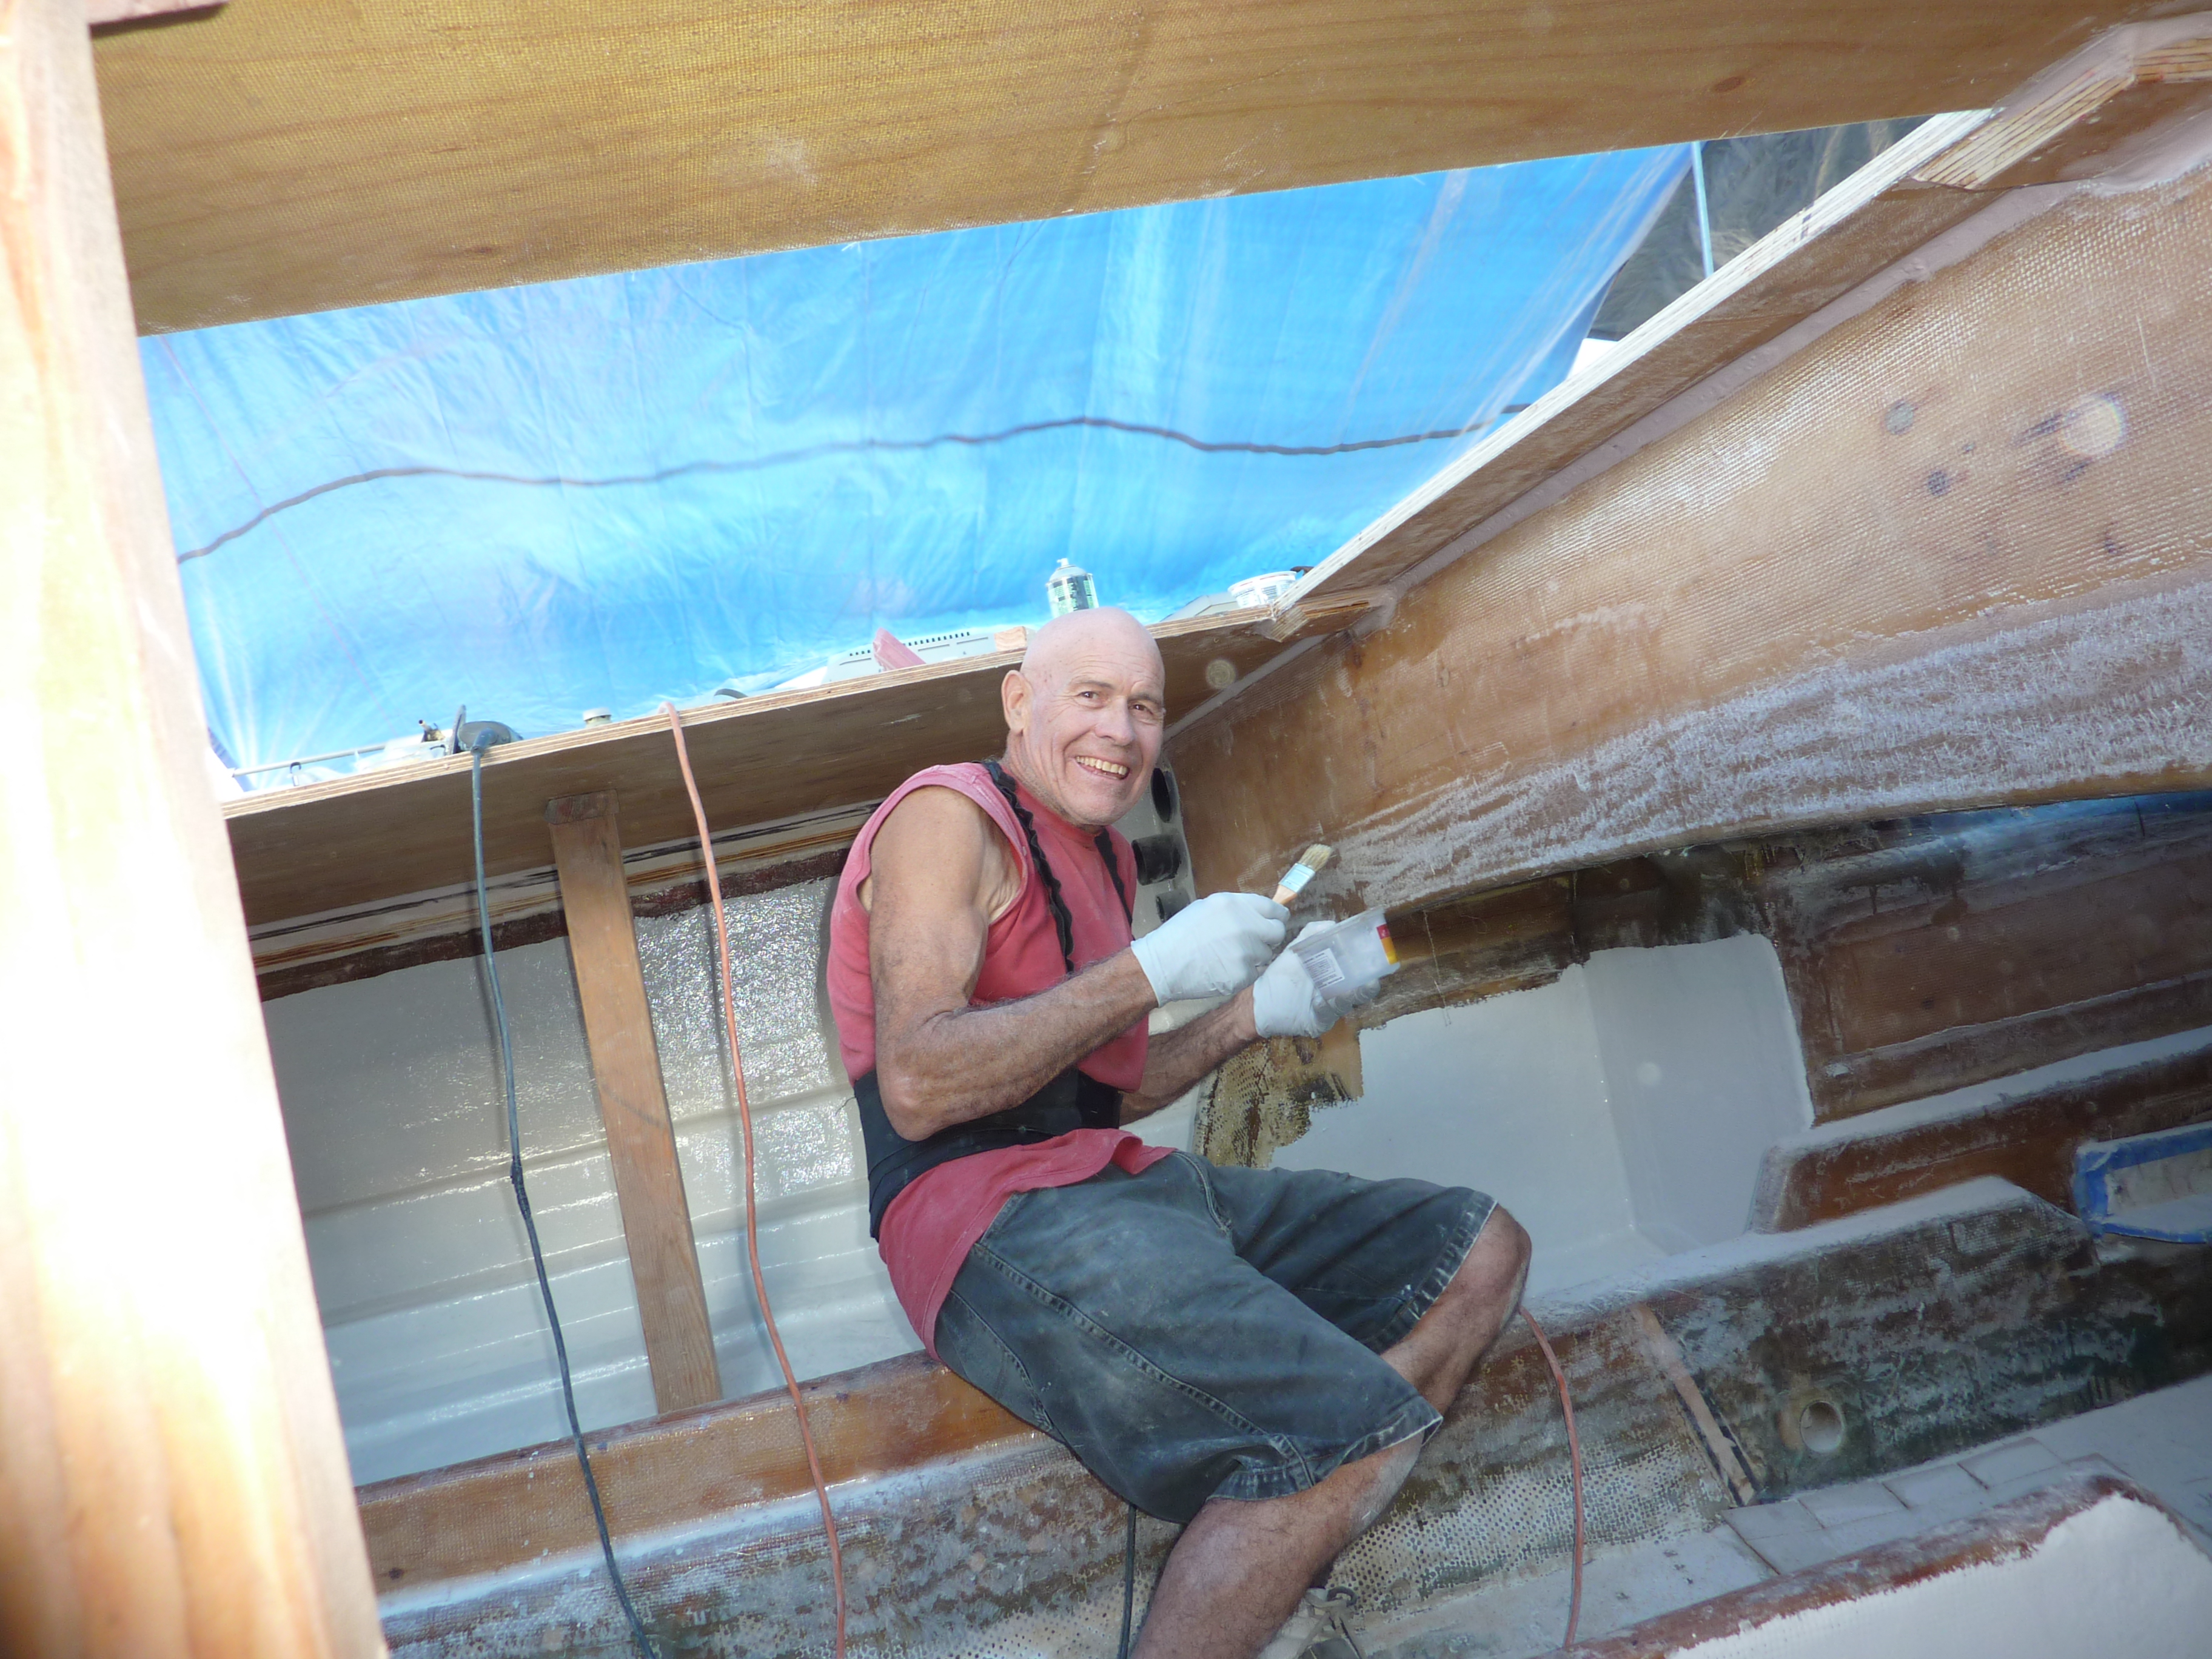
Terry Herzig – The owner of the Sunstar since new in 1973. He loved to roll on that Gelcoat.Ms Terry would come by every couple of weeks to add some moral support.