Post 1991 – Used Cylinder Block and Used Cap Screws
The top of the cylinder head capscrew is identified with an angle marking. The cylinder head capscrews must be tightened by the five-step “torque plus angle” method, as described here.
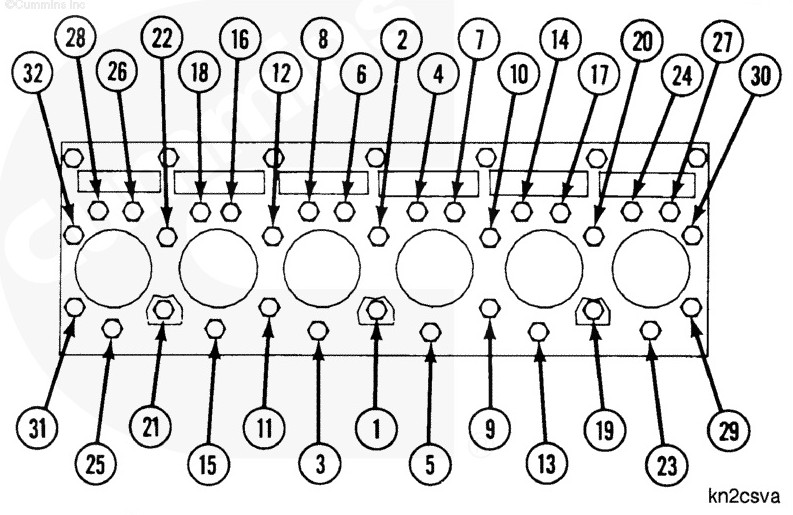
- Follow the numbered sequence and tighten all 26 capscrews. Torque Value: 70 n.m [52 ft-lb]
- Follow the numbered sequence and tighten only the 14 long capscrews. (Number 1, 2, 7, 8, 9, 10, 15, 16, 17, 18, 23, 24, 25, and 26.) Torque Value: 145 n.m [105 ft-lb]
- Retighten the short capscrews: Number 3, 4, 5, 6, 11, 12, 13, 14, 19, 20, 21, and 22 because of cylinder head relaxation and to obtain proper cylinder head torque requirements. Torque Value: 70 n.m [52 ft-lb]
- Follow the numbered sequence and retighten only the 14 long capscrews. (Number 1, 2, 7, 8, 9, 10, 15, 16, 17, 18, 23, 24, 25, and 26.) Torque Value: 145 n.m [105 ft-lb] NOTE: To turn the capscrew accurately to the desired angle, orientate according to the small “dot” and “window” marked on the capscrew head, or use the torque angle gauge for ½-inch drive, Part Number 3823878, or torque angle gauge for ¾-inch drive, Part Number 3823879. Mark the cylinder head adjacent to the dot on the capscrew head. This mark will serve as an indexing aid.
- Rotate the capscrew until the mark that has been made on the cylinder head
You are now done w/ the FIVE Steps!