I have always thought that the Yanmar 4LHA and the 28 ft. Bertram were a perfect combo when it comes to a repower. With my first 28 Bertram / Yanmar repower in about 1997, “El Corazon”, we used the early 4LH 160 with a Twin Disc 5011A as this gear had a 10 degree shaft angle and that barely allowed the engine to fit under the stock hatches using the existing shaft logs & struts. This particular repower project had a tight budget, so redoing the engine room and shafts was not in the game plan. But, it all worked out great, the boat owner was a happy camper, and we are still good friends – He did sell the boat a couple of years back and it is still a very nice running Bertram 28.
A few years followed and “Audax” came along. To me, this 28 Bertram turned out to be one the best repowers we have ever done, but I must admit that without the owner’s (Bill Fuller) help, it would not have been so successful. Audax is still a 28 Bertram that still gets oohs & ahs where ever she goes and is used much for comparison repowers as to what and how it should be done.
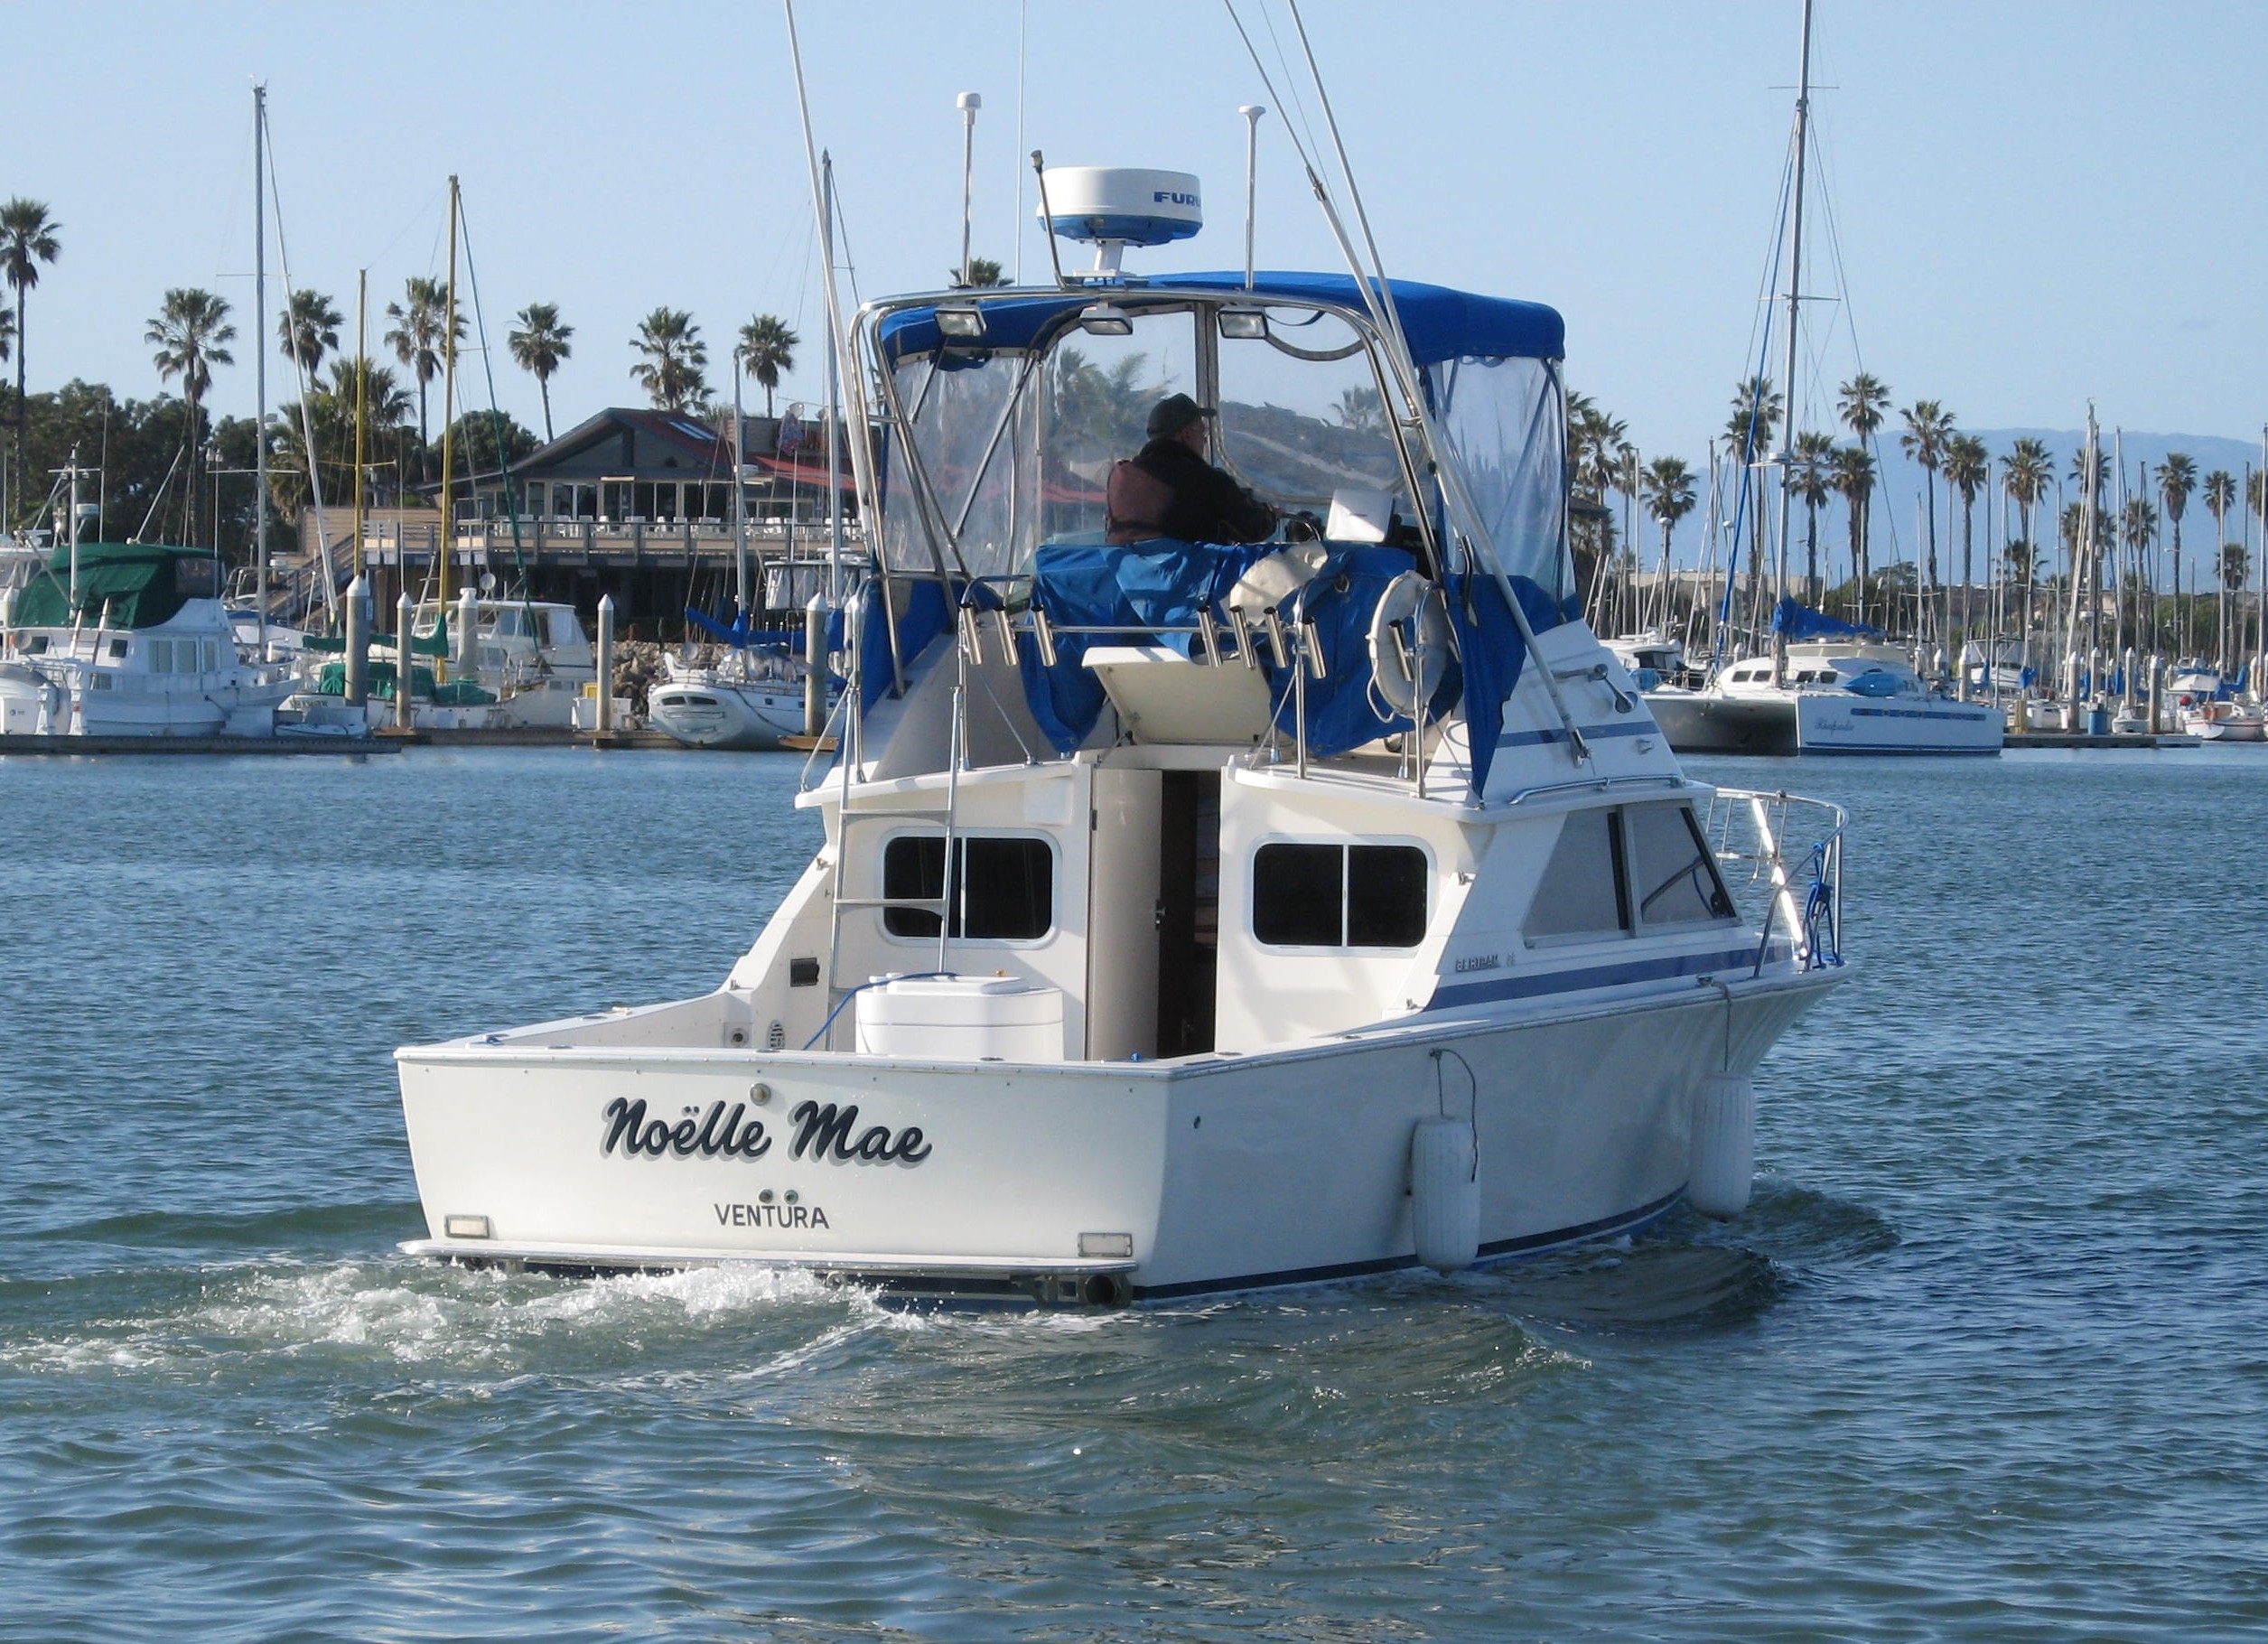
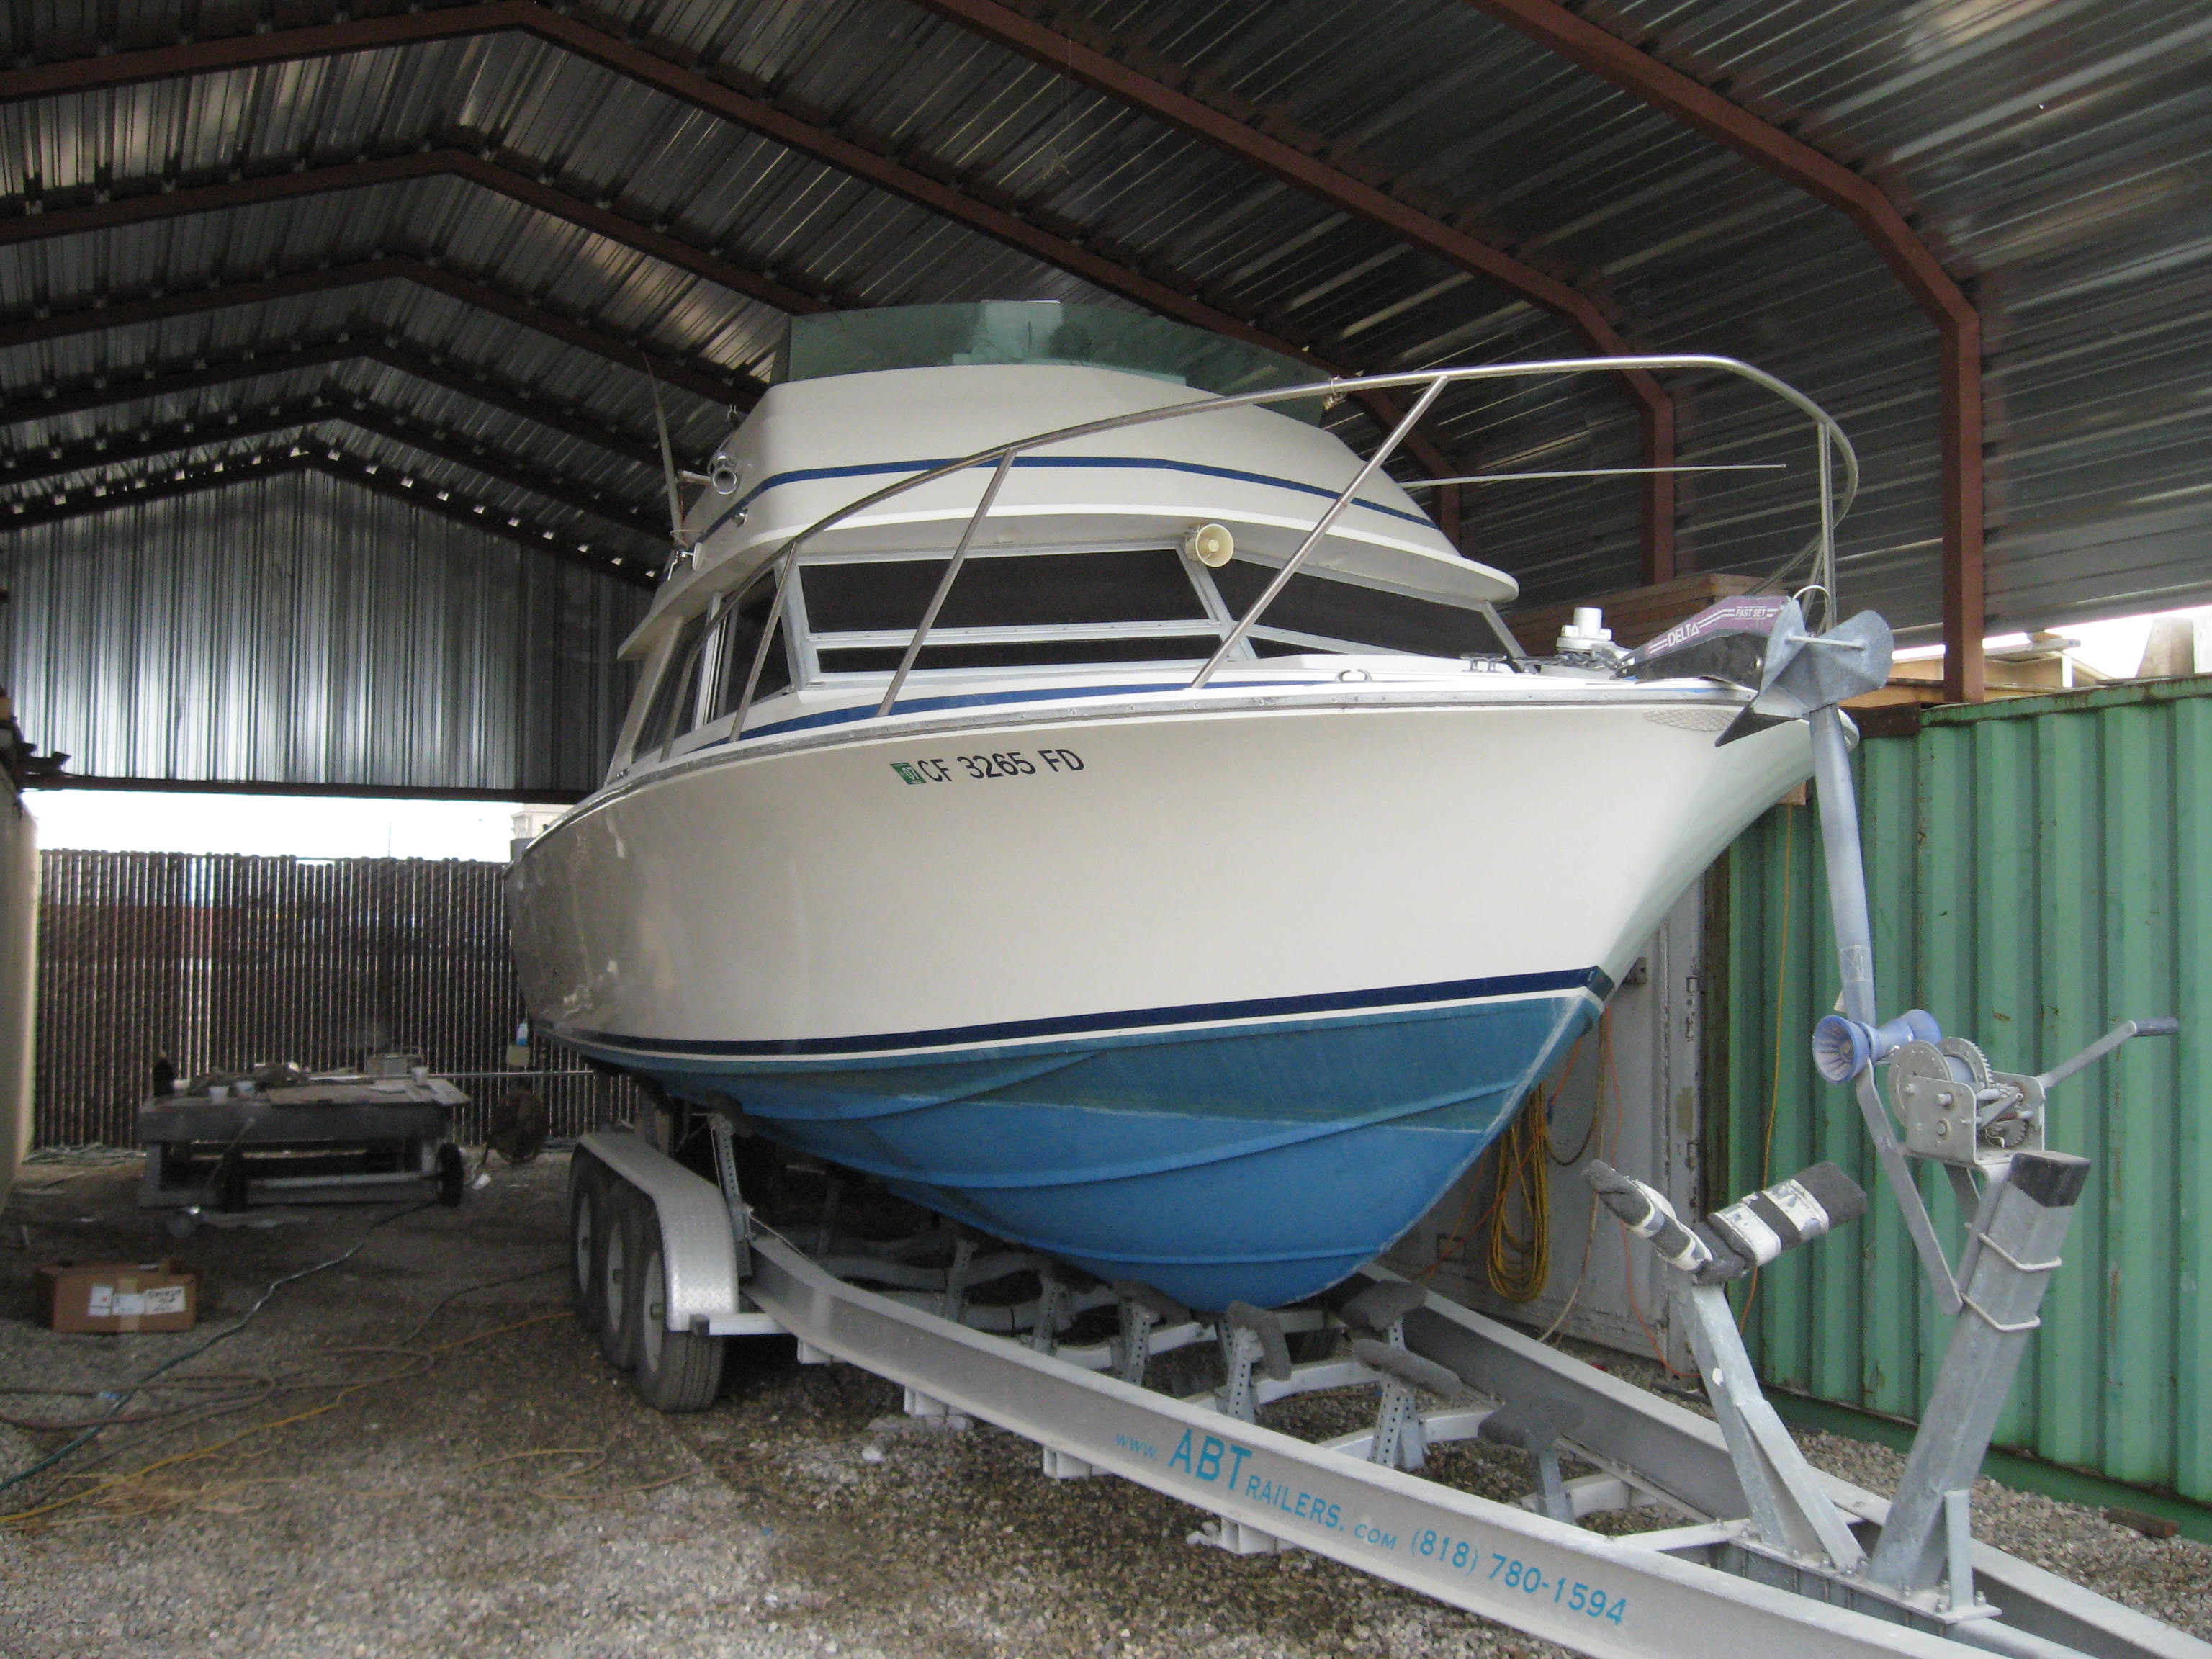
Early this year we got another opportunity to repower a 28 Bertram named “Noelle Mae” and the owner wanted it all “just so”. He knew the Audax well and wanted nothing short of it as to everything. As of this writing, Nov 8, 08, the boat is basically finished, but the owner is still tying up some loose ends as to the house electrical, plumbing and some other creature comforts. The images below show the different steps it took to get there.
The vessel was not in too bad a shape when it got to us as 28’s go, but it still required a complete gutting of everything from the back cabin wall aft to do it right.
Everything was removed (decks, all wood, hardware, etc (we left the fuel tank) and the boat was degreased down to the raw glass. Then we ground out the entire inside of the hull and prepped for a complete re-glass of all the stringers, bulkheads, misc structural attachments, etc…
Secondary bonding on old glass requires a lot of prep work and first-class materials. We used vinyl ester resin for our tie-in mat / first layer coat, and then finished all with iso-tooling resin. Our lay up was not heavy, but very strong (1 tie layer of 1 ounce mat, multiple combos at all stringer to bulkhead attachments, a combo layer and finish mat over all). We also added solid FRP battery shelves and stiffeners between the outside engine stringers and the hull – this way we could eliminate engine mount tie-in’s to the bulkhead as we had done with the Audax – Since we were going with new logs, struts and shafts, the old logs and struts were removed and semi-patched at this time. Remember, we live by this motto “There is always room for improvement”.

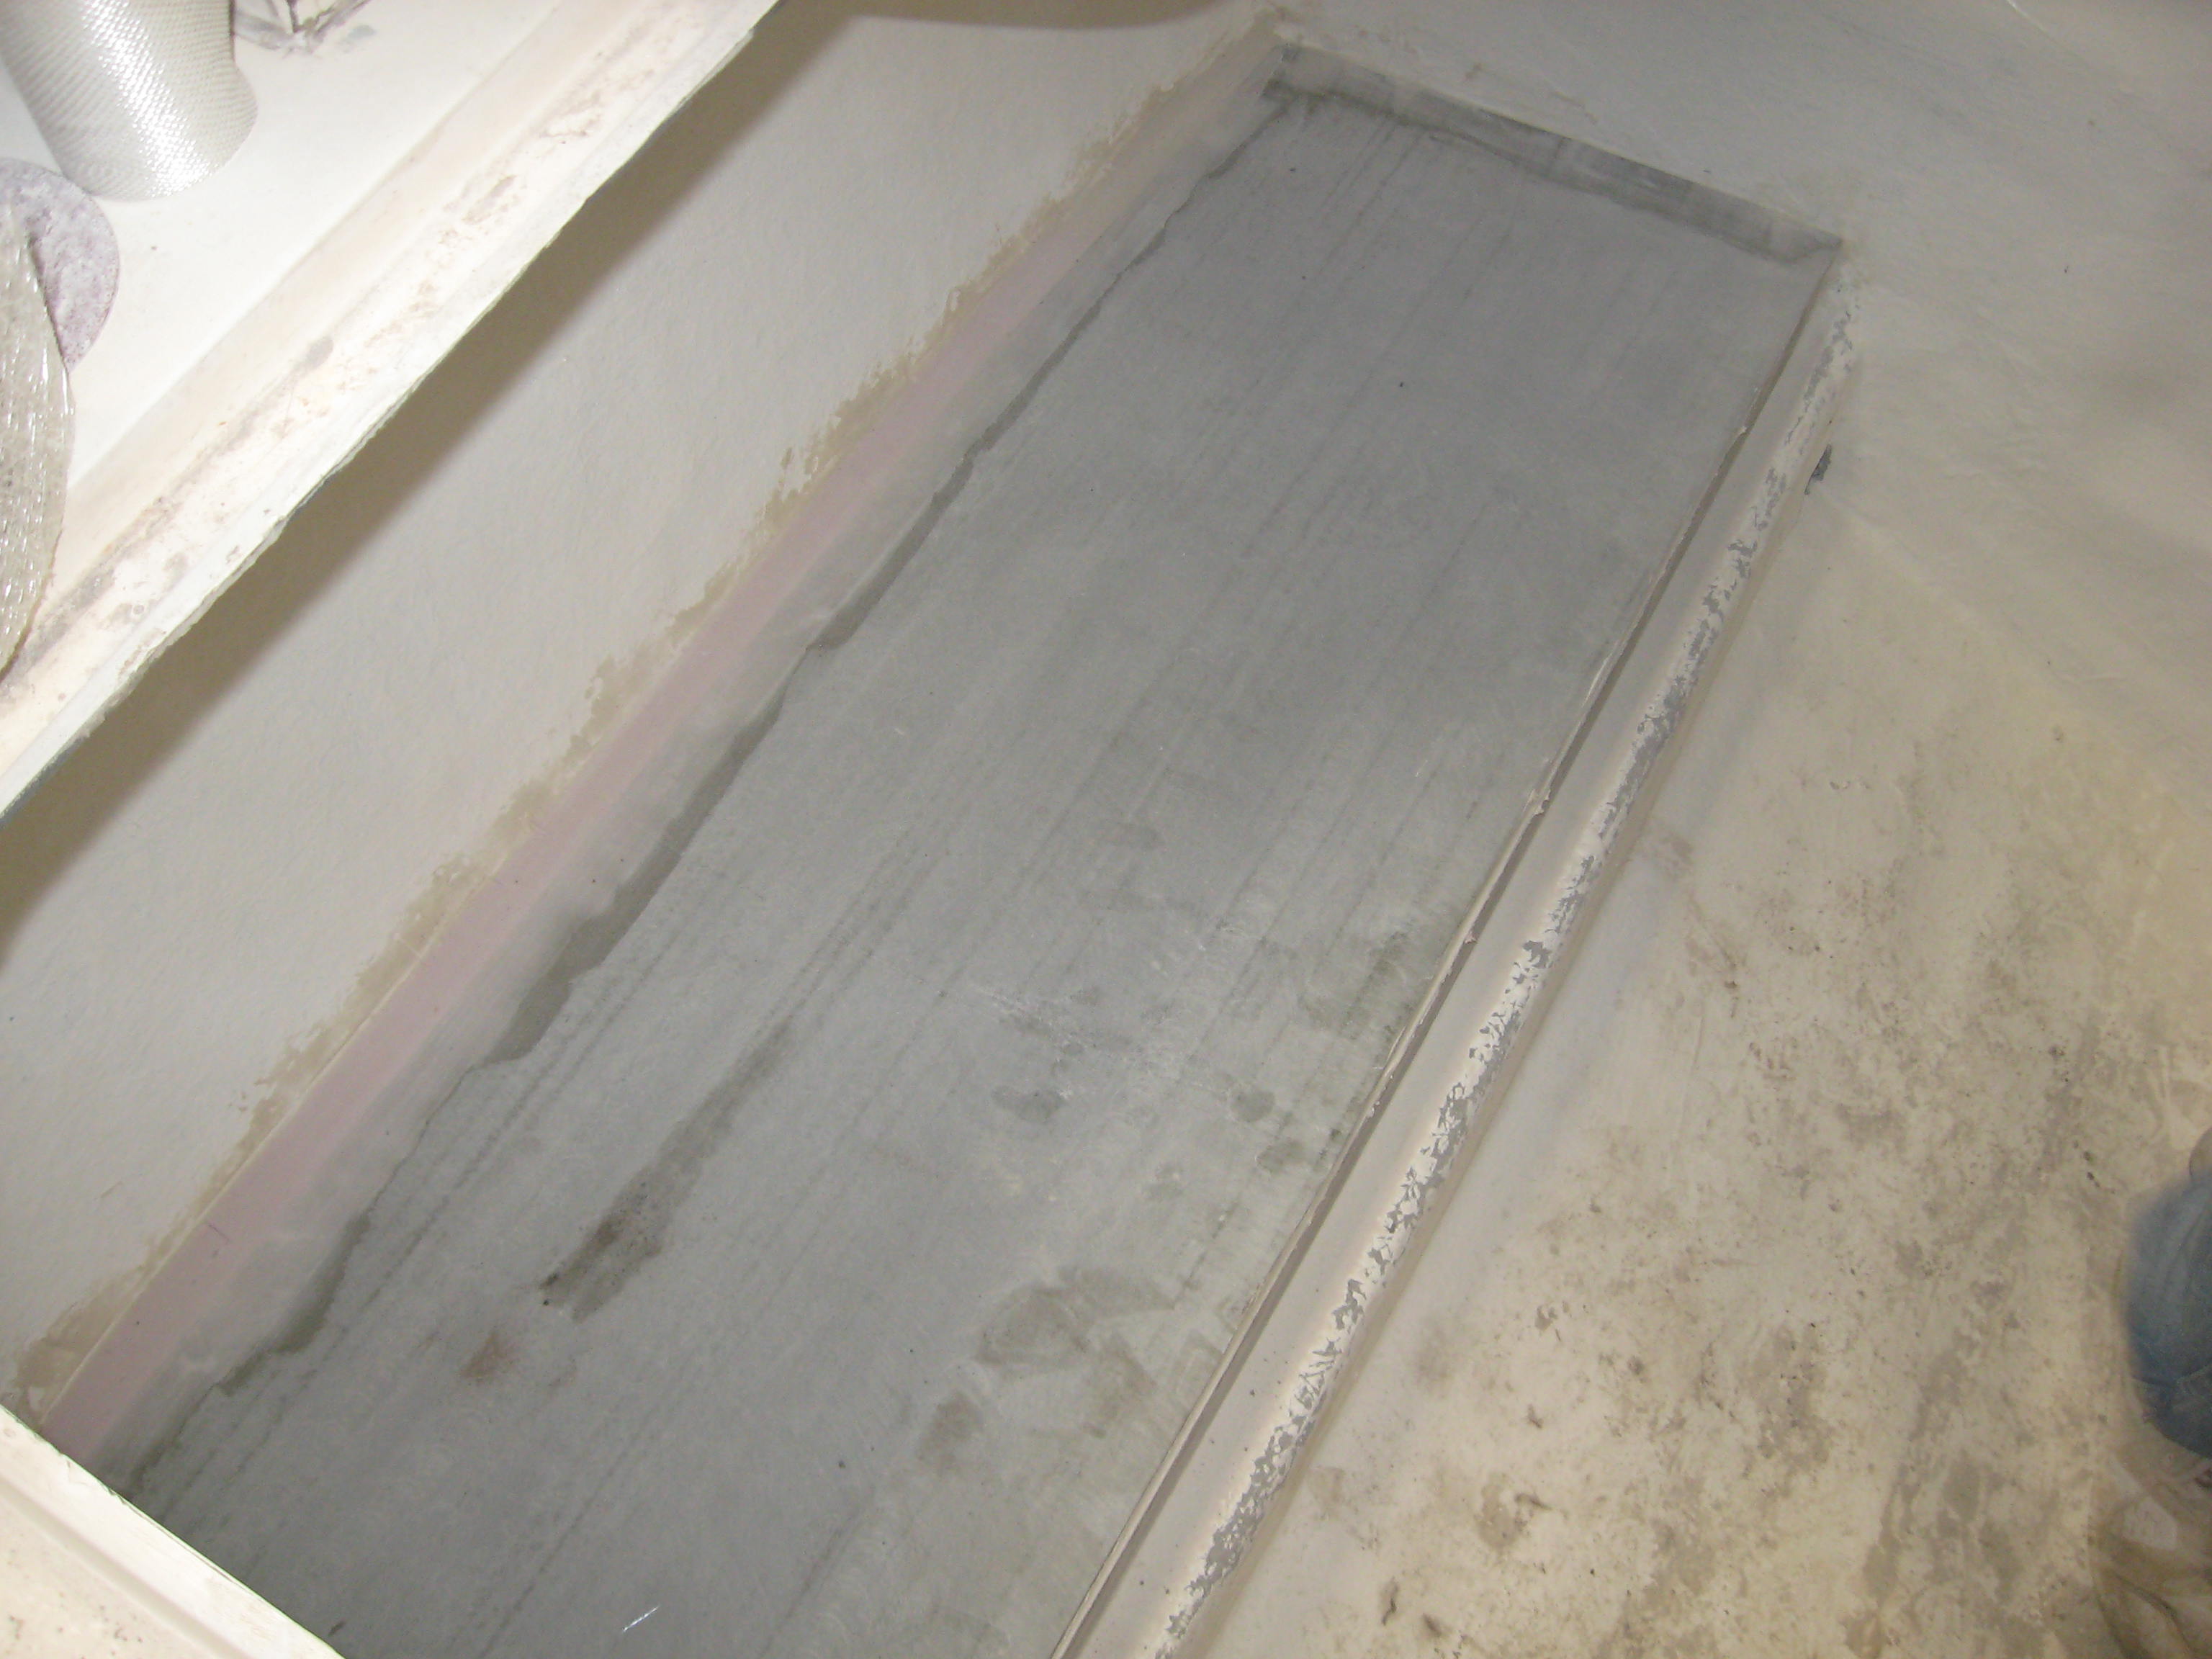
Solid FRP shelves for batteries also provided the extra strength we needed for the stringers
The rear deck was old, sunken, and had a rotted core. The rear cabin walls & door also had rot and the rear windows were a disaster. The cap rails were full of holes, etc., from older hardware. So, we re-did it all and also re-glassed the rear deck with a slight crown, re-did the hatch layout to the owner’s specs (wanted fish boxes down the road). The deck shed about 25% of its weight doing this and is stronger than it was when new (we used an Airex core). Well, when the fiberglass dust finally settled about 3 months later, we had a new Bertram 28 from the cabin back, and now the boat was actually ready to start the fun part – The repower!!
First things first – We had already done some initial fitting & measuring just after we removed the old gassers so we had the PLAN down.

Early in the process we checked clearances from all angles – these “Initial Fittings” allowed the PLAN to develop and make “FIT” right
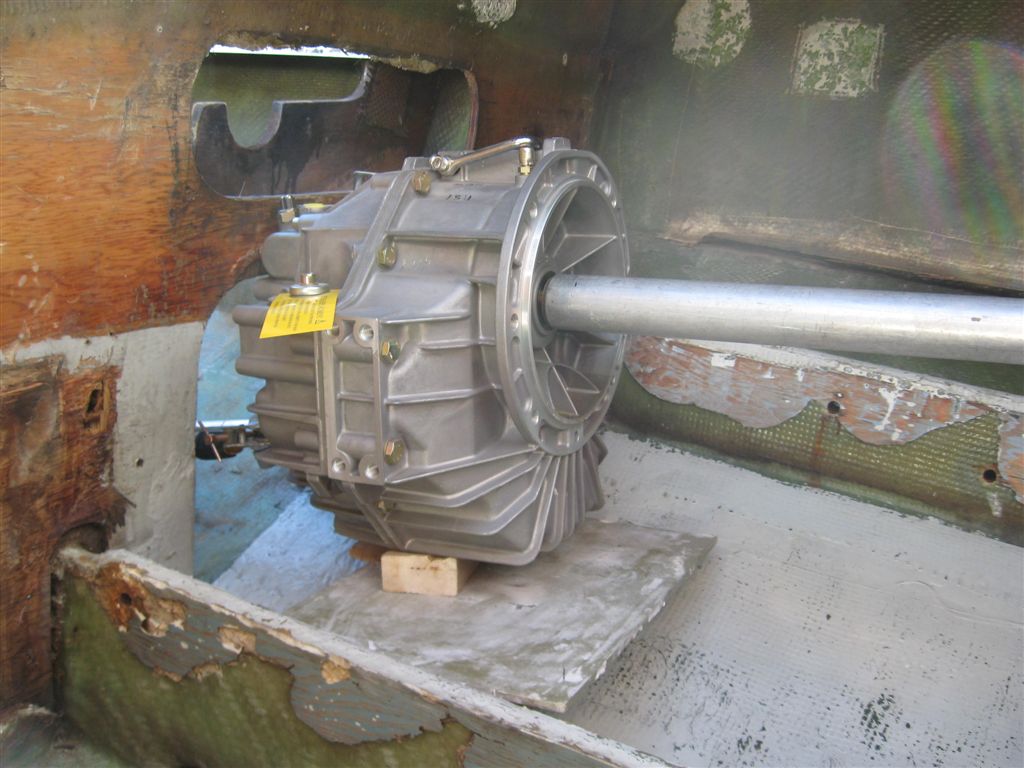
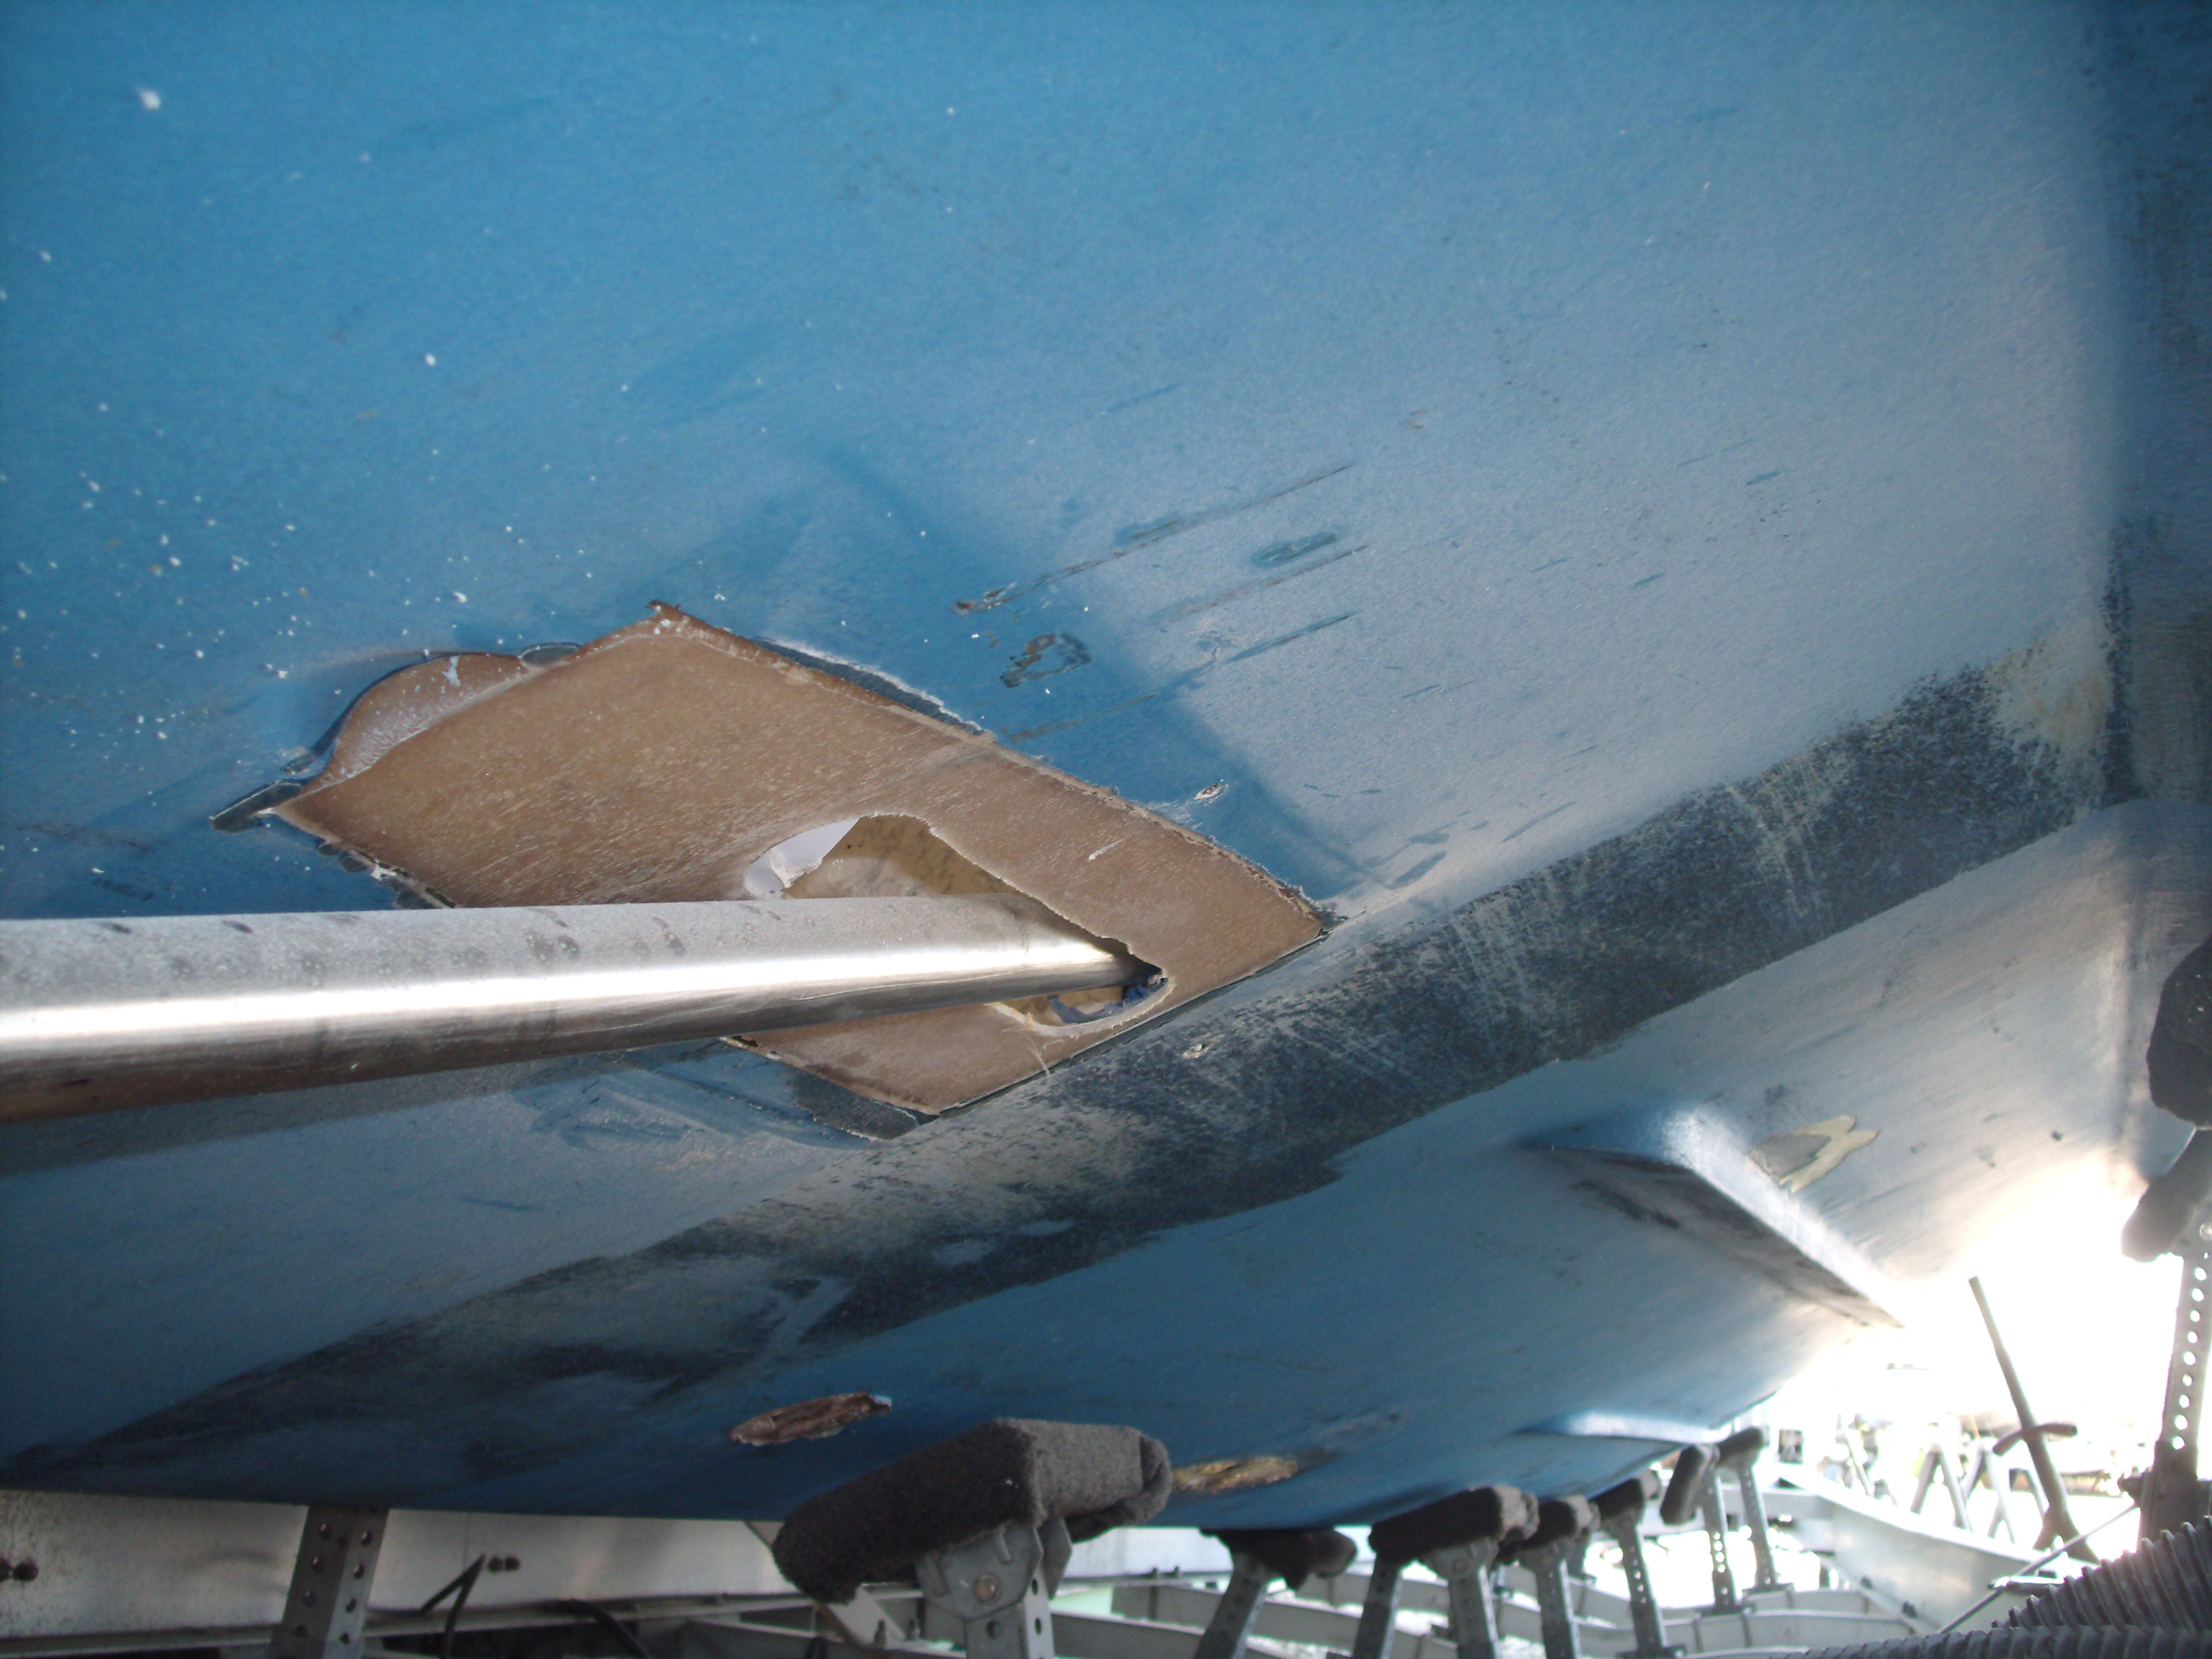
New gears in the boat, blocked up and set to what we measured out to be our initial shaft angle/engine angle & positioned to make everything clear and give us room for a 18 in. prop. After setting the gears, we cut our first “big hole” (the new log cut out) in the freshly re-glassed, strengthened and gel coated engine room.
Transmission in place – setting up for the first “BIG HOLE” – Location of the shaft log

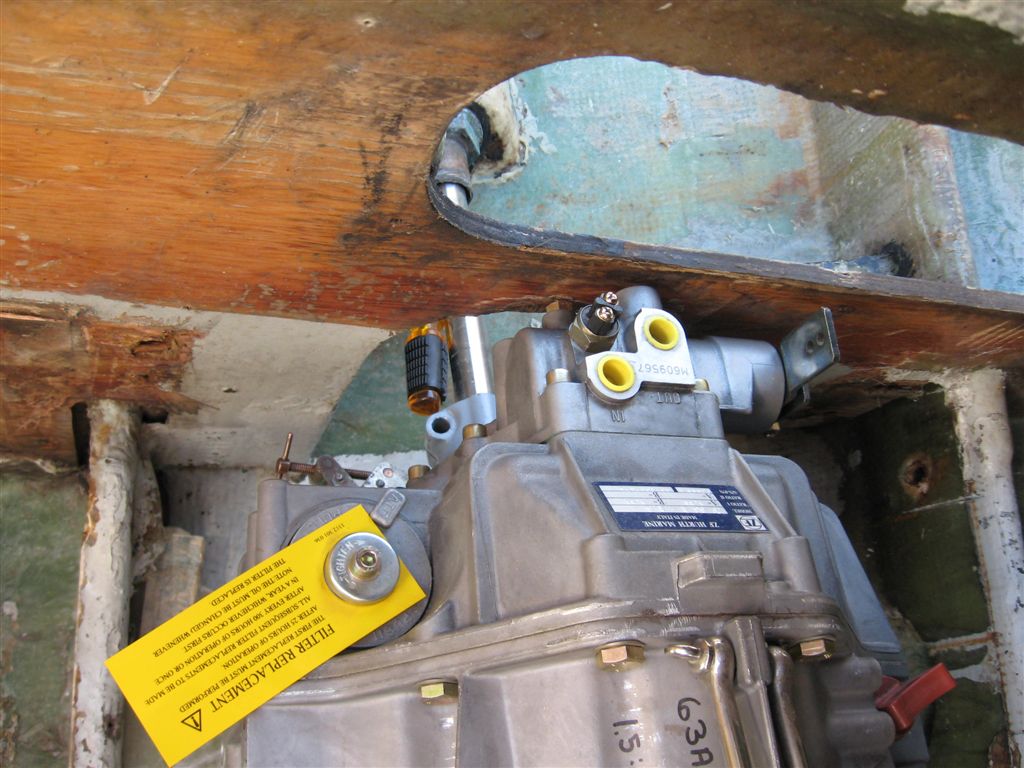
From there, we calculated the rough shaft length, made new AQ22 1.375 shafts (about 2″ longer than we needed), fitted couplings and pre-fitted all. When you start from scratch, no mounts or stringer bracketing, no shaft log, no struts, all of these must be worked together to get the final measurements as to what you need to make it work out. BTW, we always have the rudder shafts in place BEFORE this can be done as this sets our real starting point as to spacing, etc… With twin engines, it makes it even more of a challenge as it’s always nice to have identical shaft lengths, shaft angles, bulkhead clearances, etc., so all is “politically correct” – But, like most older vessels of this class, the stringers and bulkheads are far from perfect as to straightness, meaning there is always a “best compromise”. We do over-ride those uneven measurements some and shoot for both shafts to be the exact same length if at all possible.
Transmission blocked in place, shafts are pre-fitted and supported to allow transmission bracketing design
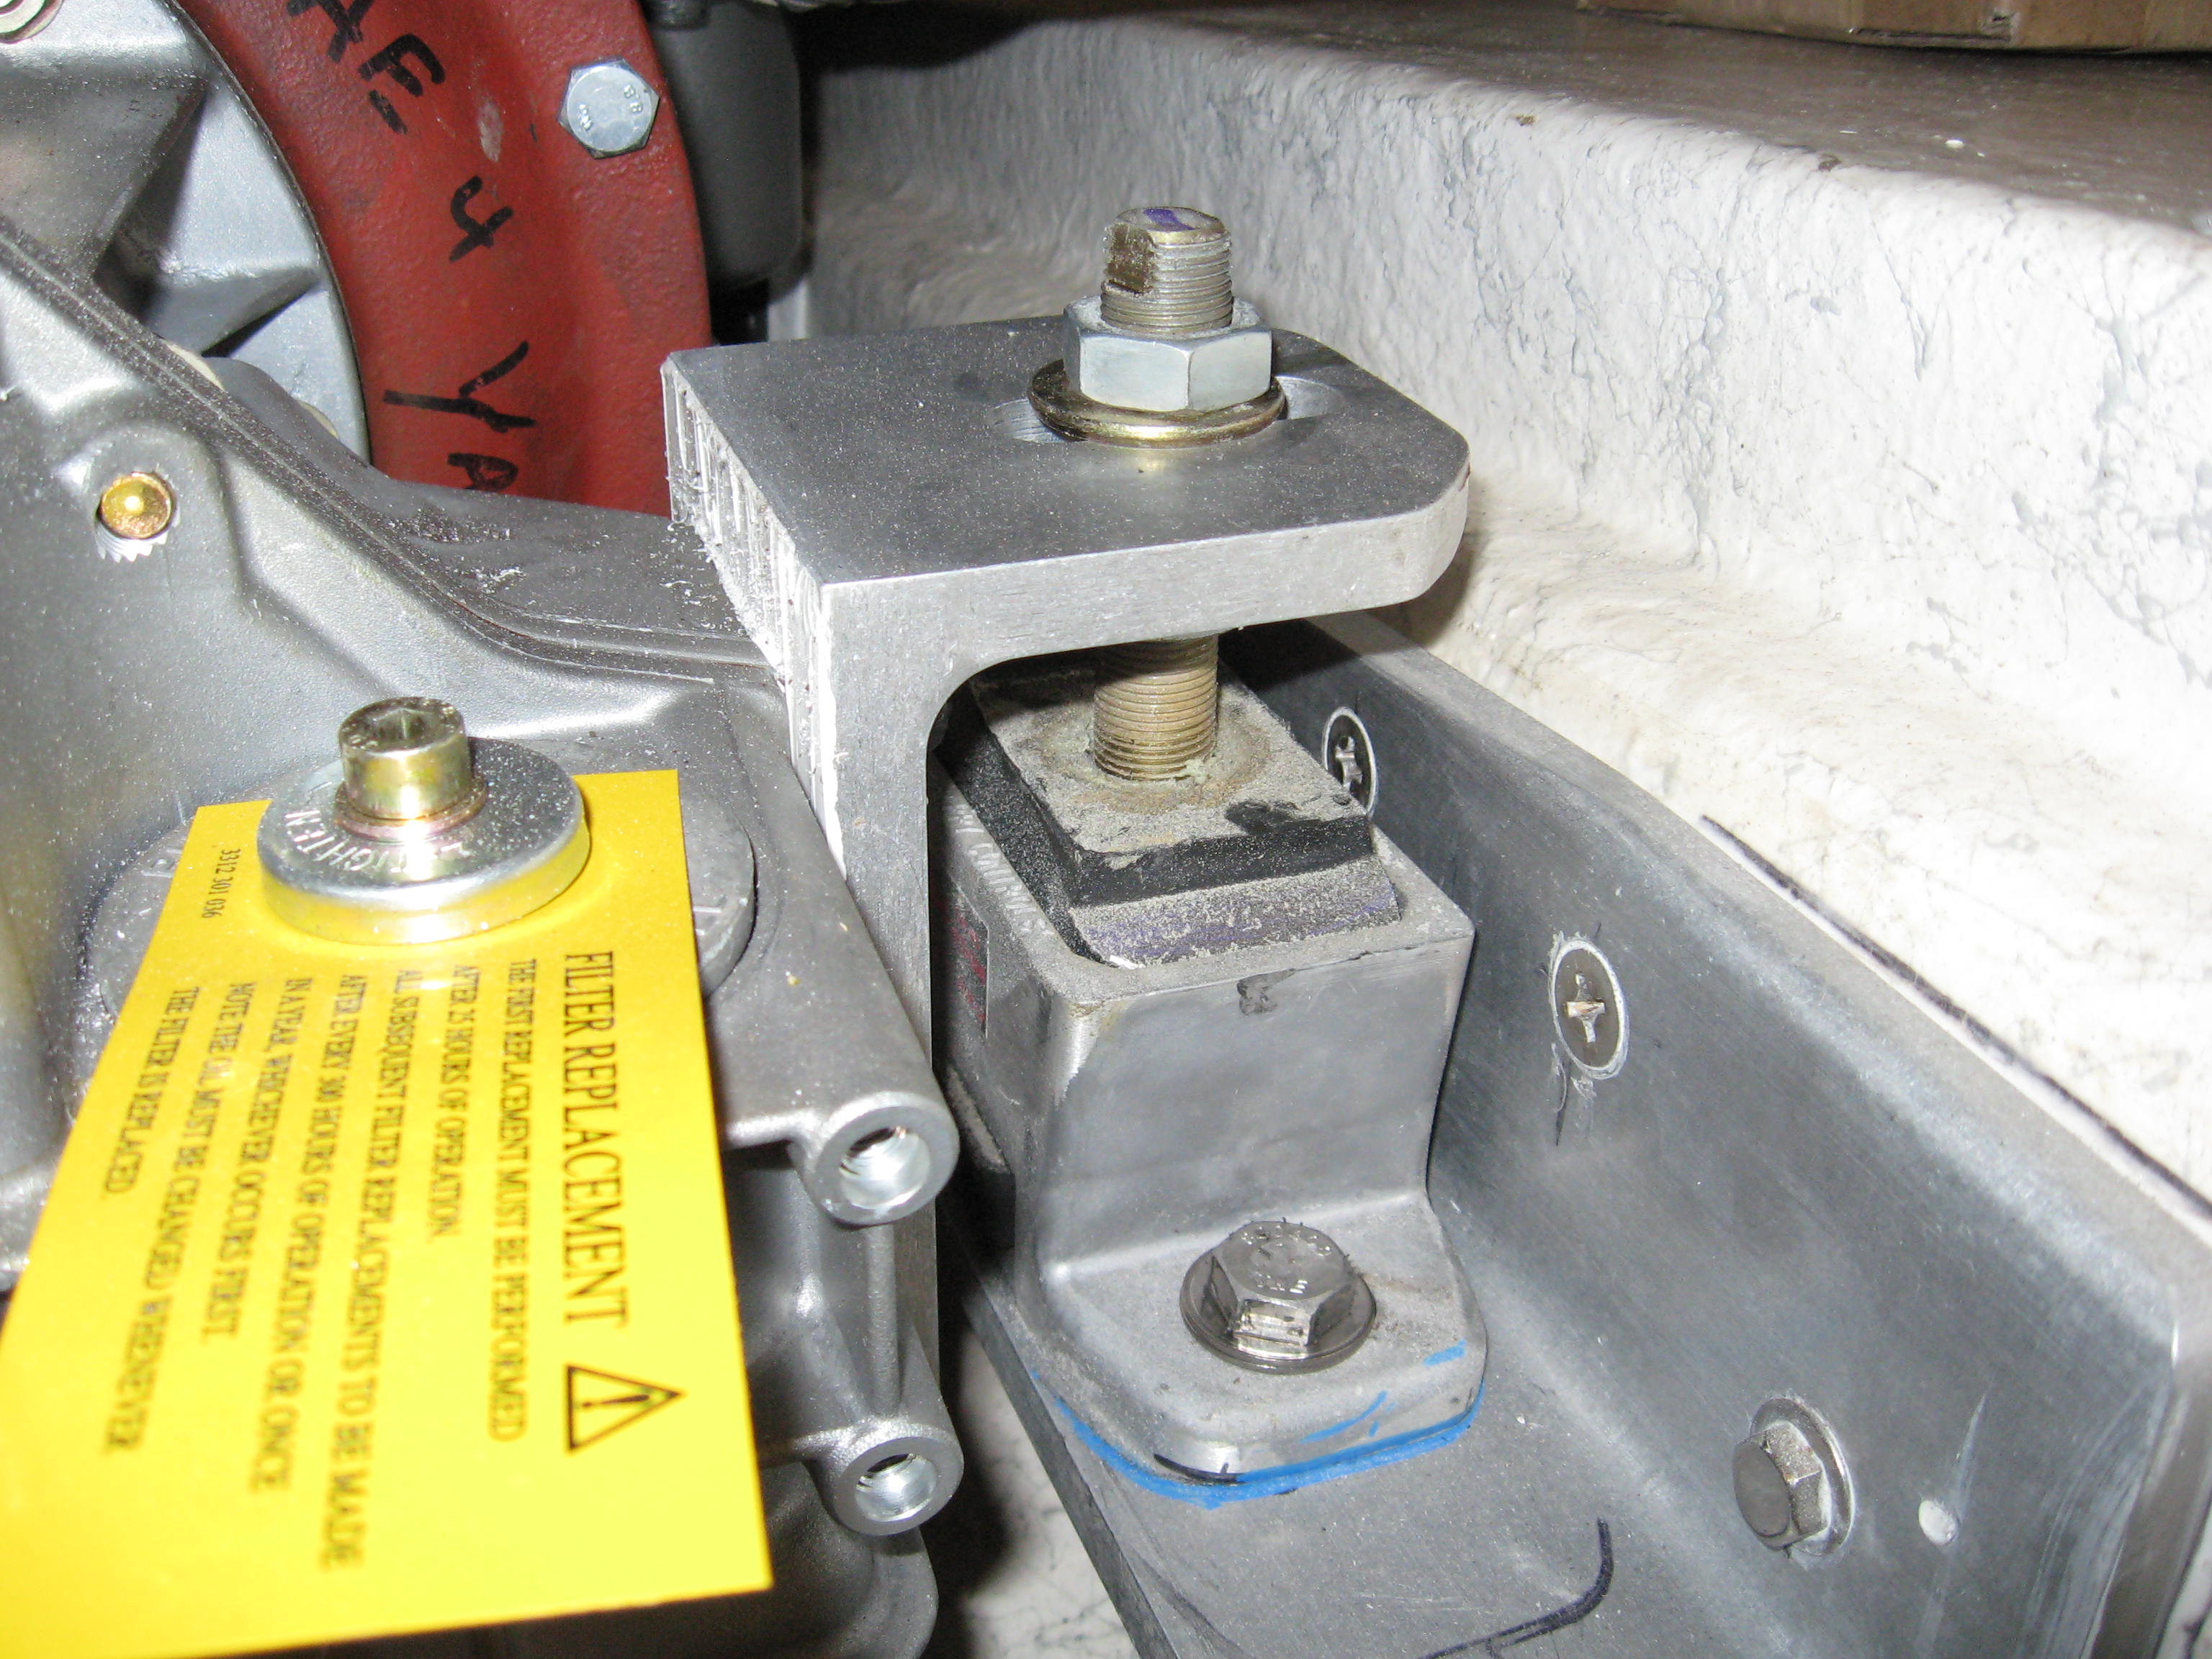
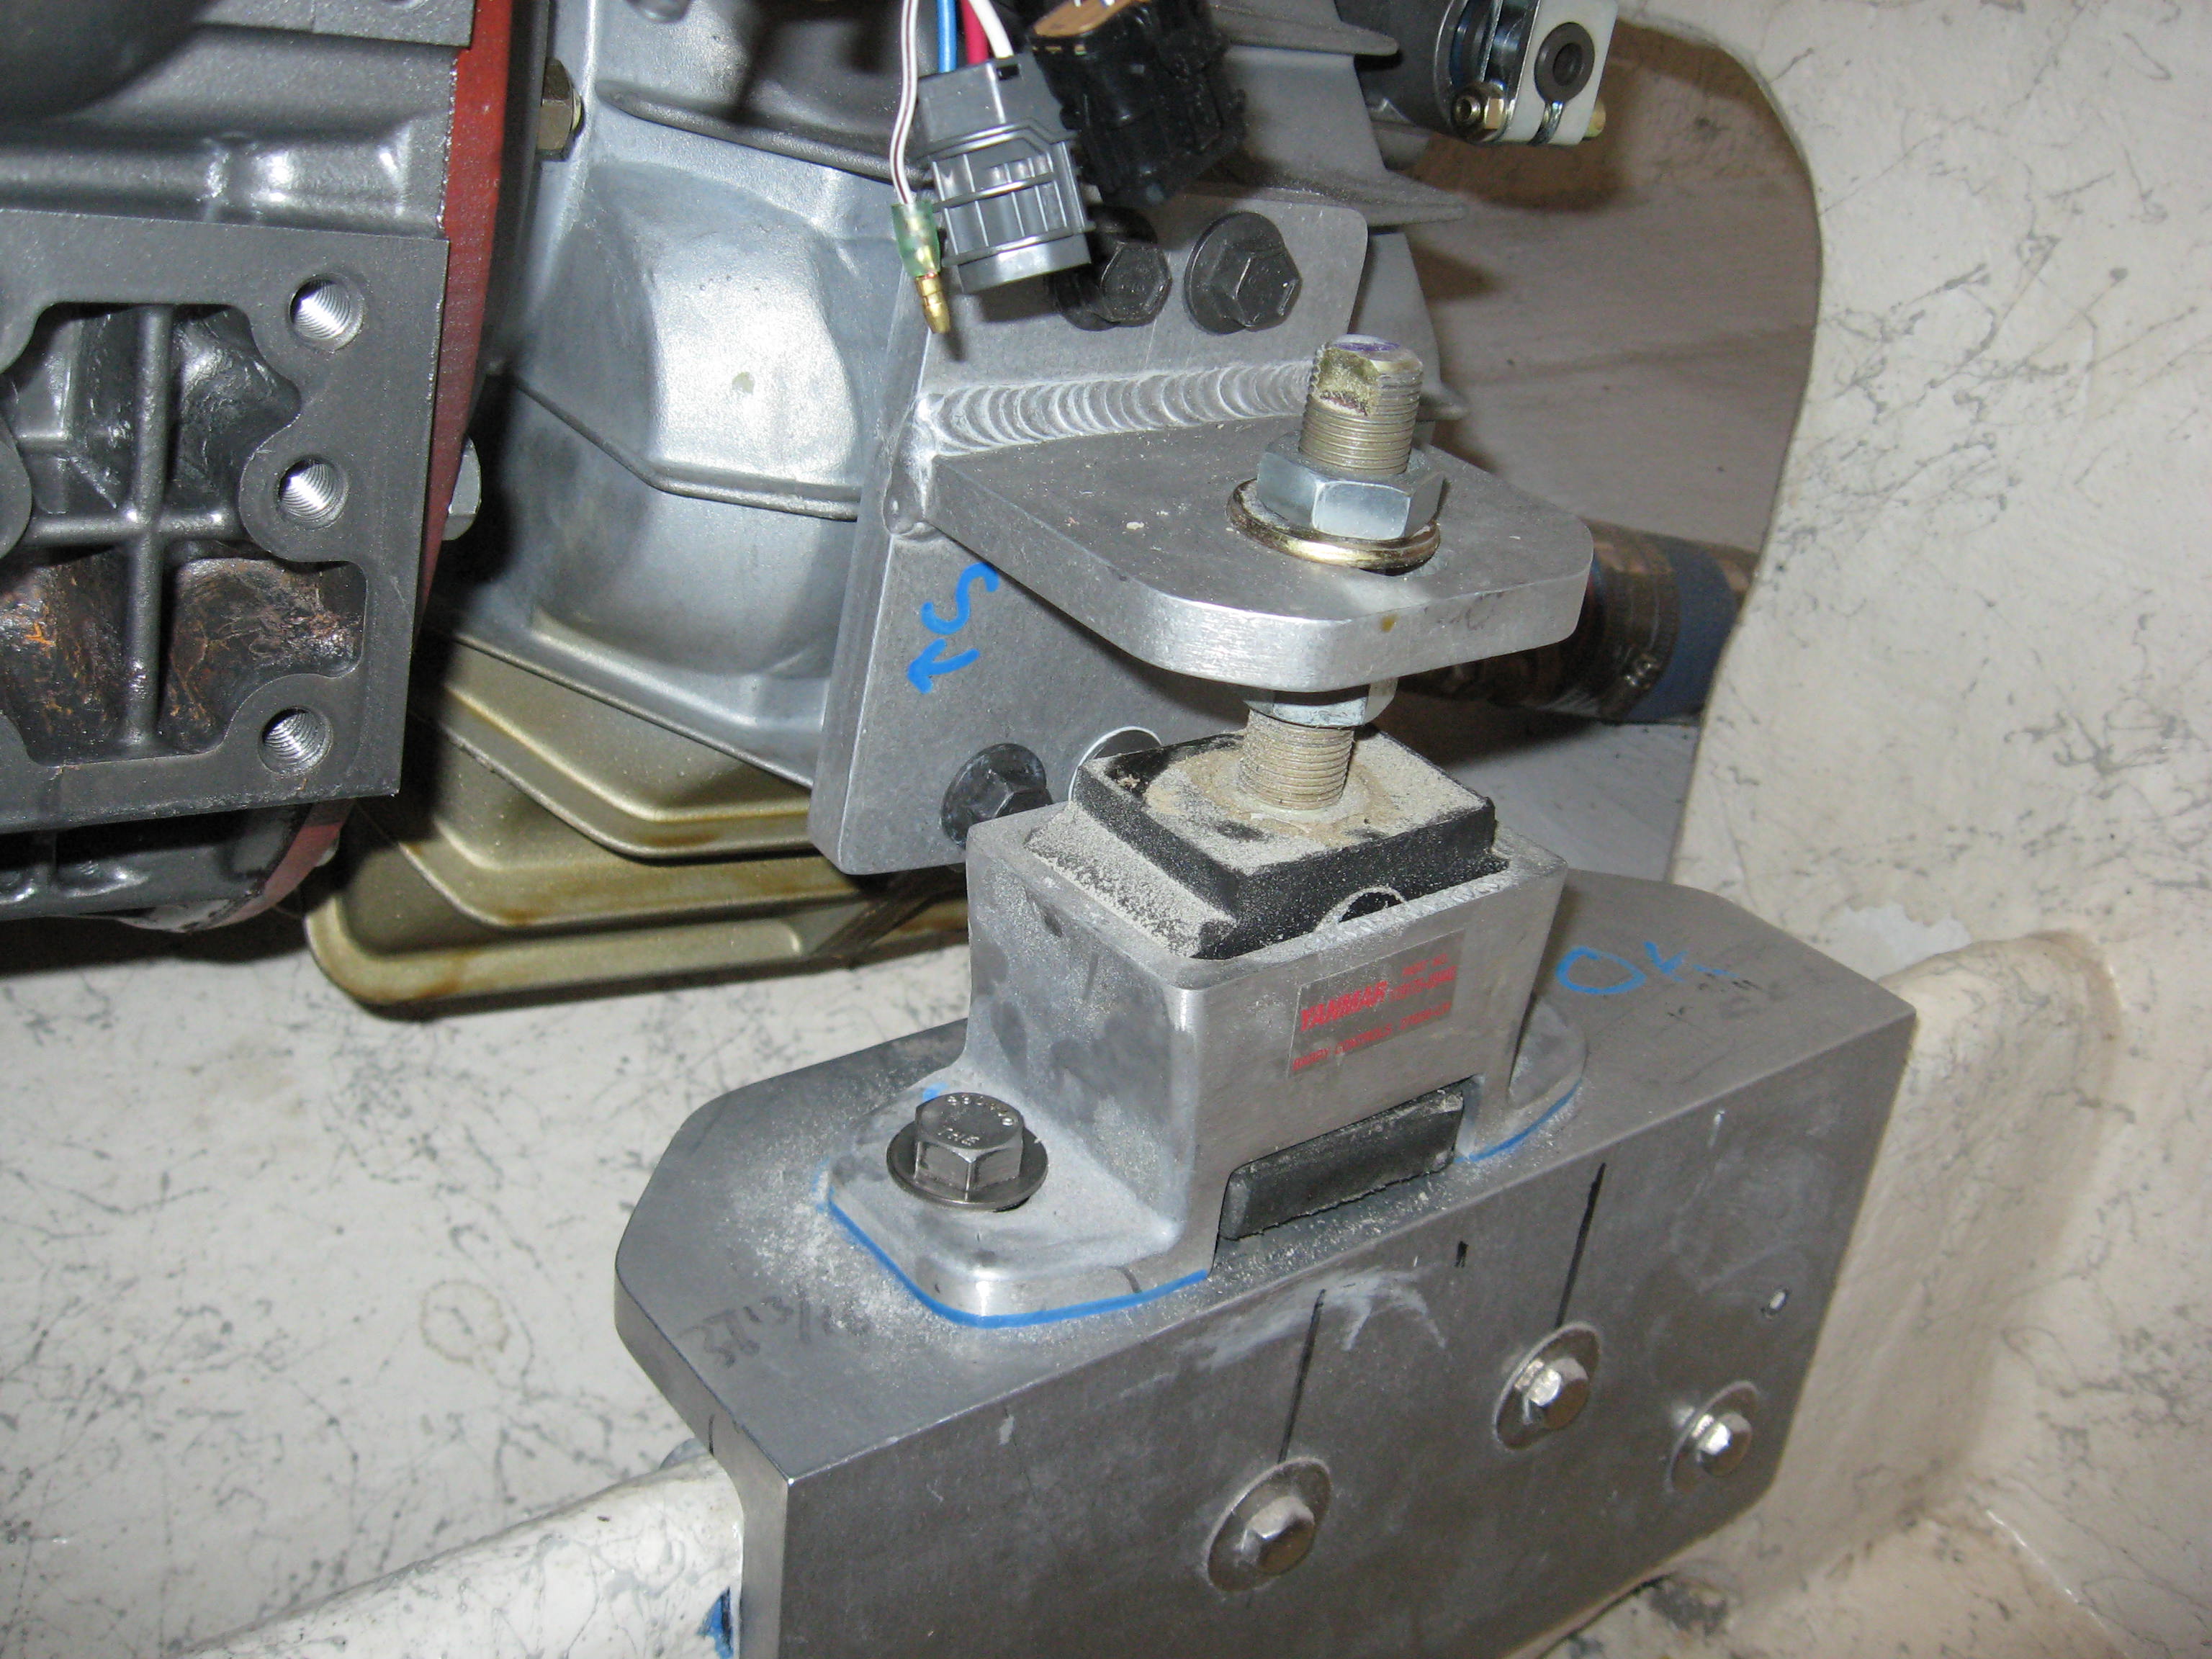
Once we are comfortable with the “close to exact” position of the transmission, it was now time to build the transmission mountings. Because all Bertram’s have such a deep V, the inner and outer stringers are far from level and are also NOT centered on the prop shaft, making them doubly tough to deal with. This has always presented a challenge as to making what we feel are the right mounting arrangements for the engine and transmission.. It only took one Bertram repower about 11 years ago to realize that, IMHO, you need asymmetrical mounts for port and starboard sides of the engine. Although our ideas would probably raise some eyebrows, our experience has shown us that this is the right way to do it. Yes, more work, but the mounts are easy to work when done, and they “fit” the boat as if it were designed that way at the factory (actually, we know it’s way better than what Bertram did using the Mickey Mouse “wood add-ons” to the stringers). As you can see from the pics, all the stringer brackets are 100% flat and in plane (all brackets are initially floated in with epoxy, left to cure and then bolted up). It’s so common for most factory, or “done by others” brackets, to be so out of plane that I sometimes wonder what they were thinking. Rubber isolators are not “universal joints”!!
Designing the transmission mounts and bracketing
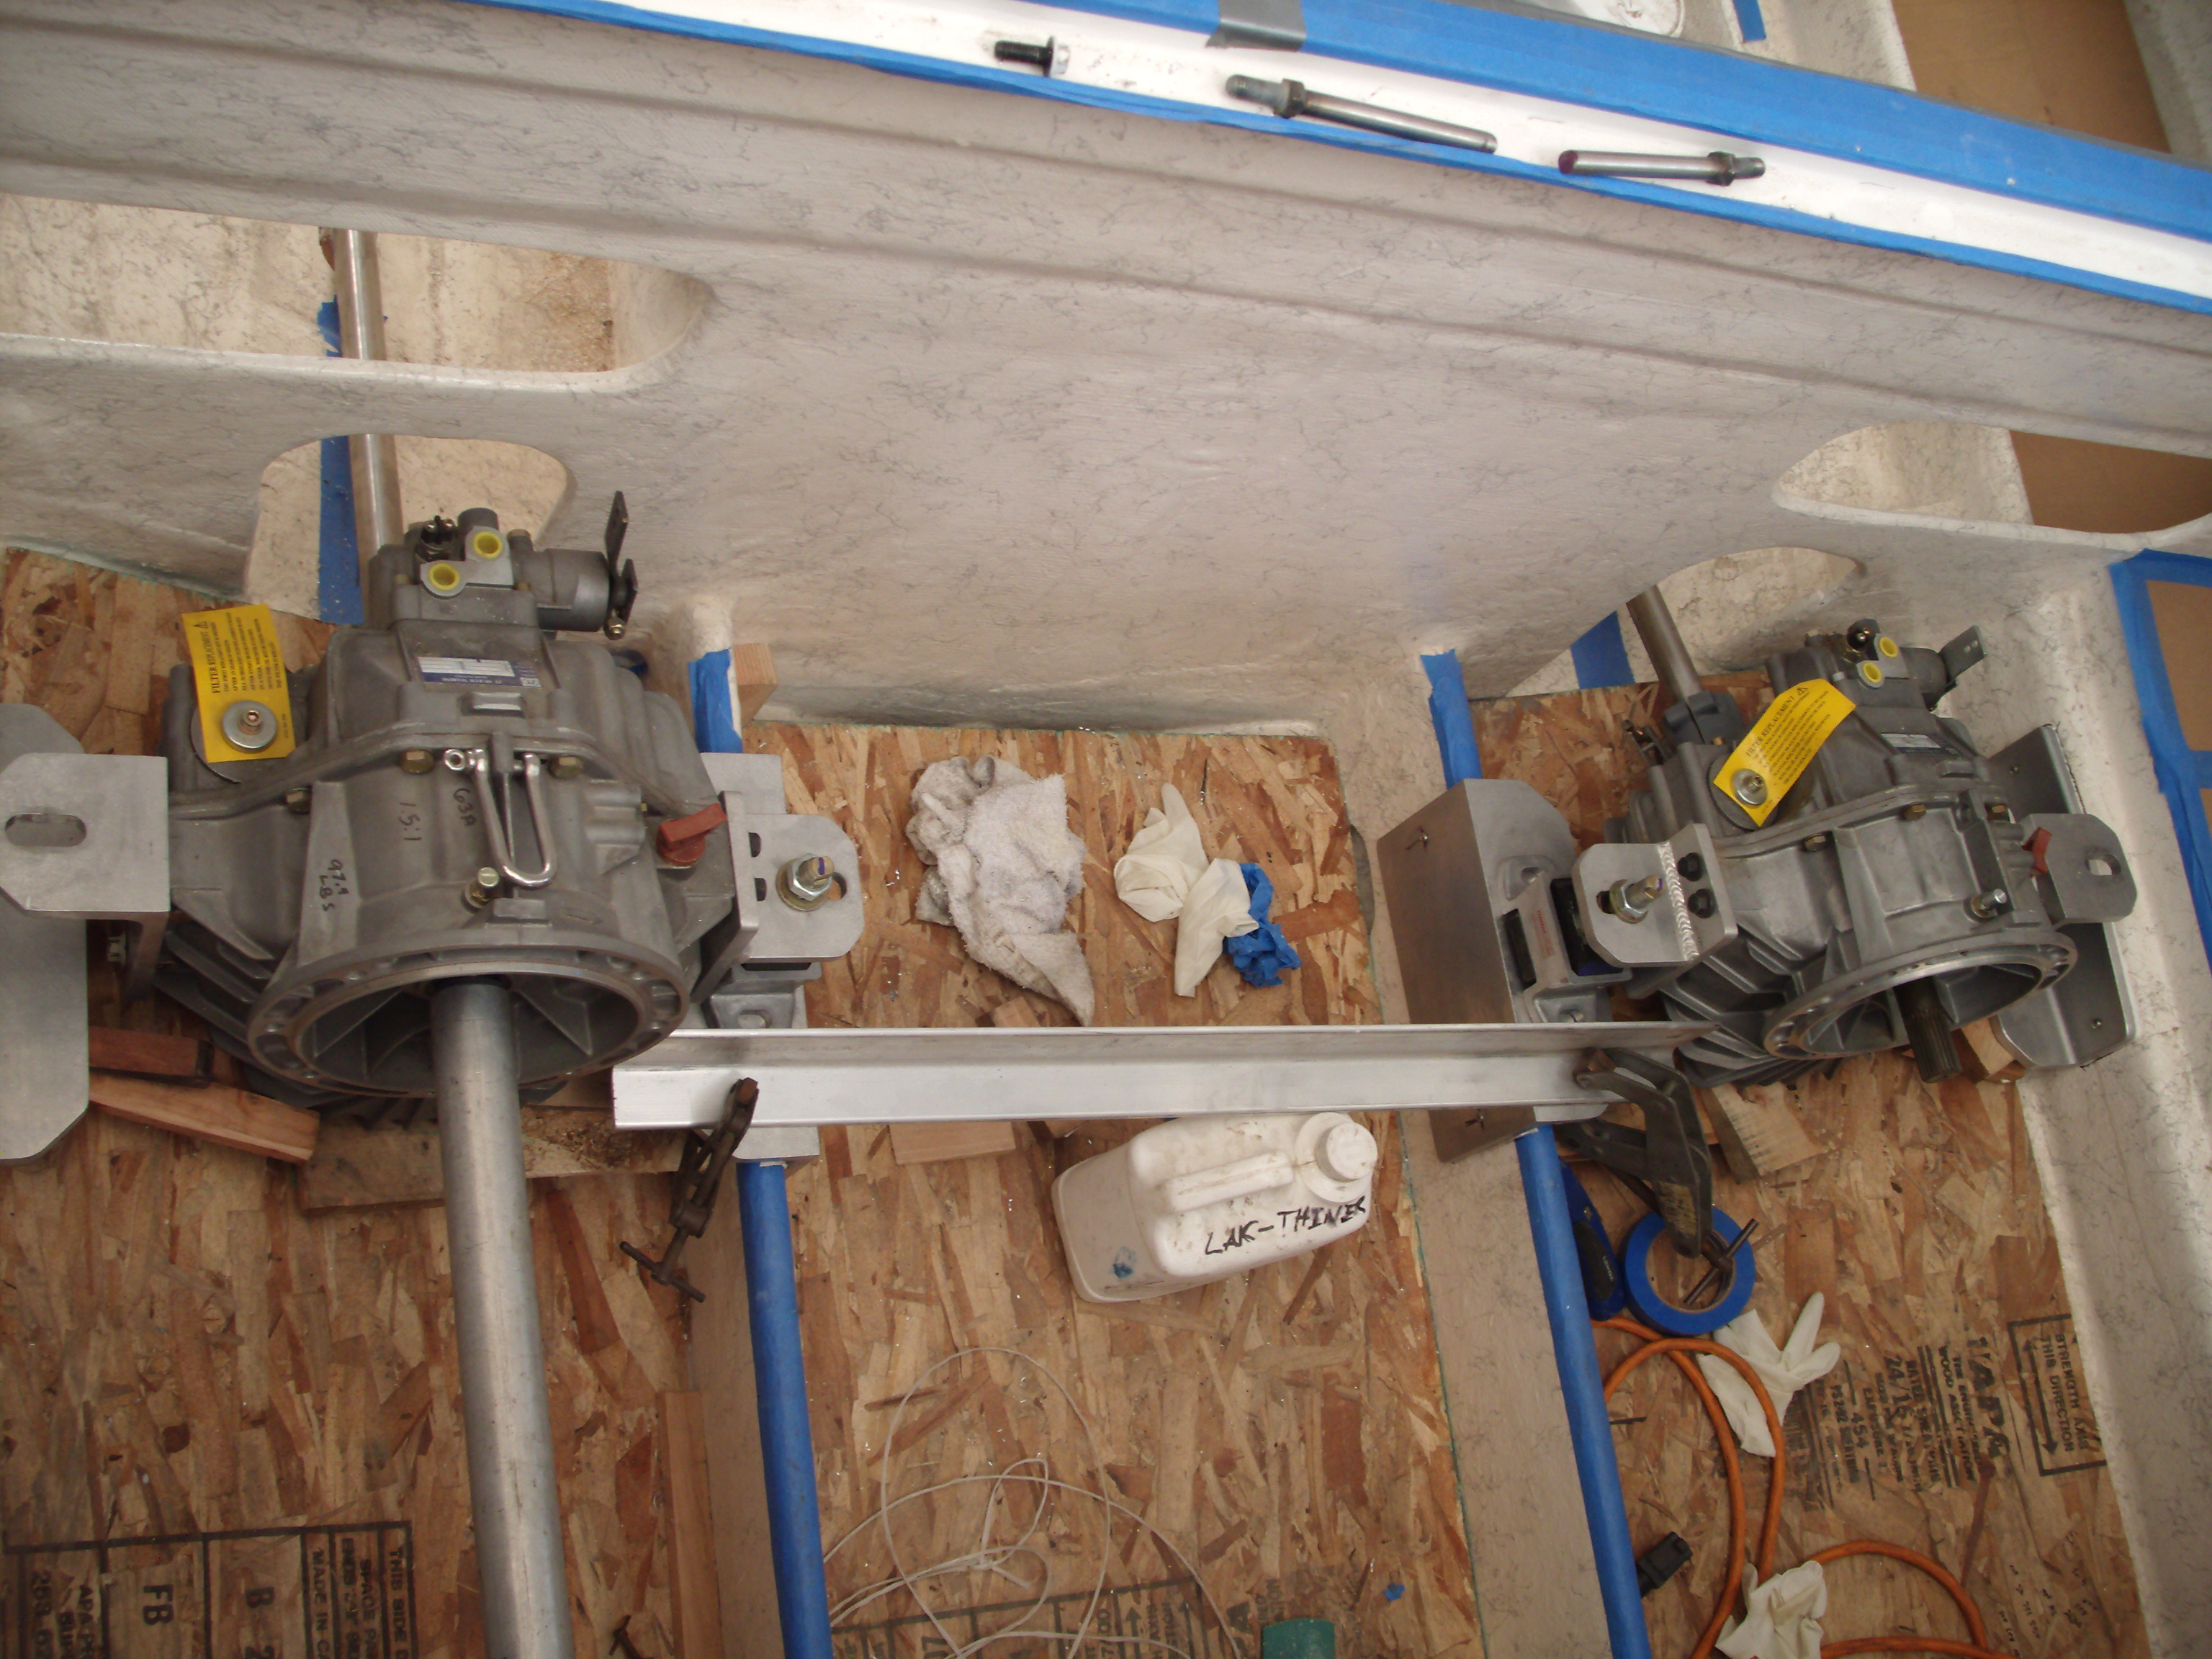

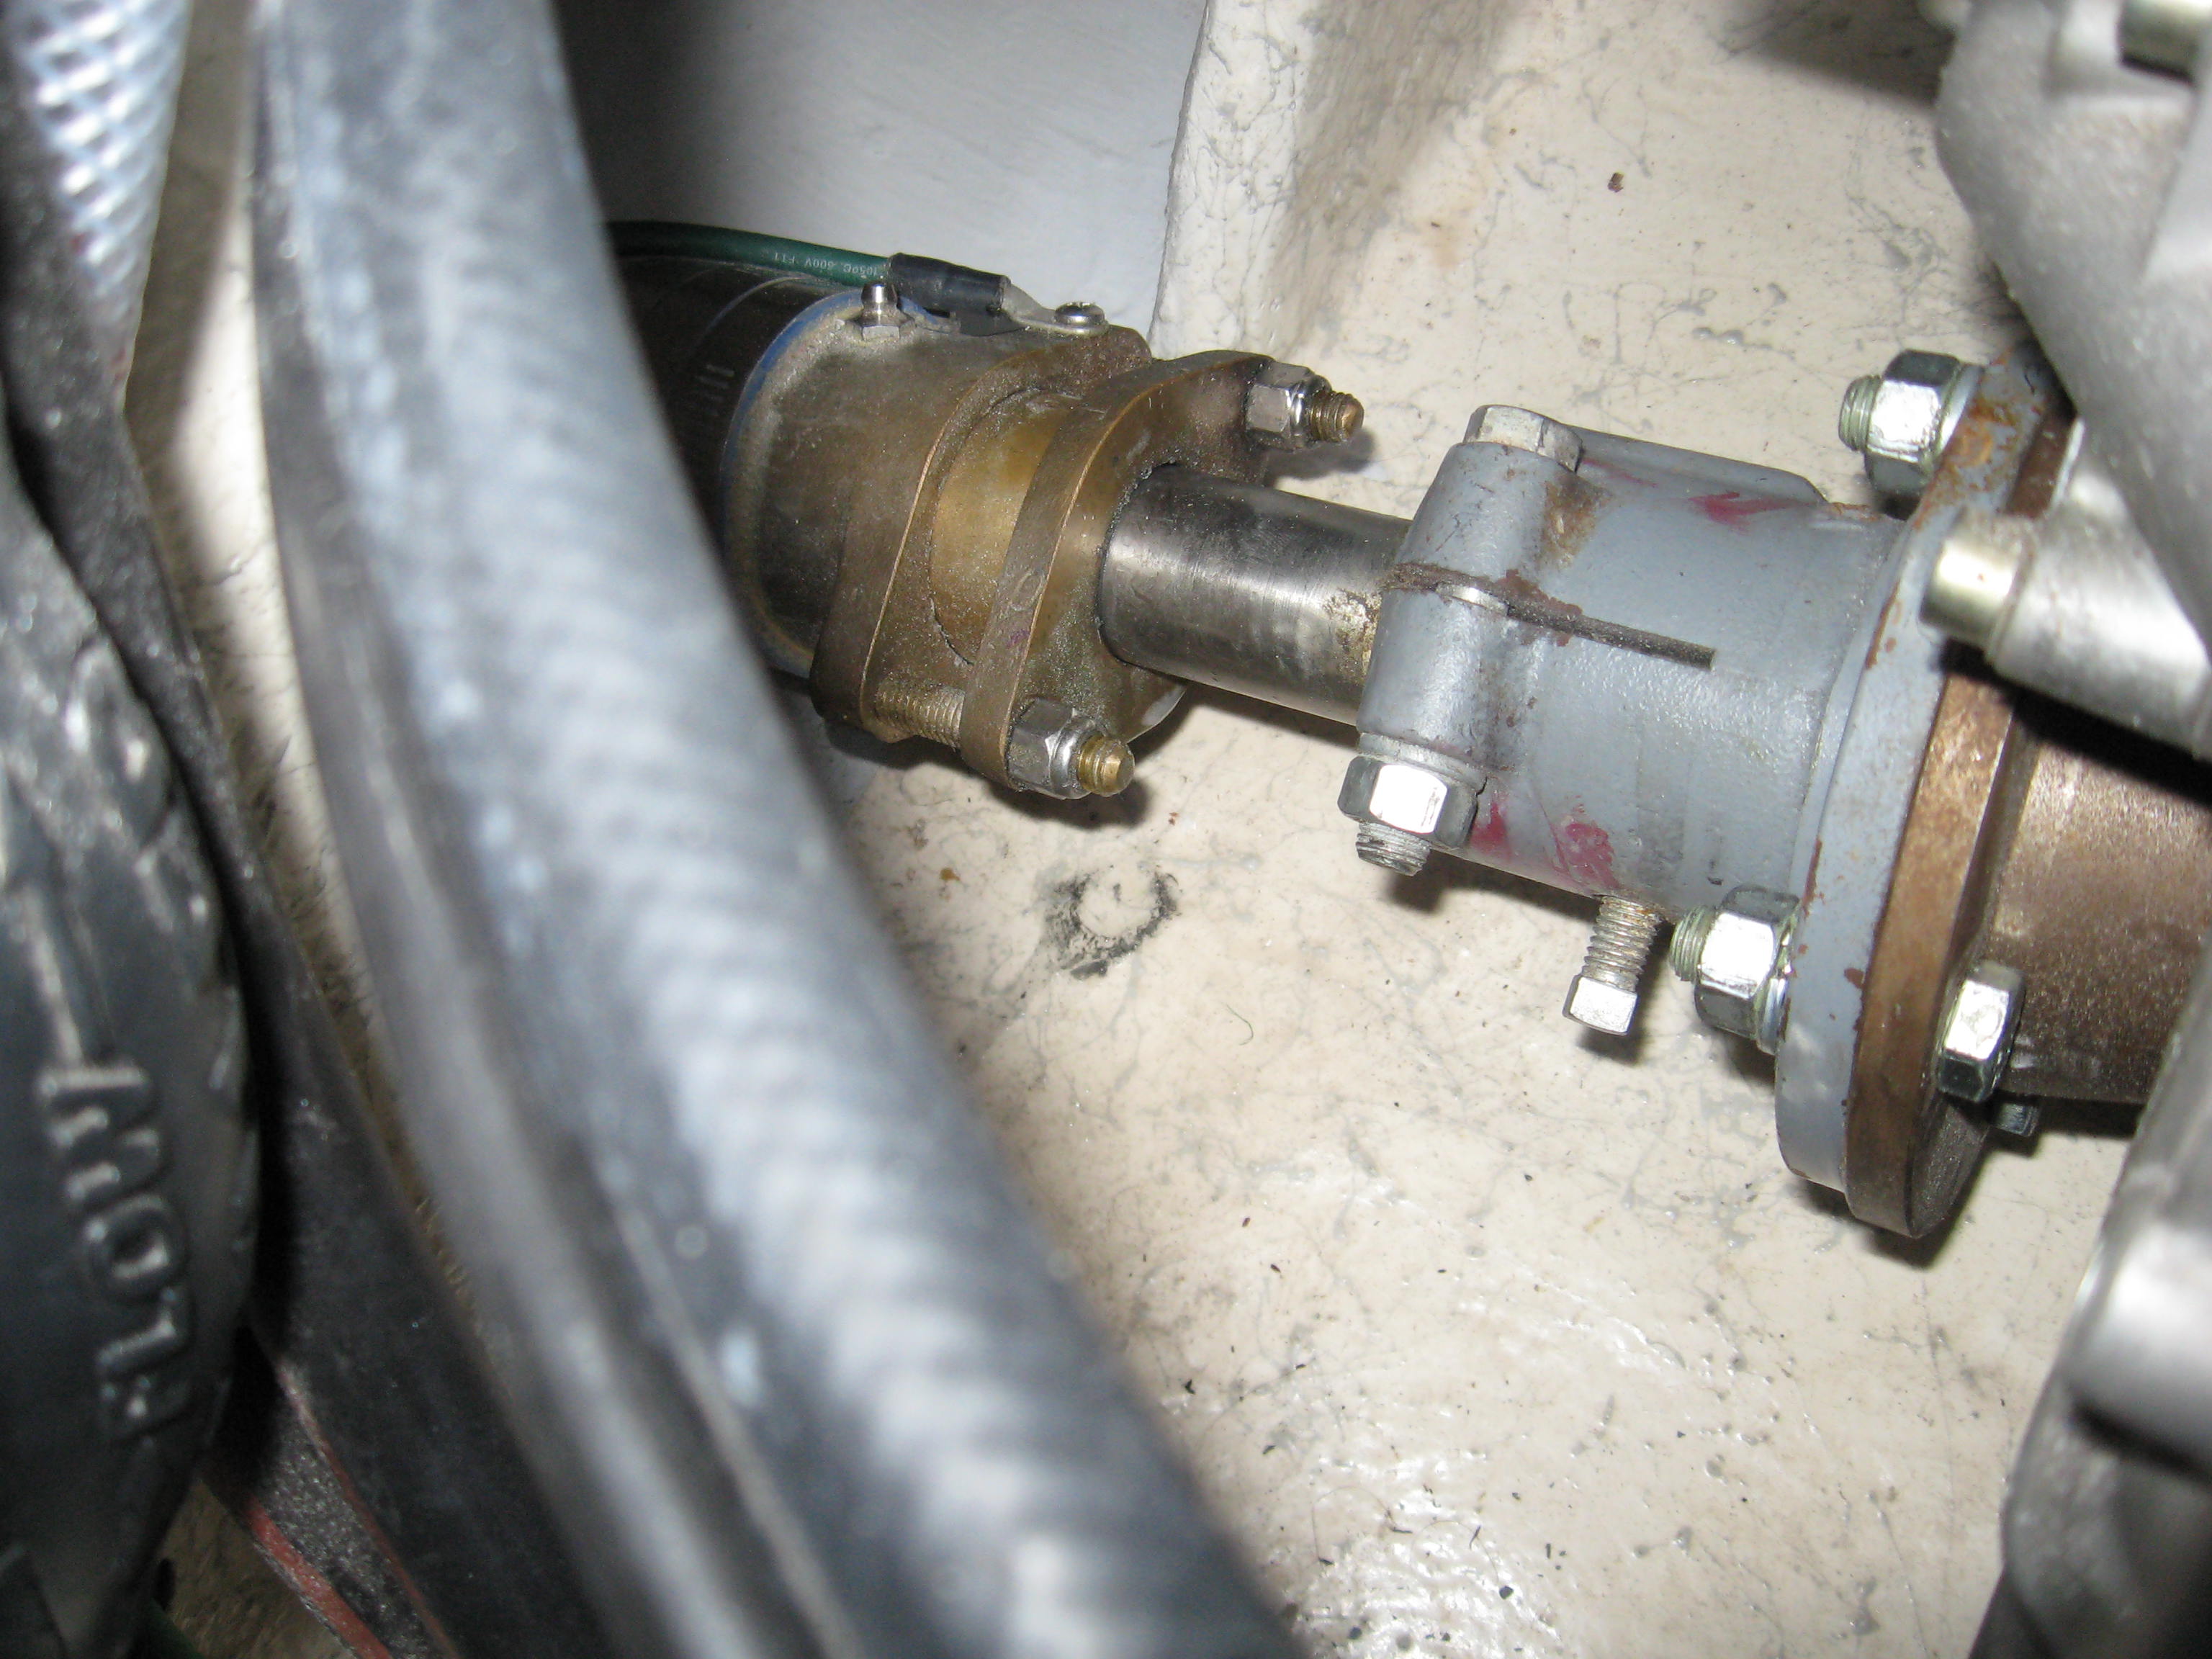
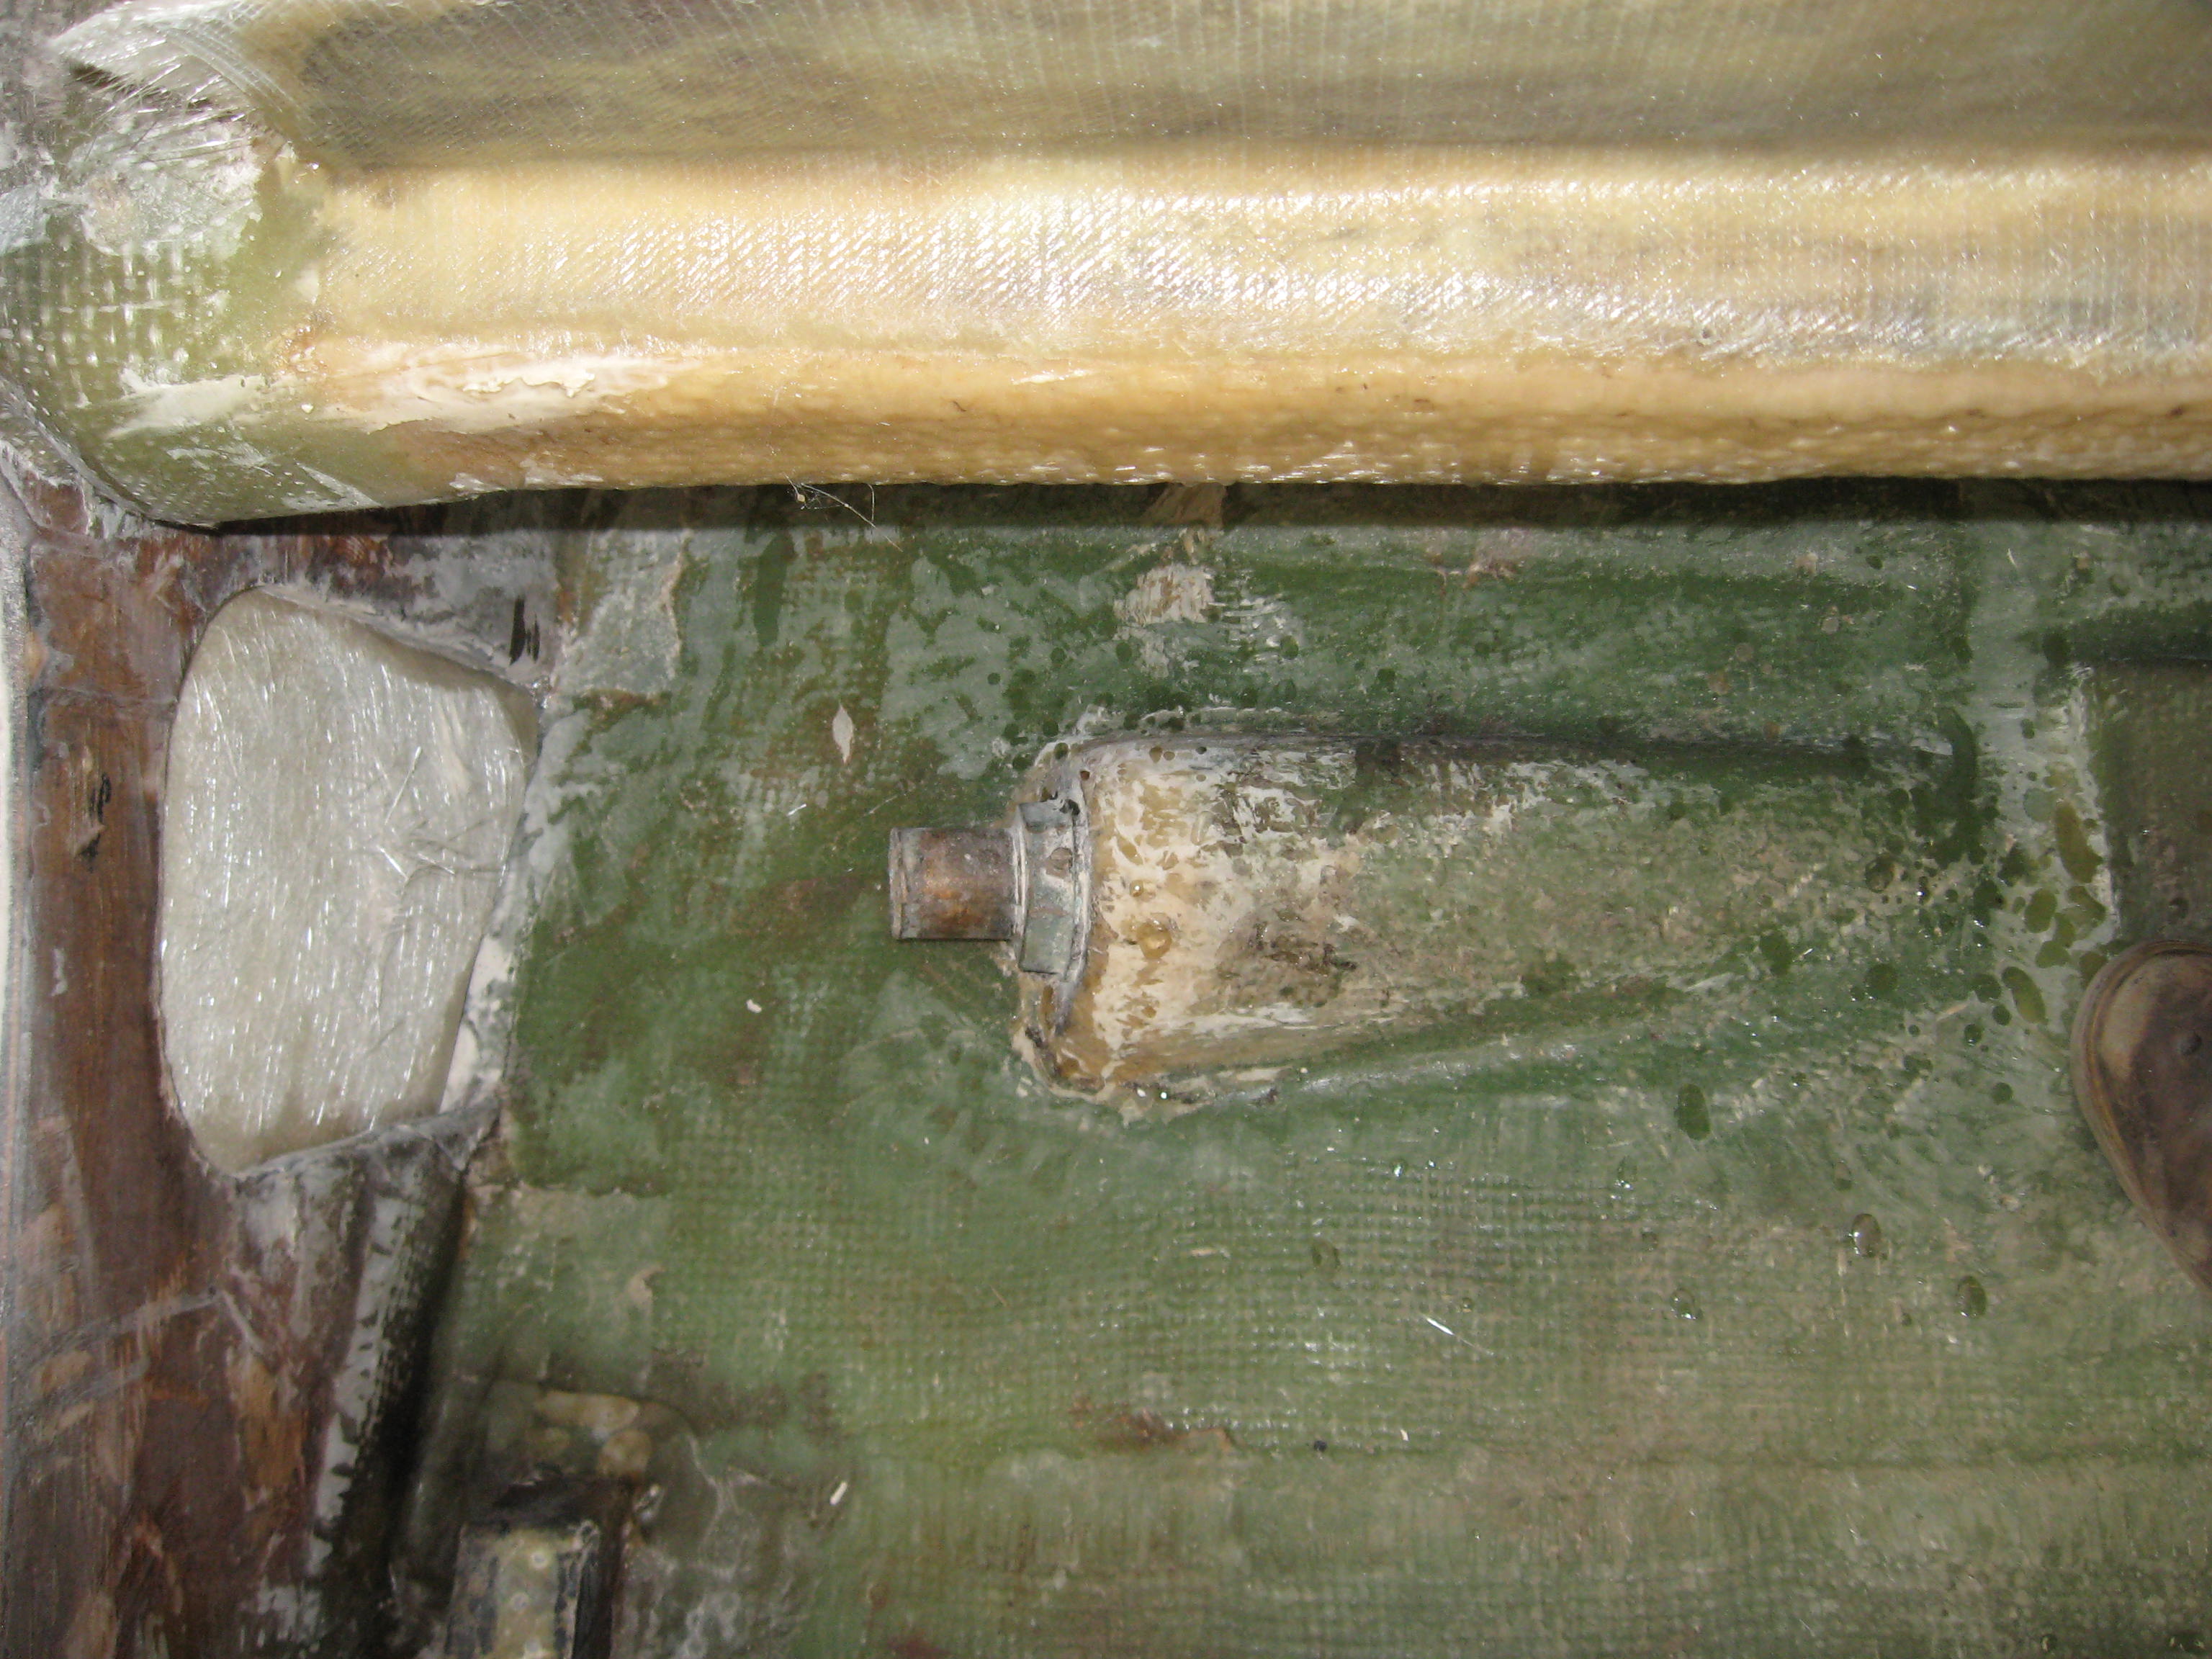
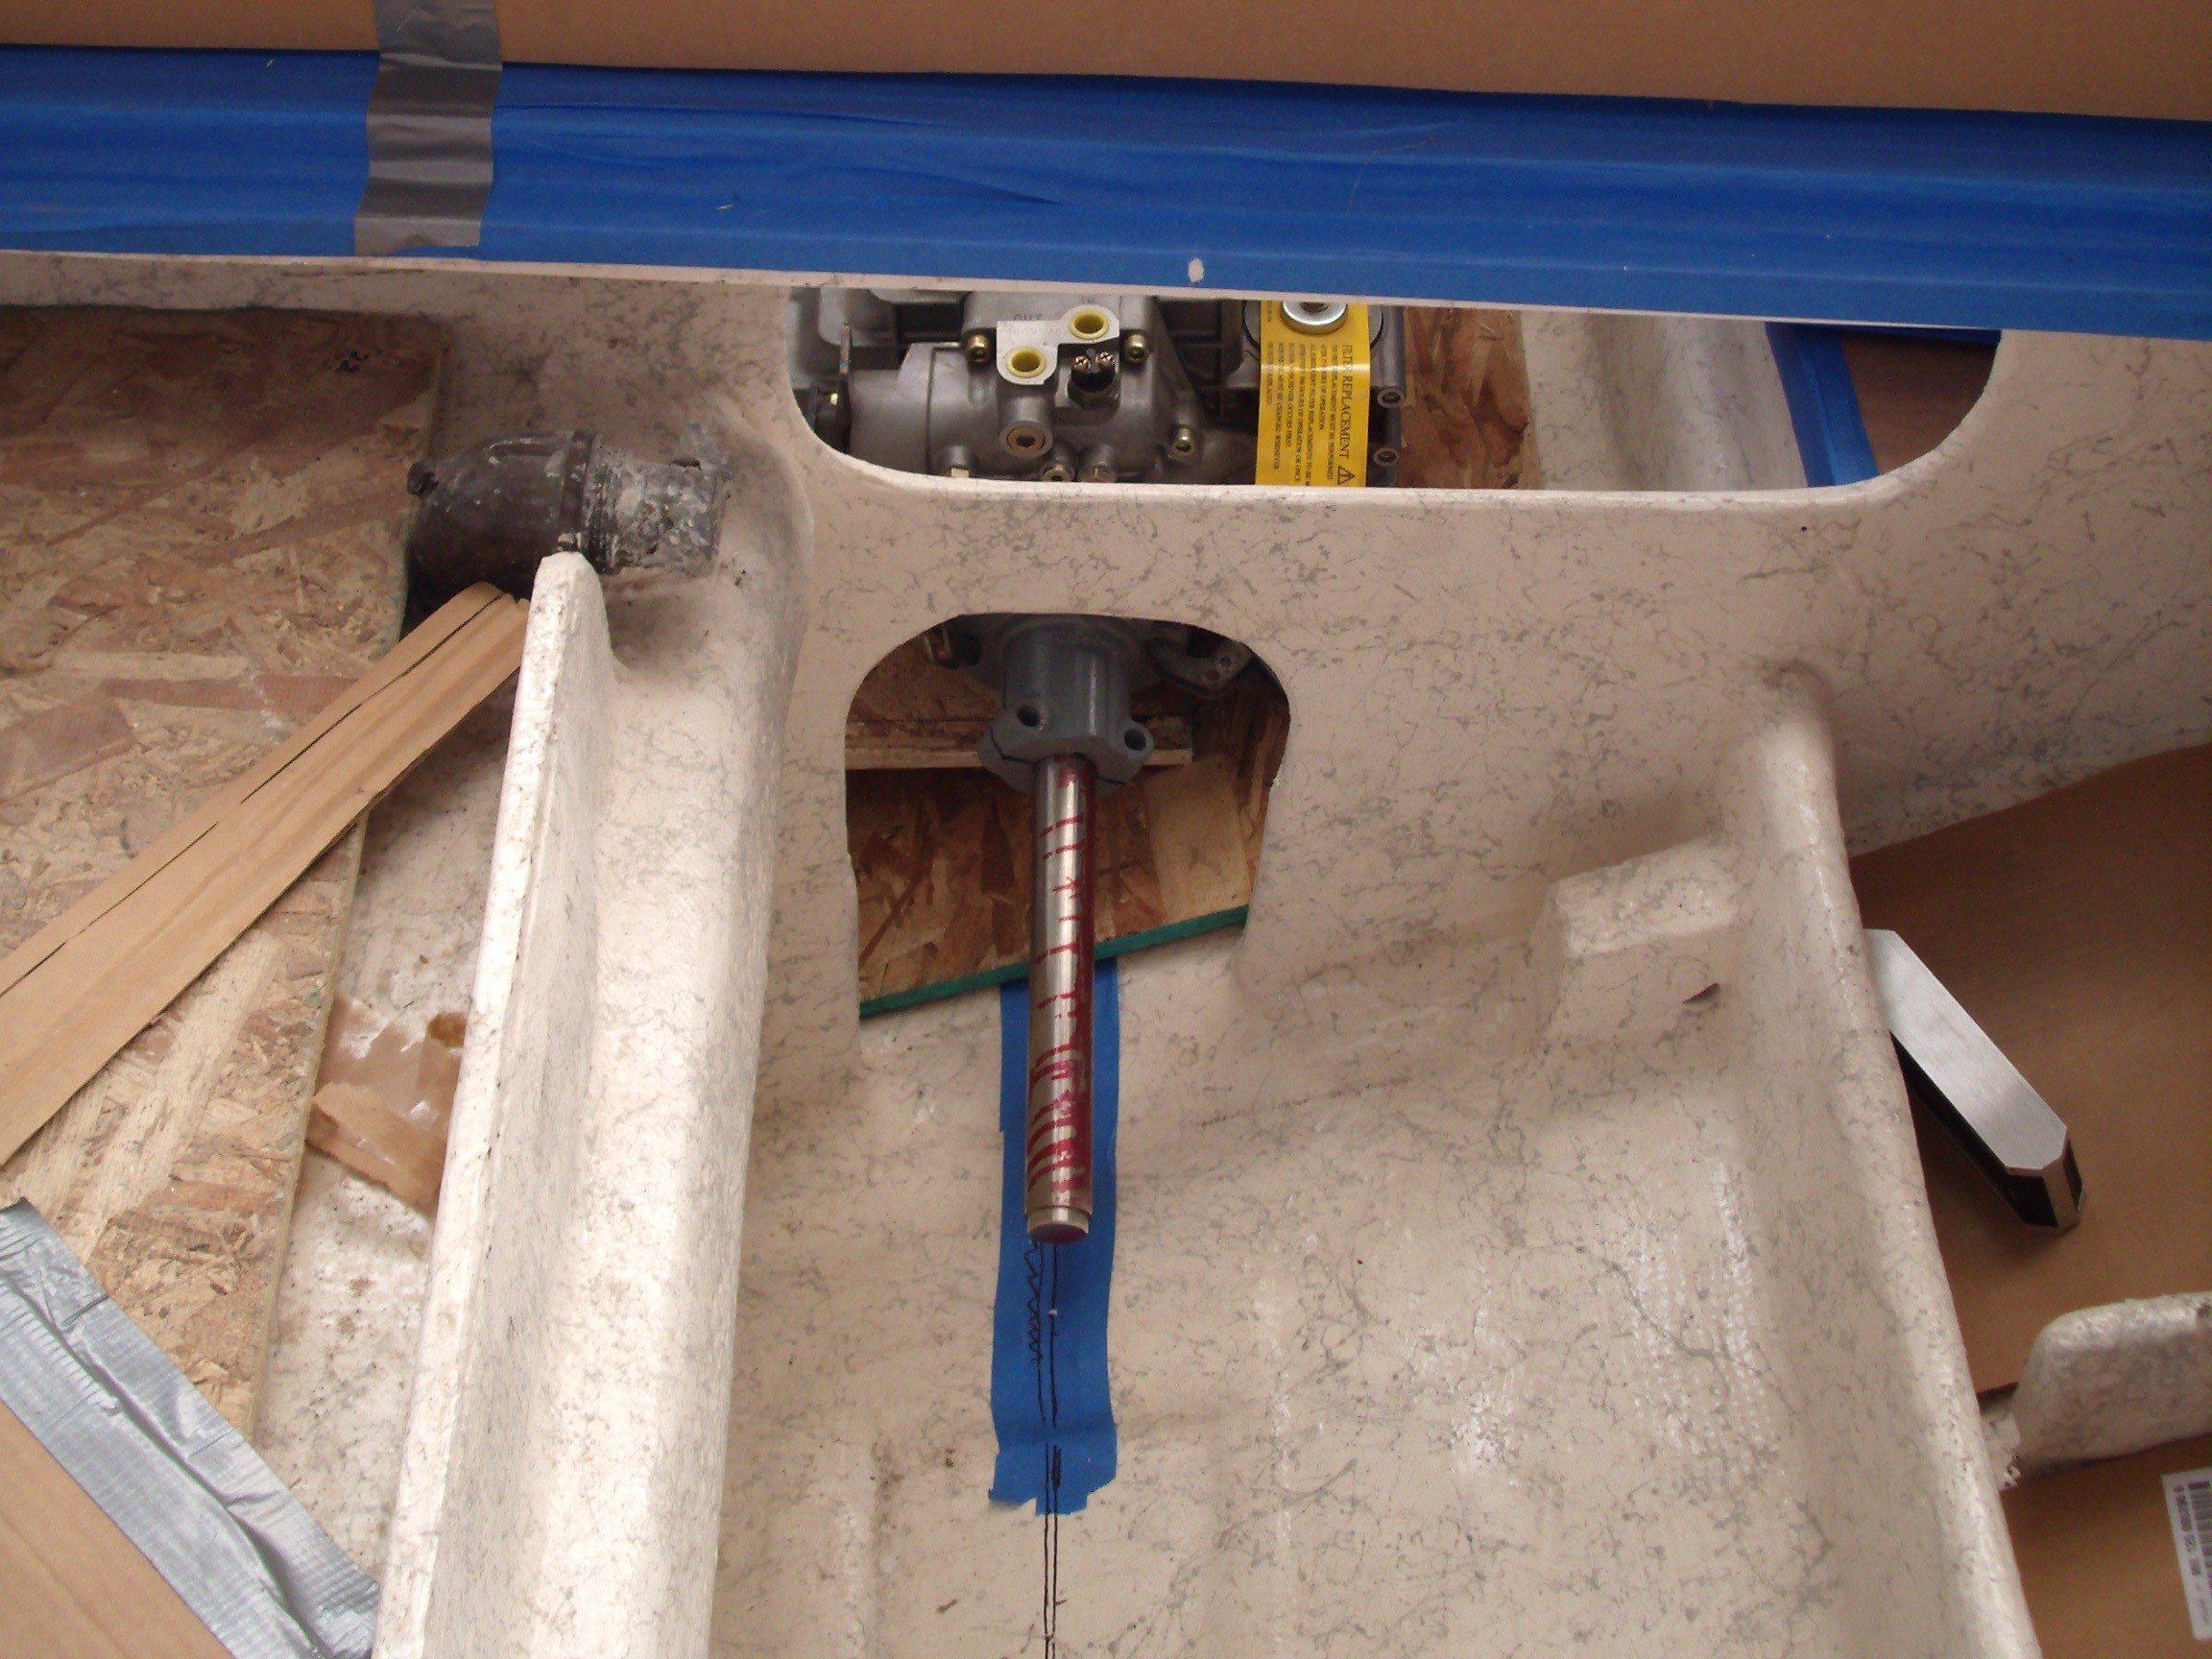
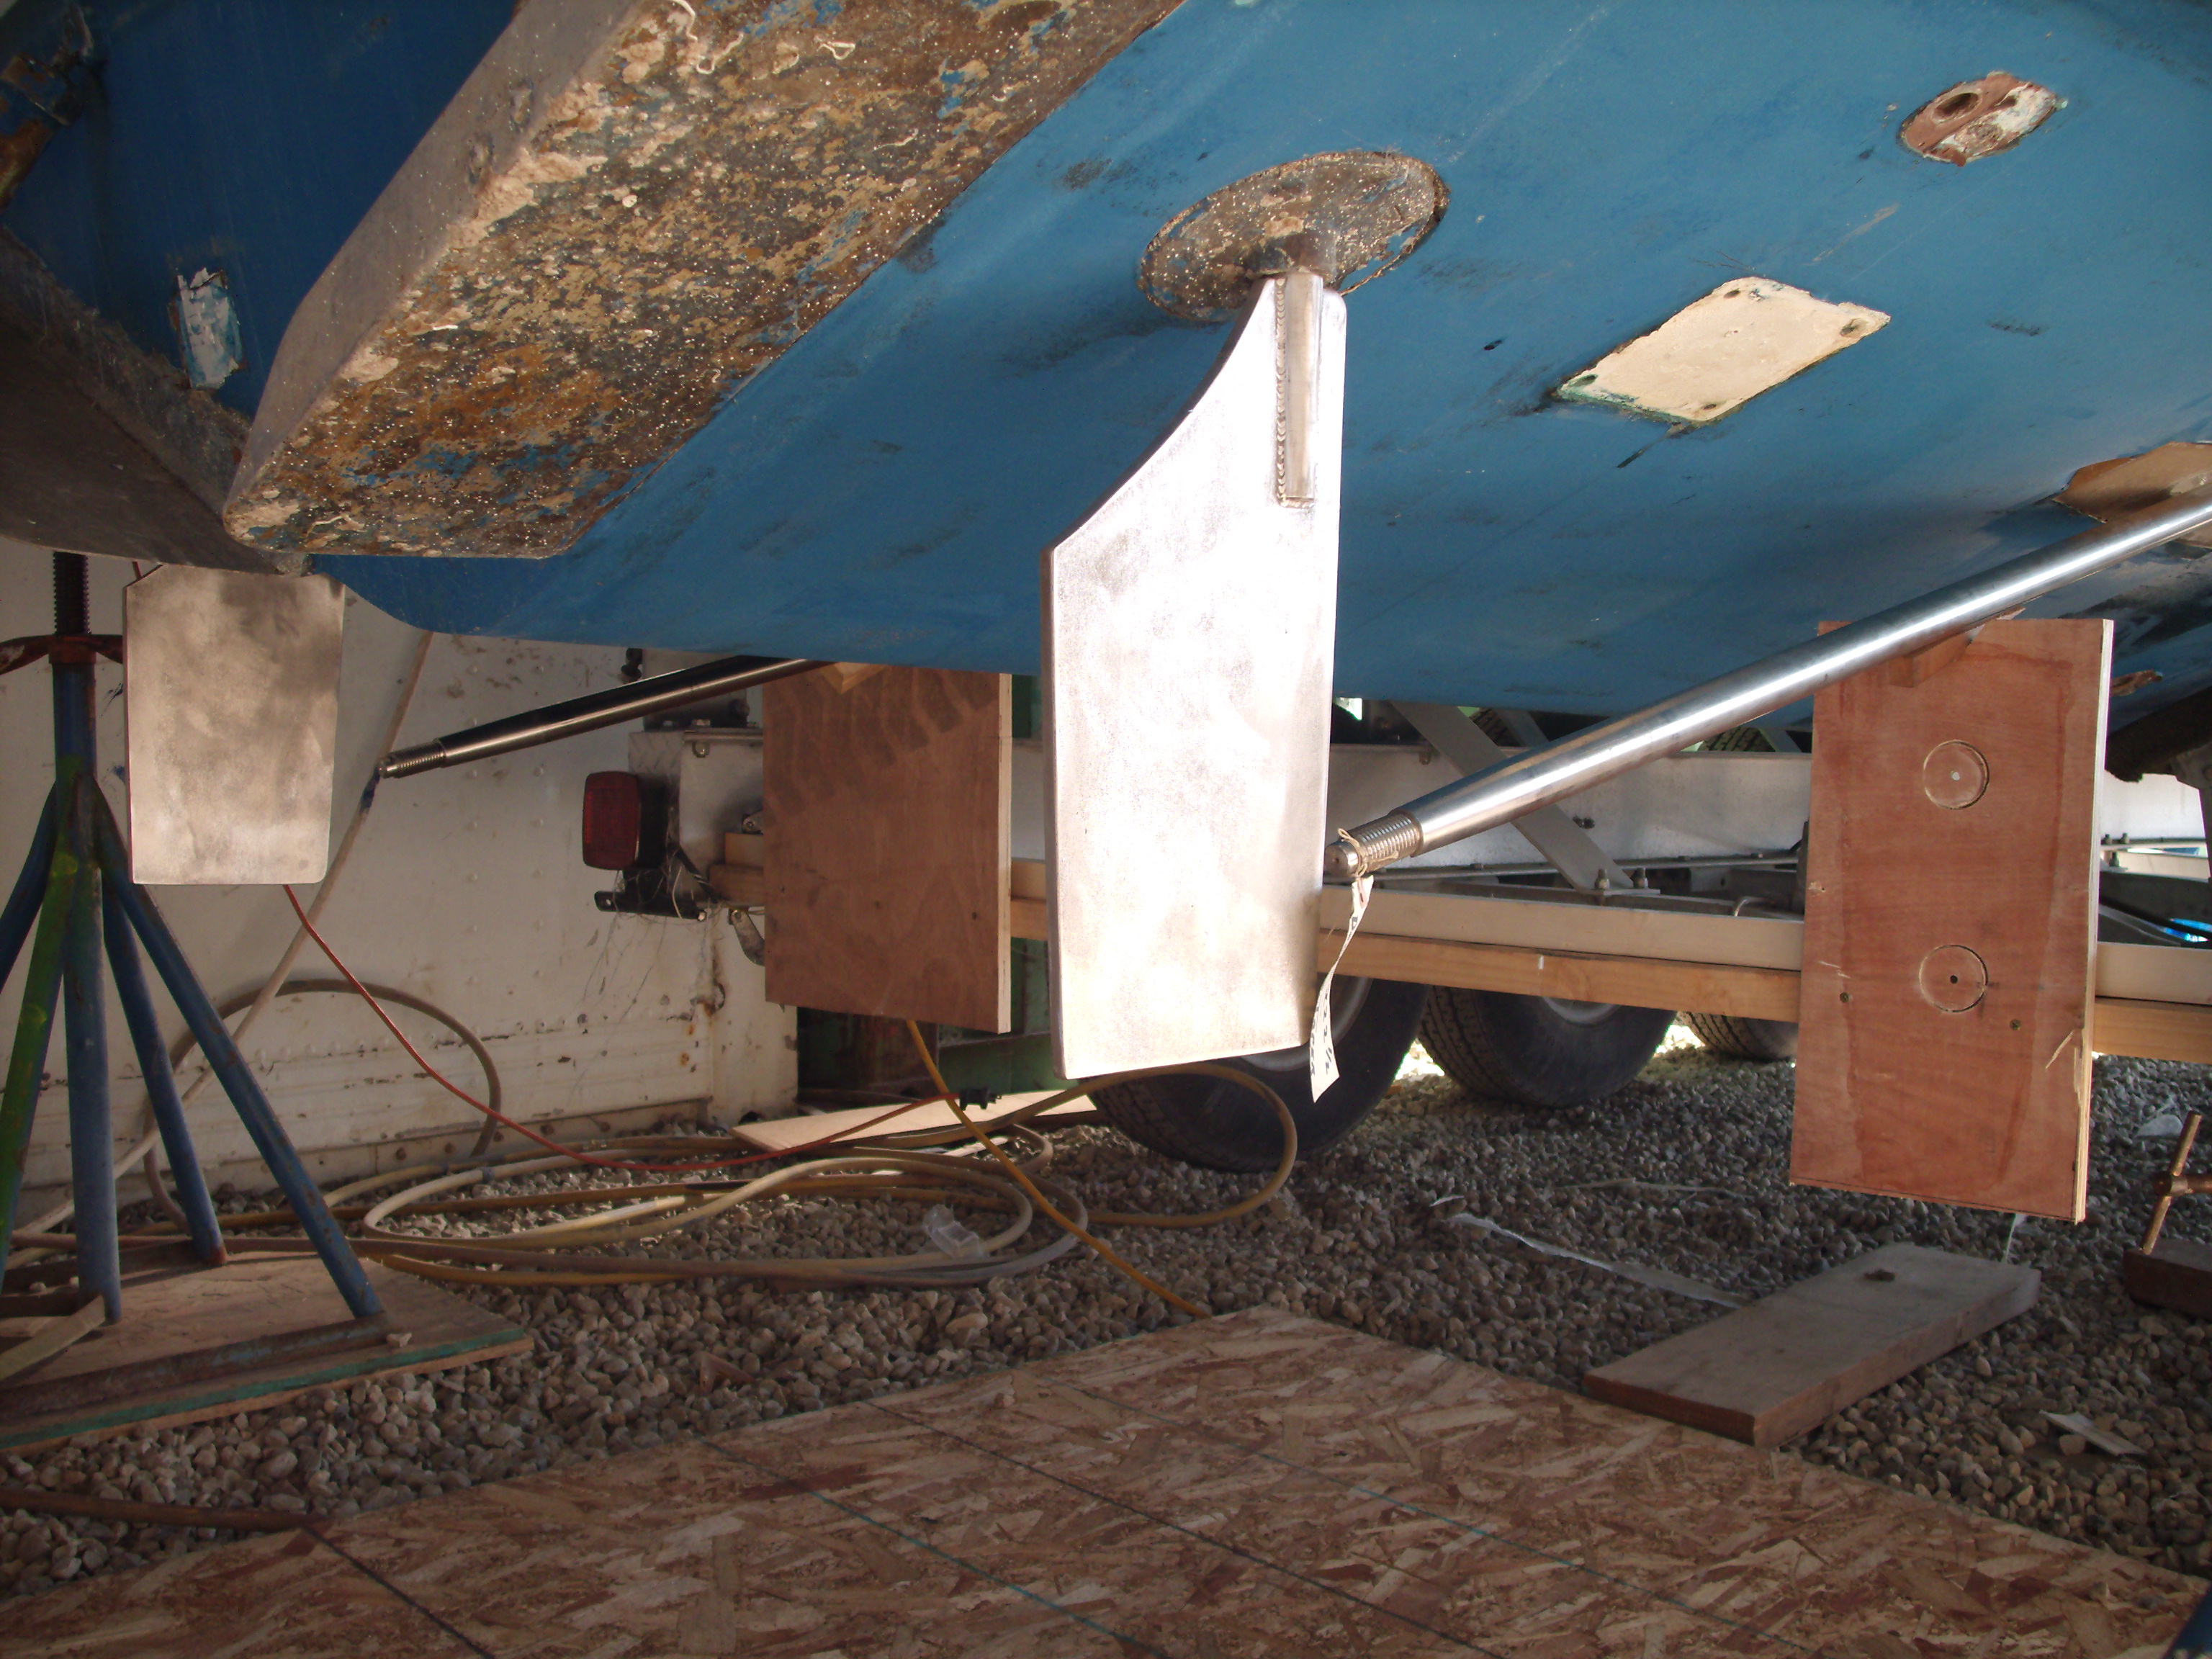
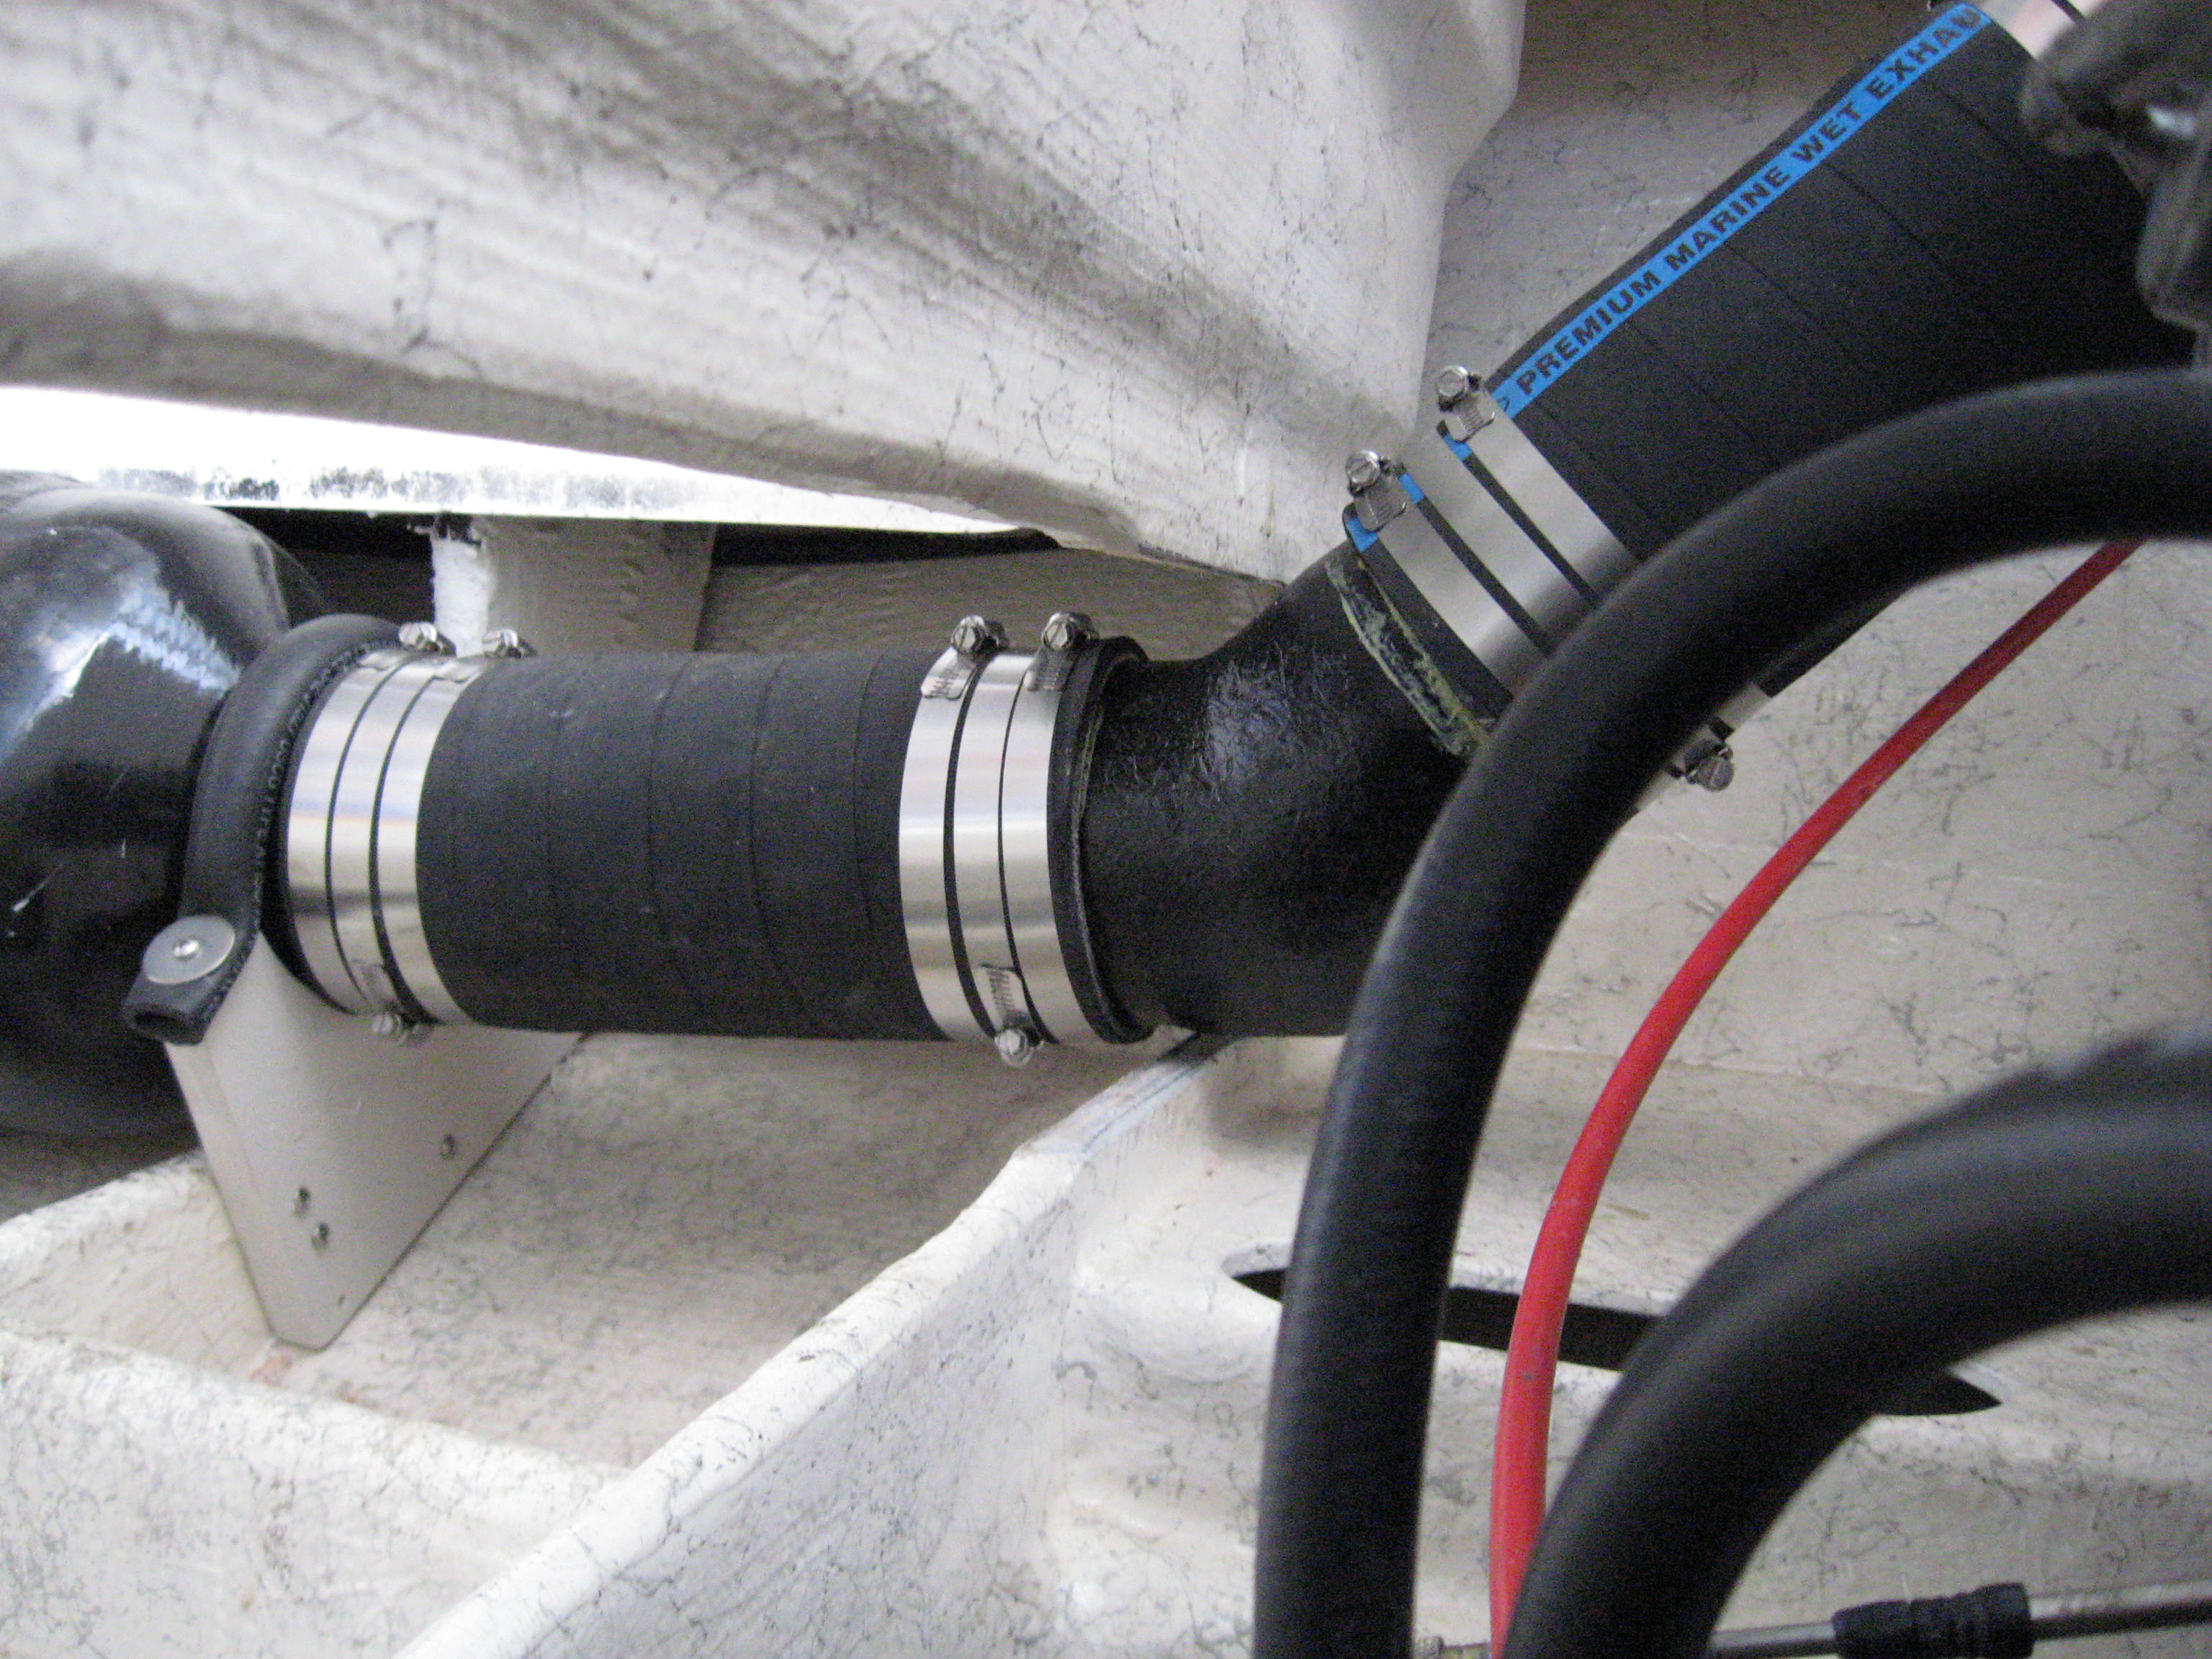
Once we had the transmission stringer bracketing up solid, we then designed and built the port and starboard gear brackets – again both sides asymmetrical and we chose aluminum fabrications for this part. Again, welding 100% in plane to the stringer brackets was paramount, especially for a 4 cylinder motor as we DO NOT want to pre-stress the rubber isolators. With the trans brackets done, we checked all our measurements once again, and now proceeded to build the new SS struts. We had the transmission in place (EXACT) and it was holding our shaft so positioning the shaft now was easy. We cut & fitted our Stainless 3 piece P&S struts, tacked in place on the boat, and were off to the welding bench. From there, we floated the struts in place in an epoxy bed with the shafts as our guides. The next day we bolted them up solid, and then rechecked all just to be 100% sure. Now we had our shaft, strut, and trans in their exact position and proceeded to build the combo shaft logs and aft shaft bearing – Heavy wall FRP tube, and positioned on the shaft with machined guides and then glassed in place to where this is one on the strongest parts of the boat bottom. This one part adds much additional stiffness to the very thin Bertram hull in this area.
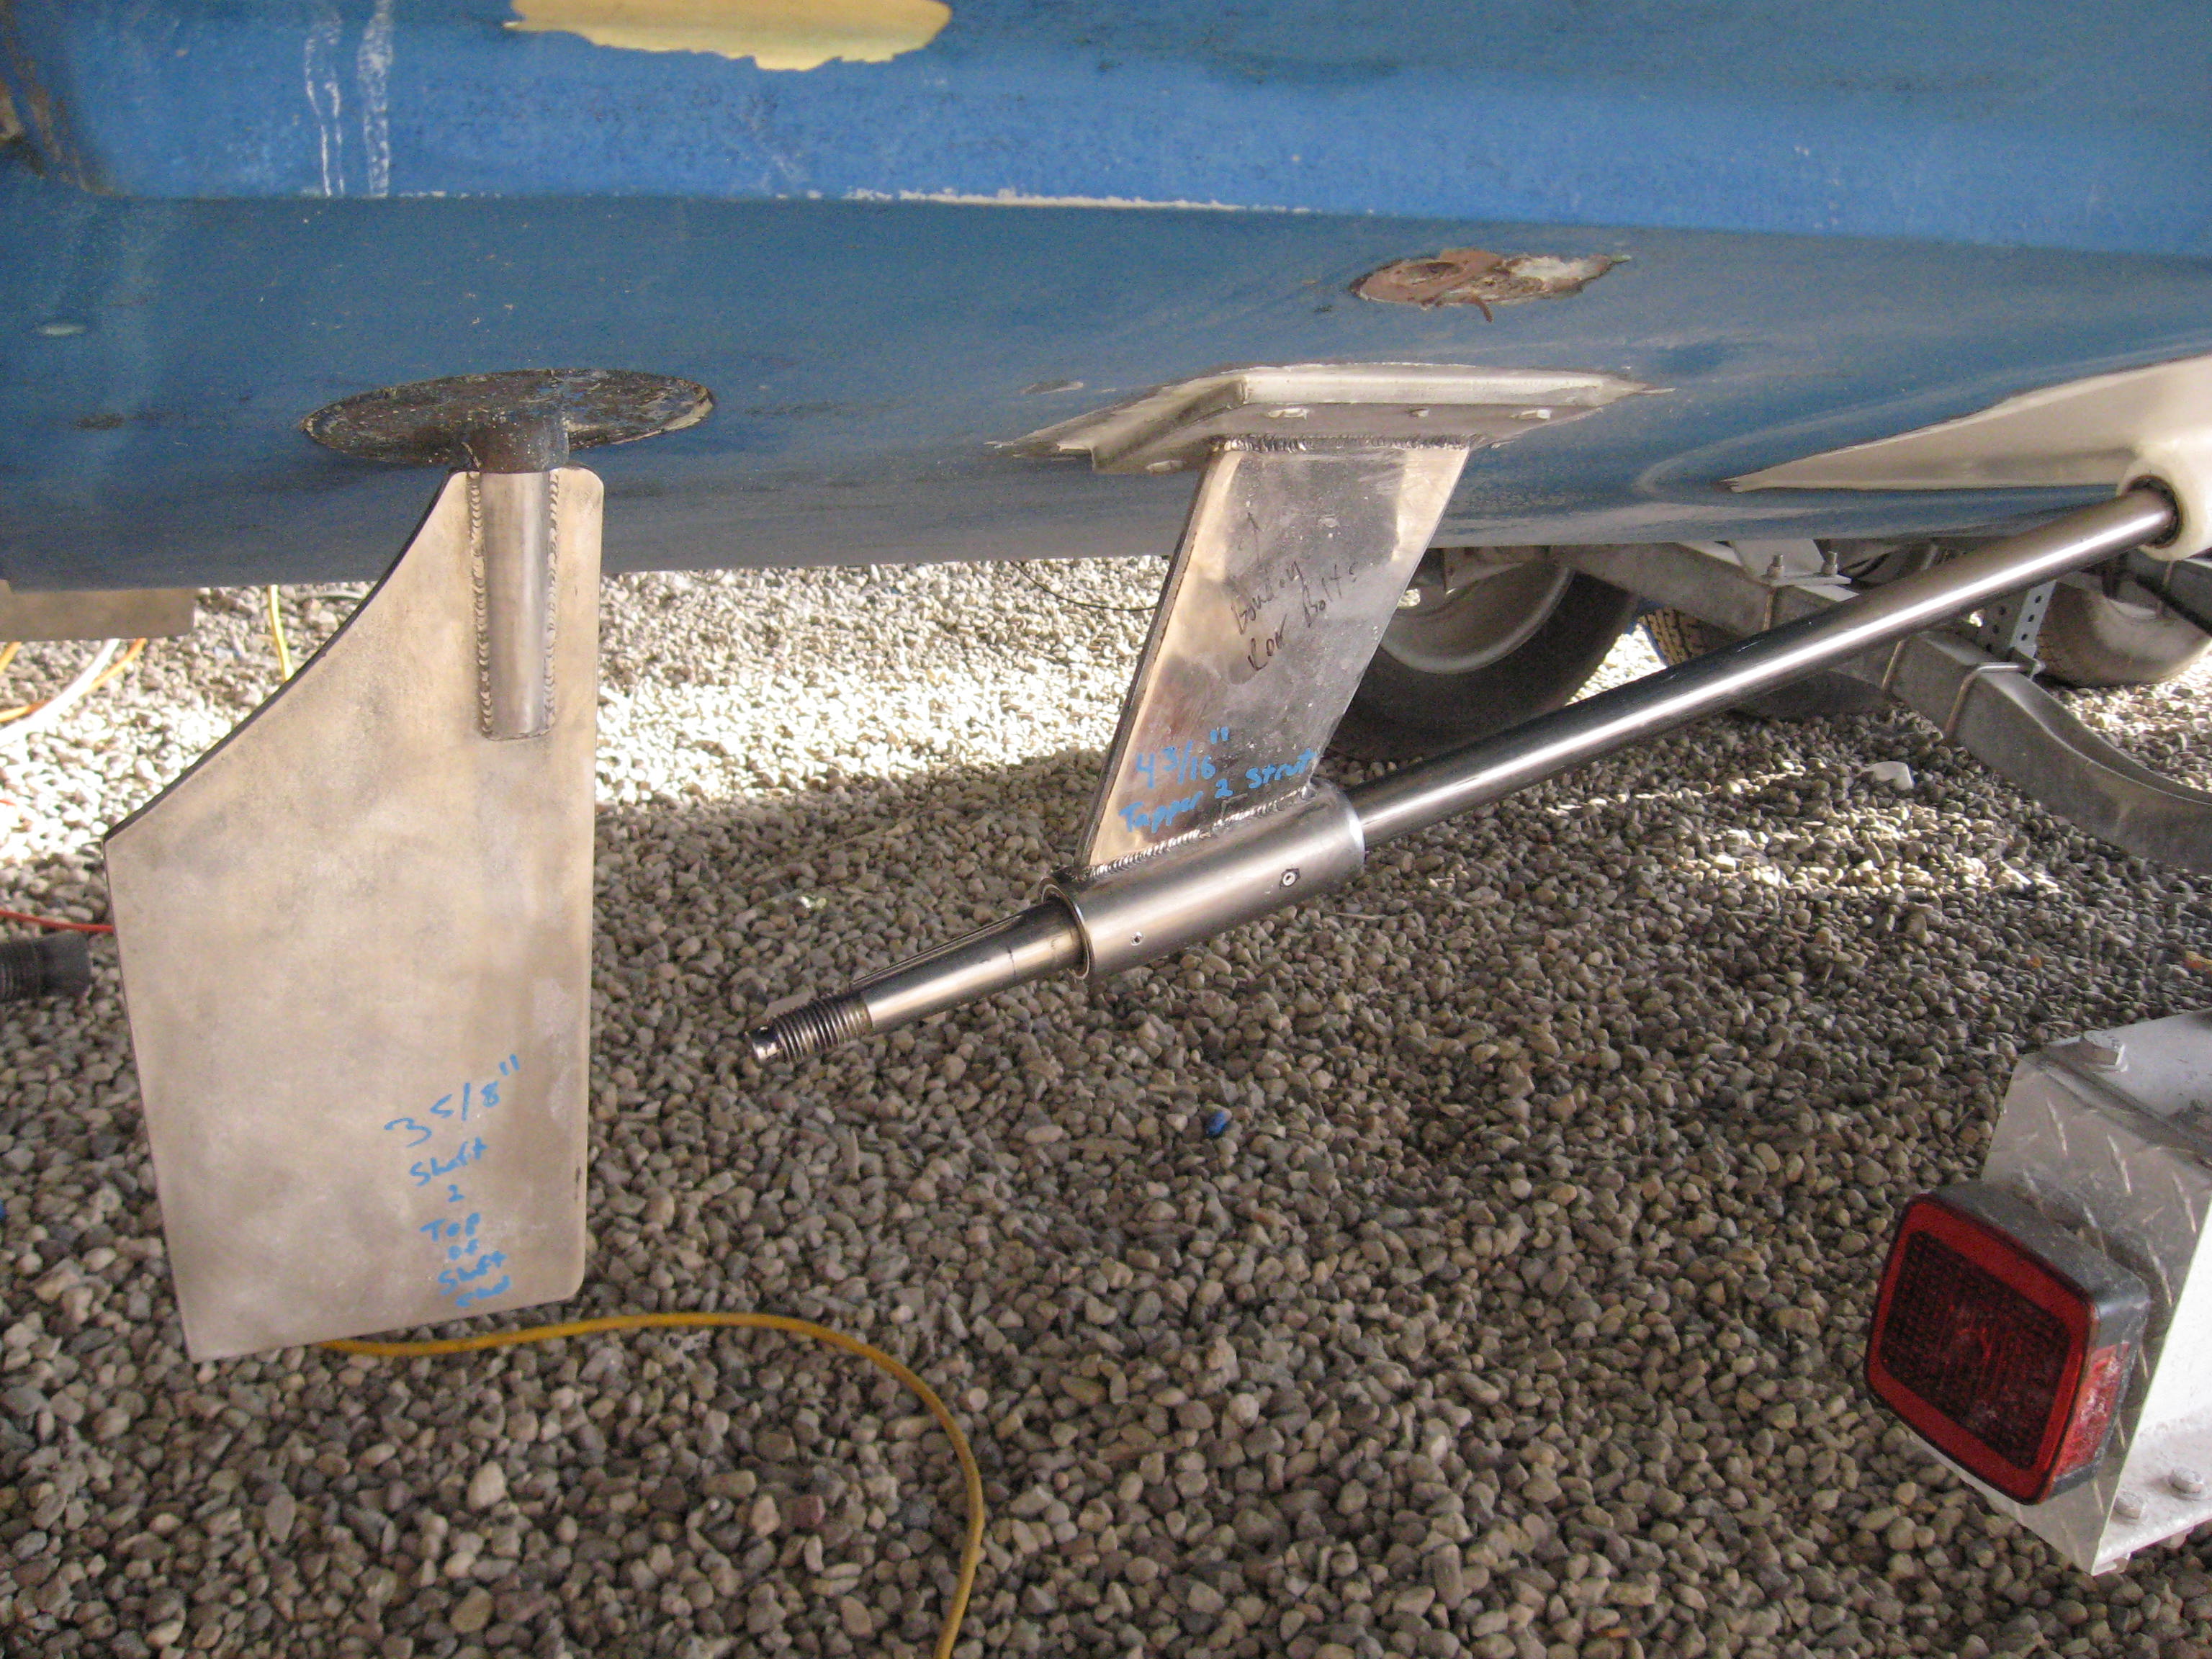
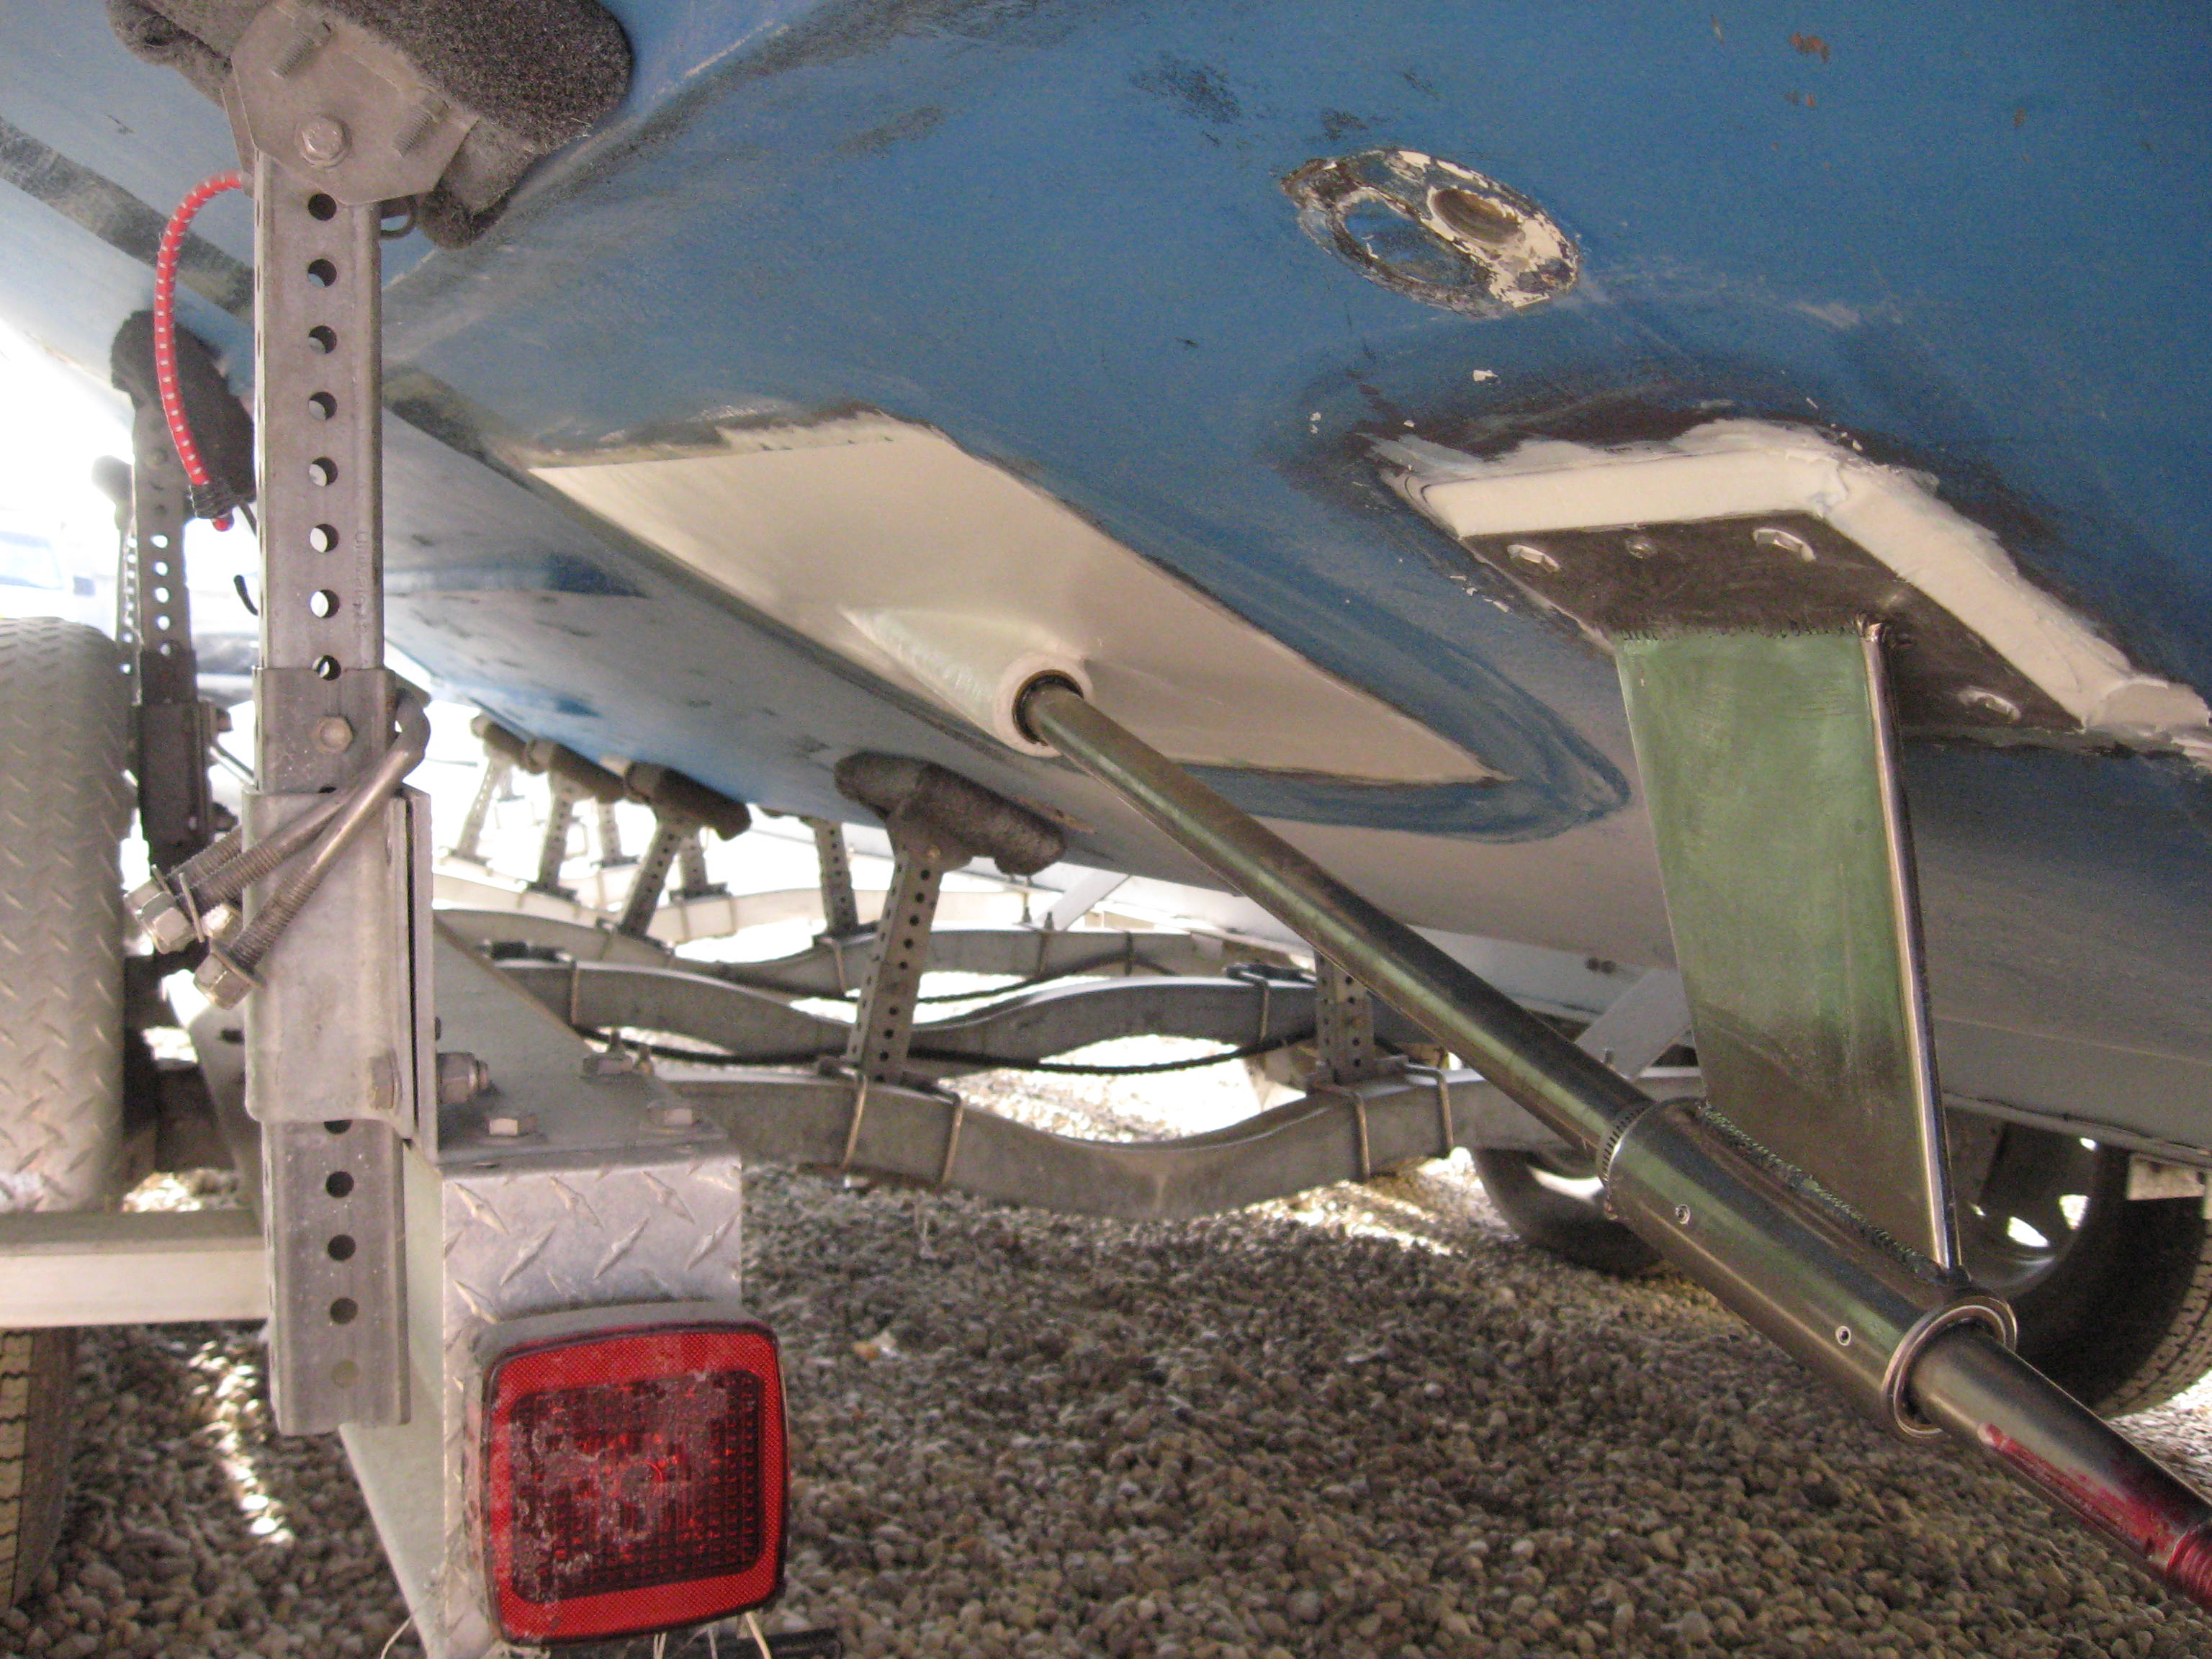
Starboard and port stainless steel struts and FRP shaft logs with aft shaft bearing – New 1.375″ AQ 22 shafts
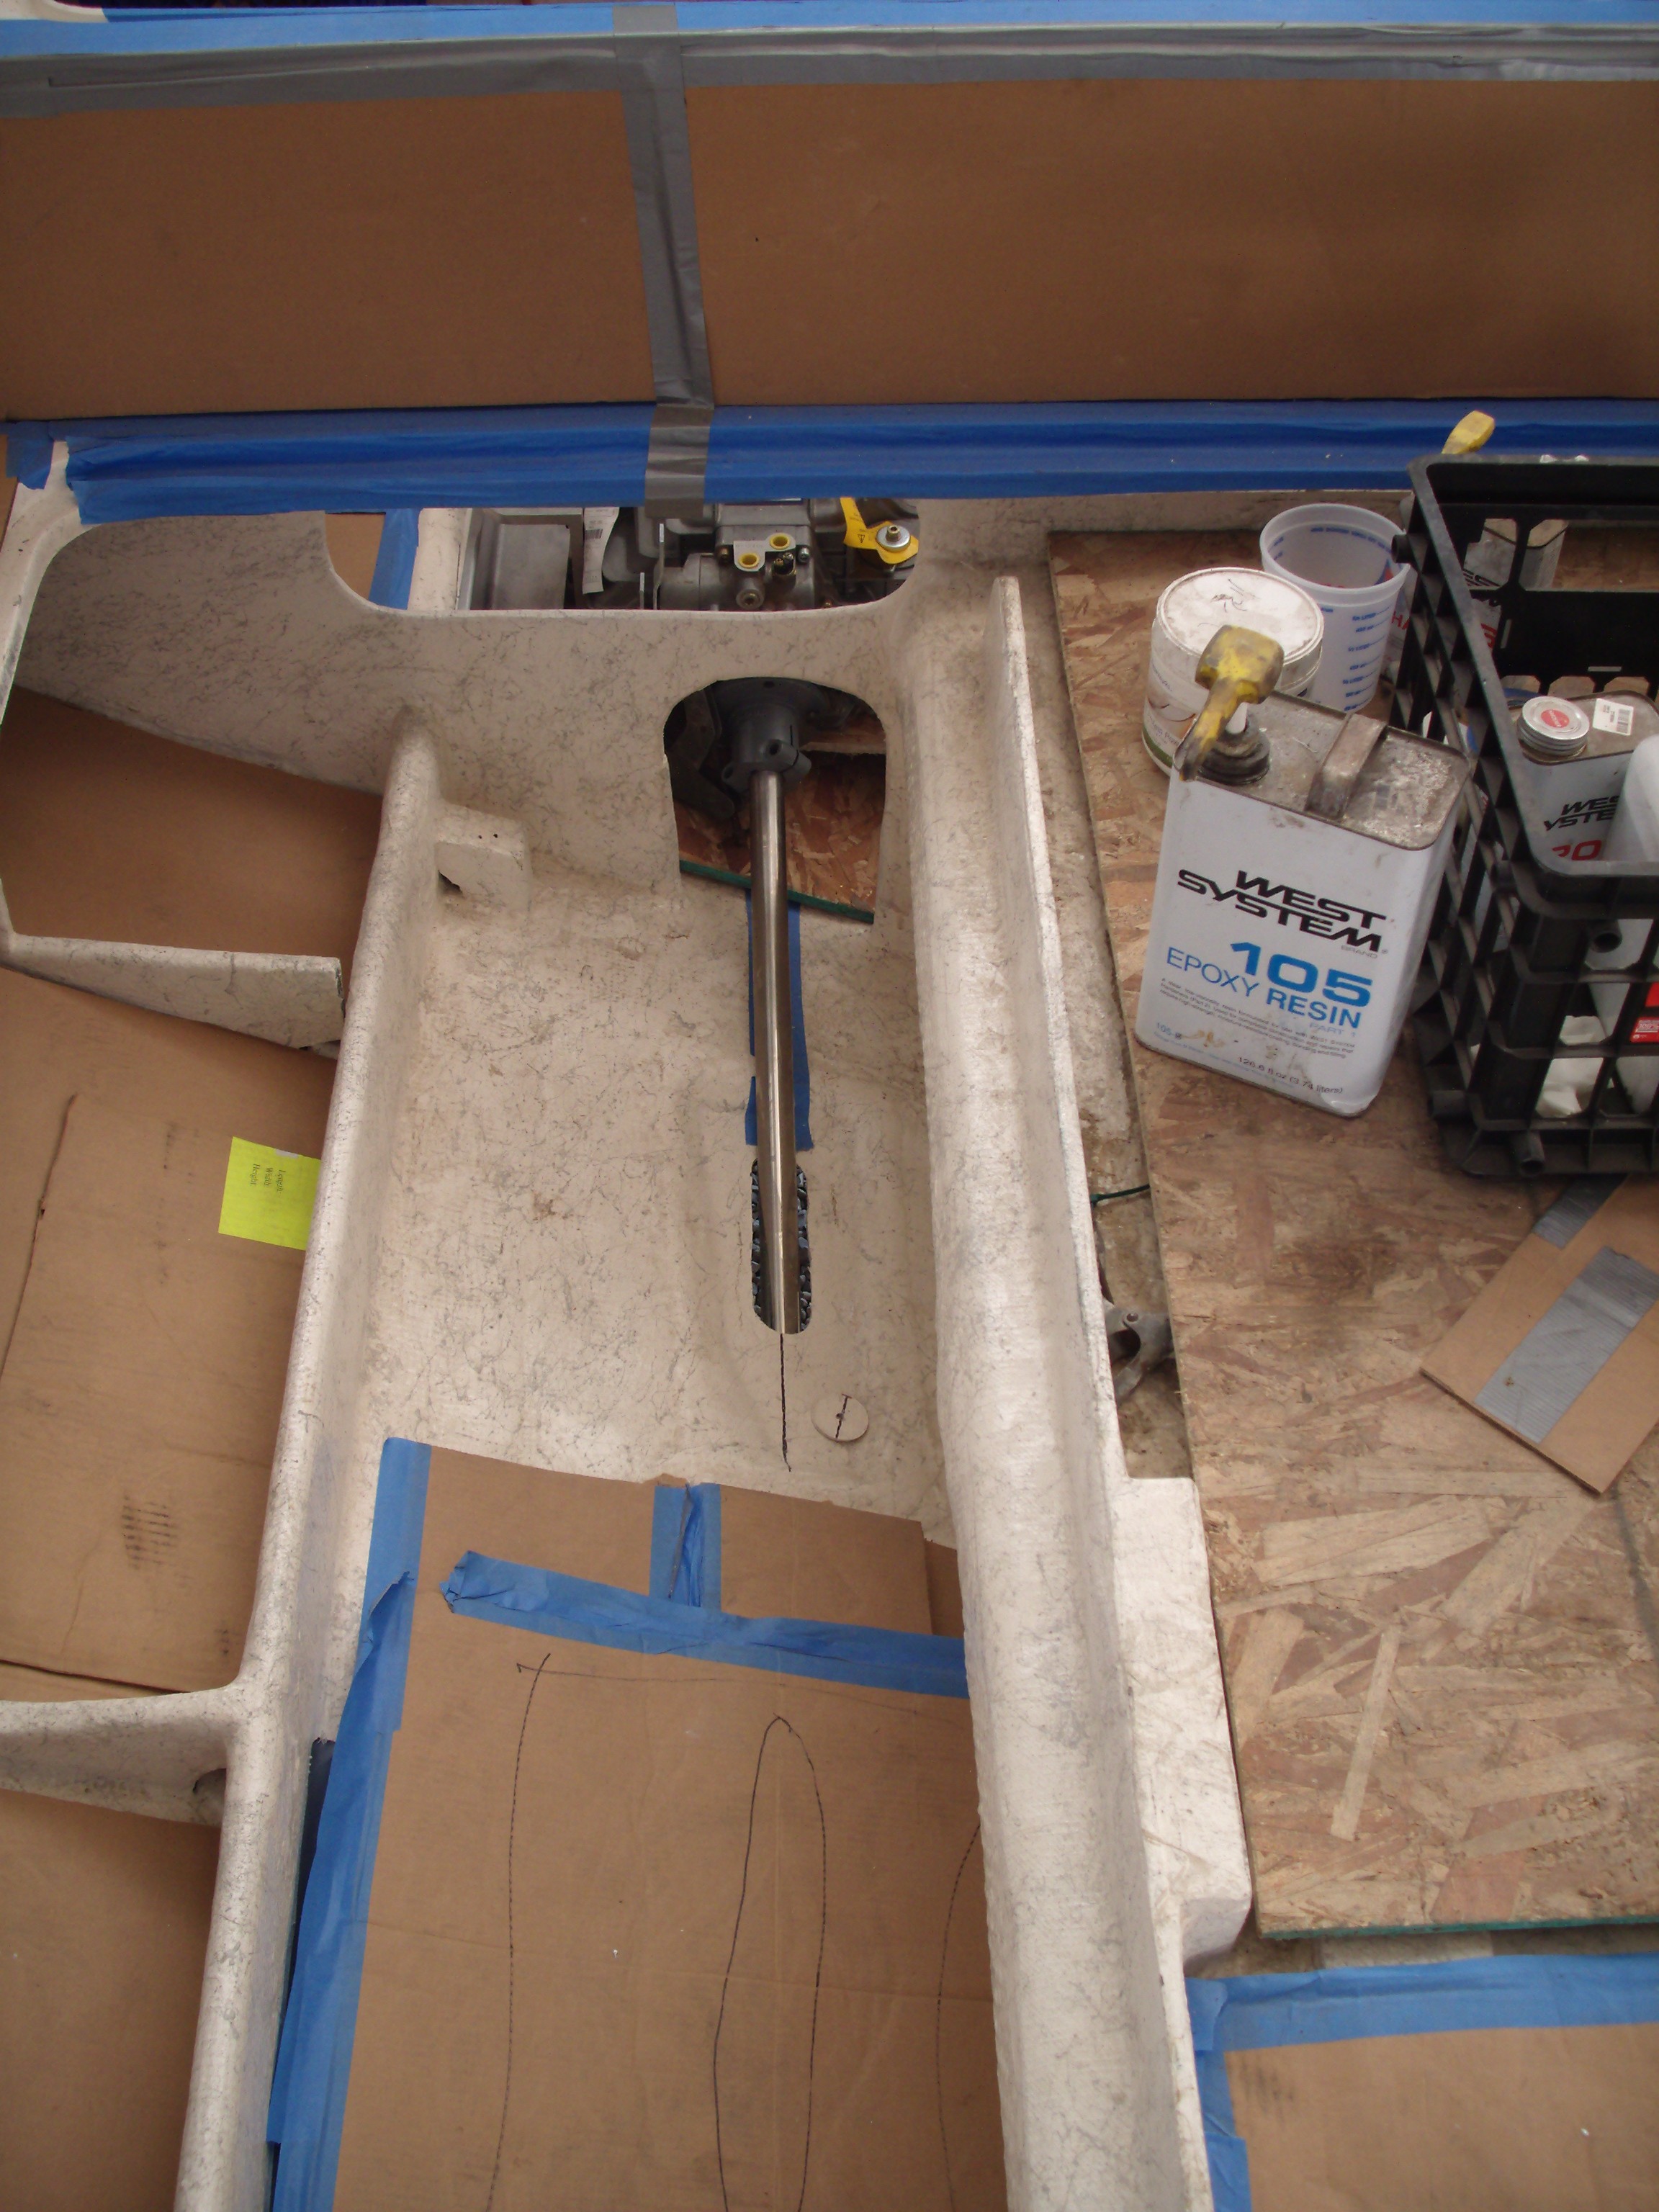
Now for the front stringer and engine bracketing. As you can see, we do not use the engine for fitting these – We prefer to have the transmission on it’s mounts and in perfect alignment with the prop shaft and then add a “jig” to the transmission input shaft that allows us to measure exactly what we need. It’s 100% accurate and you are not trying to work around the engine.
Once the stringer front bracketing is in place, we attached the front engine bracketing. The factory outer brackets were modified (a milling machine made quick work of that – needed to be closer in and slotted to allow better & easier alignment), and had to make 100% custom inner brackets – Also, if you look closely, we attached the inner brackets to an alternative place on the engine that made for a much cleaner set-up.


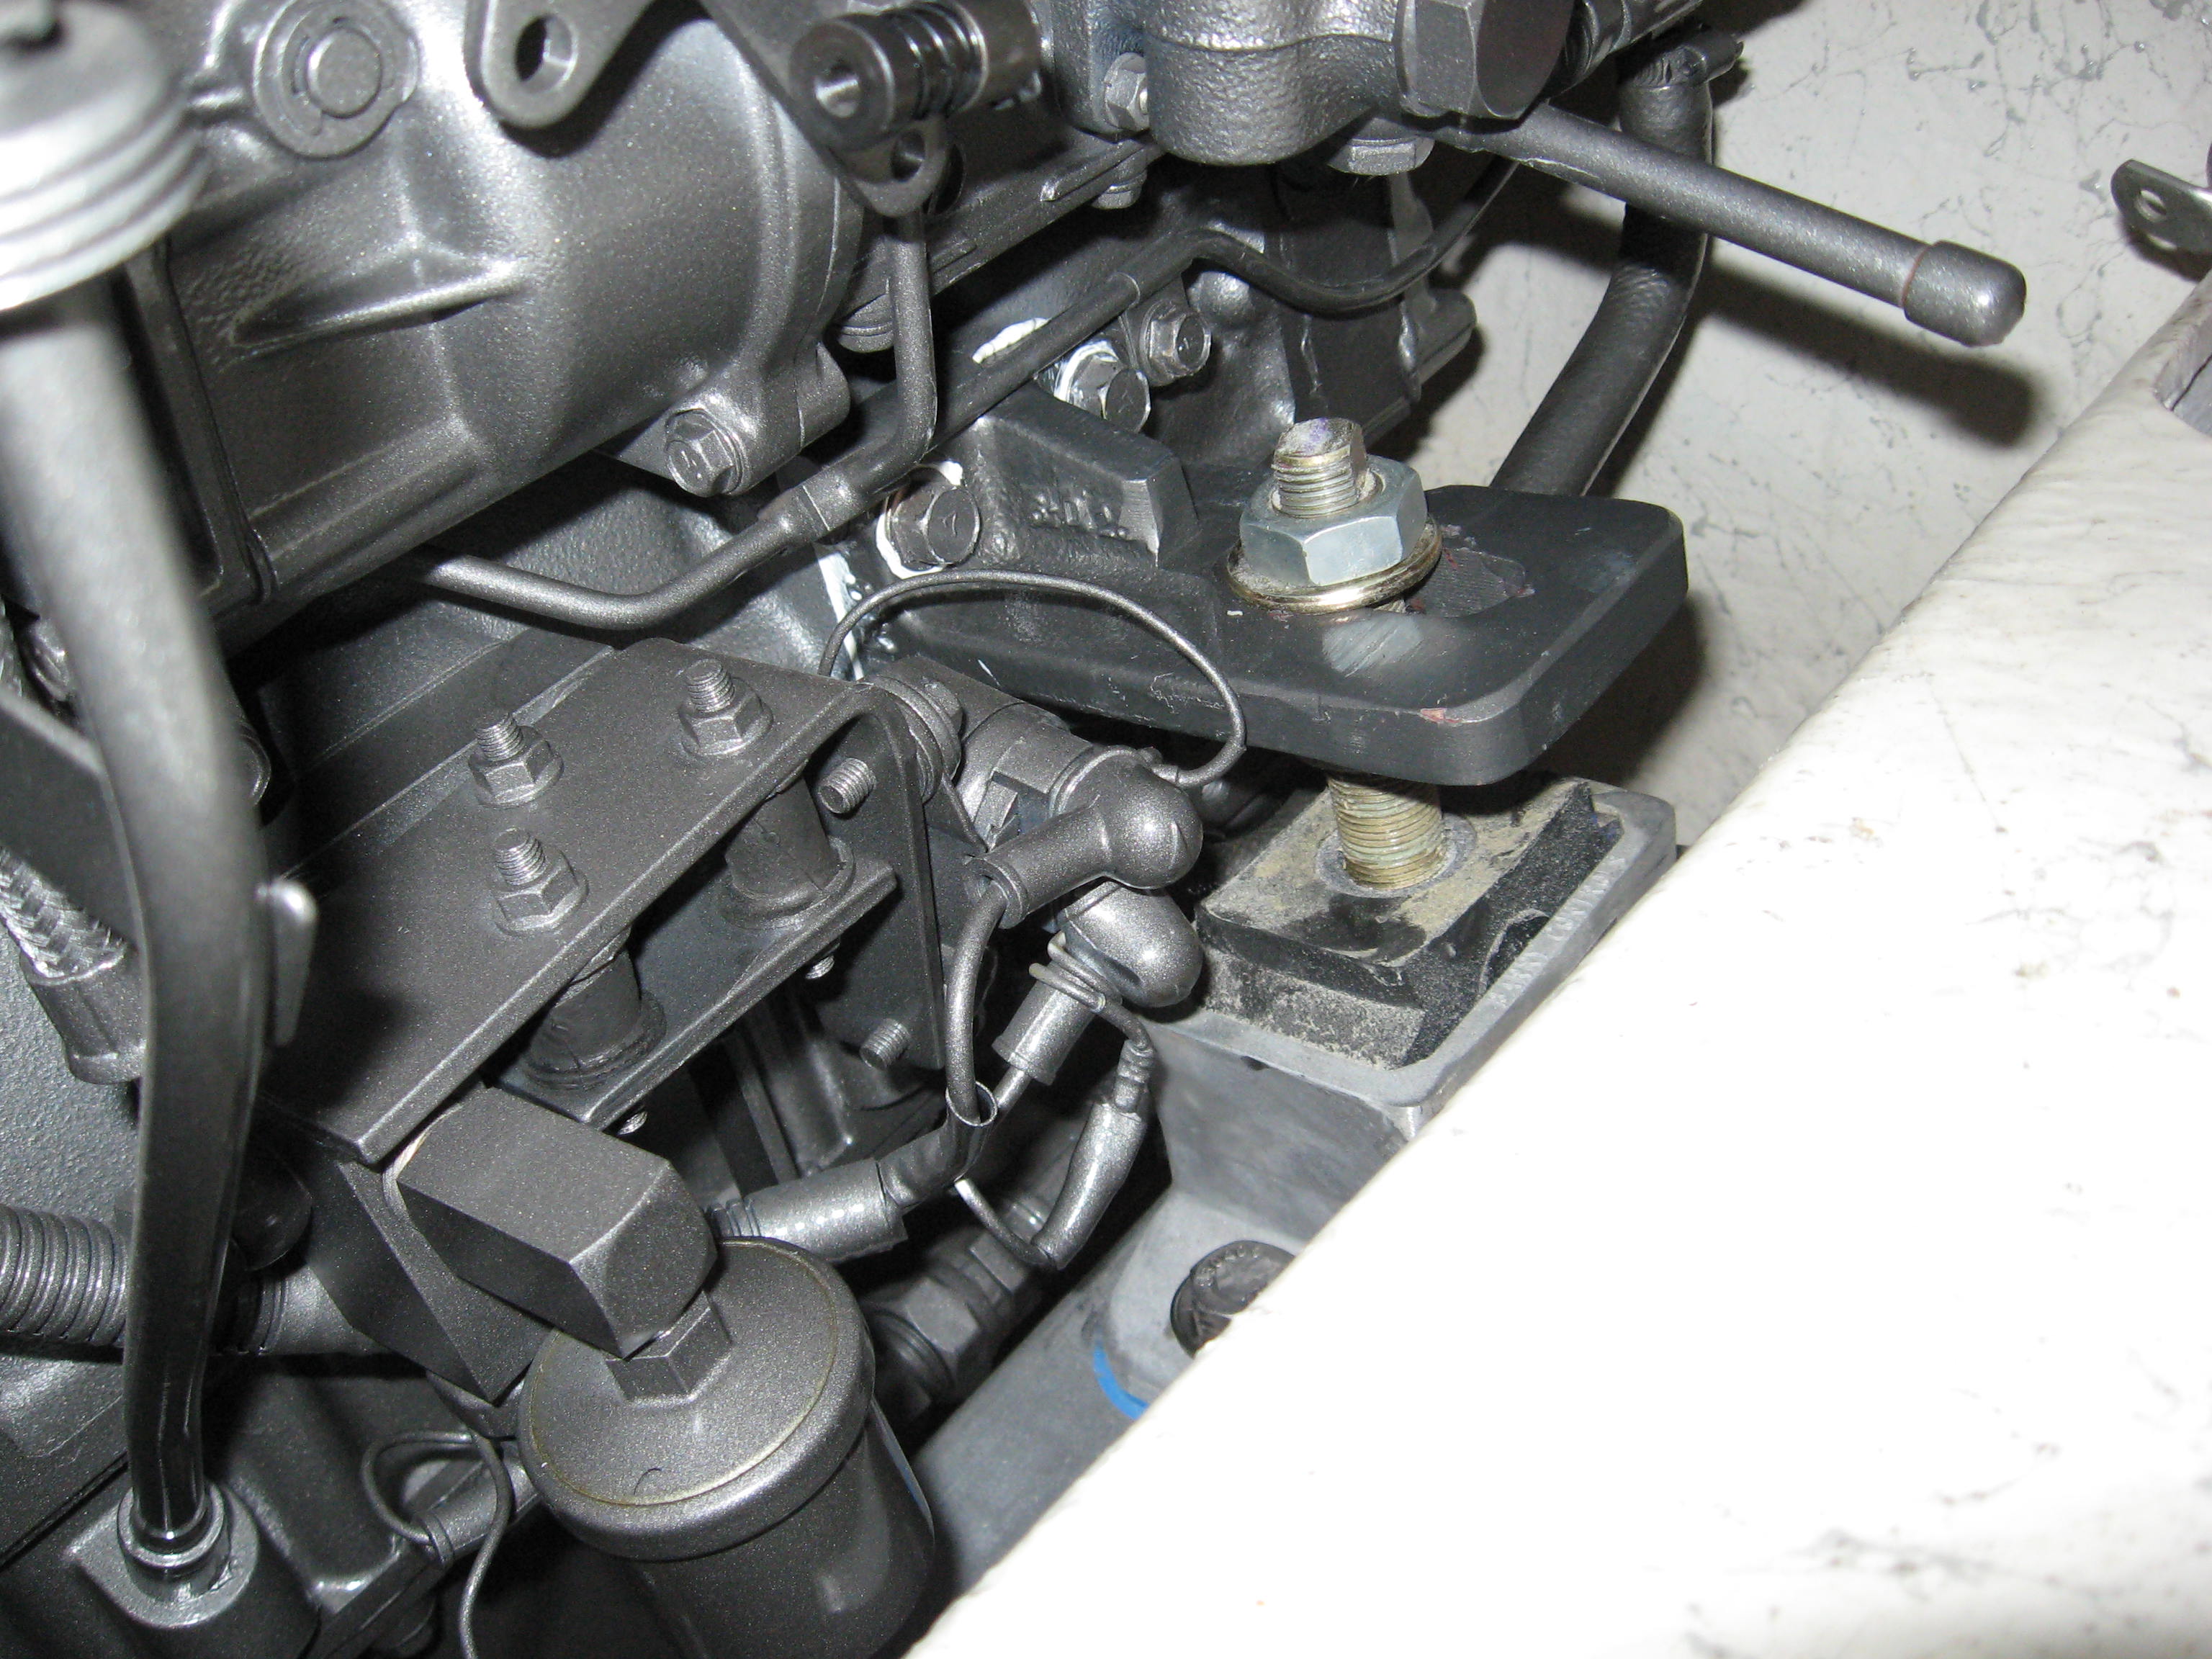
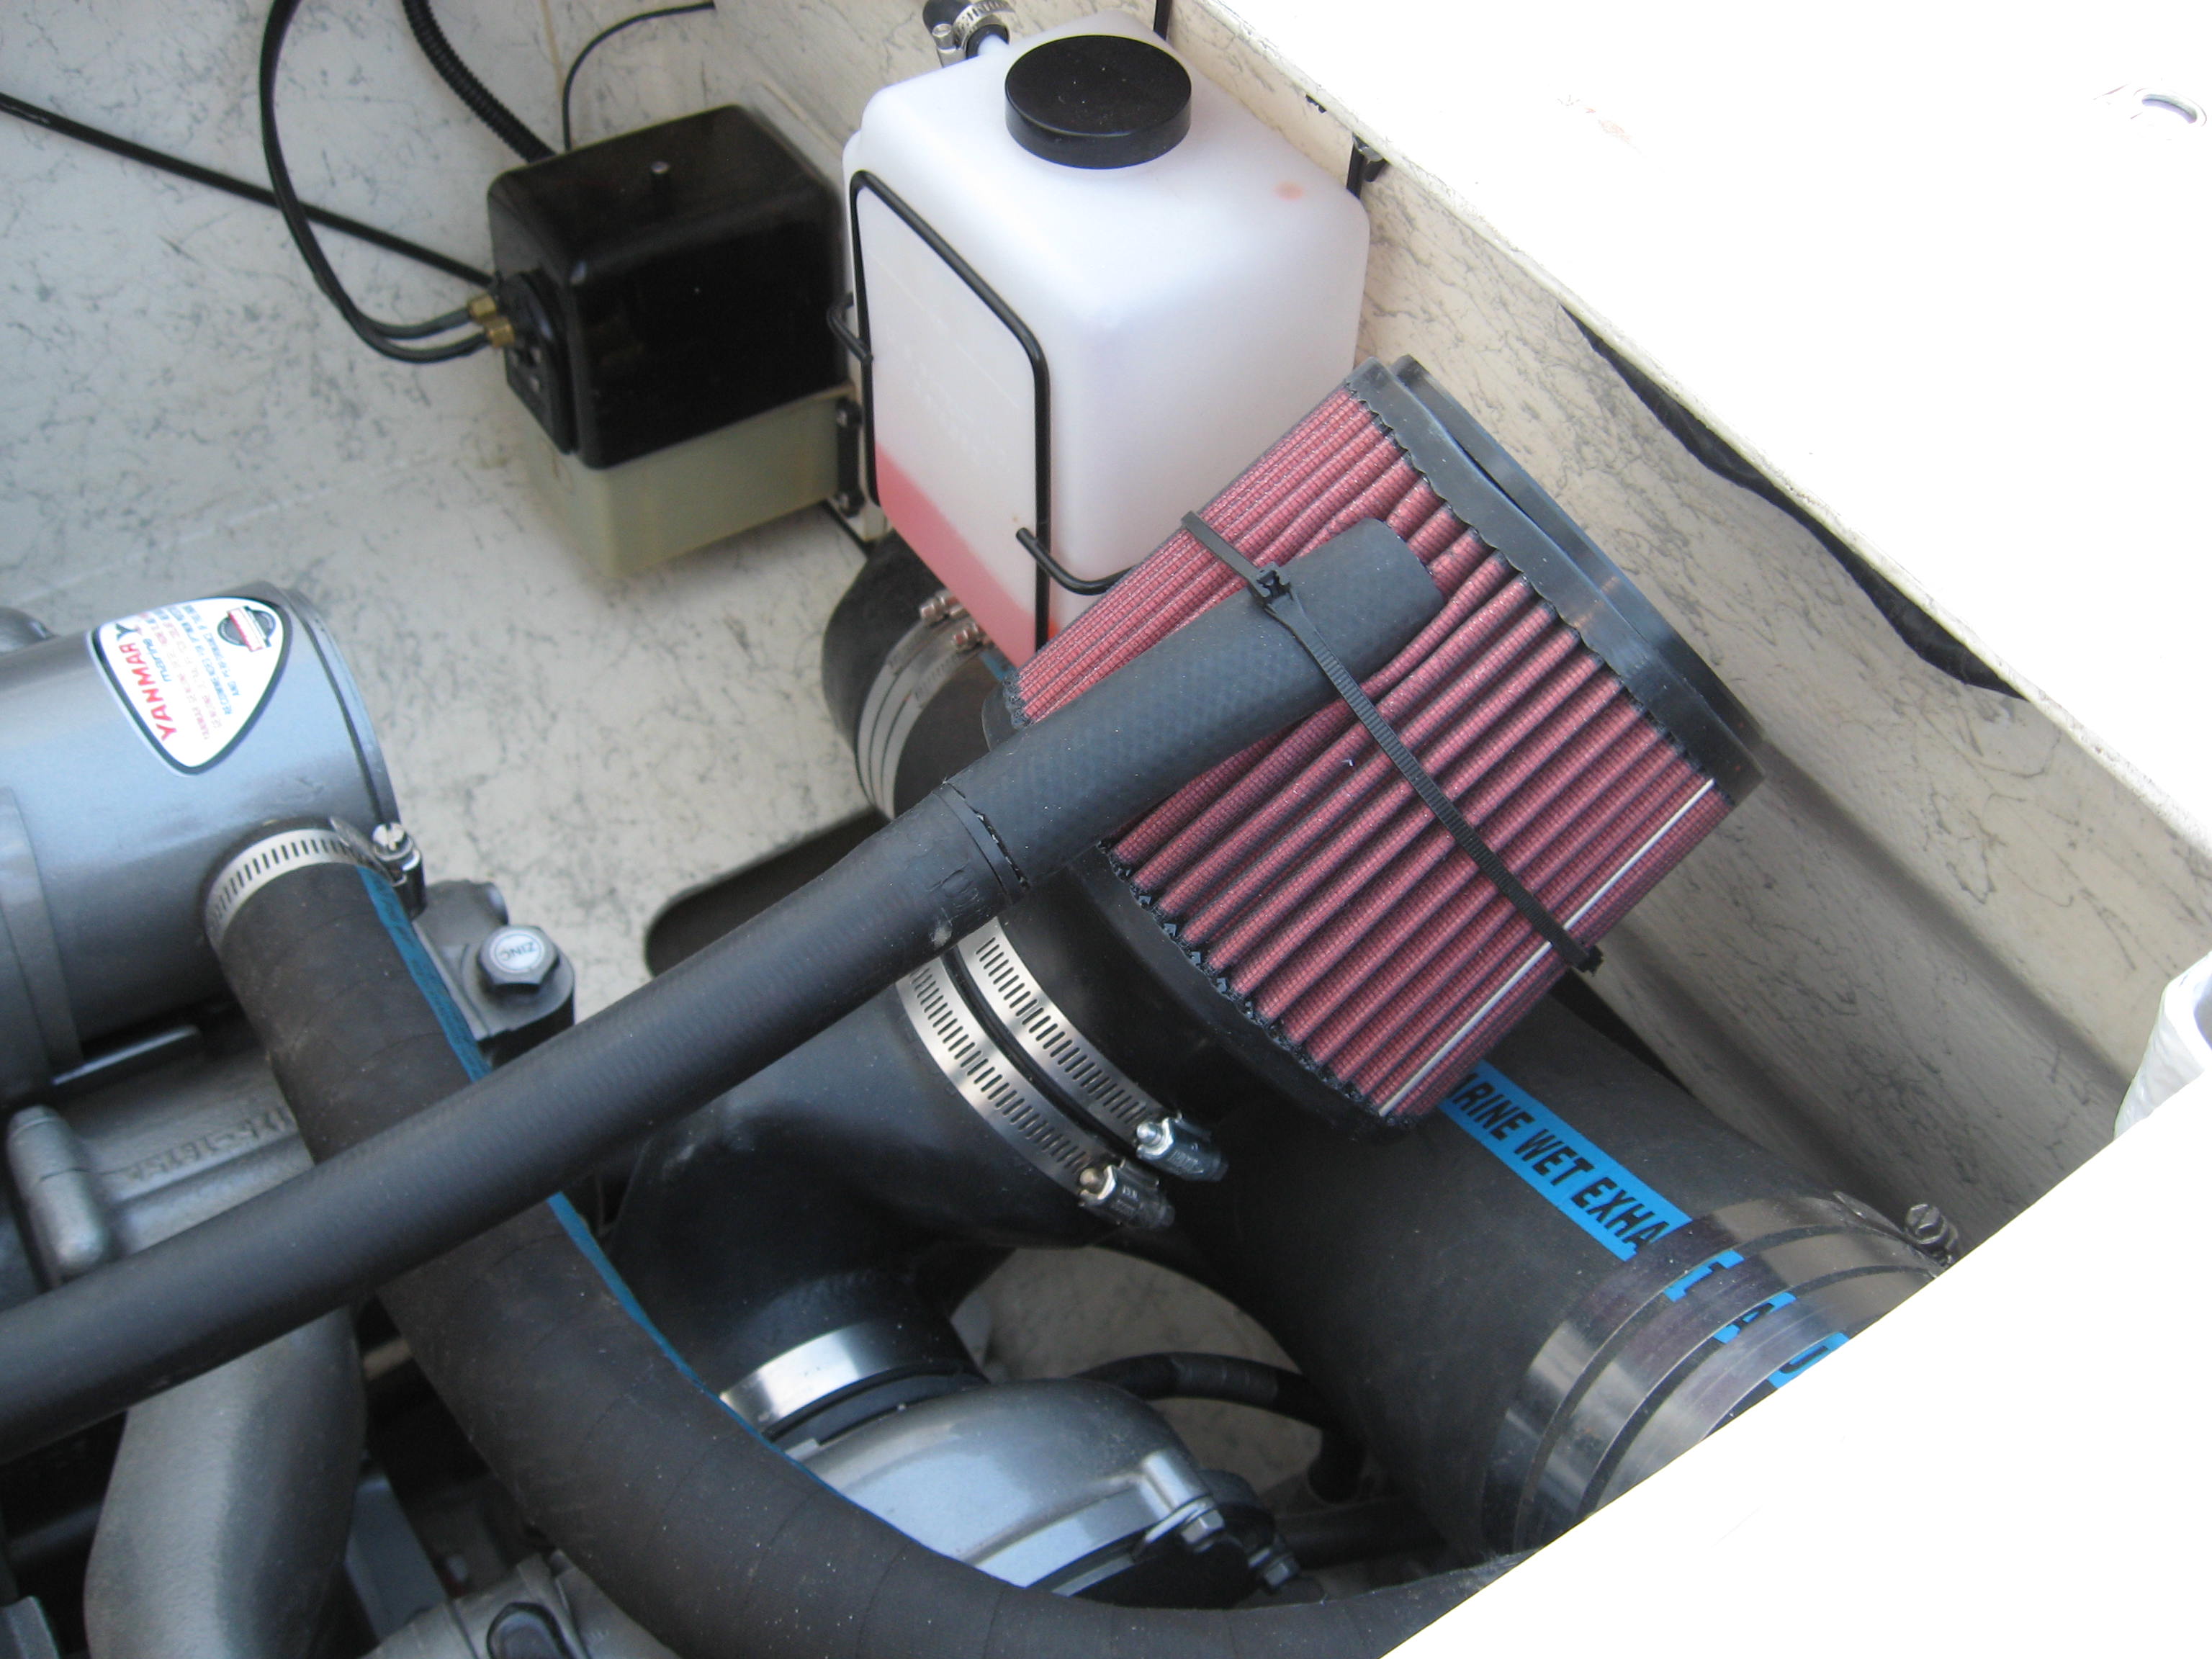
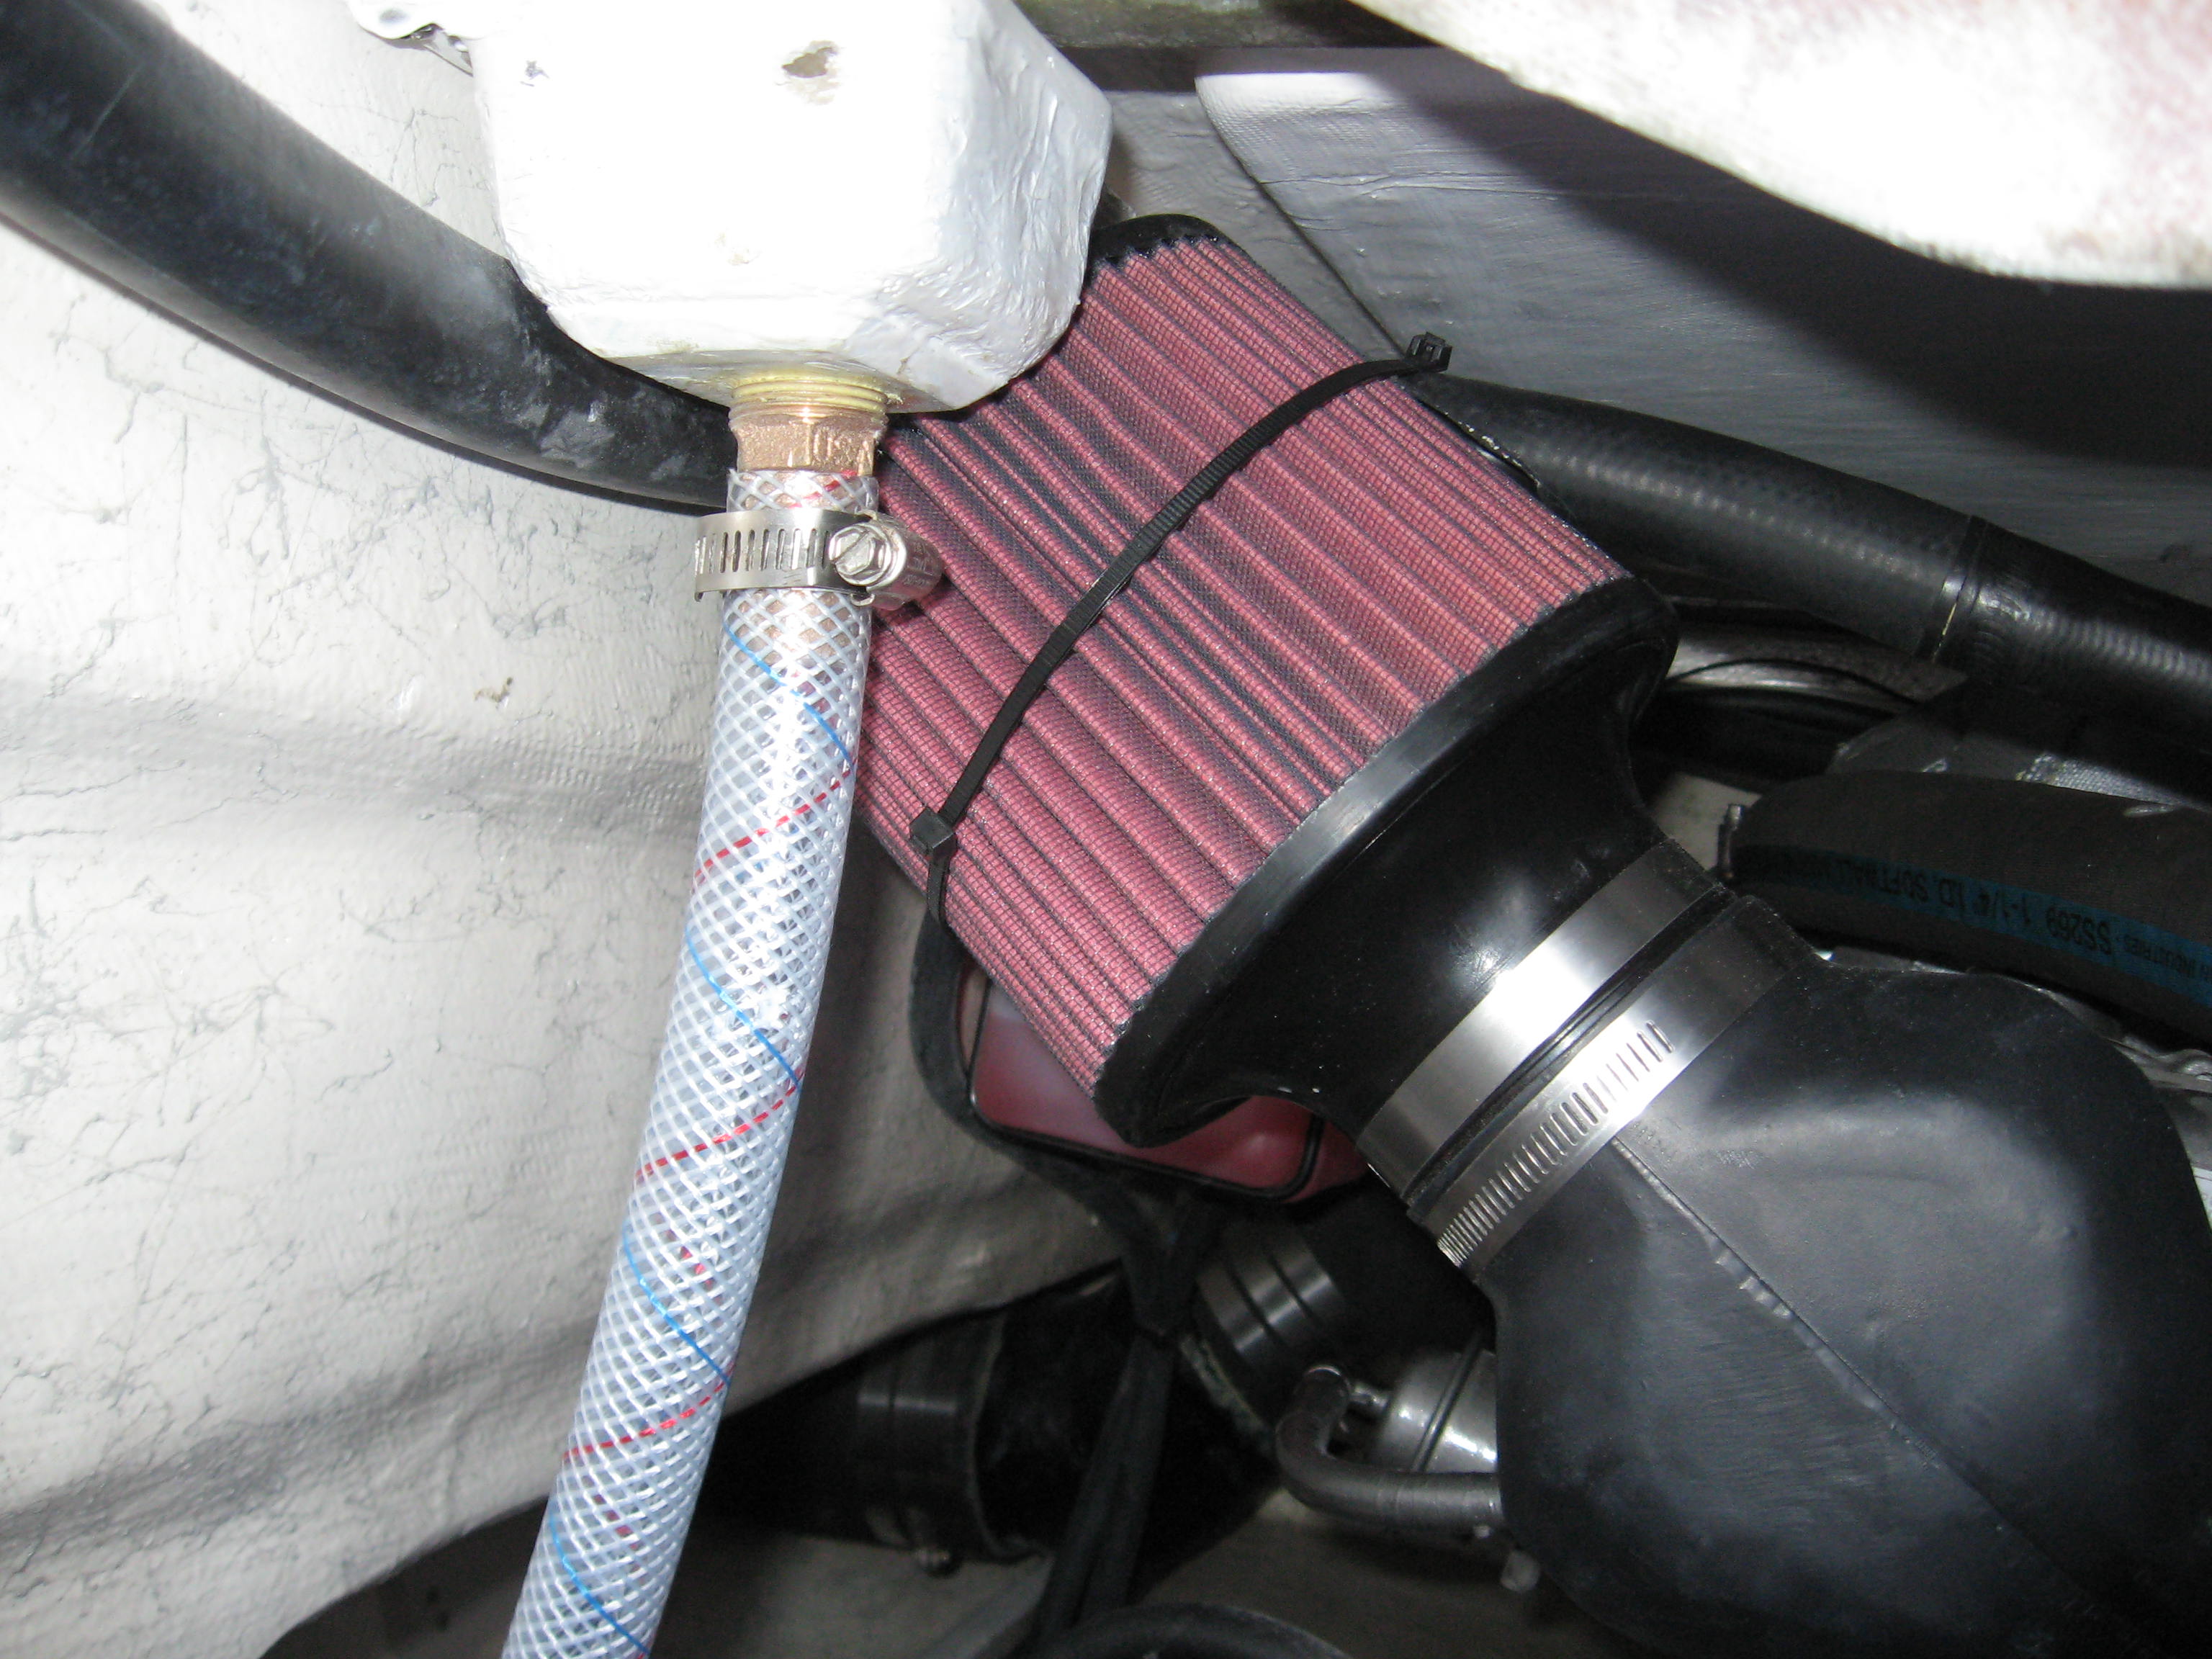
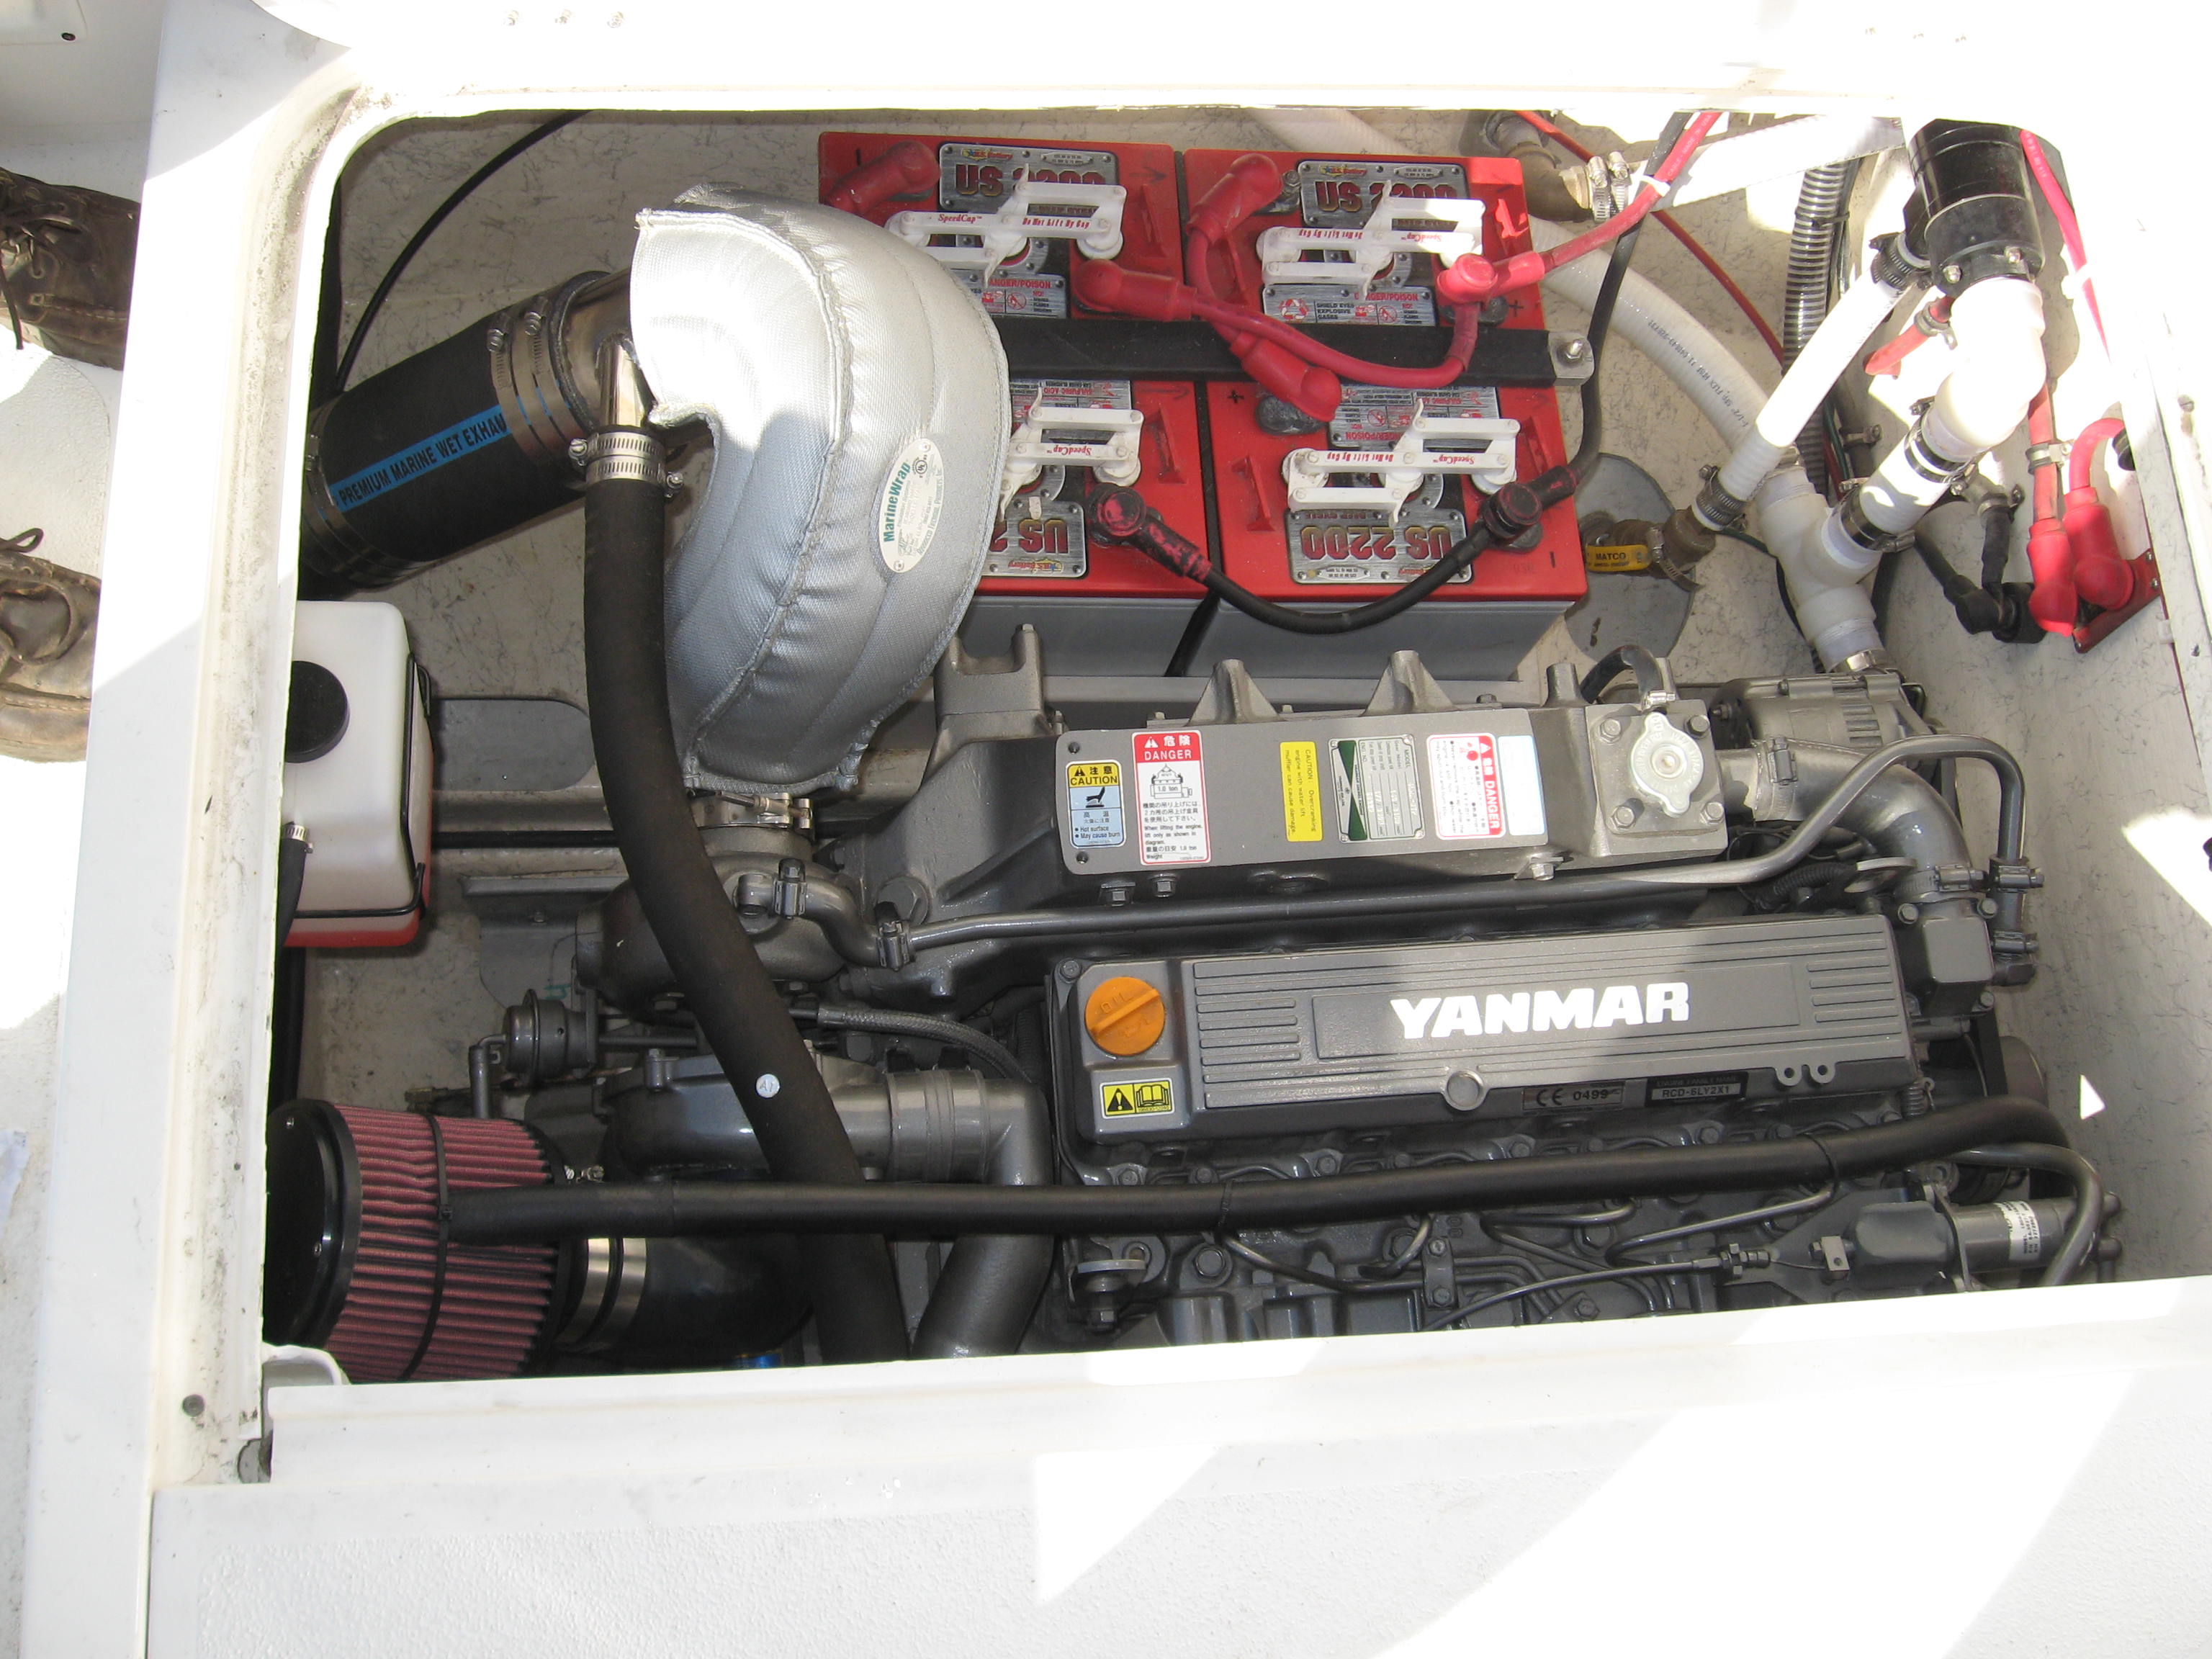
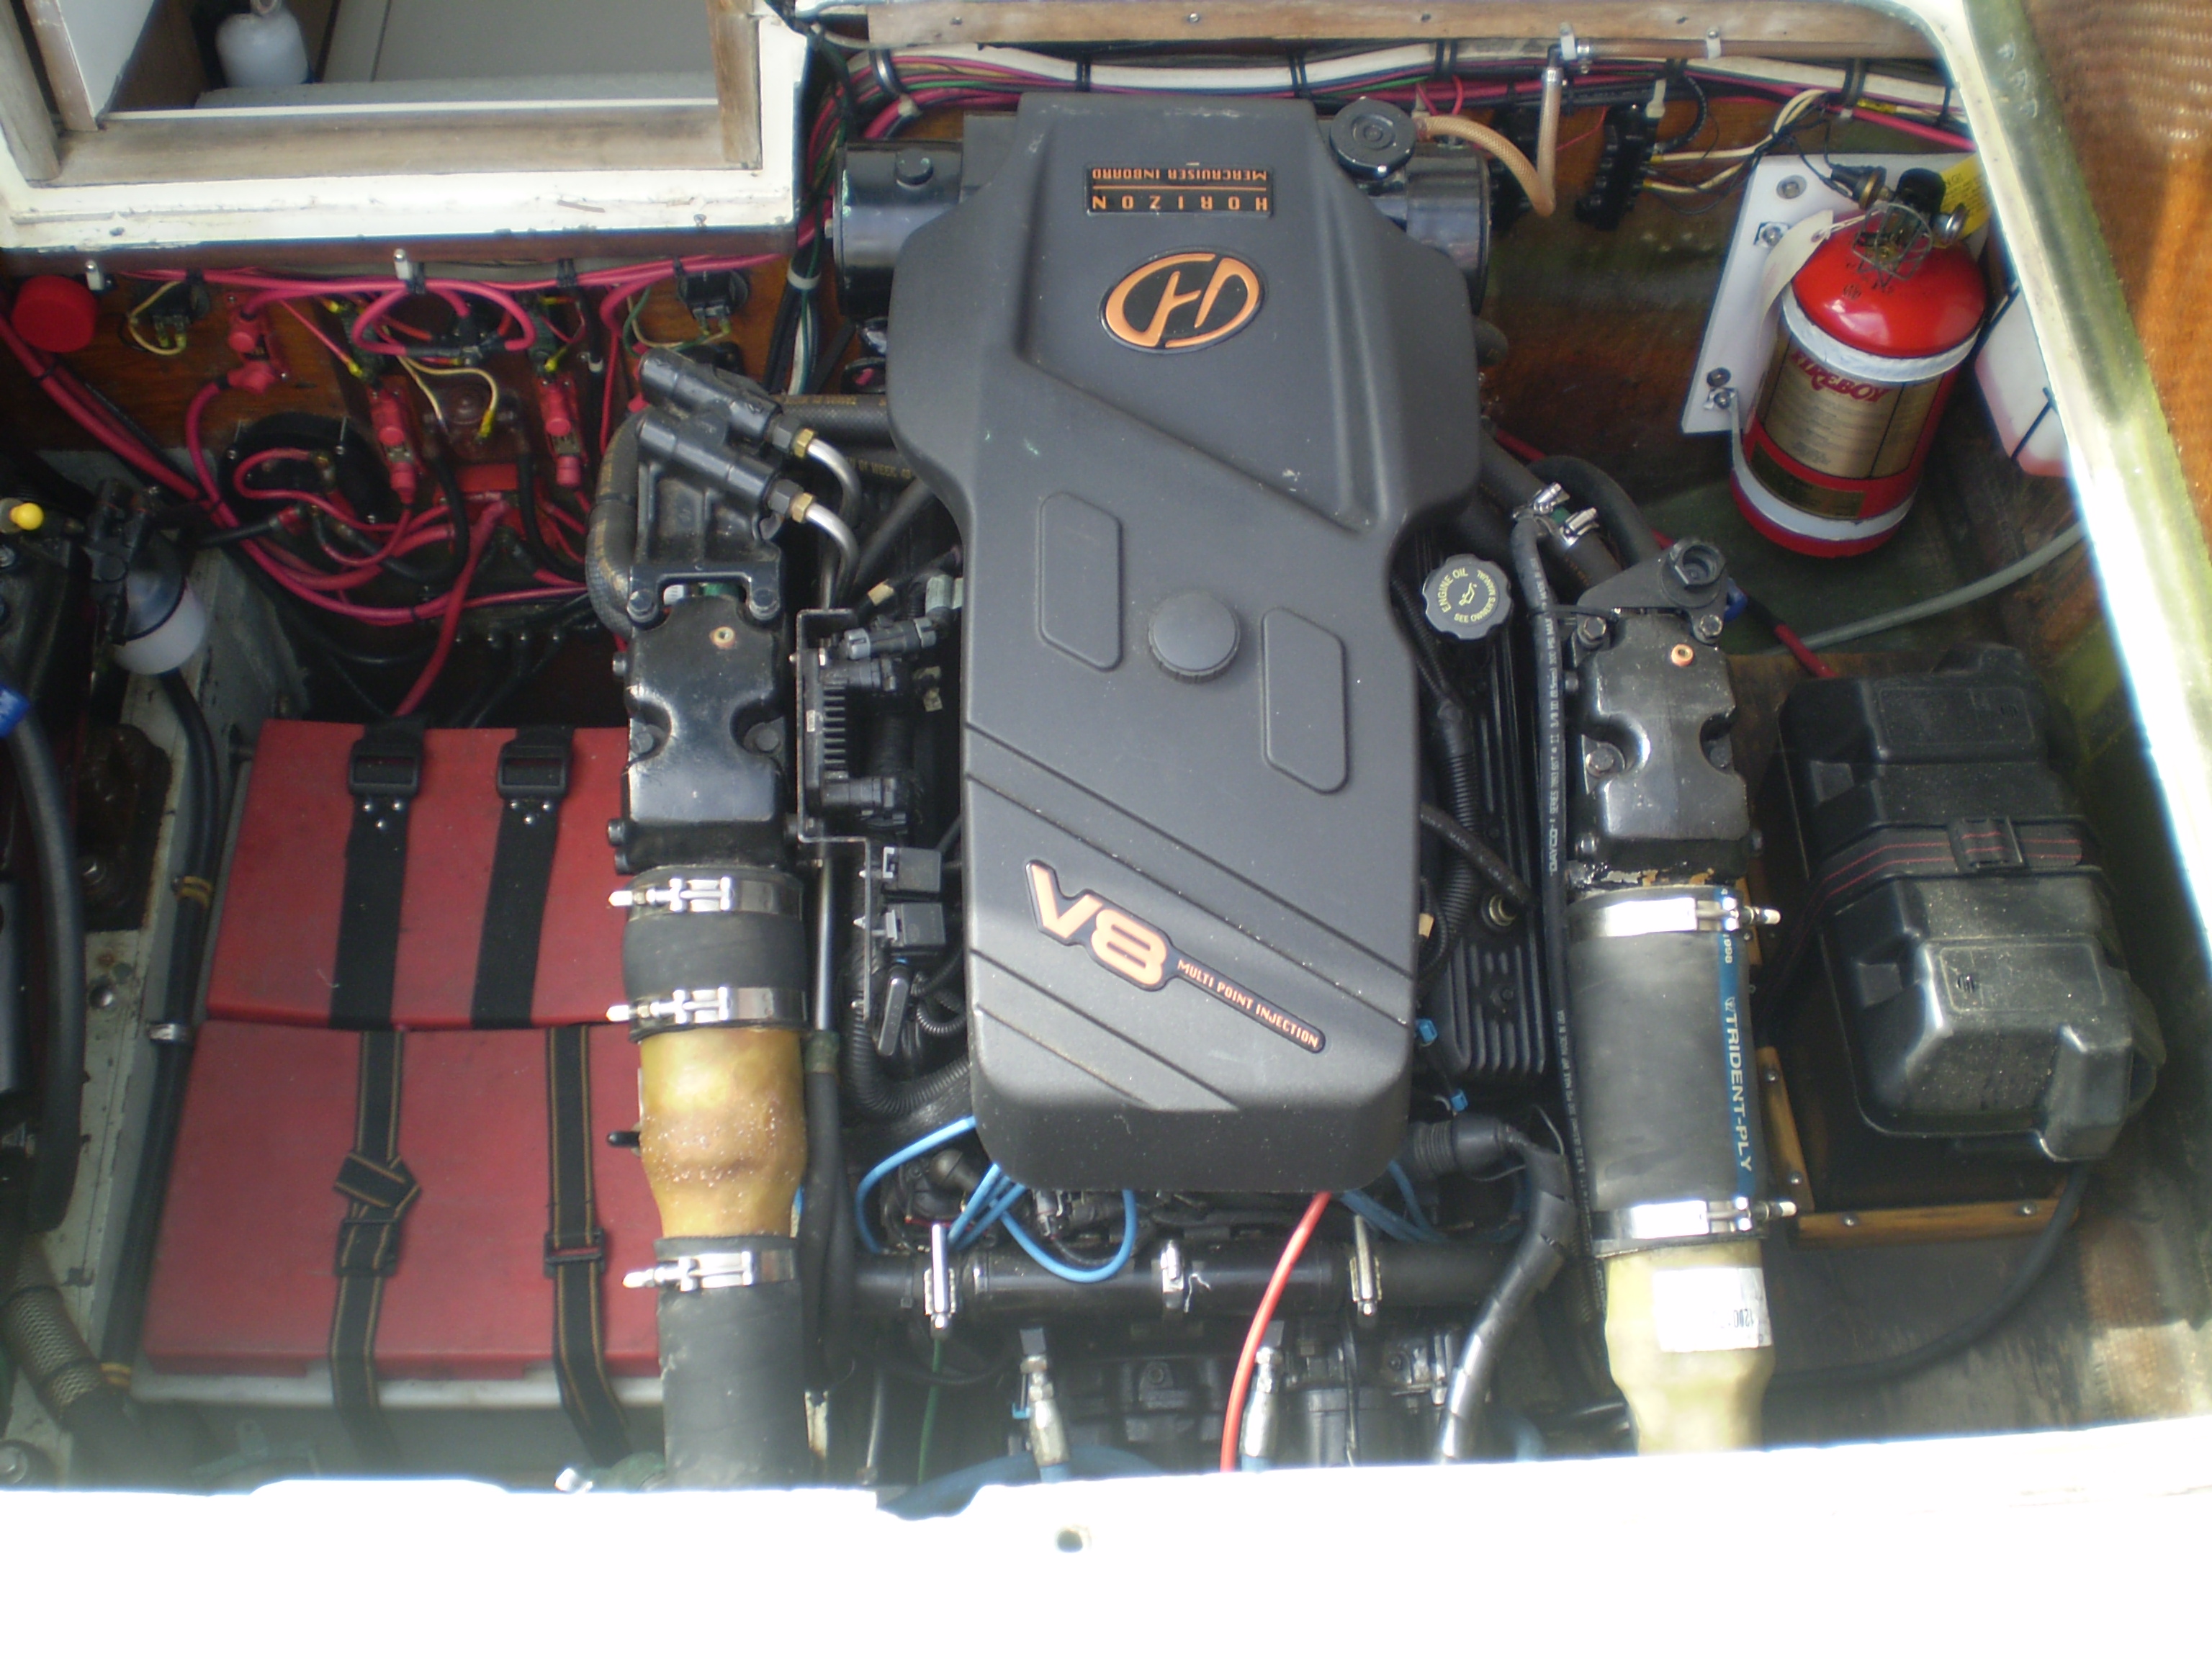
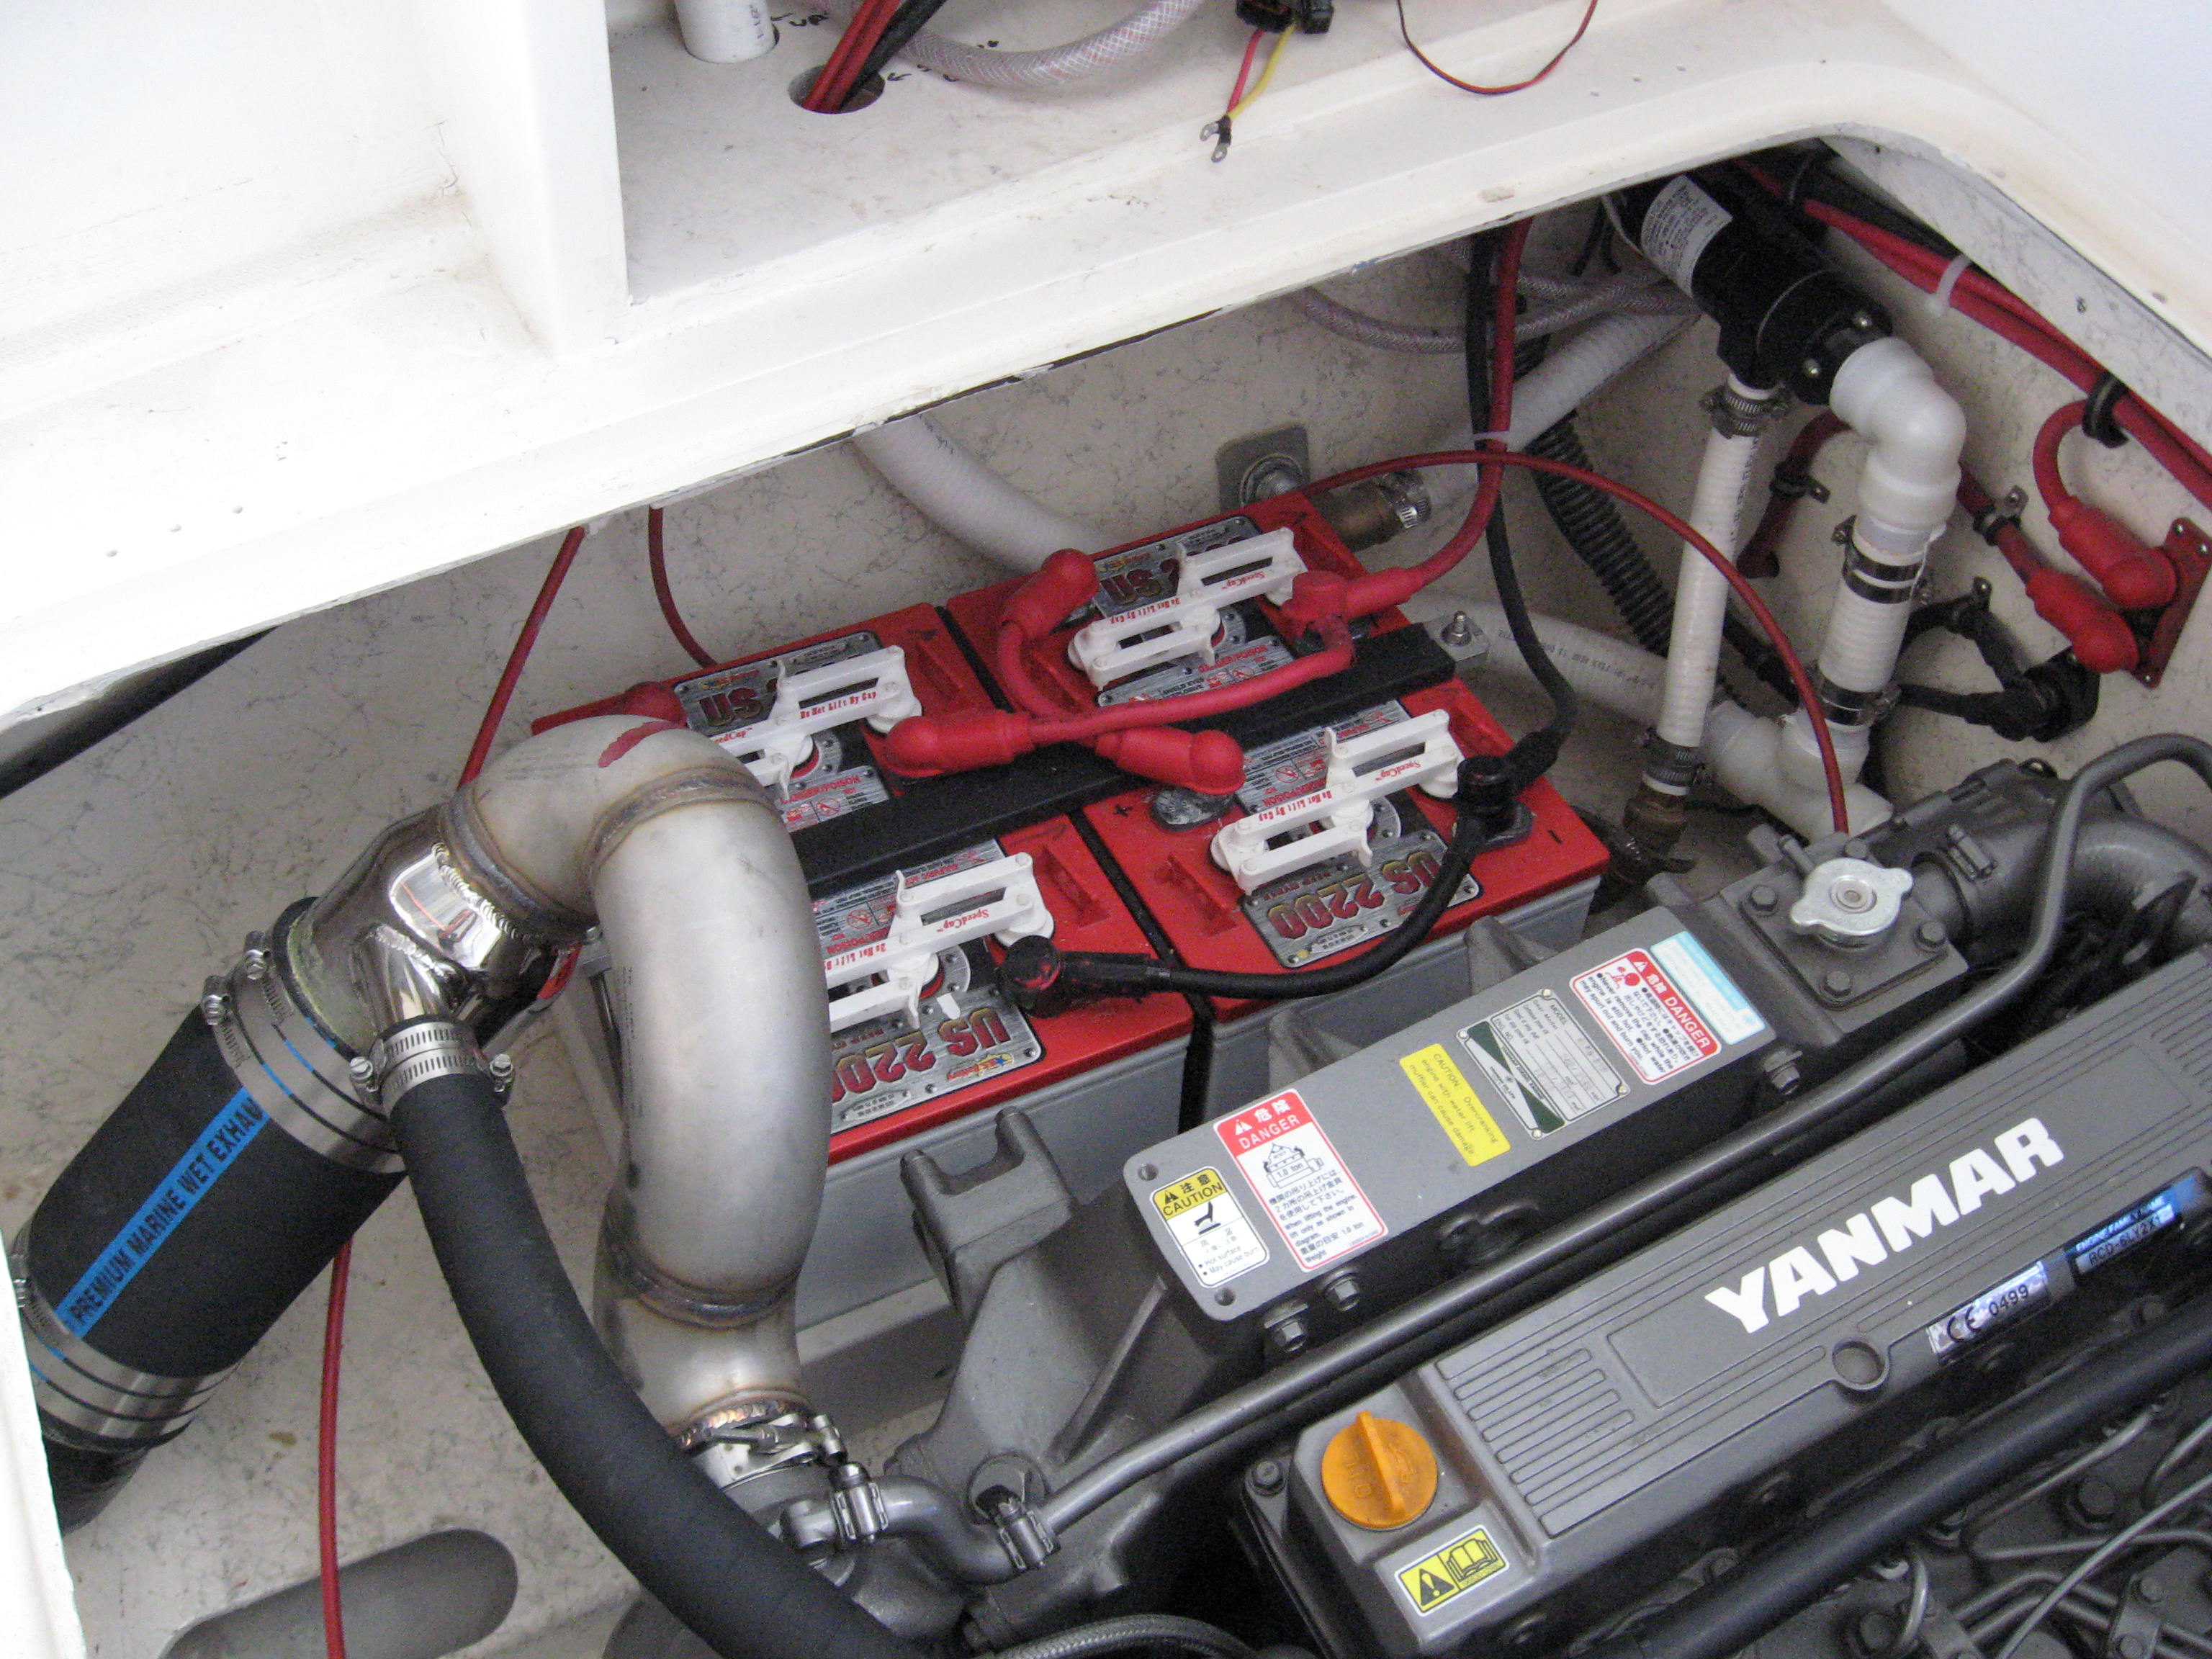
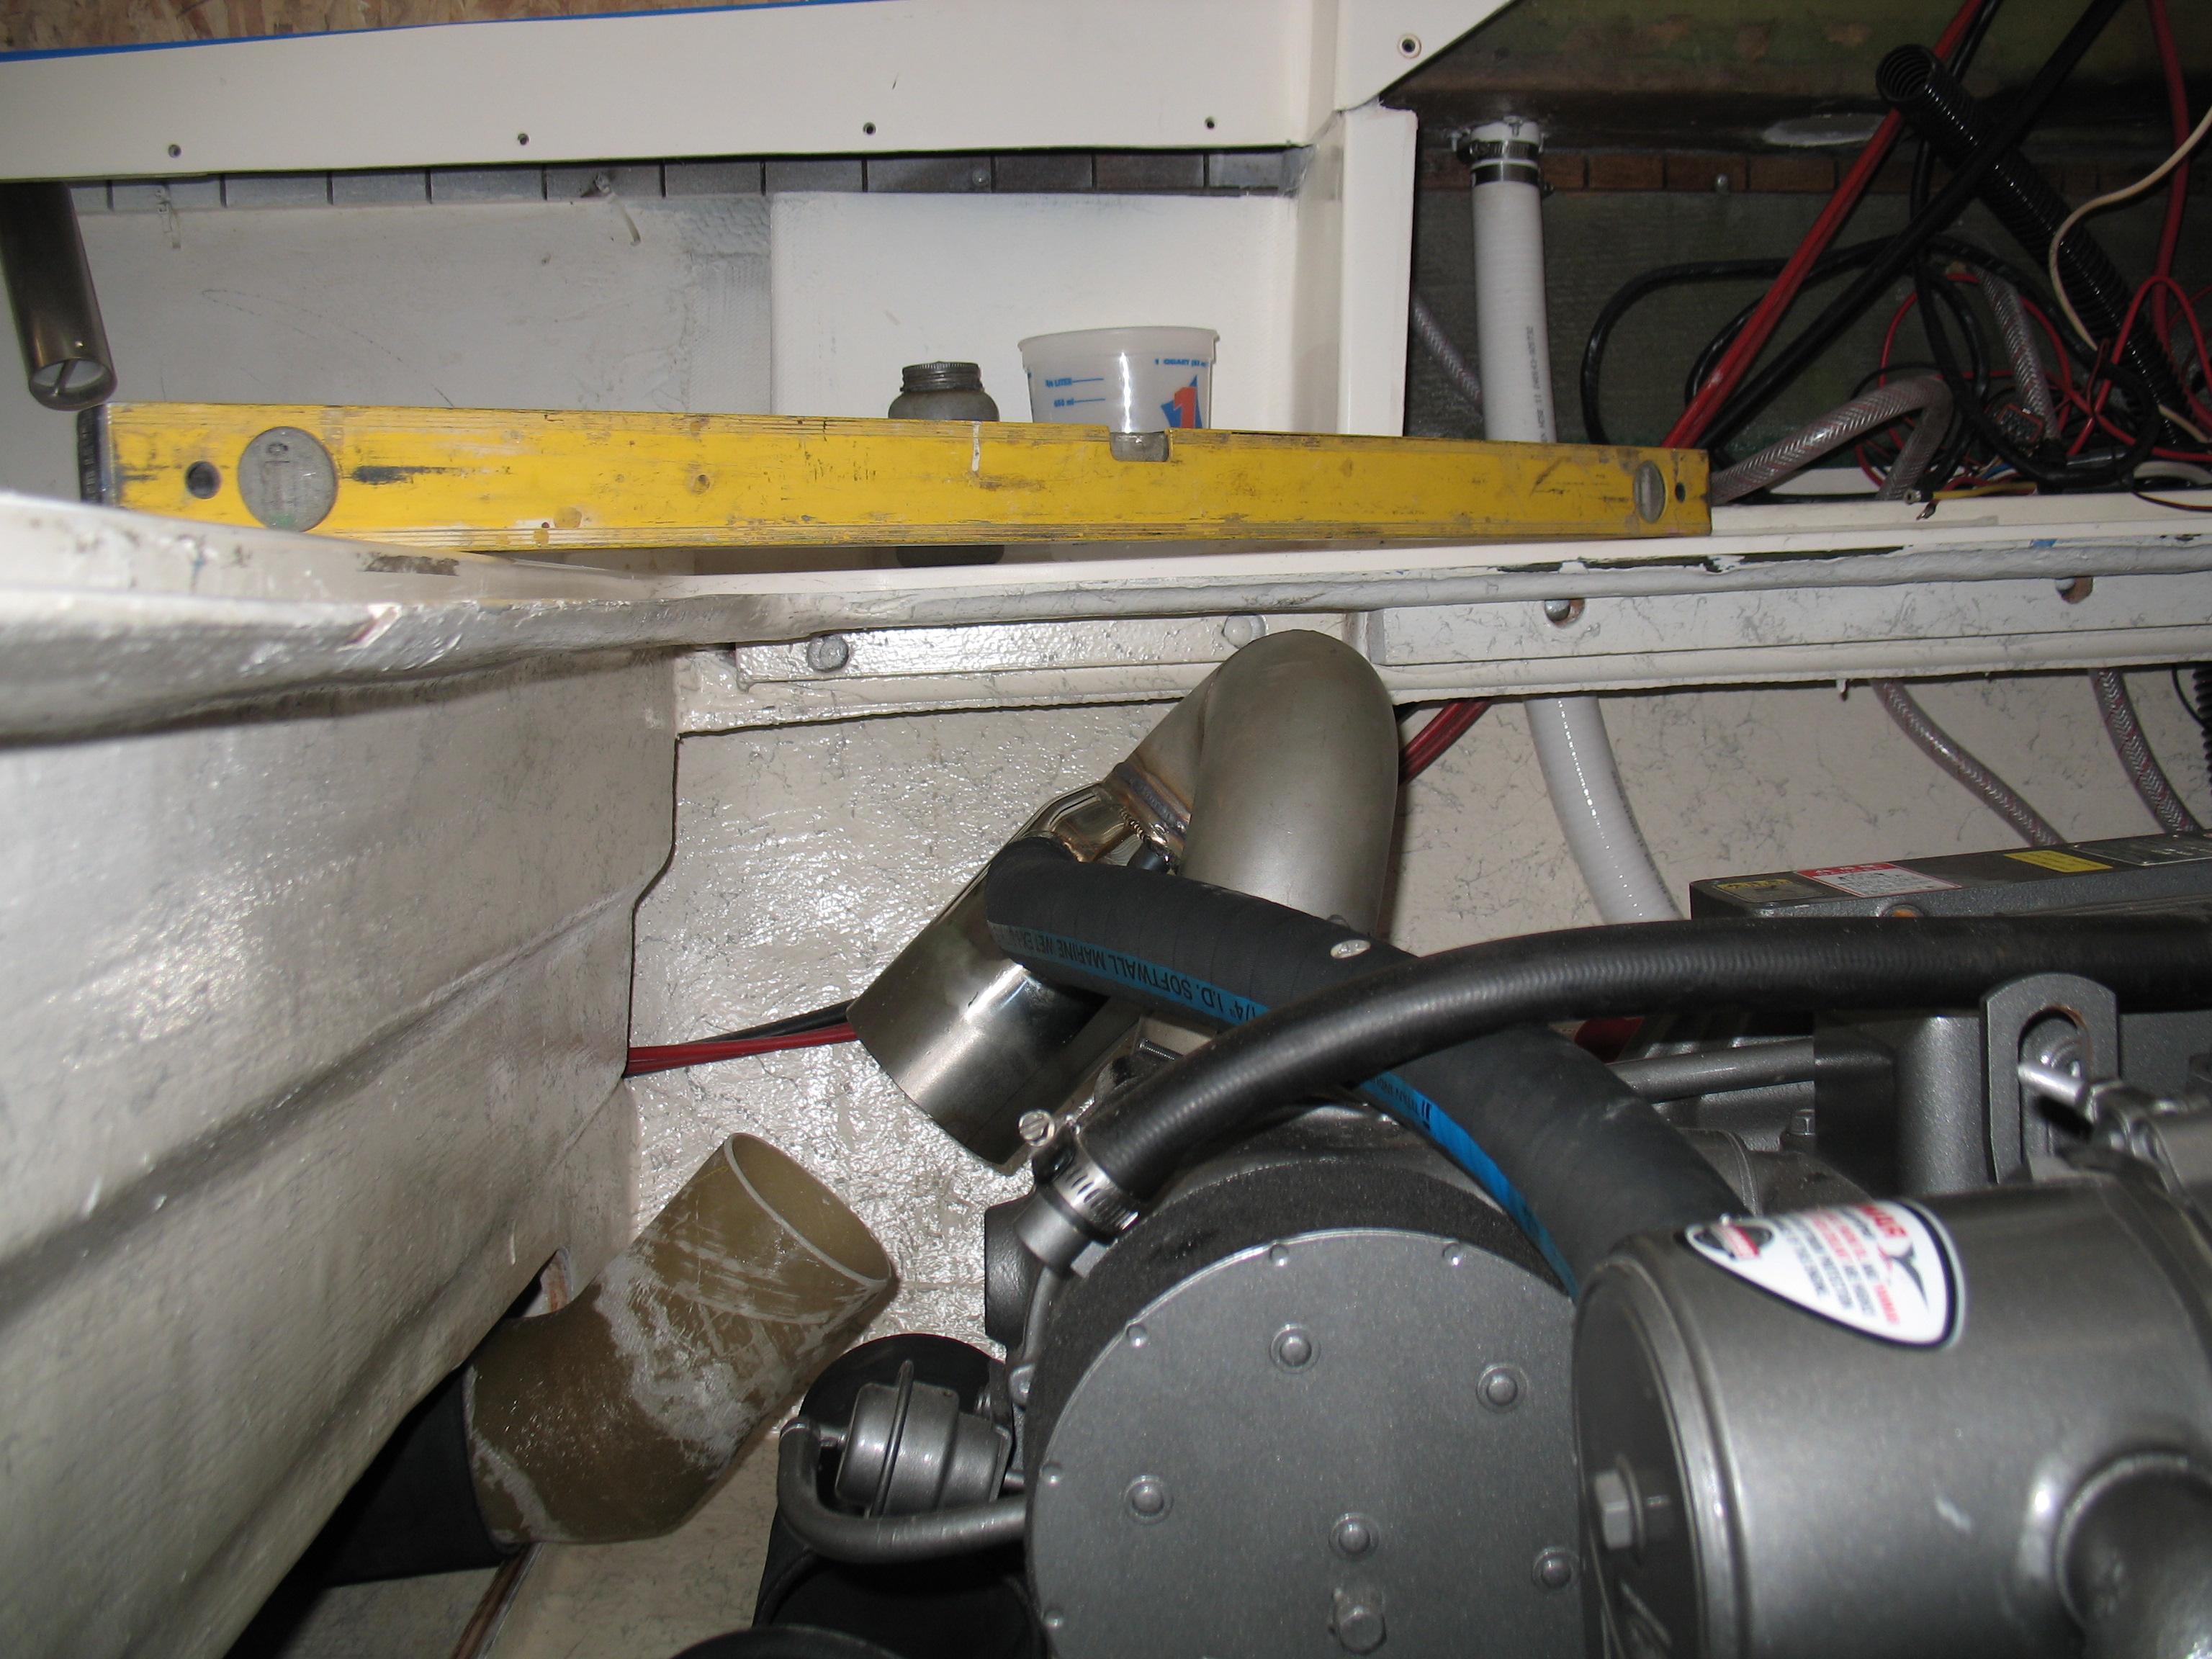
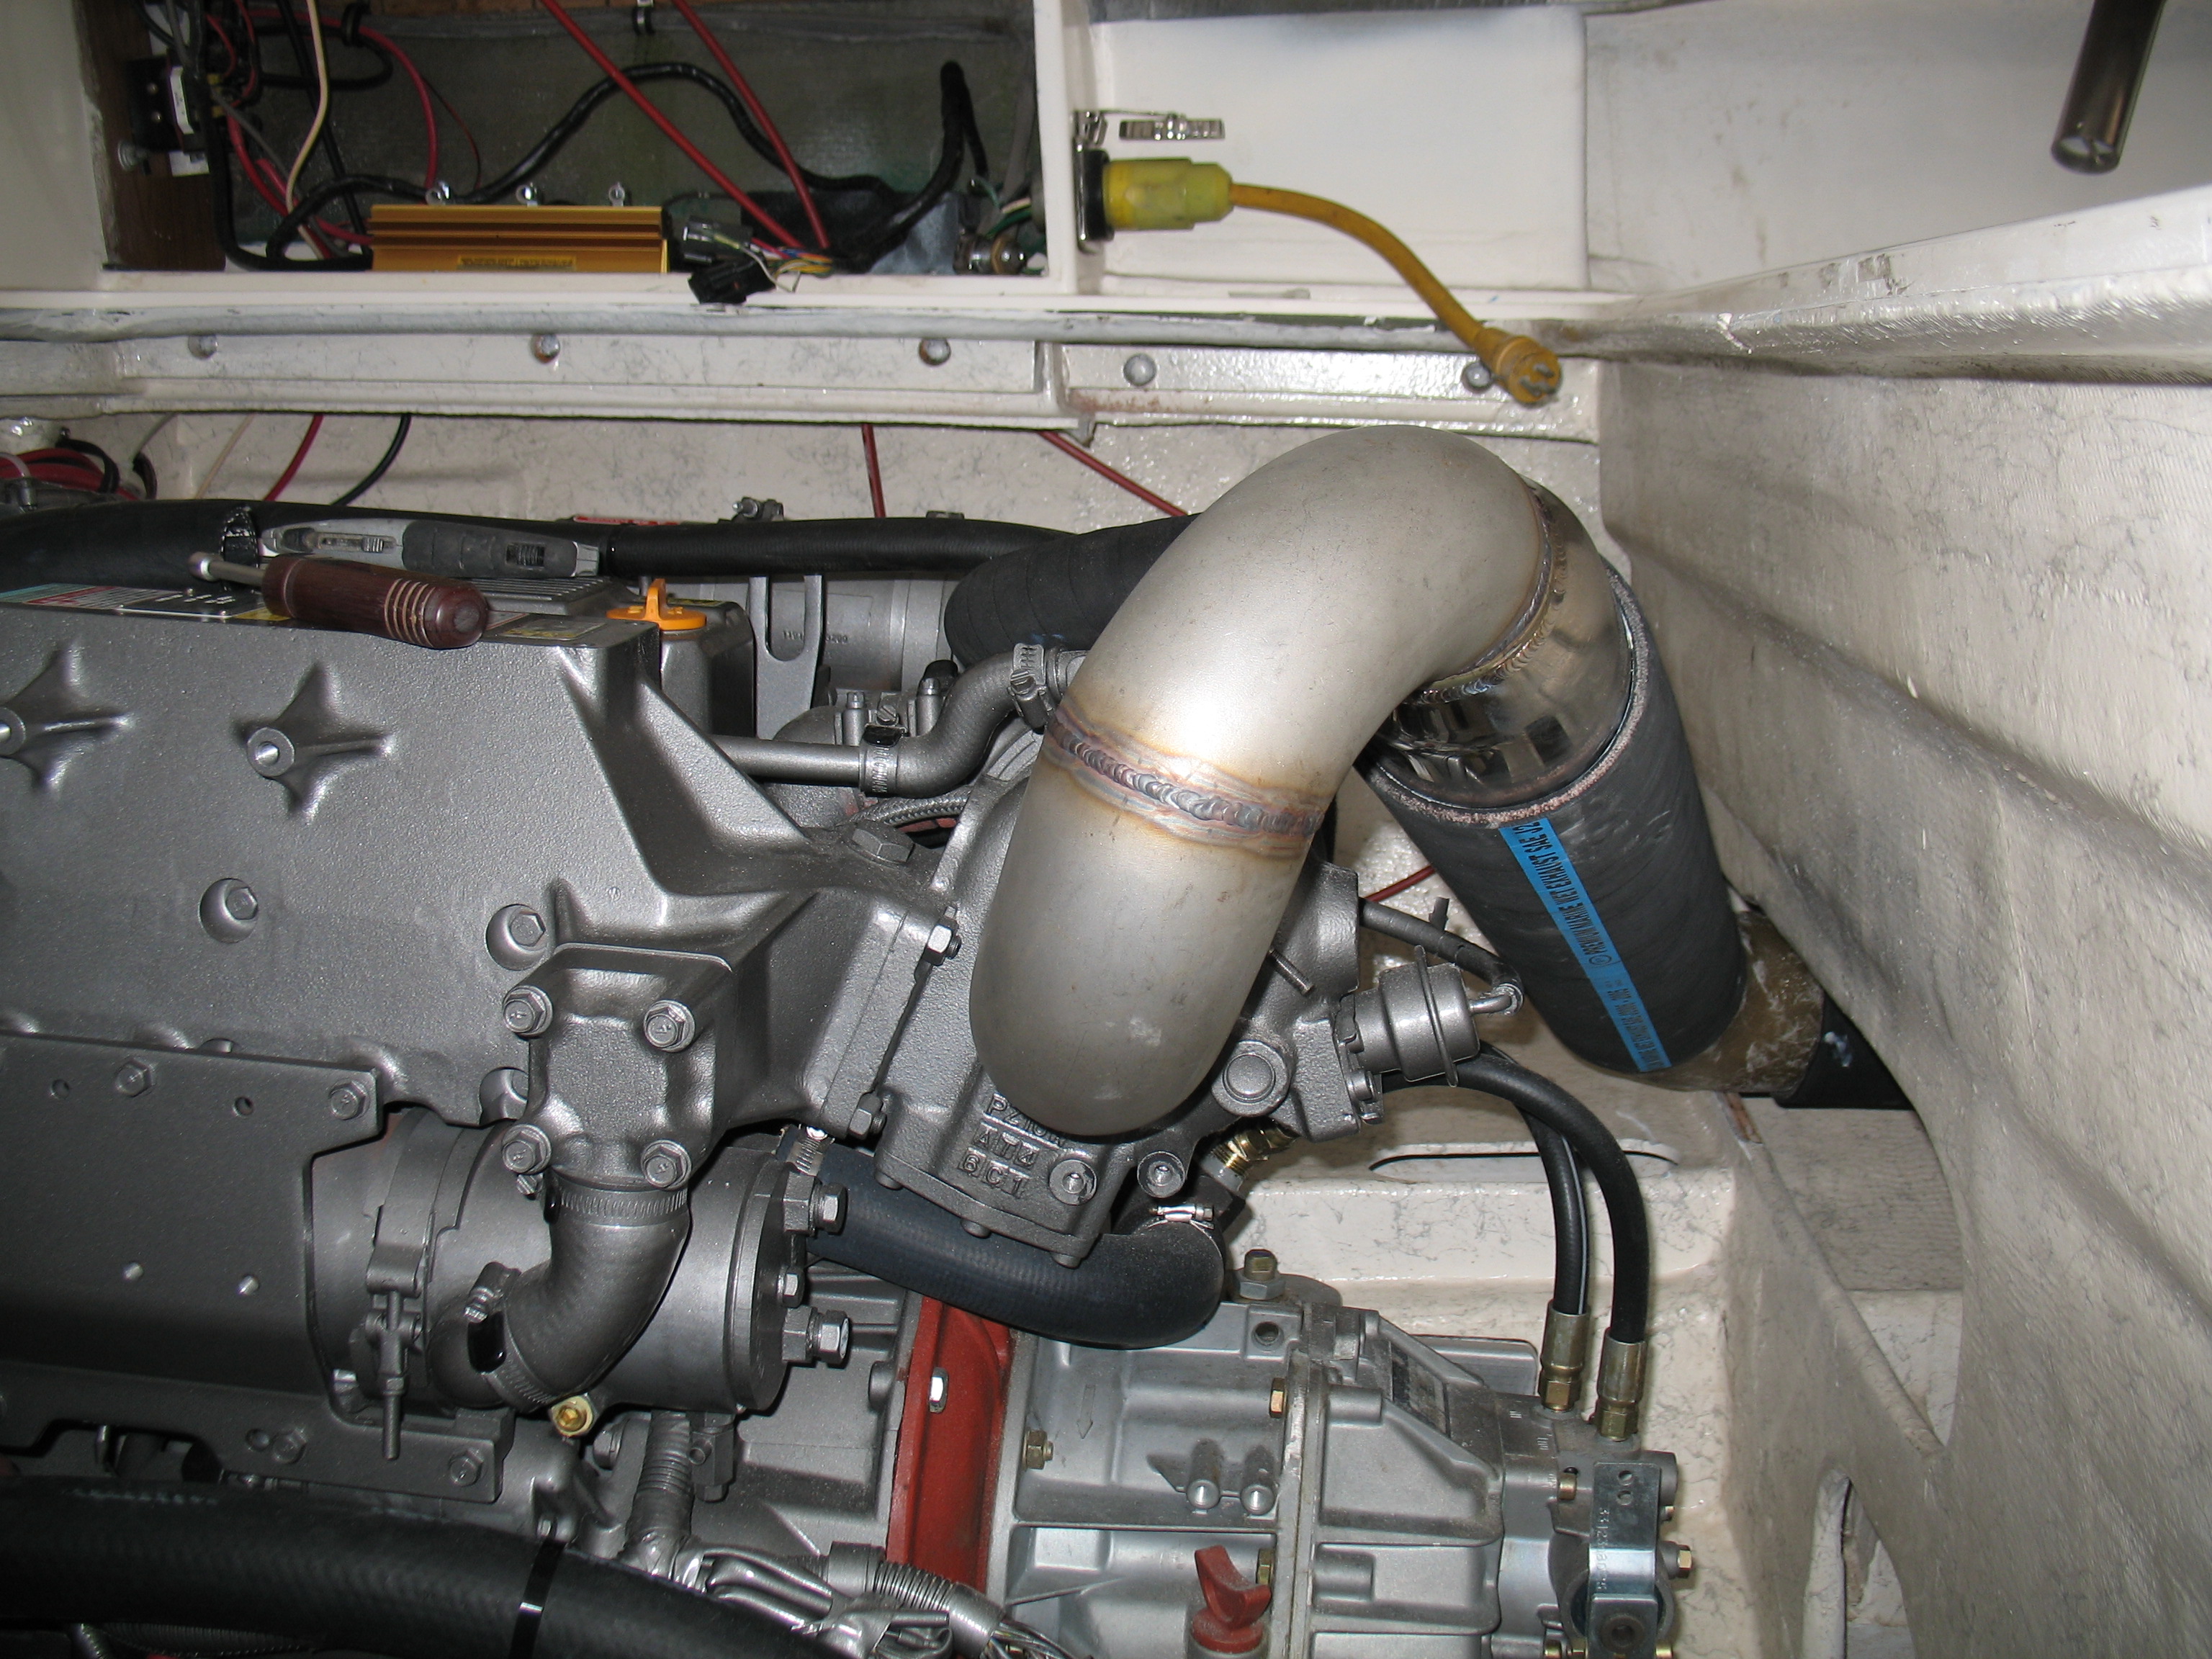
The engines were now lifted in place, 100% aligned, and all the stringer brackets were marked and drilled. The engines were now in place and it was EXHAUST time.


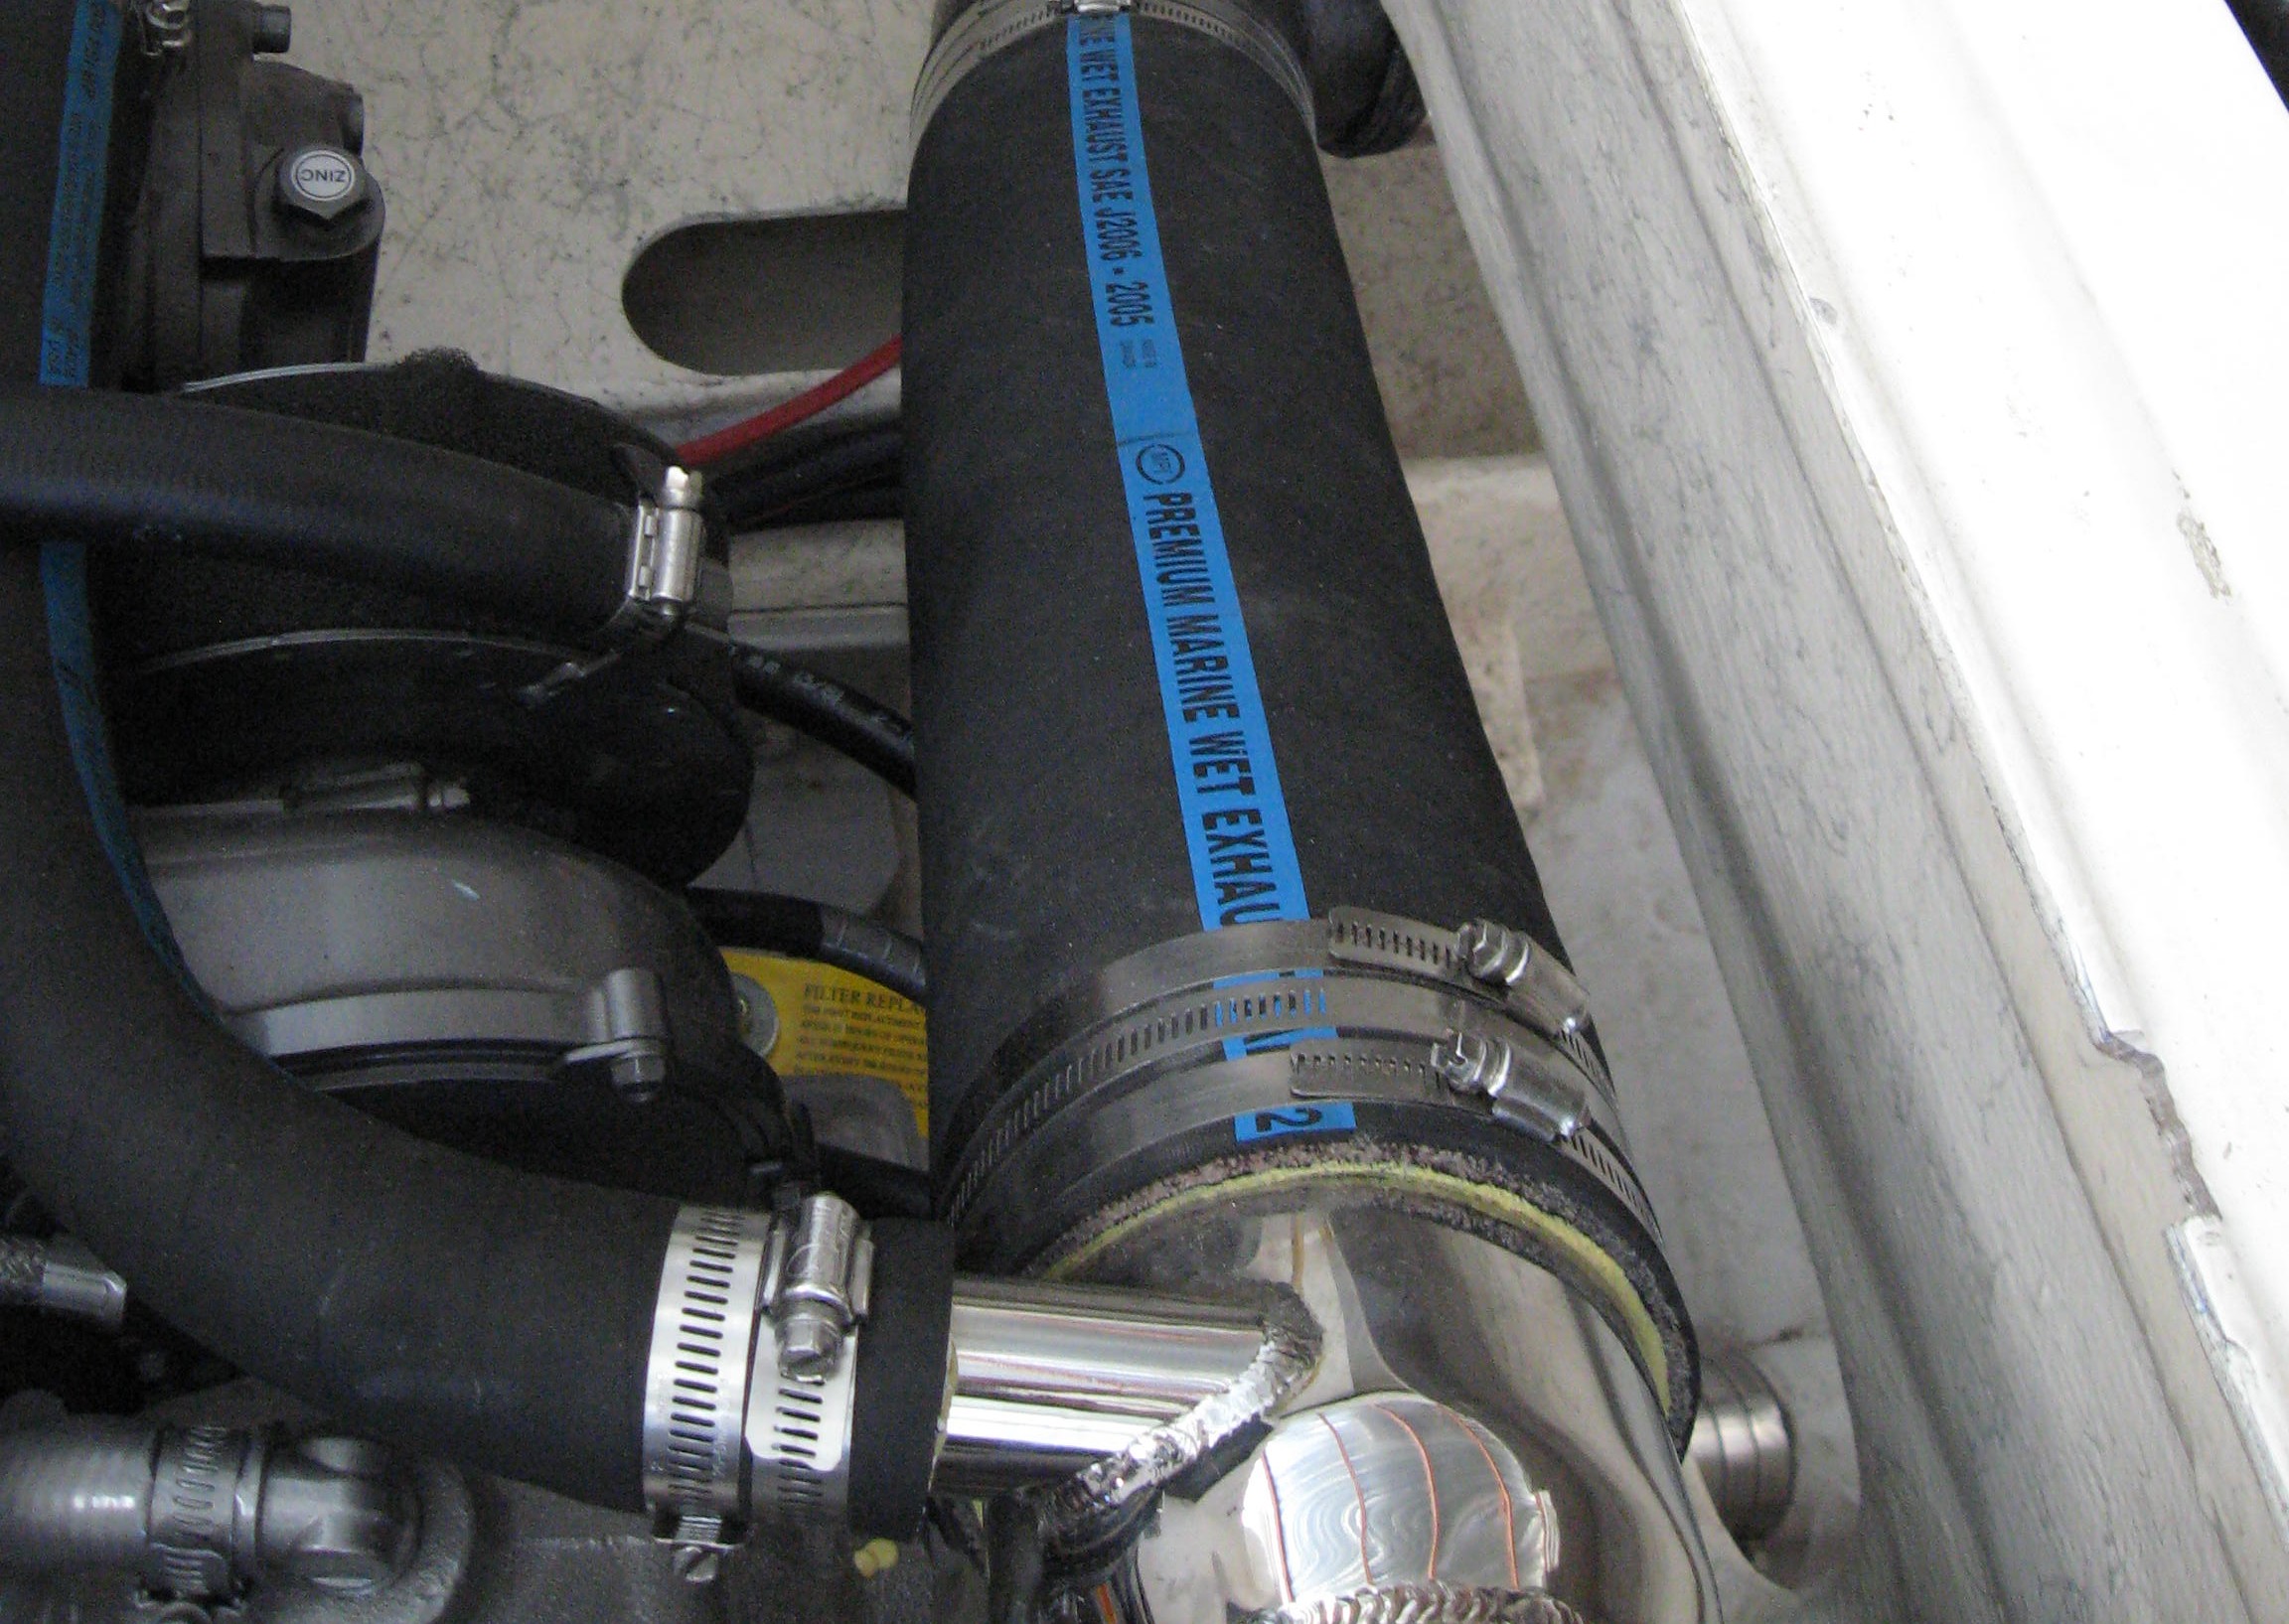
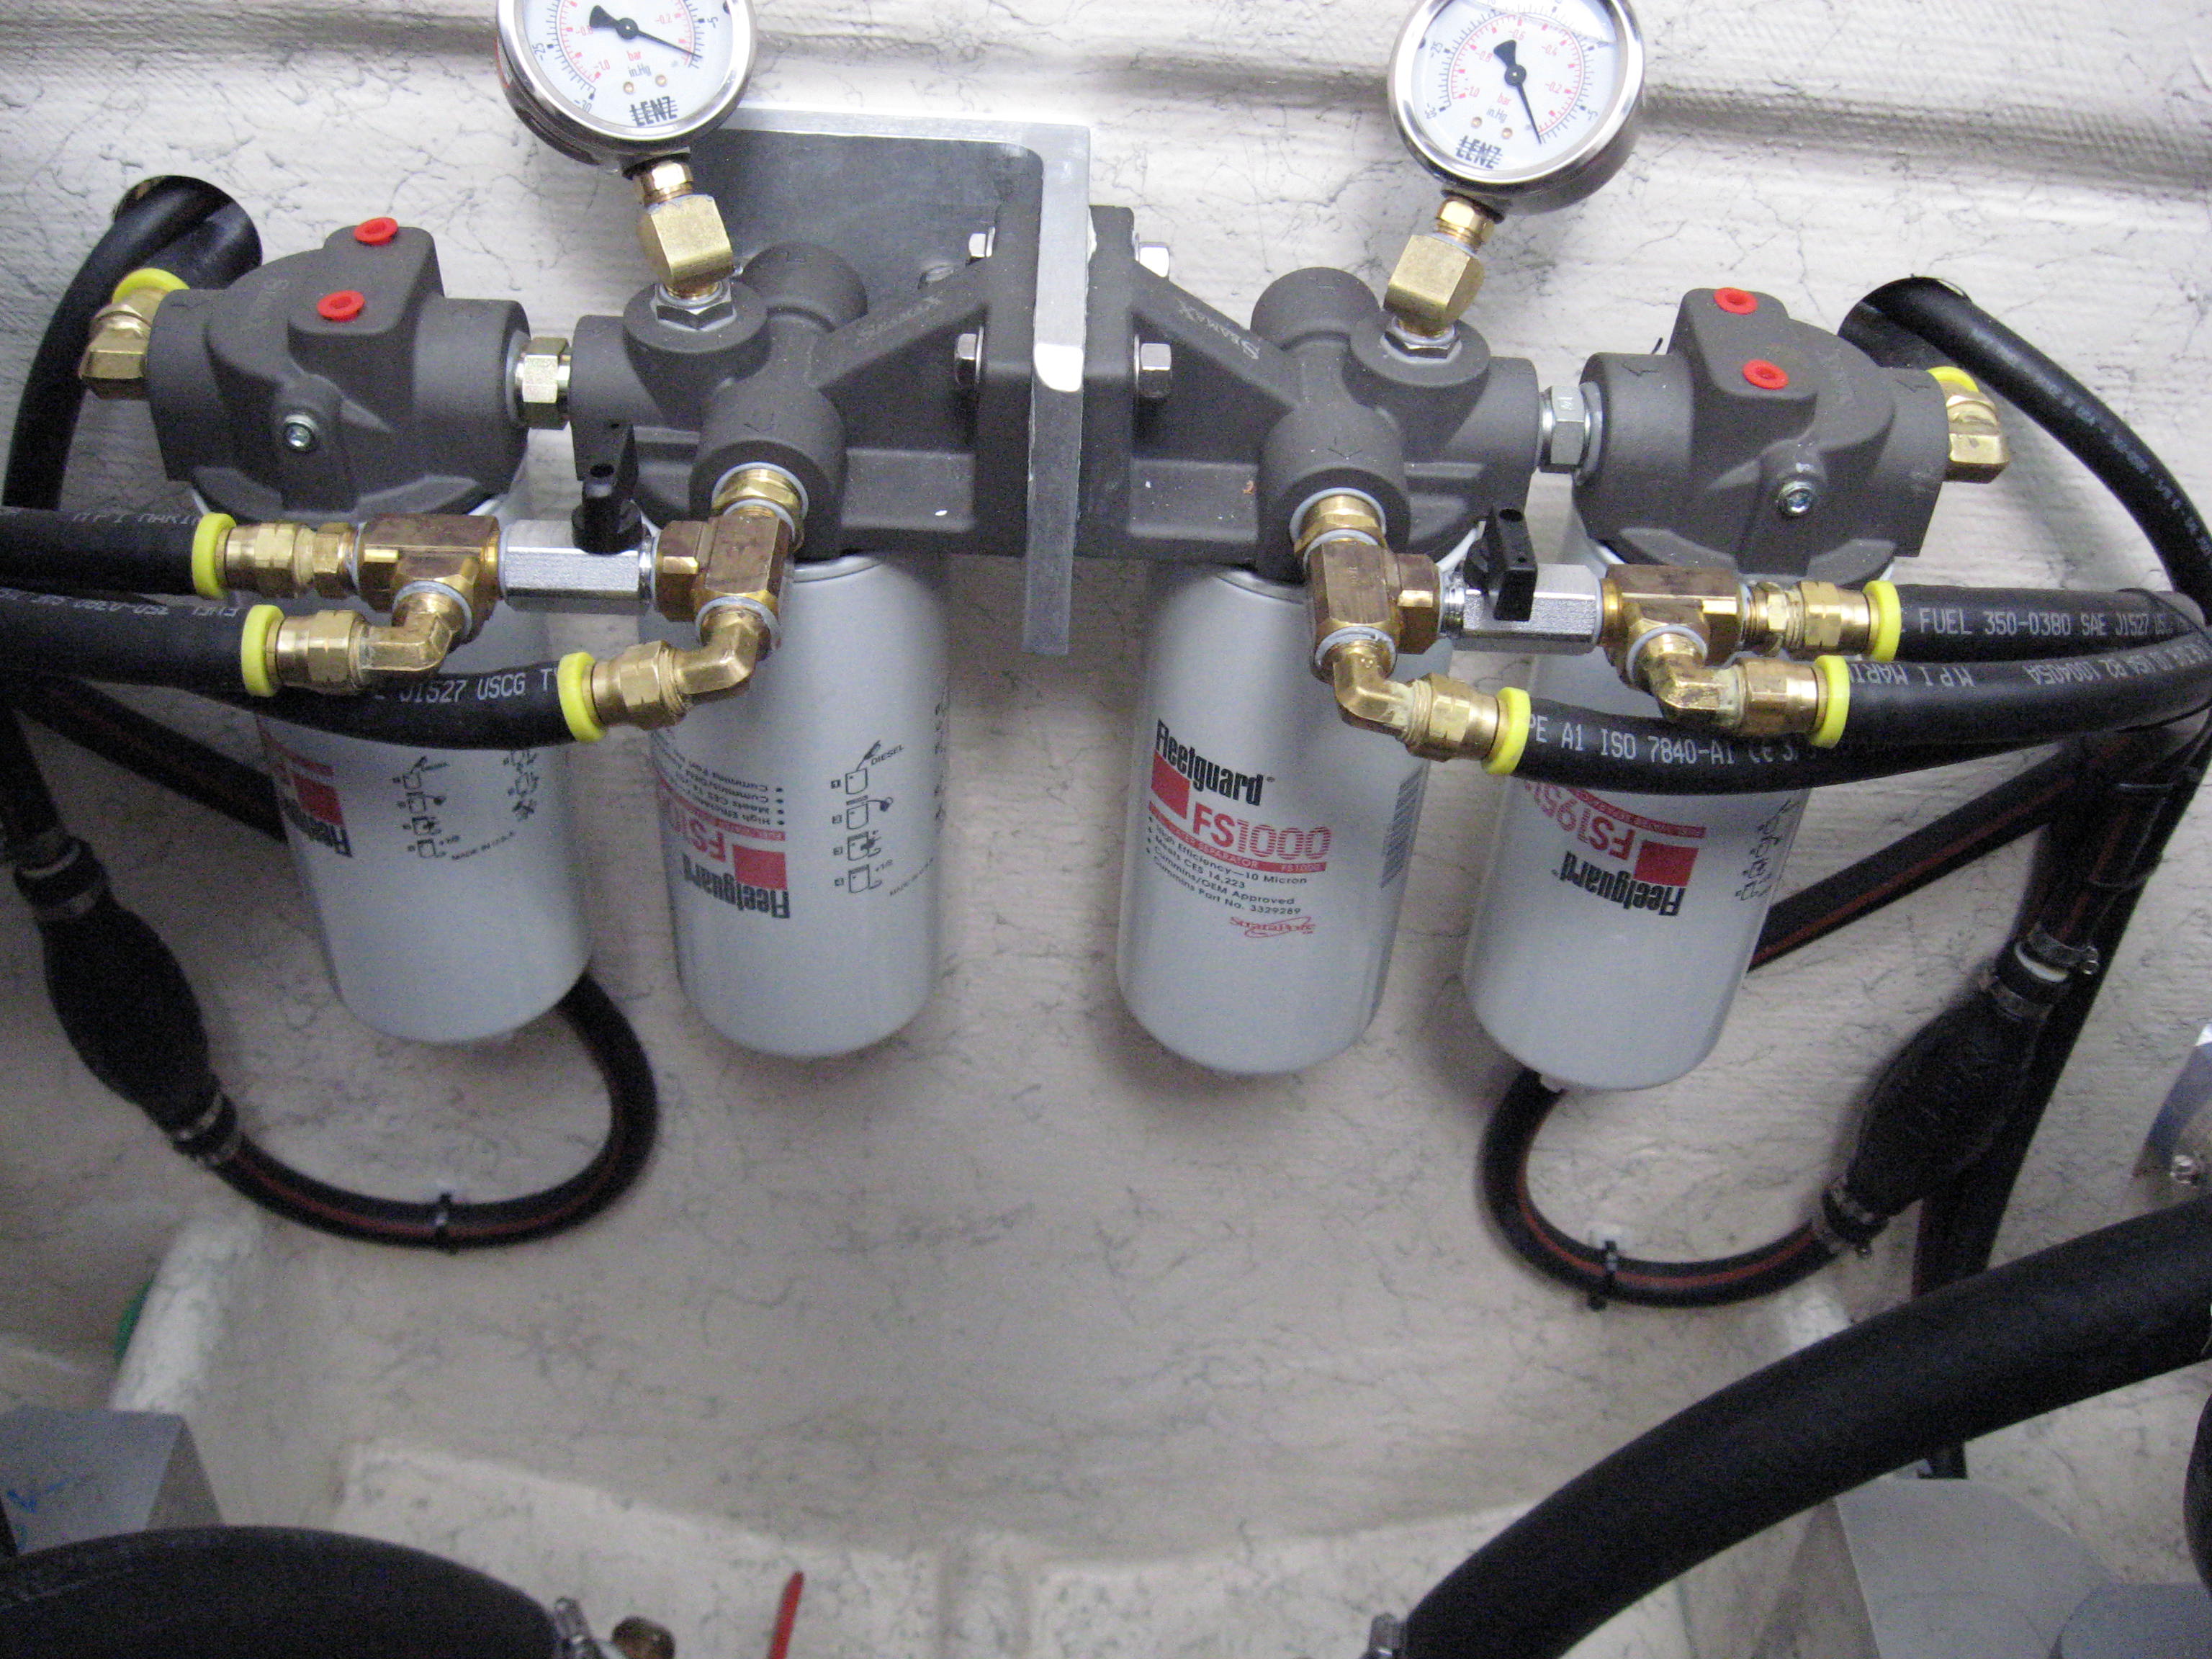
I never felt the Yanmars were high enough in a Bertram to not use a custom riser for protection. Yes, I have been guilty of using the factory Yanmar elbow welded on top of a dry section in the past, but not this time. We went for custom dry risers and WET ends made our way. We cut no corners, made custom FRP elbows, modified 4.5″ Centek mufflers so they fit “perfect”, and my guys got thru this part of the project in about 1 week (I was in Florida watching IKE head west of us).

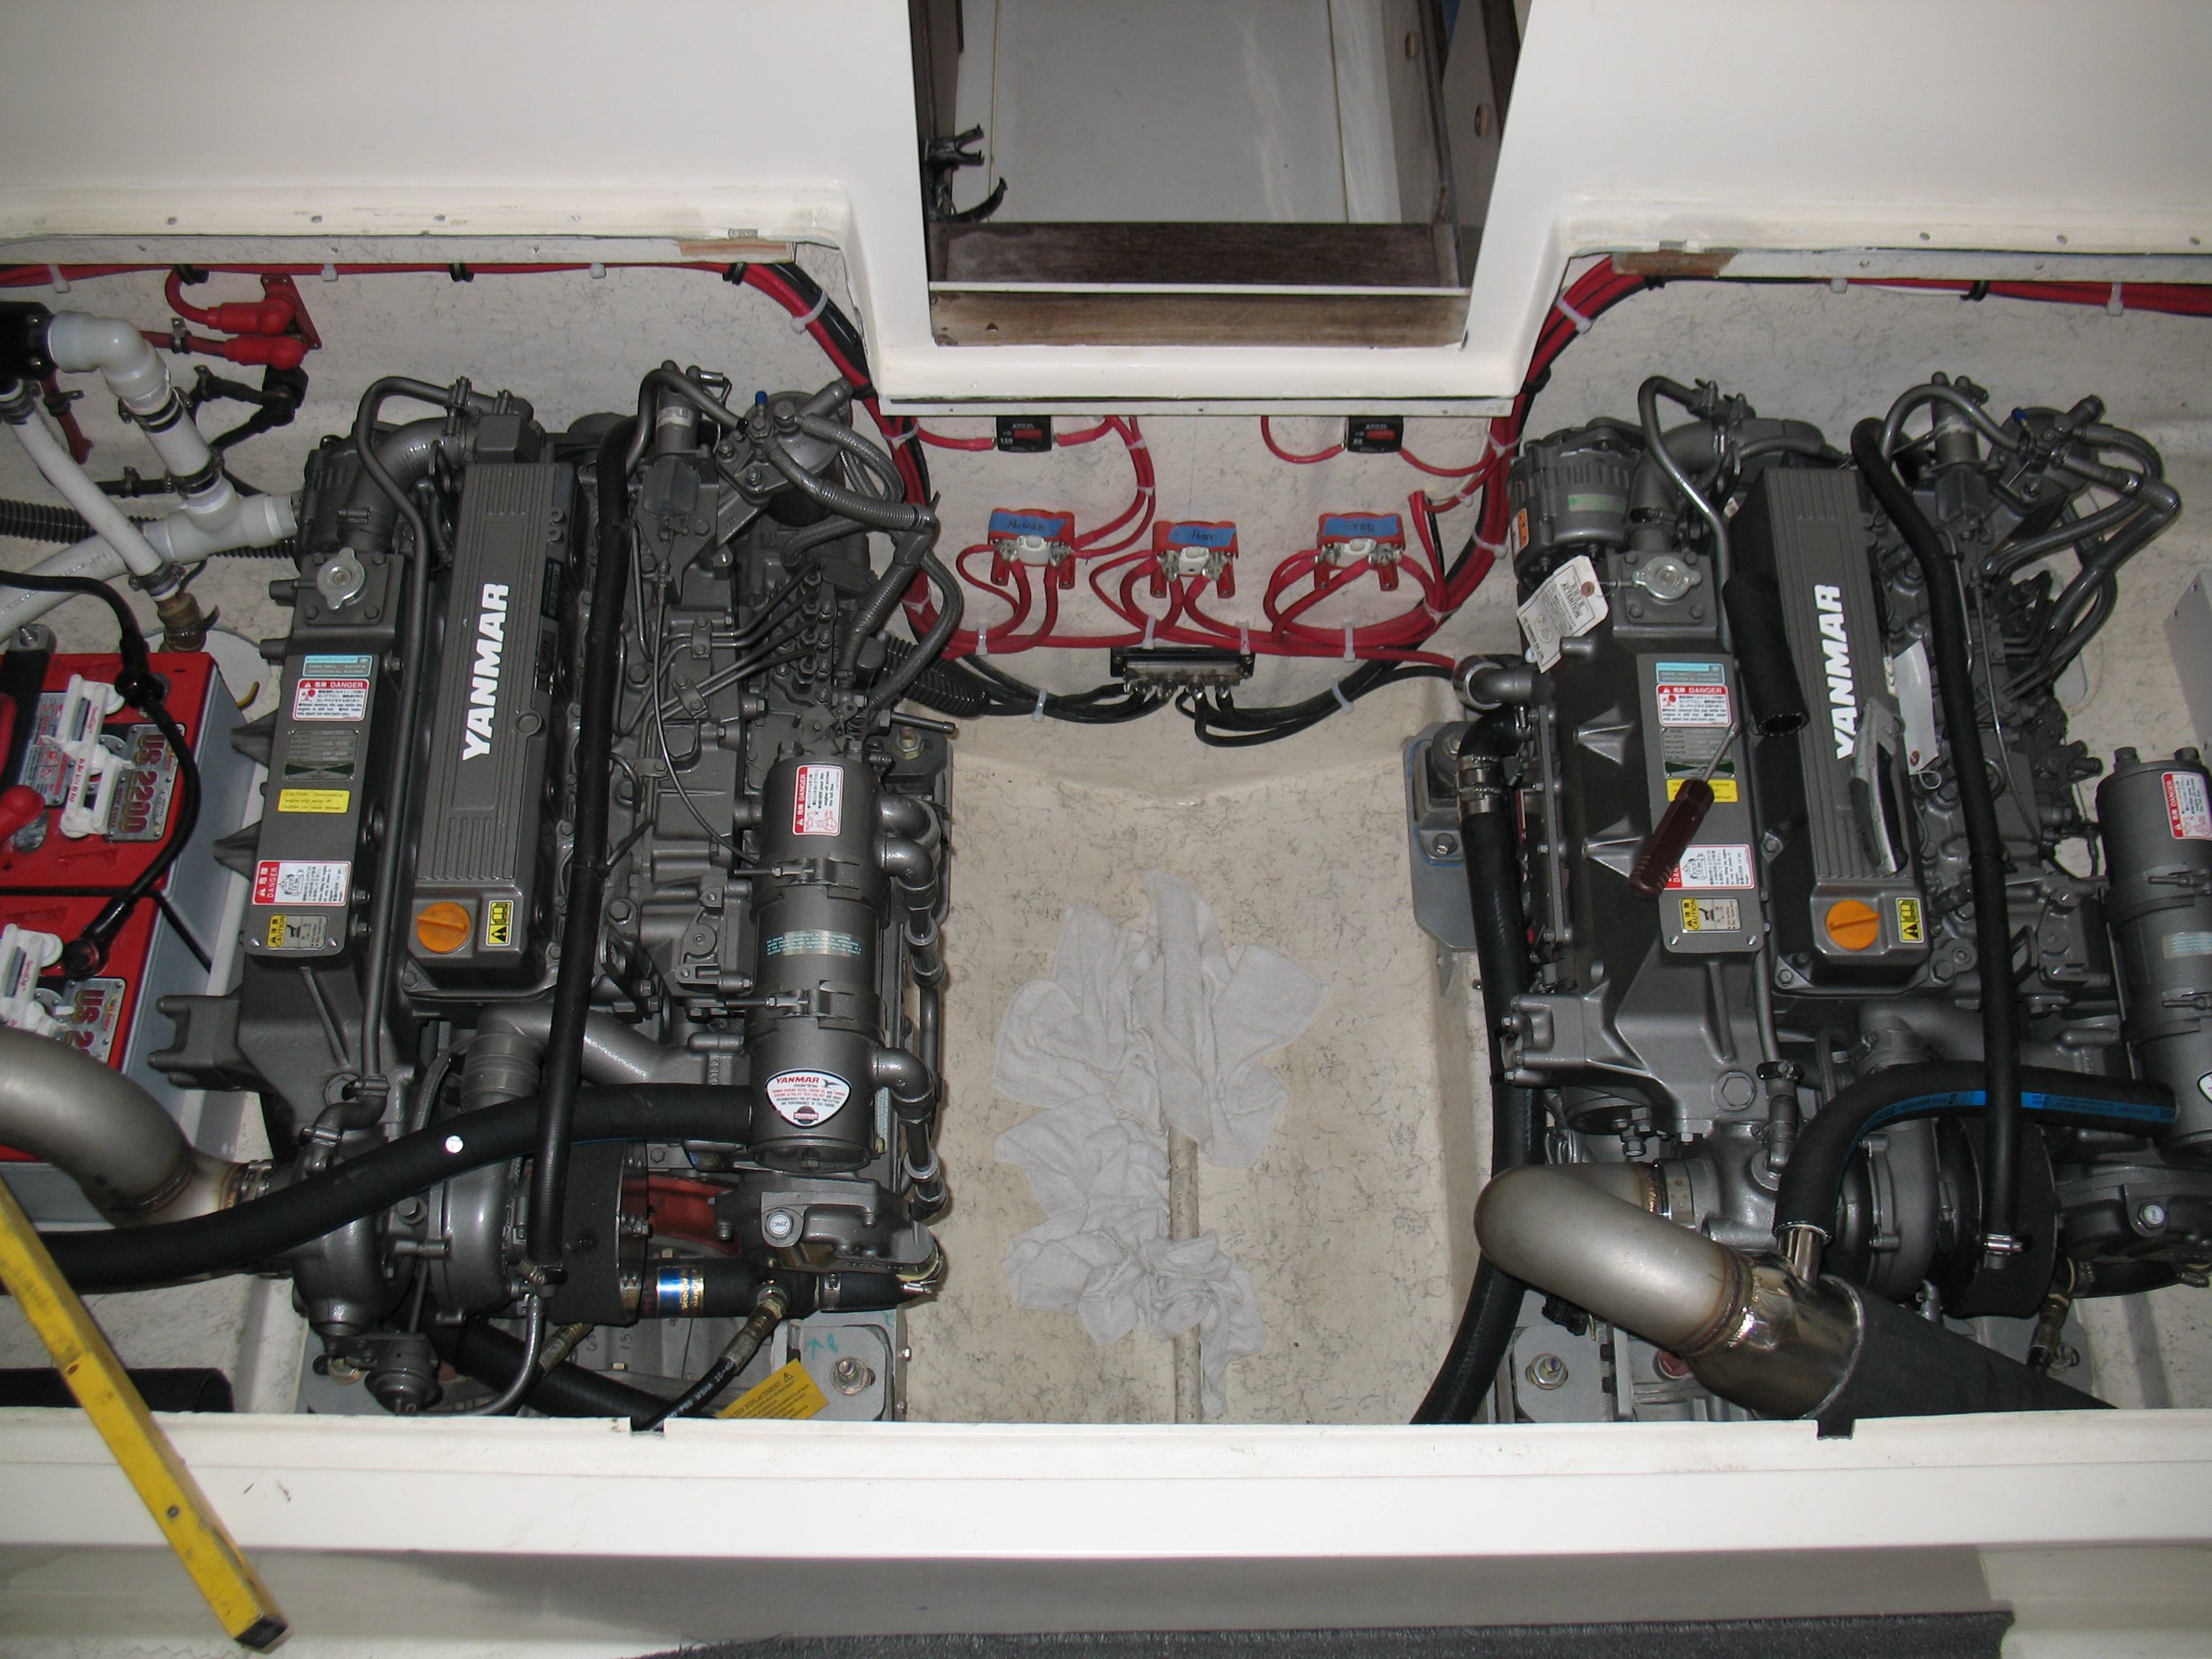
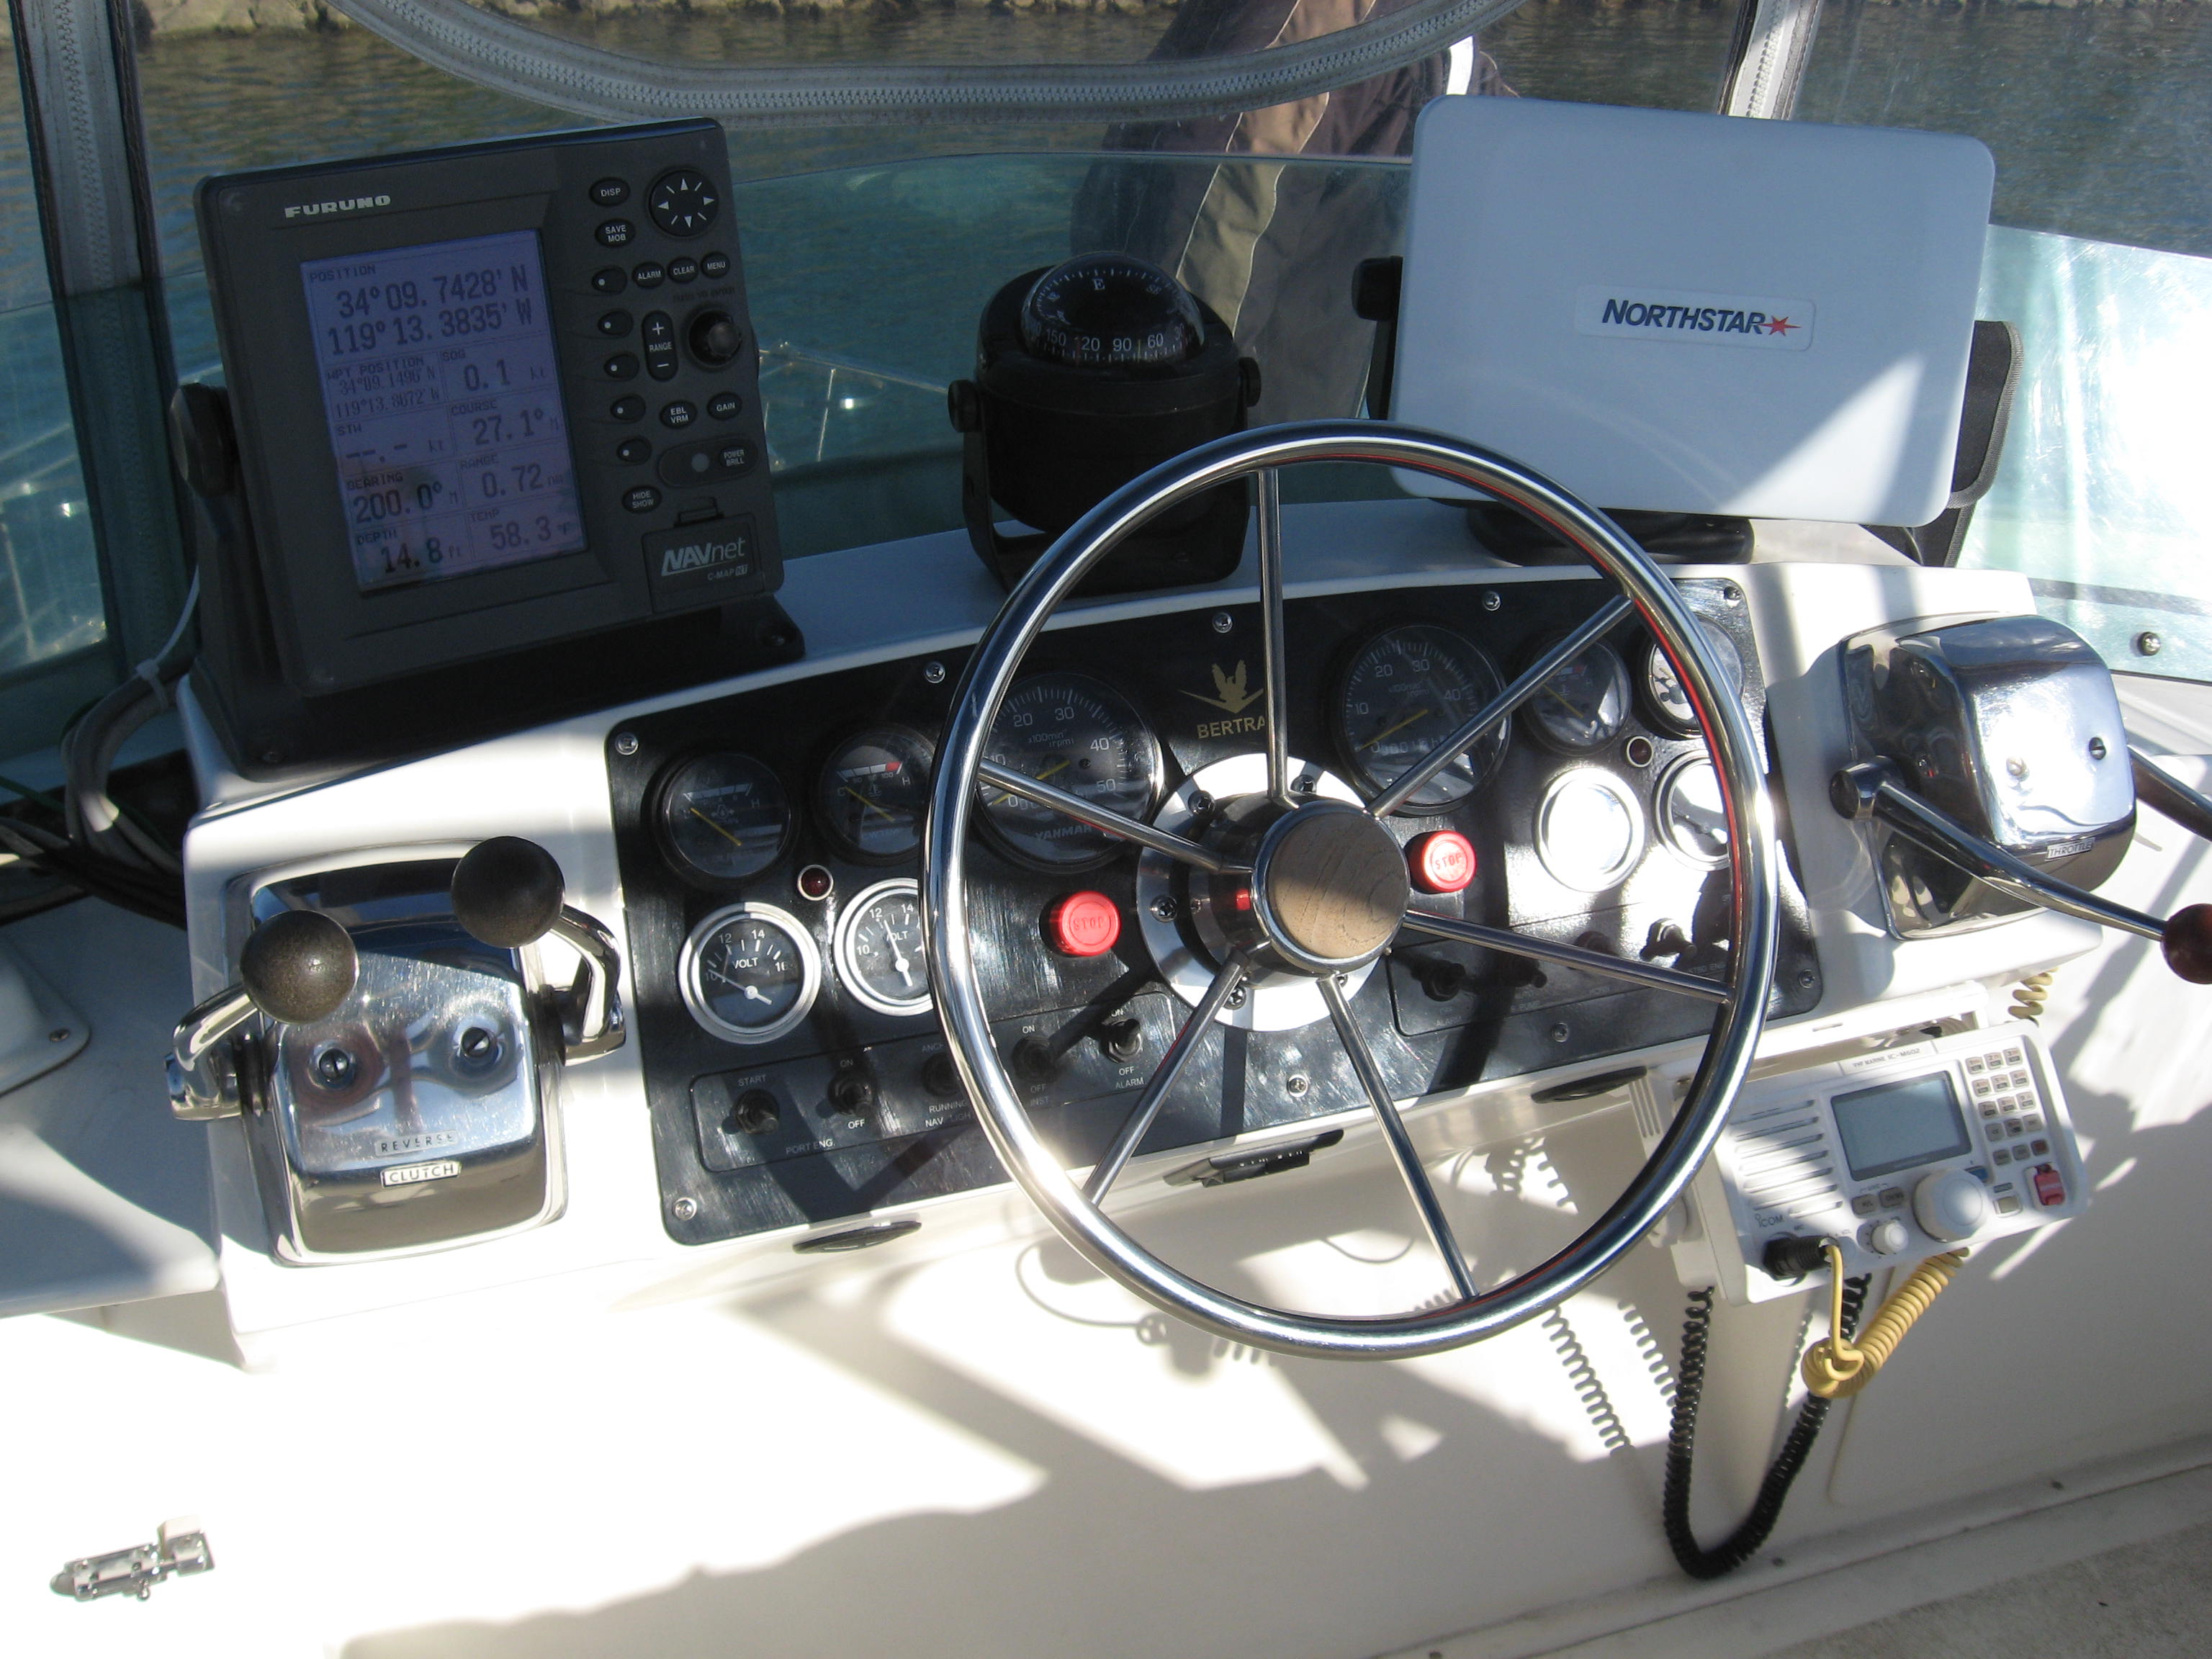
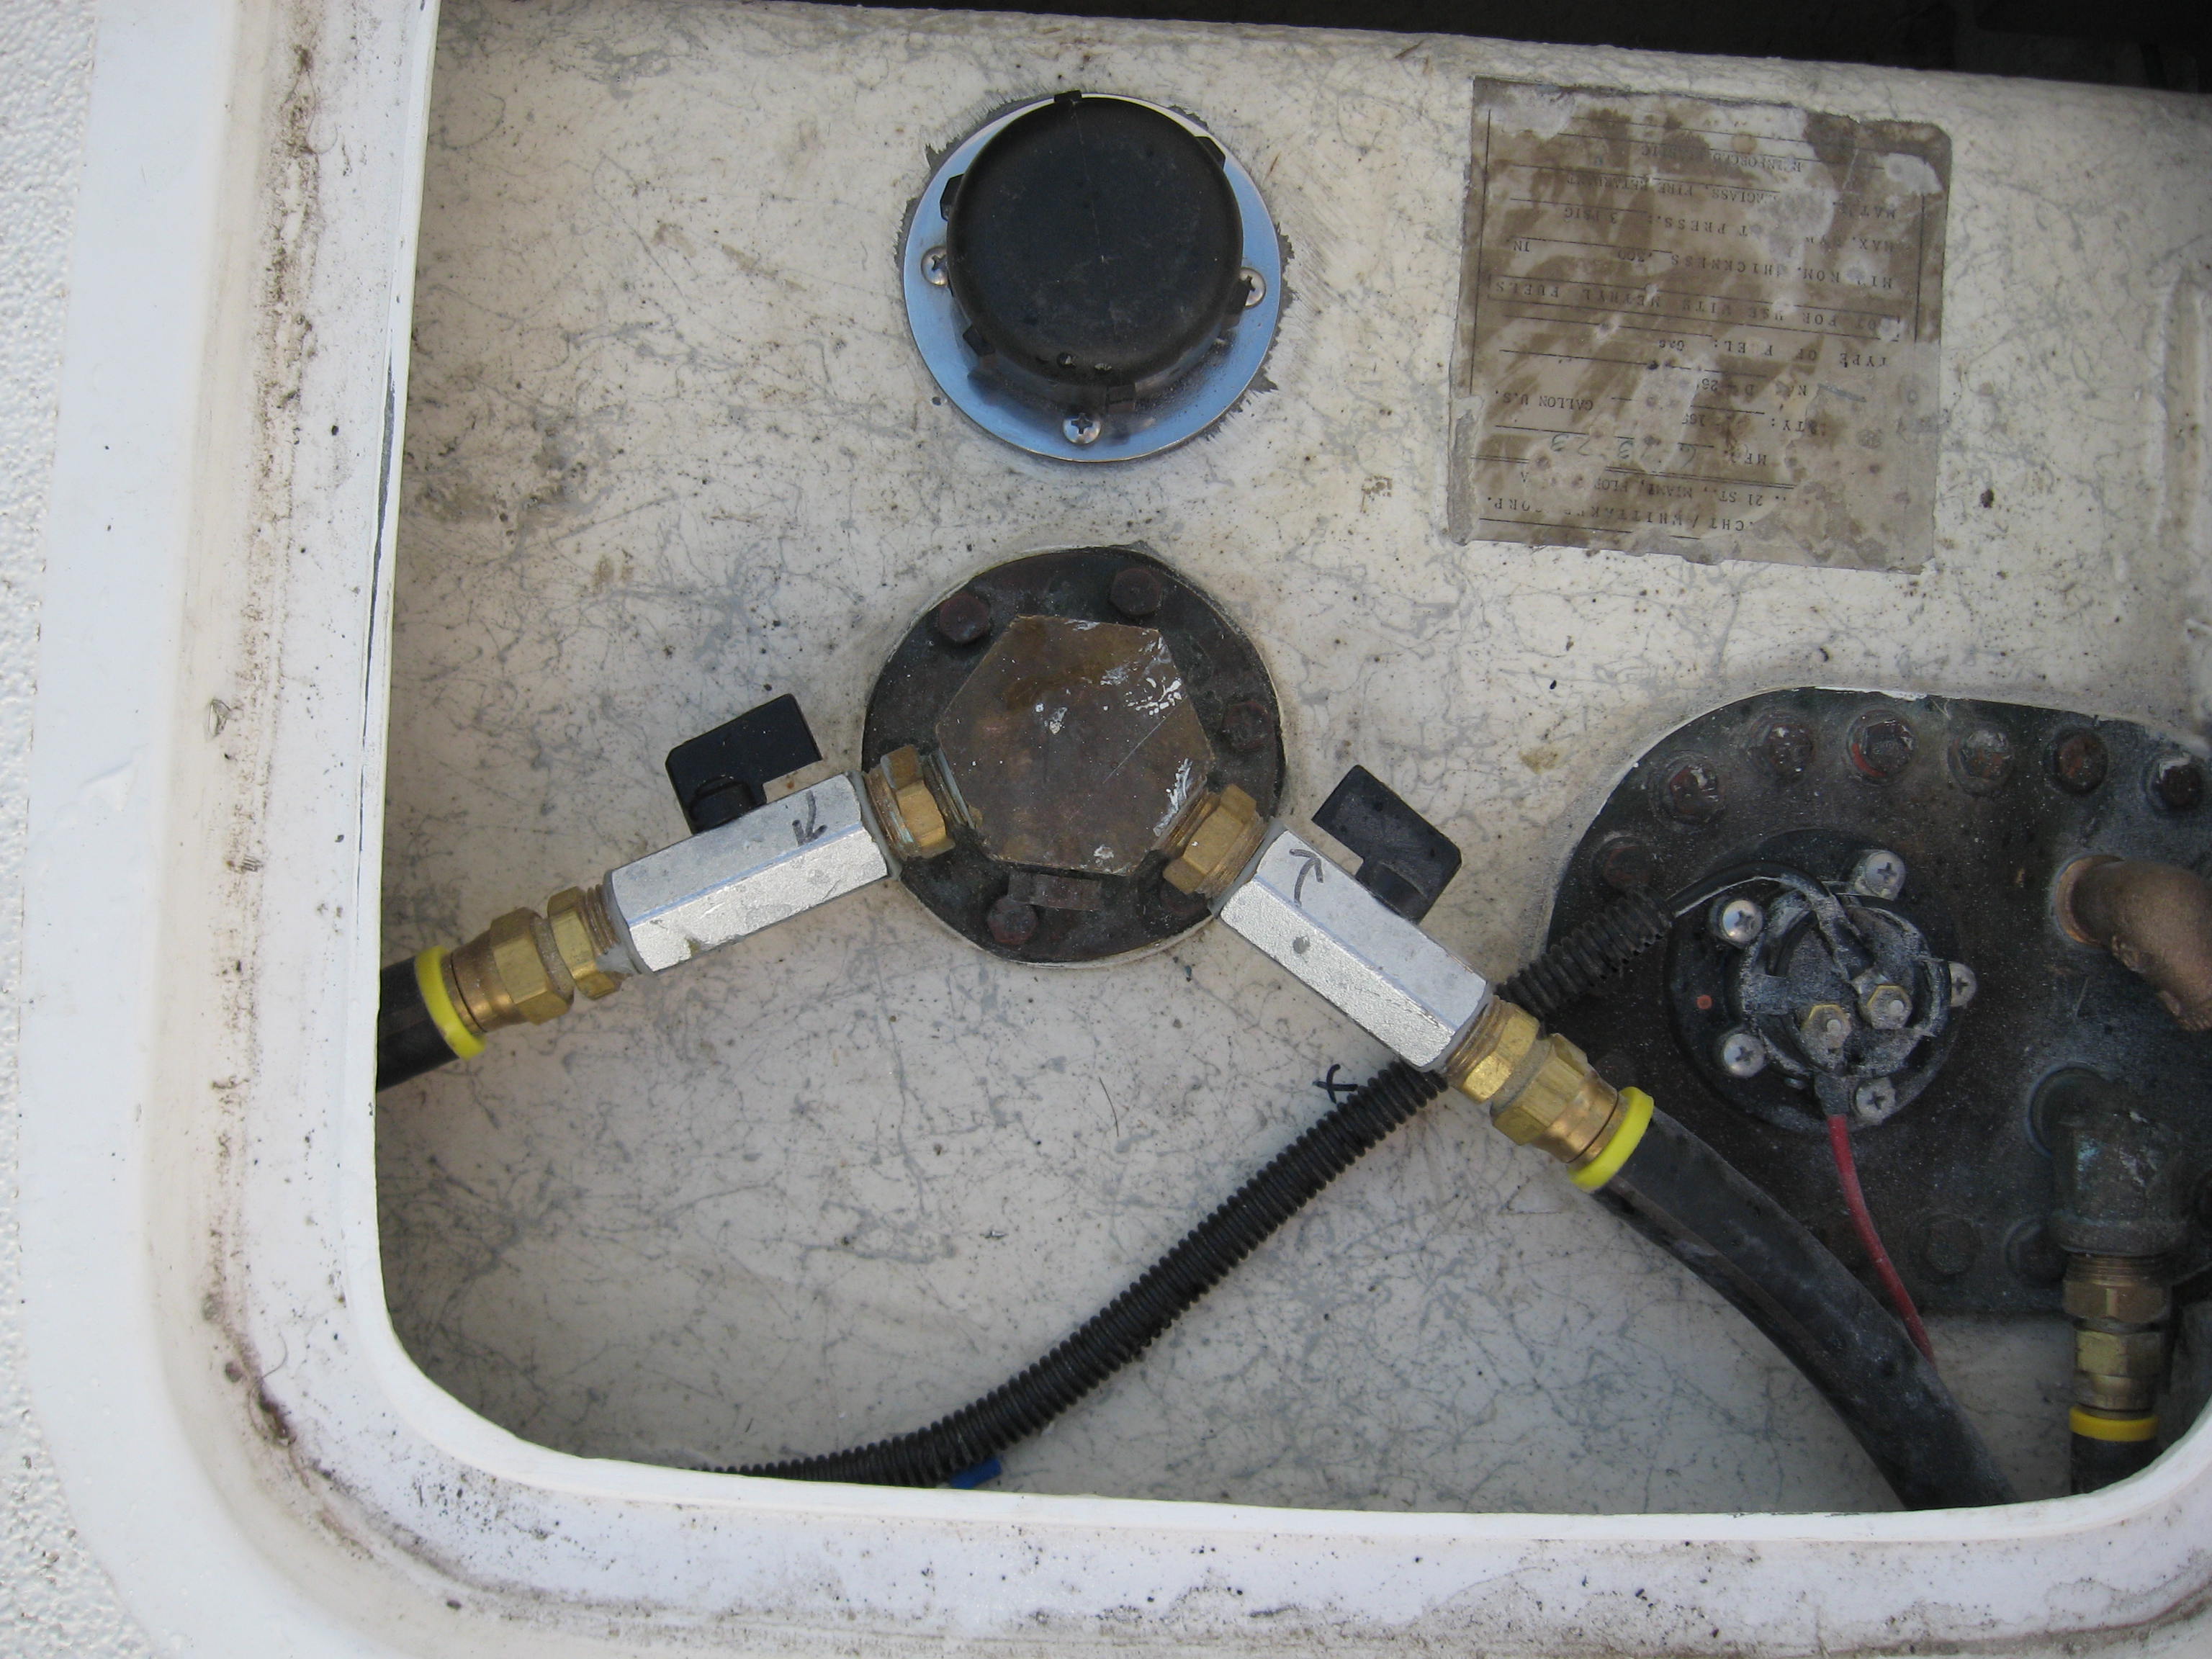
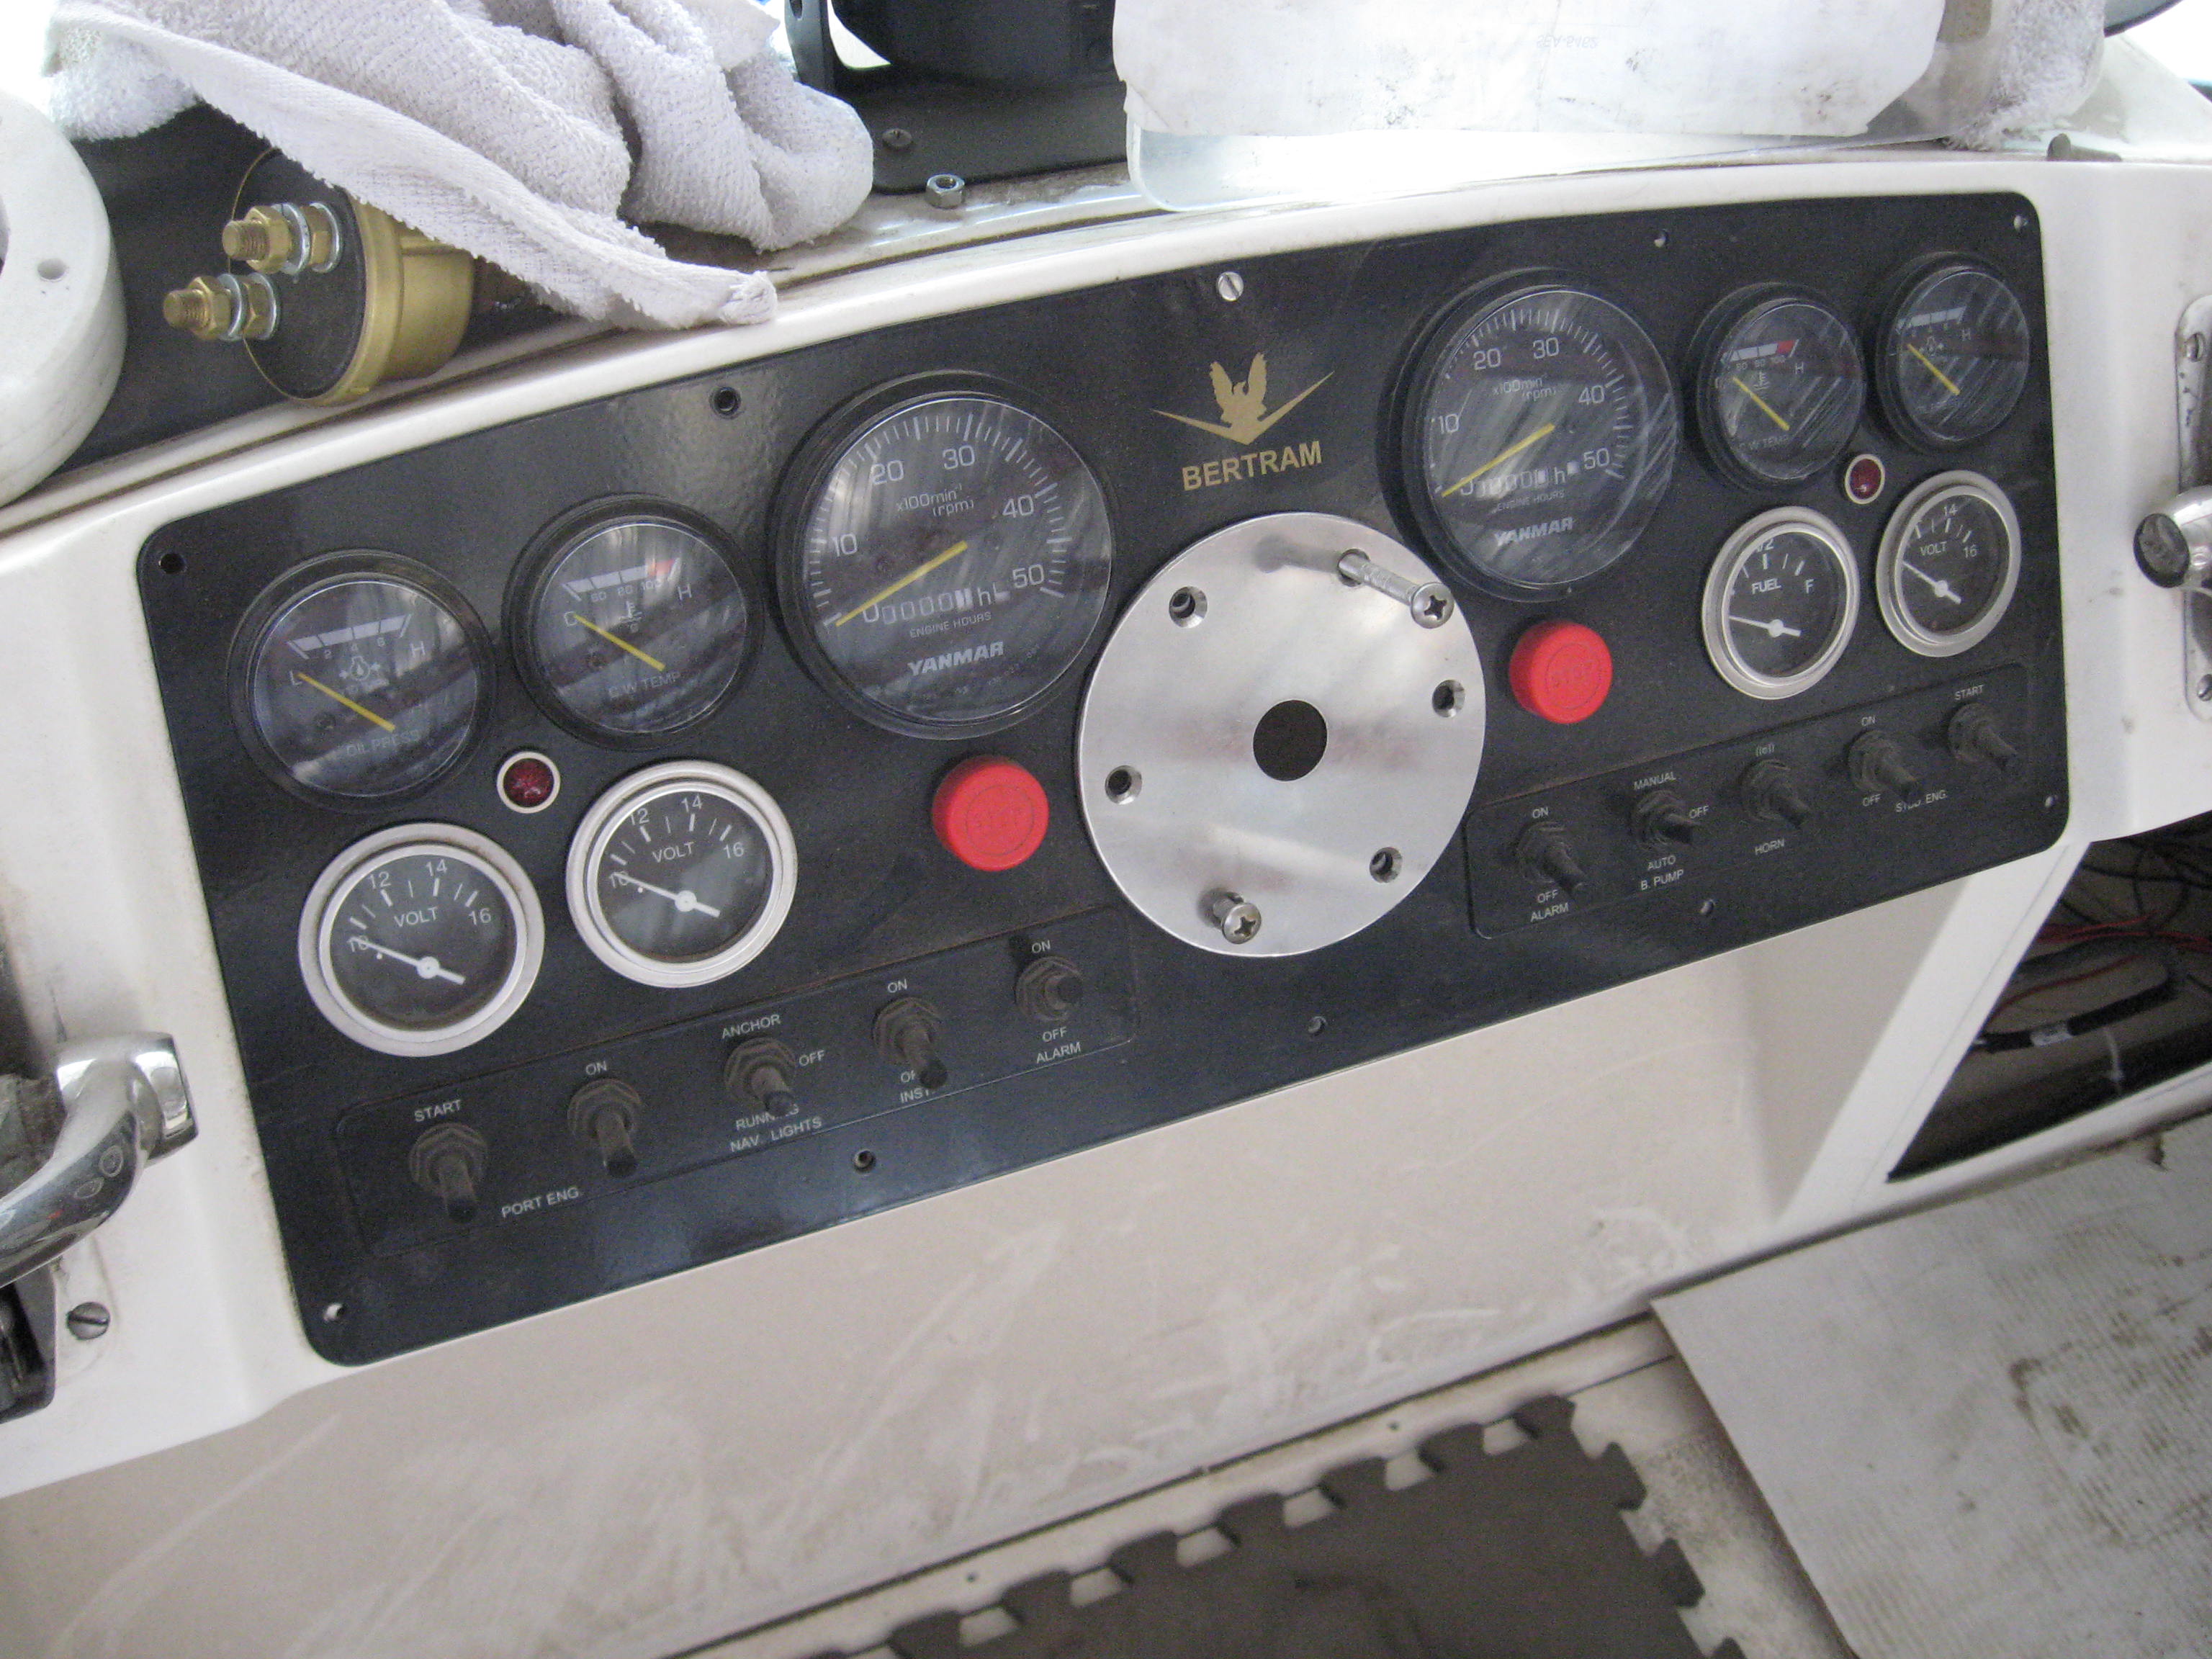
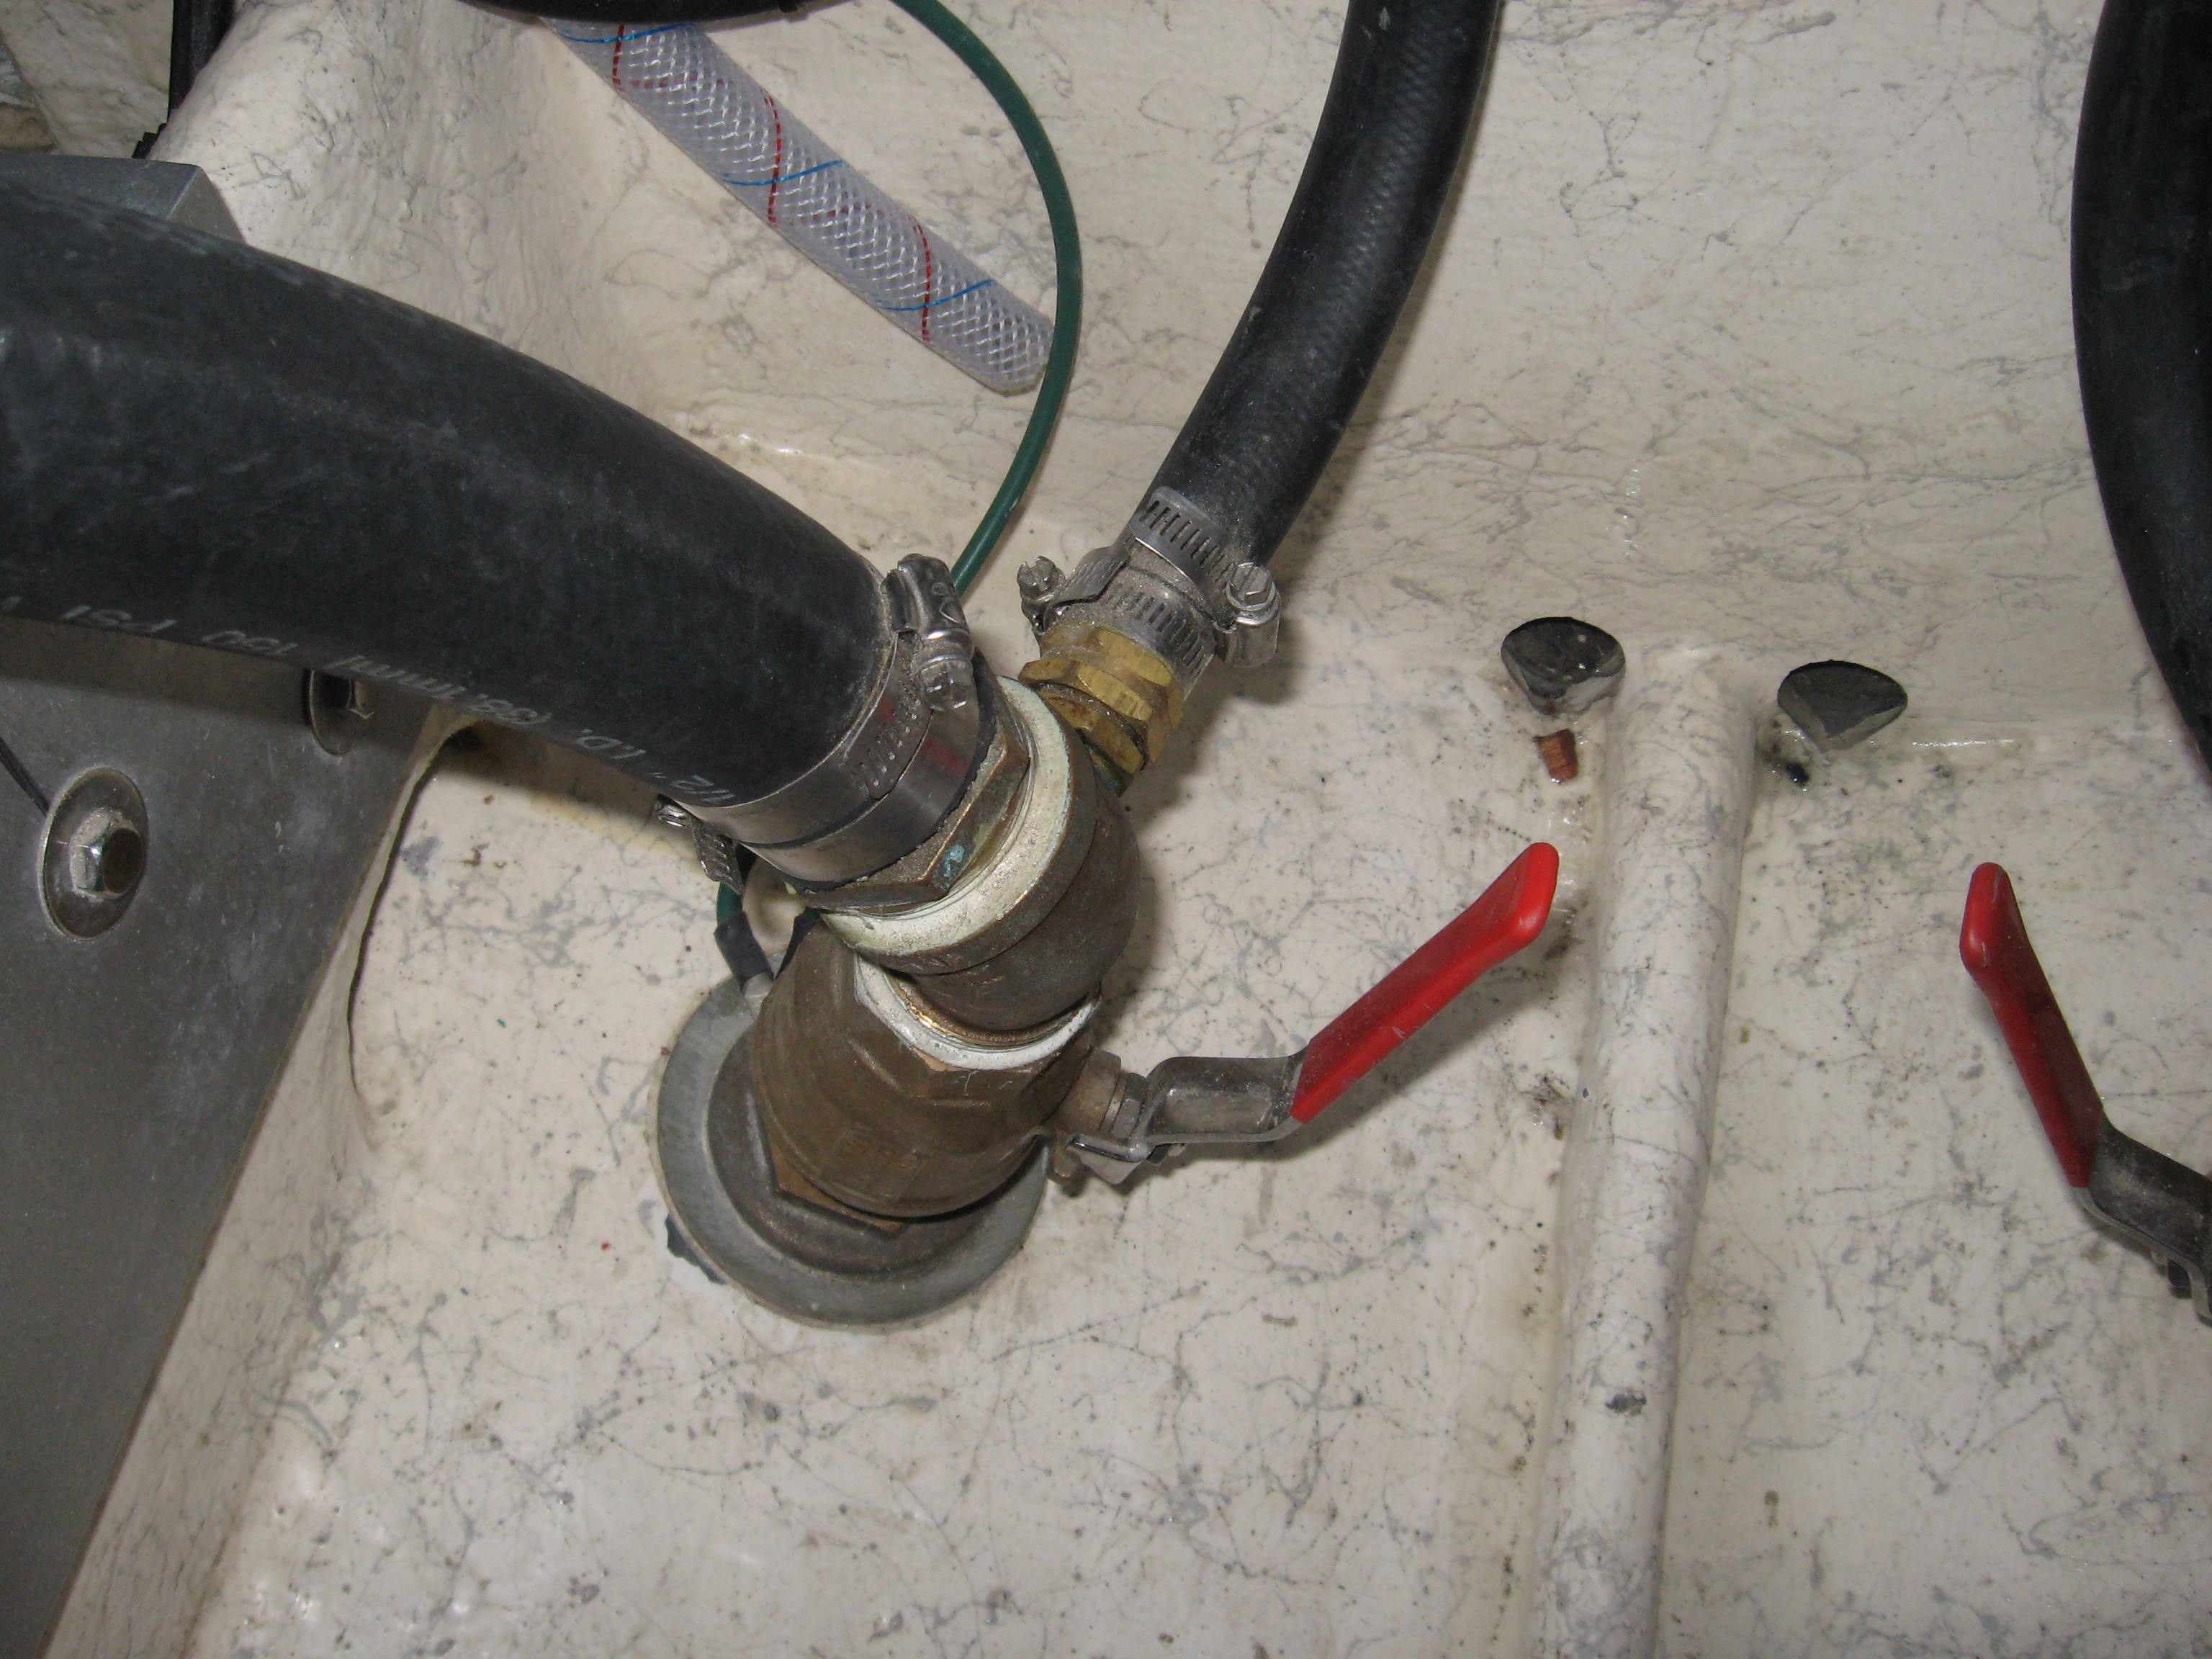
During this project, the owner, Bruce Derksen, made a custom dash for the Yanmar instruments, rewired 90% of the vessel, installed all new pumps, replaced all the thru-hulls, and plumbing, and helped guide us thru the project. I couldn’t talk him out of his old mechanical steering, although we did build a new tie-rod and mounting system – I must admit, it’s simple and works good (at least on the hard). He swears his old pilot works great, so maybe I’ll learn something here about cable steering and cable drive pilots. Personally, I have my doubts as with the added push on the rudders from all the extra power, I do not see him being happy with the constant “feel” of older style steering. With hydraulics, you can “let go” as the rudders are always locked in place with the check valves in the system.

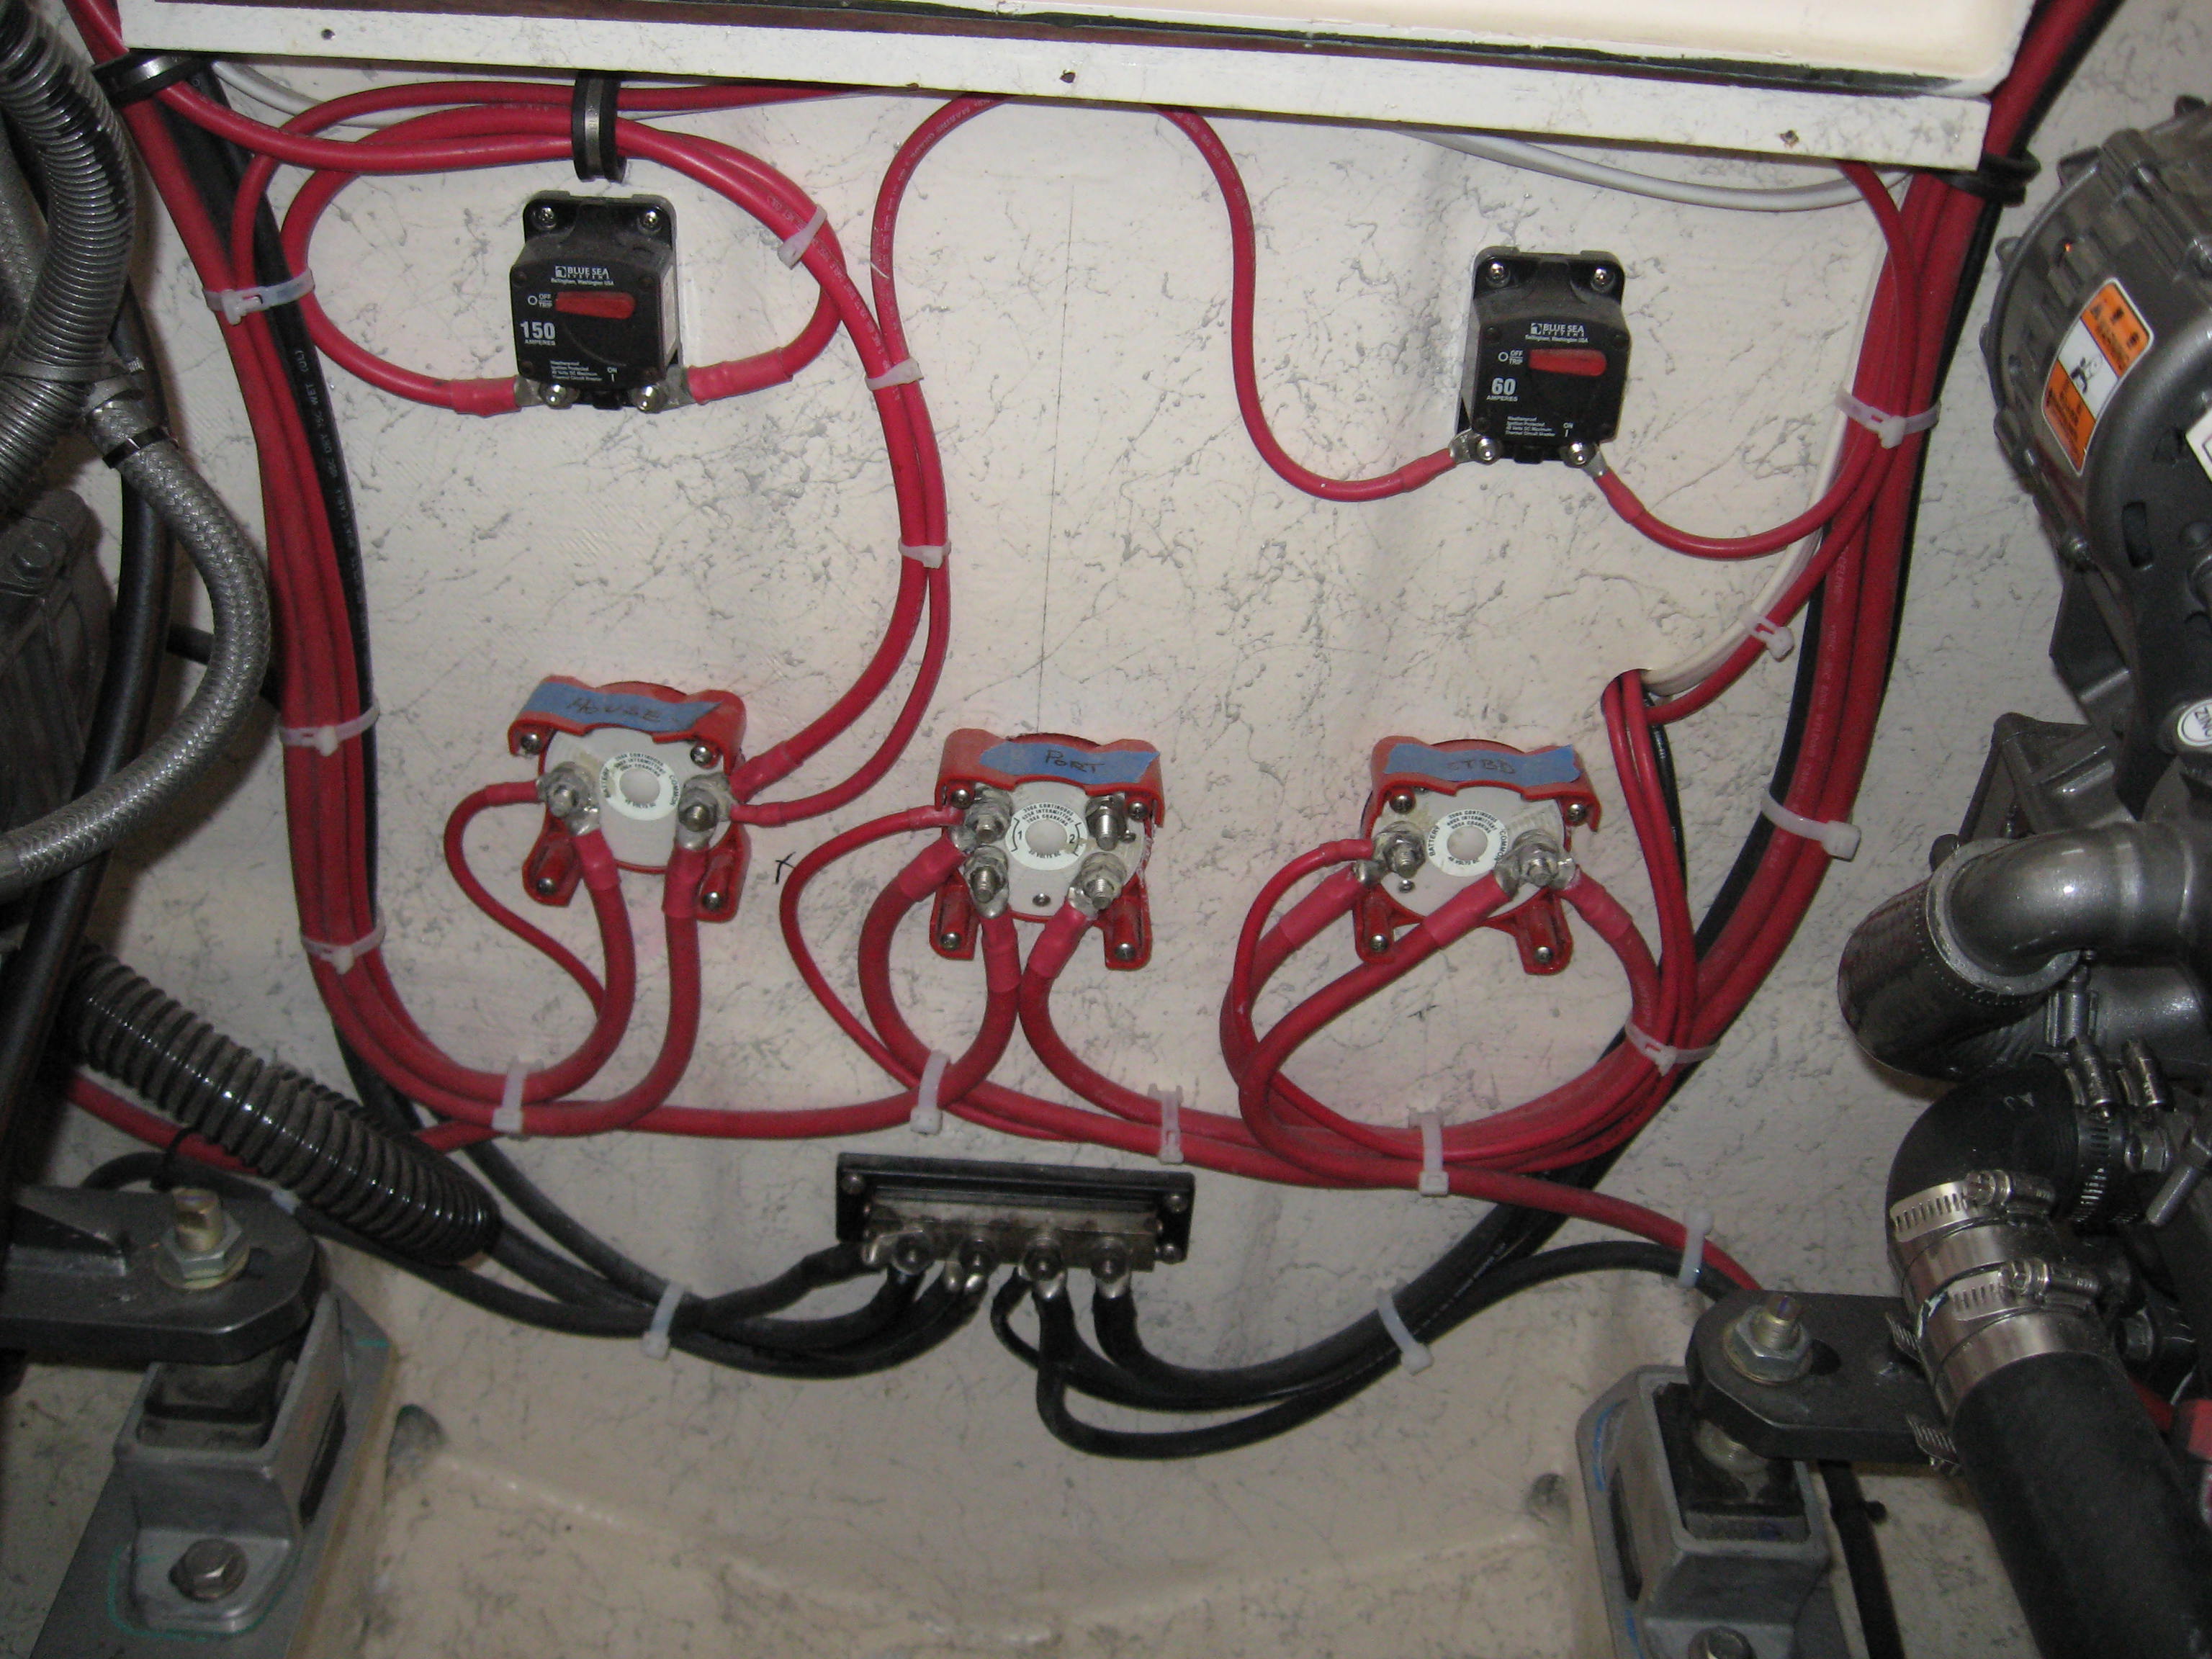
DCV Power Distribution


We went with 1.5:1 ZF 63A gears and his very good condition old Nibral 3B DJ props bored to 1.375 inches and re-tuned to Class 1, 17 x 19 med cupped. That should yield about 30-32K’s top and allow the engines to hit an accurate 3450 RPM on the tachs. This boat should be lighter than Audax by about 800 lbs and the performance should show it. But in all practicality, the 28 Bertram is an easy and comfortable cruiser in the lower to mid-20’s 99% of the time.
We should sea trial sometime in the next few weeks (the owner still has things to do) and I’ll post the numbers then, along with some “sea trial comments” and some additional pictures. Although this has been a fun experience for us, there is a sad part about it. This will probably be the last pair of Yanmar 4LHA 240’s that I’ll get to install as Yanmar went to sleep a few years back and let the EPA push this great engine into the history books. Had they seen the writing on the wall a little more clearly, they could have redeveloped the 4LHA into a 100% electronic Common Rail Tier 2 engine and would now have a true competitive edge in this engine size-range where I feel the market has a big gap. SAD !!
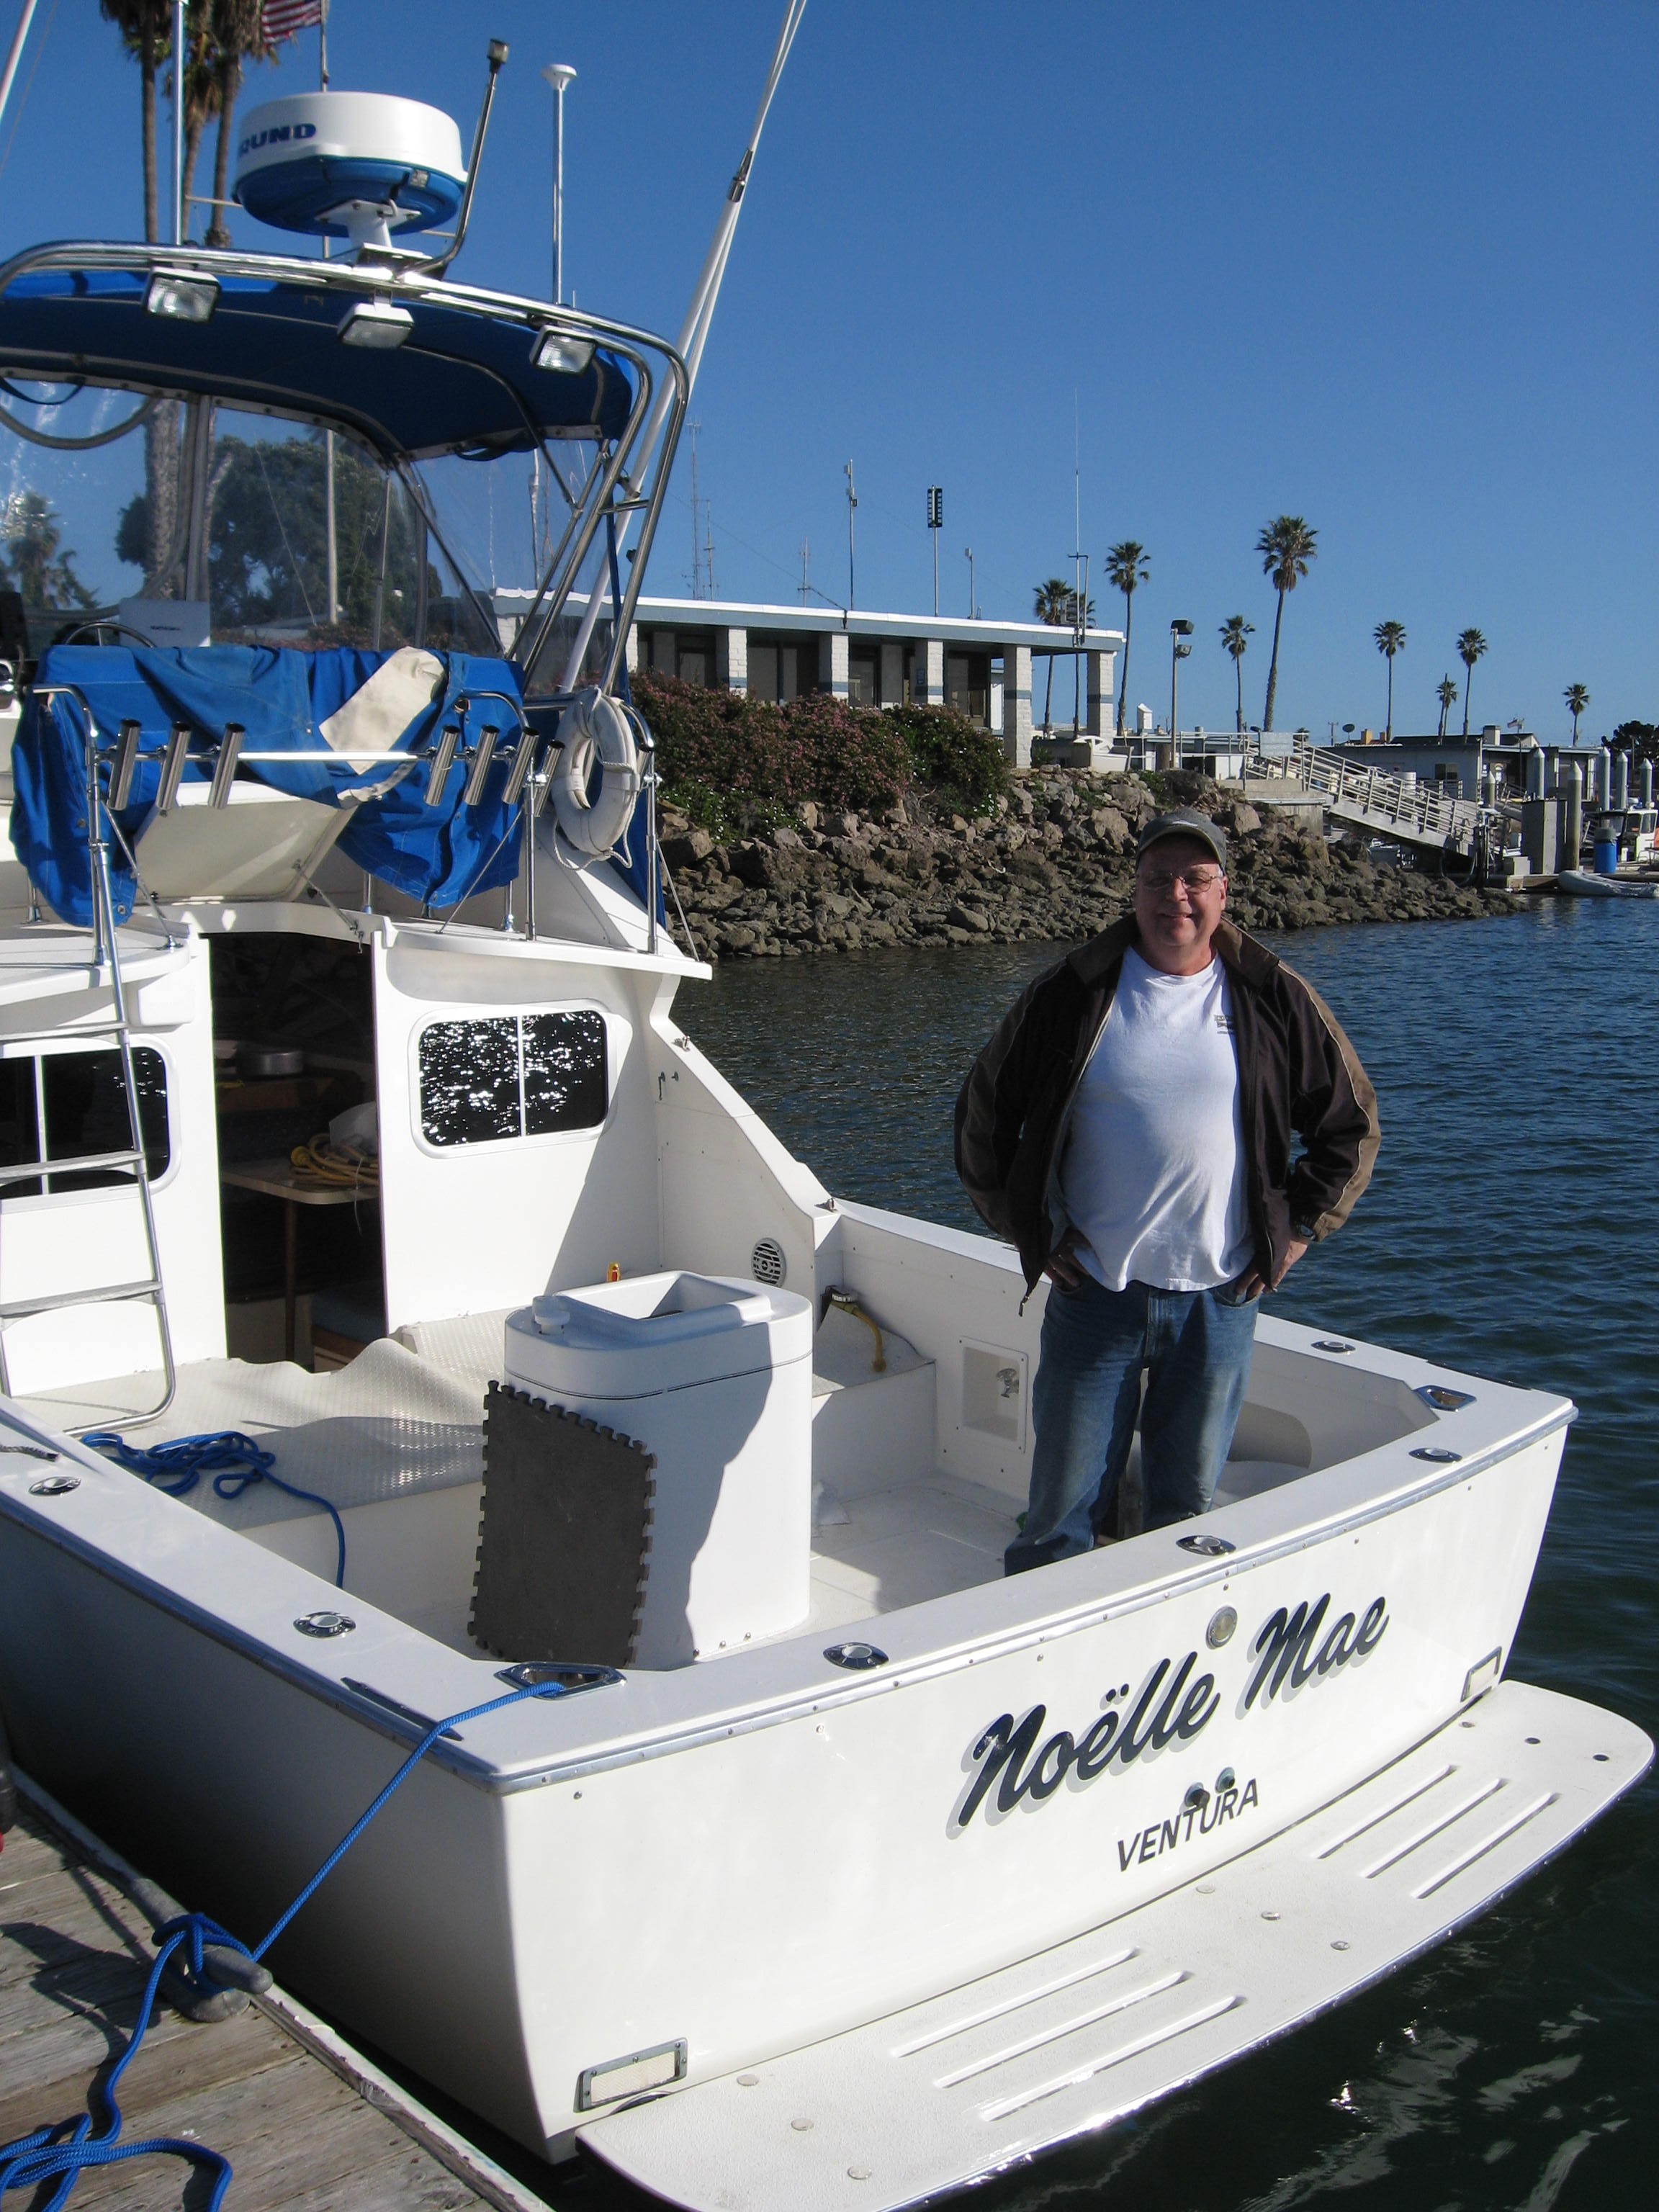
Sea Trial – Feb. 2009
Well, we (actually the owner) finally finished up the “Noella Mae” this week. We launched on Feb 18, did a final “in the water alignment”, got everything “tight-tight” as to the mounts and coupling, did a thorough once-over, and went for a very hard ride. Weather was good, we (3 fat guys w/ tools) topped off the fuel, filled the bait tank and after about 45 minutes of easy running, we put the pedal to the metal. Tachs climbed to 3620 on one engine and 3660 on the other and 29-29.9K’s was what she wrote on the GPS in various directions. No-Load RPM on the Yanmar tach was 3720-3760 RPM so we knew these engines were quite a bit under propped. I did not strobe the tach at this point (next week), but already know we are at least 230-250 RPM over rated. GOOD for this stage of the repower project. Since the Yanmar tachs CANNOT be adjusted, all we can do is get a DEVIATION “tach card”, so to say…
Boat ran 100% flawless, quiet and smoooooooooooth… Our shaft seals ran “cool” to the touch and maybe saw two drops of water, total. Tranny temps stayed under 150°F, and everything else was as it should be. Love those Yanmar 4LHA’s !!
Over the last two months or so, we built custom fish drop-in boxes (very light/ Divinycell core), and the owner finished up all, or most, of the electrical / house and electronics, and got the engine & boat ship-shape overall. We feel we could not have done a better job and I think the owner agreed. But then again, our base motto is, “there is always room for improvement”.