Cummins Marine Diesel Repower Specialists › Forums › Cummins Marine Engines › 6bta weight
- This topic has 22 replies, 5 voices, and was last updated 5 years ago by
 Tony Athens.
-
CreatorTopic
-
March 16, 2019 at 12:08 am #62808
Stephen OliverParticipantVessel Name: Ascella
Engines: 2x Cummins 330hp Diamond
Location: Perth, Australia
Country: Australia
Hi guys
Further to my port engine fun with the raw water pump replacement.. could any one tell me the complete weight of a 6bta 330 diamond with a zf220a gearbox please. I’ve searched but cannot find the specs. I need it to make sure I’m specing the right engine mount as a replacement as the existing ones has no markings.. I know they are a bushings Inc isolator and I think I know which one. I just have to ensure its the right weight capacity.
Thanks
Steve
-
CreatorTopic
-
AuthorReplies
-
March 27, 2019 at 6:57 pm #65025

Tony AthensModeratorVessel Name: Local Banks
Engines: QSB 6.7 550 HP
Location: Oxnard, CA
Country: USA
Steve,
Sometimes you have to do what you have to do and work around it the best you can.. And sometimes it’s a compromise between some things that neither of them are the best solution…………………So, with all that said, it really comes down to what is INSIDE those tall pedestals and the skin on the outside..I.E.–Just how substantial are they? Plus, how FLAT and how parallel are they fore & aft and side to side with the plane of the engine mounting brackets. And then, mix that is into how “hands-on” are you and how deep do you want to go as to re-doing the engine mounts to make them more in-line with the mounting arrangements you have seen on our web site…
With such high pedestals, the options are many as to what could be done..Now that you have the new isolators, # 1 would be just to see if they will adjust down LOW ENOUGH to even fit as you have your mounts now. (You can use a ½ nut on the bottom if needed, but a full nut is preferred)..
One idea that has been 100% (again assuming you have real substance inside your pedestals).. Instead of lags, drop in SS or B-8 threaded rod in a 6”-8” deep “loose” hole filled with liquid epoxy. Way better than a “lag” You just drill a sloppy hole ( 1/64” oversize) fill it with something like West Systems about ½”, push in the threaded rod slowly until the epoxy flows out the top, clean it up and walk away for 24 hours.. That stud in now part of your boat. Some OEM’s “T” bone the stringers cross wise on 5” centers with 1.5” brass ( or steel) rod and about 2” below the top.. ( 5” wide stringers need 6” long “T-bones”) Then, they drill and tap it ½” x 13TPI .. Done right, seems like a neat alternative to “lags”……………..Anyway, lots of options out there.I’ve rambled enough for now..
Tony
March 27, 2019 at 12:06 pm #64958
donald rothParticipantVessel Name: Paumalu
Engines: Cummins 6BT 180 hp
Location: where the fish are!
Country: United States
Photo didn’t load, here’s what I’m talking about.
March 27, 2019 at 10:56 am #64928
donald rothParticipantVessel Name: Paumalu
Engines: Cummins 6BT 180 hp
Location: where the fish are!
Country: United States
Read in this website under Tony’s Tips, Repowering your Vessel.
Sounds like your original installer did not read this section, as lag bolts in stringers are a poor combination up against the torque and vibration of a diesel motor, and “engineering” and “lag bolts” are not in the same dictionary!March 27, 2019 at 6:50 am #64836
Stephen OliverParticipantVessel Name: Ascella
Engines: 2x Cummins 330hp Diamond
Location: Perth, Australia
Country: Australia
Thanks Tony
Awesome info as per usual – New mounts are here – so will be getting into this after this weekend as work allows. Then I’ll be entering the world of engine alignment..
Another quick question though – the mounts are held on to the hull by stainless studs – fine thread on the mount side and woodscrew type thread into the hull. The engine bearers are fibreglass and I assume timber inside – they are significant pieces of hull though. ie about 5″ wide about 12″ high and about 12″ front to back
First question – have you seen it done like this (boat is 22 years old so must work!) See picture for a bit of a view (this is an old picture so things look a bit cleaner in there now)
Secondly one of the studs has been put in a bit crooked ie at an angle (looks crap but has worked for 22 years) – I’m thinking when I get the new mounts in I will put a spacer in the mount bracket to clear the pump and move the mount outboard further – then I can fill the existing crooked hole with resin and filler and redrill straight – can you see any issue with this?
Steve
March 27, 2019 at 5:52 am #64835
Tony AthensModeratorVessel Name: Local Banks
Engines: QSB 6.7 550 HP
Location: Oxnard, CA
Country: USA
Yup–Must have “turbo stuck in my brain..
Anyway, we prefer Grade 8 if American or 10.9 or better if Metric..Most prefer fine treads, but IMO, it makes no difference.. What make the difference is Grease/lube on all ( your choice as to type) and all tightened to close to yield.. No lock washers–Flat washers are optional but usually best under the nut and possibly the head. Some nuts and bolts have built in washer faces.
Tightness is the key–Power is transmitted by friction between the couplings faces, not by the bolts being in shear like many think. So high strength bolts and lubed to you can get them tight.
Tony
March 26, 2019 at 6:48 am #64450
Stephen OliverParticipantVessel Name: Ascella
Engines: 2x Cummins 330hp Diamond
Location: Perth, Australia
Country: Australia
Hi Tony
You must be on Auto answer Mode as I’m sure you have typed the turbo bolt answer a million times! But thanks for reiterating it.. I’m sure there will be a day when I need to replace them with no time to order some correct ones.
This is for the shaft coupling.. Gearbox to propshaft..
Turbo bolts already replaced with your quality kit (including extra thick washers) and lots of anti seize!
Steve
March 26, 2019 at 5:35 am #64441
Tony AthensModeratorVessel Name: Local Banks
Engines: QSB 6.7 550 HP
Location: Oxnard, CA
Country: USA
Turbo Flange to Turbo connection
Flange to turbo bolts——–Quality hardware 9.8, 10.9 grade or better. High temp Anti-seize is a must. Flat Washers are optional, but we prefer them. No Lock washers.
Tony
March 26, 2019 at 5:30 am #64440
Rob SchepisForum ModeratorVessel Name: Tenacious
Engines: 6BTA 5.9 330's - "Seaboard Style"
Location: Long Island, NY
Country: USA
If they are of proper class and serviceable no need to replace.
March 26, 2019 at 5:22 am #64439
Stephen OliverParticipantVessel Name: Ascella
Engines: 2x Cummins 330hp Diamond
Location: Perth, Australia
Country: Australia
And new hardened coupler bolts while you’re at it, no lock washers and plenty of grease.
HI Rob
Can I ask why new bolts? there are currently no washers or lock nuts or anything – not even grease!
Just wondering why you specified them?
Steve
March 23, 2019 at 7:24 am #63996
Stephen OliverParticipantVessel Name: Ascella
Engines: 2x Cummins 330hp Diamond
Location: Perth, Australia
Country: Australia
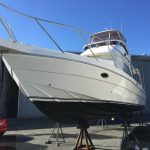
Sorry best picture I had of the whole boat. Only taking her out once every 2 years is the plan. Diving to clean props and running gear, hull just gets slimy so a 25kt run sorts that. Hot place to live but cold water.
Thanks for the tips Rob. Kneepads? Haha I’d be so lucky being able to kneel! The port water pump which caused all of this required me to contort around the raw water strainer while squeezing under the fridge moulding.. 6’1″ and 240lbs.. it’s a bit of a squeeze!
Rest of the mounts will need similar contortion.. so knees are fine shoulder and back is buggered!
Alco metalube and zinc anti seize at the ready, mount brackets will be primed and painted then bolts will be painted once brackets are back on. Everything engine wise is being renovated and greased or anti seized as I go…
When you say hardened do you mean grade 12.9 or 8.8? Currently no washers jus t a locking type nut (not nyloc)
Steve
March 23, 2019 at 6:03 am #63992
Rob SchepisForum ModeratorVessel Name: Tenacious
Engines: 6BTA 5.9 330's - "Seaboard Style"
Location: Long Island, NY
Country: USA
Ah, she’s in the water, I pictured her being on the hard, well I guess I would have based on your profile picture!
Sounds good. Get some good comfy knee pads if you don’t already have, I’m recovering from knee bursitis at the moment from too much of this type of stuff.
And new hardened coupler bolts while you’re at it, no lock washers and plenty of grease.
March 22, 2019 at 10:55 pm #63987
Stephen OliverParticipantVessel Name: Ascella
Engines: 2x Cummins 330hp Diamond
Location: Perth, Australia
Country: Australia
In My instance yes the alignment will be done as it looks like 22 years on the mounts has not been too kind – so likely its out of whack by a good way where they have slowly collapsed. I doubt very much if they have ever been checked. I will start by matching the new mounts lower nut height with the old (measured with engine weight on it.) and working from there. Mounts will be replaced one by one, brackets are being painted along the way.
Boat is in the water – I’m just hoping they are not too far off – after all the engine has been floating around on the mounts loose for a while! – SMX purple mounts are on their way and should be here Thursday.
Steve
March 21, 2019 at 2:08 pm #63748
Rob SchepisForum ModeratorVessel Name: Tenacious
Engines: 6BTA 5.9 330's - "Seaboard Style"
Location: Long Island, NY
Country: USA
Either way, an alignment is in order. You can start on the hard to get it close and then a final check after she splashes, after sitting wet for at least a day or so..
March 21, 2019 at 12:48 am #63637
Stephen OliverParticipantVessel Name: Ascella
Engines: 2x Cummins 330hp Diamond
Location: Perth, Australia
Country: Australia
The other way is to take the weight of the engine via jacks etc and unbolt the engine mount bracket from the engine. This way you can remove the mount without disturbing the engine position too much. Certainly not to the point of removing shaft couplings etc. IF the engine alignment is correct then you can take a measurement from a fixed reference and re position the new mounts levelling nuts based on this.
That is if the engine mount bracket CAN be unbolted – which it couldnt from mine so I had to cut the heads off the bolts (and then the stub was only hand tight!)
Steve
March 20, 2019 at 10:38 pm #63634
donald rothParticipantVessel Name: Paumalu
Engines: Cummins 6BT 180 hp
Location: where the fish are!
Country: United States
The coupling must be split, and the shaft slid back far enough for the engine to be raised high enough to clear the mounts.
This can entail uncoupling the exhaust system, and anything else that won’t move that far, or is in the way, sometimes raw water pump too.
Figure out how to raise the motor without damaging the boat or loosing fingers.
Check the beds per Tony’s instructions on leveling and paralleling them before installing new mounts.
Then it’s alignment time, I think theres informative articles on here about that too, it can be a bear, but doesn’t have to be.
Be aware that aligning a motor/shaft often illuminates other Problems that must be addressed – bent/worn shafts, coupling faces, worn stuffing boxes and cut less bearings, incorrectly aligned struts, etc.March 20, 2019 at 11:17 am #63552
Paul GreenhalghParticipantVessel Name: ADELAIDE
Engines: QSB6.7 480
Location: Sydney
Country: AUSTRALIA
Don….Could you expand please on your comment about all the related jobs that need to be done when replacing mounts? I am in a very similar situation to Steve…. Bushings mounts …12″ double-up monsters at aft/trannie end that appear spec’d for 2200lbs way more than needed for a 370 Diamond with TD 507; forward singles that seem to have the right rating. actually all look ok despite being 25years old but their mounting brackets are pretty corroded. If I’m going to remove and treat or replace the brackets I guess I’d renew the isolators at the same time.
March 20, 2019 at 6:00 am #63487
Stephen OliverParticipantVessel Name: Ascella
Engines: 2x Cummins 330hp Diamond
Location: Perth, Australia
Country: Australia
I think I’m just gonna bite the bullet and order a set of 4 of the SMX purples 60 duro. Get this engine done and aligned and then buy another 4 and do the other engine. I guess I missed the sale! Postage is a killer now to Aus..
Steve
March 18, 2019 at 10:25 am #63092
donald rothParticipantVessel Name: Paumalu
Engines: Cummins 6BT 180 hp
Location: where the fish are!
Country: United States
Bear in mind that each time you go in to replace a mount, there is a ton of associated chores that must be done.
That’s why I’d replace all four rather than taking a piecemeal approach, also mixing them might not be a good idea.
While you’re in there, check that the mounts are correctly installed per Tony’s tips on this website. Poor installation leads to premature wear.
The Barry mounts are a superior product, you’d not be up against the current issue if they had been originally installed!March 17, 2019 at 11:14 pm #62977
Stephen OliverParticipantVessel Name: Ascella
Engines: 2x Cummins 330hp Diamond
Location: Perth, Australia
Country: Australia
No thoughts on replacing just the 2 mounts for now? I need to get them ordered so I can use the boat!
Steve
March 17, 2019 at 6:19 am #62911
Stephen OliverParticipantVessel Name: Ascella
Engines: 2x Cummins 330hp Diamond
Location: Perth, Australia
Country: Australia
Ok so thinking more about this.. what would be the forums collective wisdom if I changed the 2 rear mounts (timing gear end) or the screwed one and the good one and replaced them with Barry mounts or the new smx equivalent, leaving the bushings Inc on the gearbox mounts, until such a time I can justify replacing those and then continue maybe 2 at a time on the other engine as budget allows?
It would mean mixing mounts but not sure how much of an issue that would be if they are all equivalent spec?
Steve
-
AuthorReplies
You must be logged in to reply to this topic.