Mr. “6BTA 5.9” Cummins owner. Welcome to the world of “couch engineering”. The team of engineers who designed the mounting arrangement for this pump on the later Cummins 6BTA engines, cramped behind the engine mounting bracket, IMO, need to be slapped. Lots of grief here that a ¼”~ ½” change in design would have solved. I’d gladly be the lynch man as this whole mess has caused way too much grief over the past 15 years or so. Here are some suggestions that may help the next time around when it’s time to deal with your seawater pump. You do have some long term solutions, but it’s up to you whether spending some extra effort now will be worth it over the next 5-10 years that you may own your boat… Access is the biggest problem for the 6BTA’s – It’s the maze of plumbing around it, coupled with the less than thoughtful designed engine bracket, that makes it close to impossible to service or replace without drawing blood…..

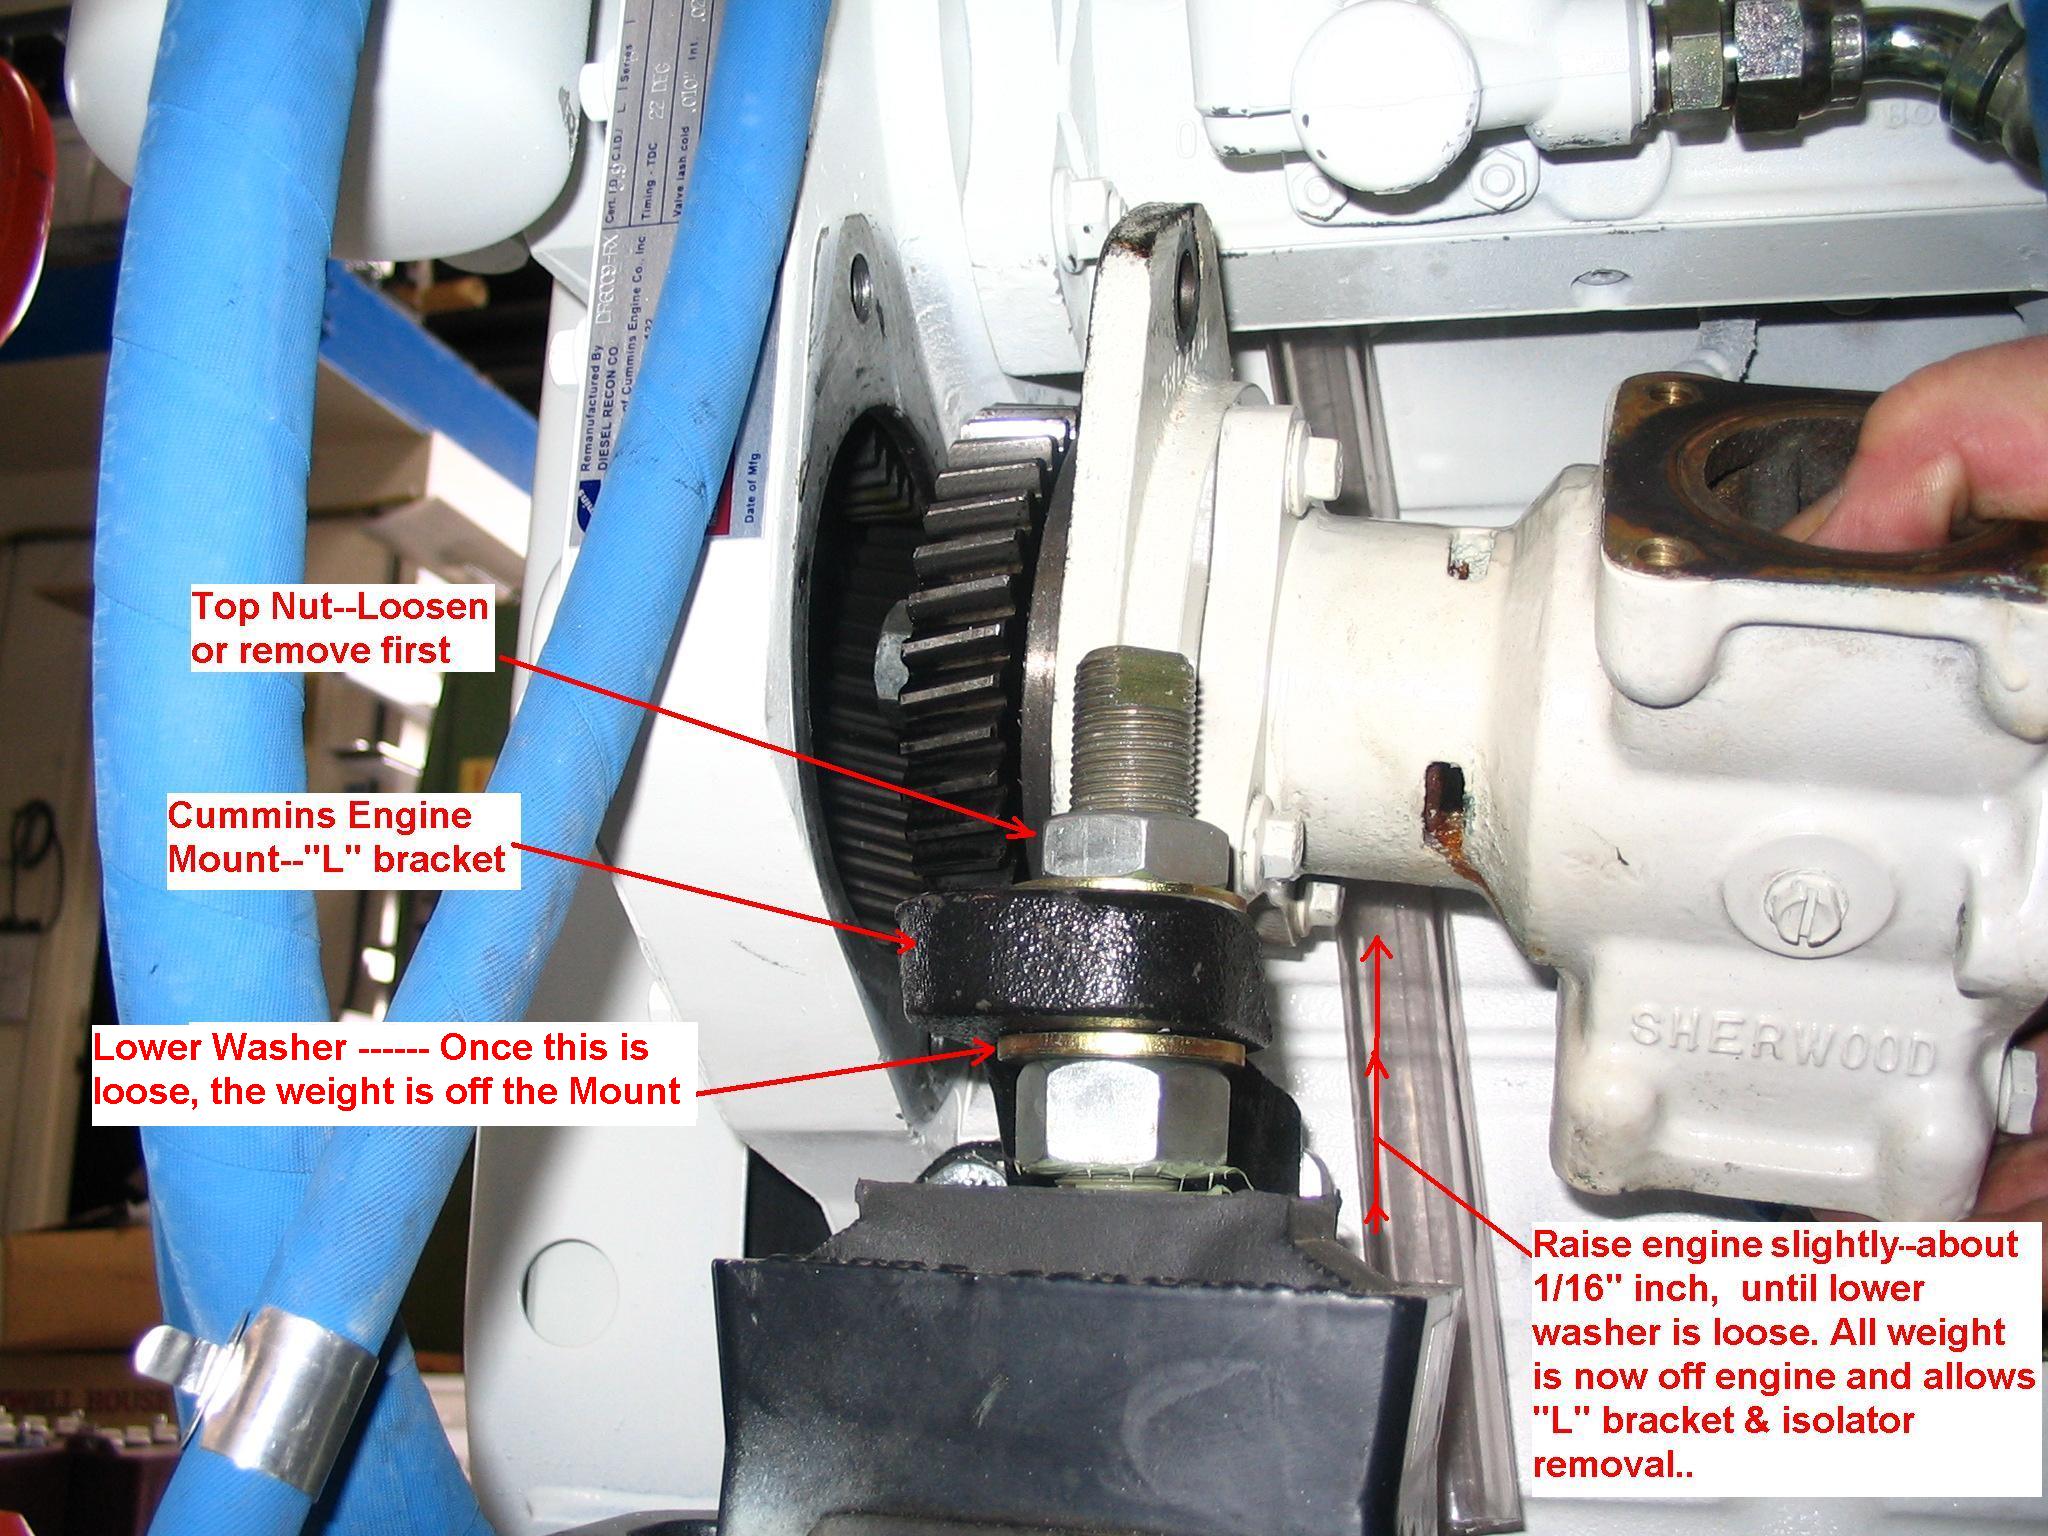
SOLUTION – Remove or loosen the top nut on the isolator in that corner, completely if you like – the engine should not move as gravity will keep the engine in place. Now you have to figure out a way to jack up that corner of the engine ever so slightly (maybe 1/16″-1/8″ inch) to where the washer under the bracket is loose. This tells you the weight is off the isolator. From there, again depending on access, either remove the two bolts holding down the isolator to the boat (stringer / bracket or ?) and / or the 3 bolts holding the engine bracket to the engine and remove the items by wiggling them away until they are out of the way. For sure this will be a frustrating job. Now you can remove the two 12 mm dia bolts holding the pump to the engine and slide out the pump. You DO NOT have to touch the 4 smaller bolts holding the pump to the large Diamond shaped plate as all that does is loosen the pump on the face plate. But if you were to remove them, it does allow the pump to “wiggle” more – some say it makes the process less painful??
Check out our SMX Seawater Pump / Engine Mount Spacer Kit
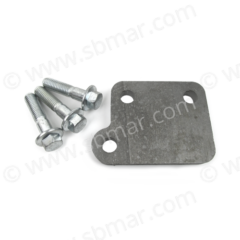
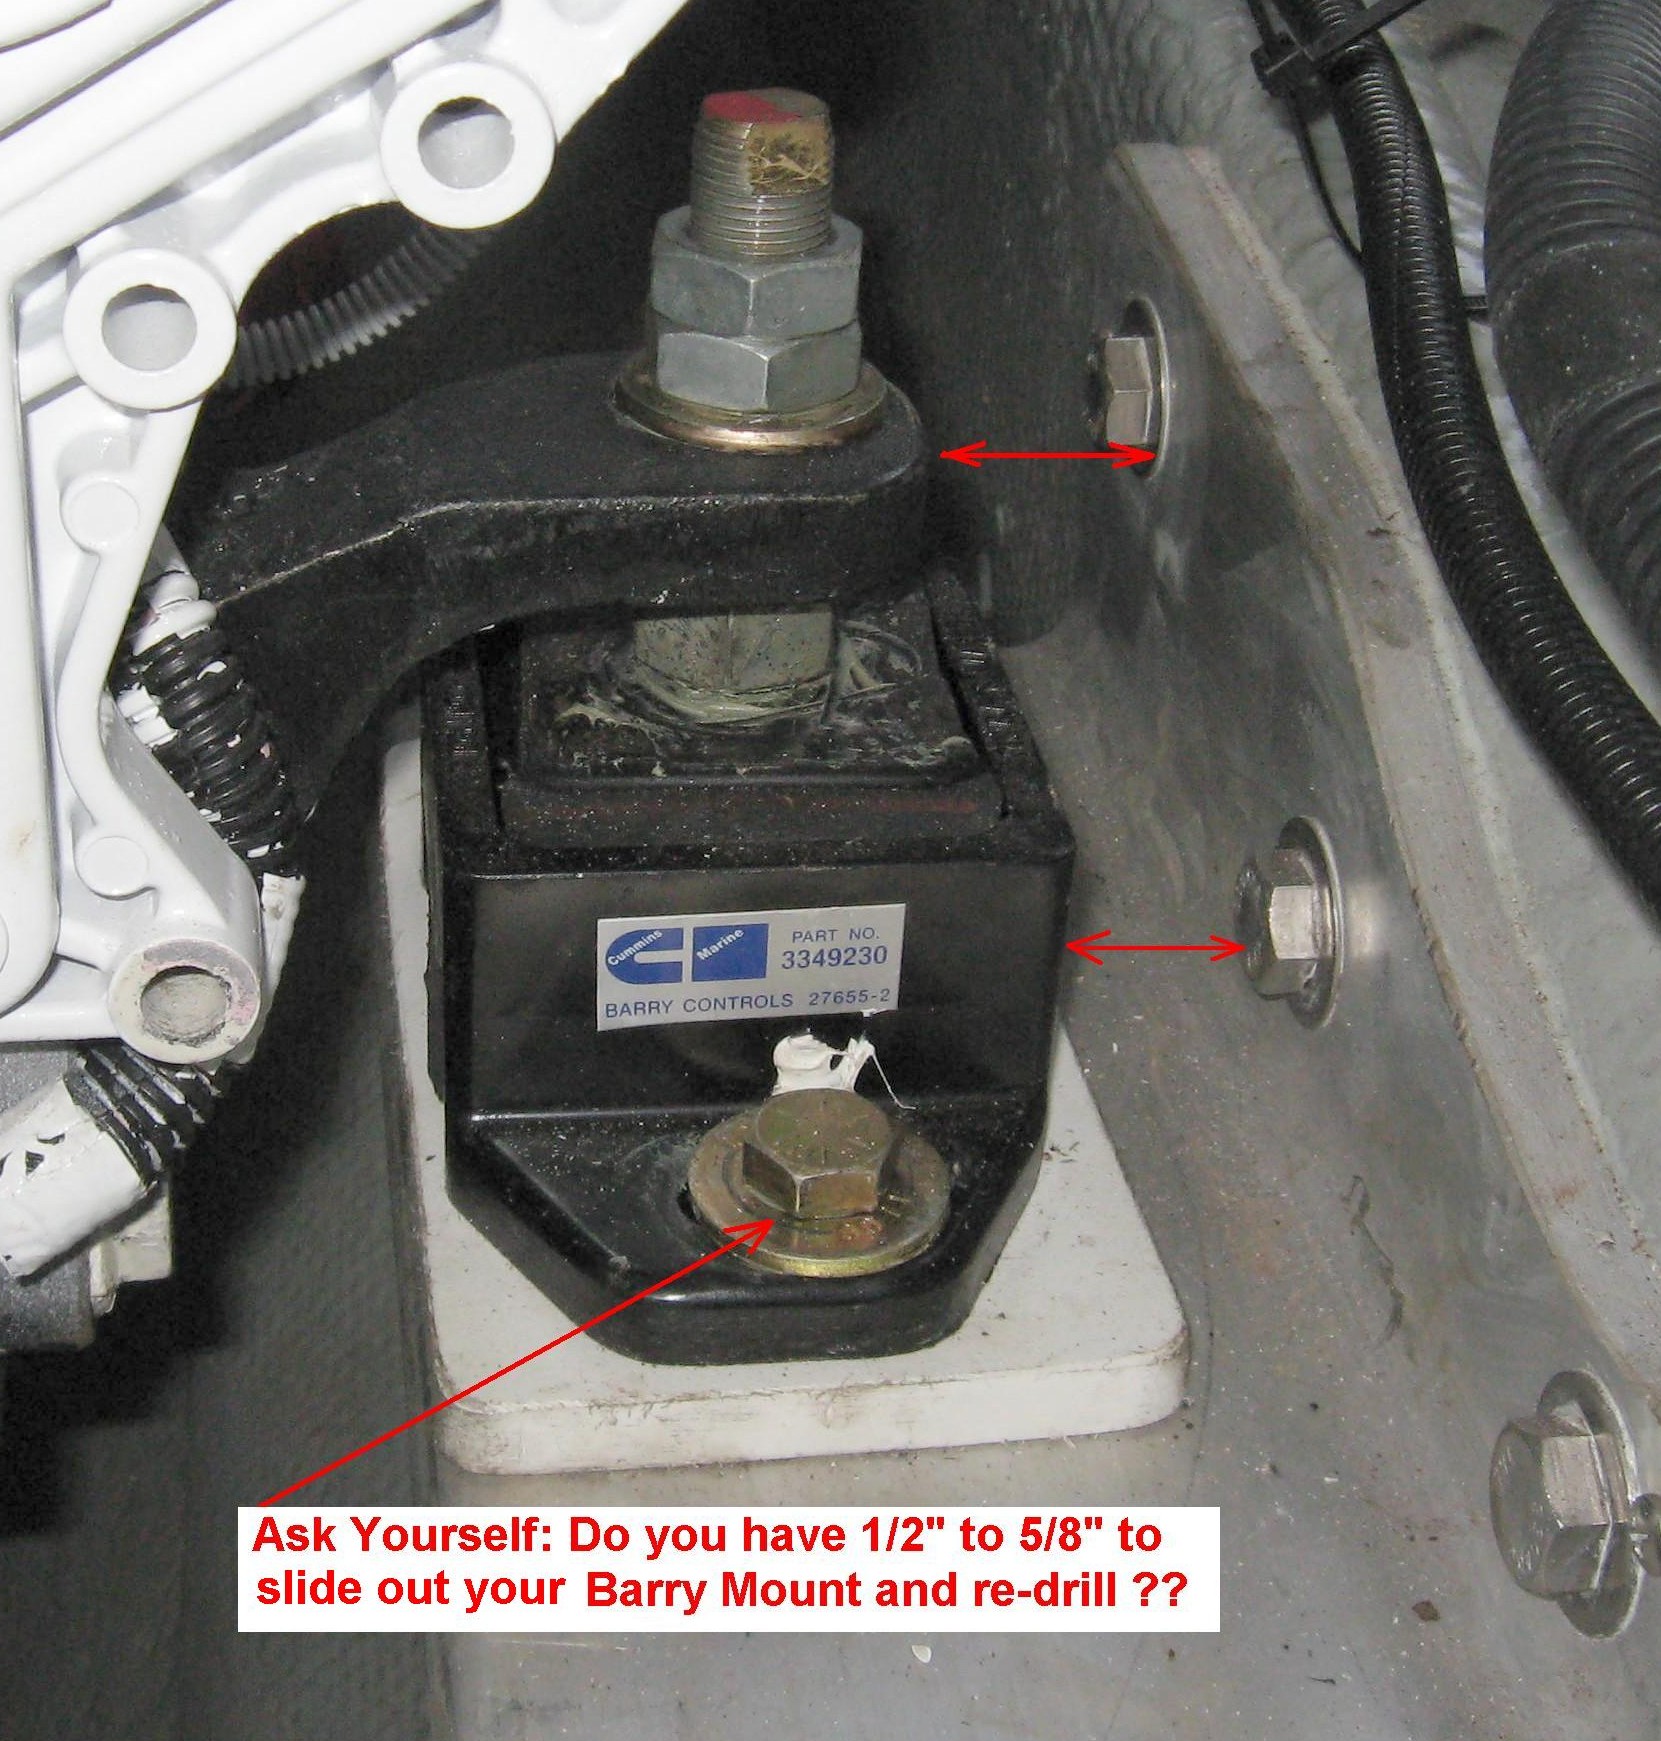
Now before you reinstall your repaired pump or a new one, ask yourself what you could do NOW in order to make the NEXT TIME you need to service your pump a lot easier. You do have some logical choices at this time that make some real sense. 1) Look over the isolator and the vessel mounting arrangement to see if you could add a 1/2 inch spacer behind the mounting bracket. On many boats this is easy, on others it is not. You need clearance on the outside of the isolator base to slide it out 1/2 inch. But if you can, then this ONE modification makes a world of difference. Look at the pictures. Use 3 new 12MM high strength bolts (8.8 or better) about 10-15 MM longer than the stock ones and when re-assembling, tighten to about 80 ft-lbs. Use lube on all bolts.
2) Consider modifying some of the plumbing & other things that you may not need. Removing the fuel cooler & some related plumbing (if you have it) can also help for easier maintenance. The fuel/oil manifold block can also be removed and/or bypassed in many cases making access and service much easier.

![]()
Some other help: Proven tricks on IMPELLER removal and installation that may help – To remove the impeller, this works best if you must leave the pump attached to the engine, or even do it on the bench. Remove the back plate, spray inside/all around the impeller and shaft area with WD-40 – Bump the starter so the engine revolves (if on the bench, spin the pump shaft a 1/2 turn both directions). Do it again / twice to three times. This breaks the rubber bond in-between the impeller and the pump housing. Then start pulling on the impeller with pliers, or use a “Ruko” puller (they are the best, although expensive). You may have to spray and rotate more as it comes out. When installing a new impeller, also use plenty of LUBE (grease, hand lotion, soap, Vaseline, etc.) on all parts and inside the housing when installing. You CANNOT use too much. And, DO NOT WORRY about which direction you twist, rotate or push – the impeller vanes DO NOT care how they end up – Another “old wives’ tale” that will not go away.
3) Lastly, consider using a better pump that will actually clear the front mount without any bracket modification. This will really clean up your 6BTA to make the engine so much simpler, IMO, safer to use and maintain, as now you can actually deal with it at sea when rockin’ & rollin’, if adrift…
Servicing the pump if you are not replacing it – If your seawater pump has been in salt water for a few years, I do not recommend just replacing the impeller without replacing the cam and inner wear plate. Both of those particular Sherwood parts corrode excessively over time (Marine Age seems to make them dissolve away even without high annual hour use), and the corroded / worn parts can quickly eat a new impeller if not replaced. As to the drive “key” that is supposed to be easy to deal with, and also be square in shape, if you are having issues sliding in the impeller with the “key” in place, you need to be absolutely sure why your impeller will not go in. If the key is wedged or ??, and the impeller is sticking out a tad, putting on the back plate and tightening it flush is a NO-NO, and could cause some very serious damage. Most likely, the instant you bump the starter, the pump shaft will shear off at the gear and the drive gear is now loose, spinning inside the timing case – a major disaster is just seconds away. Too bad Sherwood forgot that a splined shaft is so much easier to deal with. Hopefully the pictures here will help guide you and help anyone trying to service or replace this pump. Even better, do some or all of these suggestions by up-fitting your Cummins “B” BEFORE you install it in your boat if doing a repower. You’ll pat yourself on the back for years to come… Tony